


From the moment I saw BB-8 rolling in the first Star Wars trailer I began exploring ways to make my own. I tried everything from foam builds to clay sculpting, nothing quite made the cut.
Then I stumbled across the newly formed BB-8 Builders Club, a Facebook group which at the time only had a few members. Presently, this group has grown to thousands thanks to the number of enthusiastic fans who are striving to create screen-accurate droids. These fans have gone through incredible processes to find measurements and details about BB-8, from examining photos, to digitally measuring them to gain a sense of size. The key was to find an existing used part so the other dimensions could be found based on its size.
Two of the club founders started to bounce ideas back and forth about designing 3D printed parts for the droid that would fit together. This proved to be exactly what I needed. When I realized that the 3D part files were readily available to club members, I jumped at the chance to be one of the early adopters and give it a go.

After I printed my first part (the main radar eye) I was astounded at the level of detail that had been put into these files! Alongside them, an intricate instruction manual was being developed, too.

Having already sold some 3D printed props through my online store in the past, I knew full well that a raw, straight off the print bed part was in no fit state to display or paint. But never had I considered the lengths that I would go to to remove the “stepping effect” printed parts are notorious for.
Sanding my first BB-8 part, the radar eye, down to a completely smooth surface gave me a glimpse at what would follow. Using my orbital sander I worked the part for about 35-40 mins, cutting into the corners as best I could until I was completely satisfied with what I had before me. I made up my mind there and then to continue with the build and see where this method would take me.
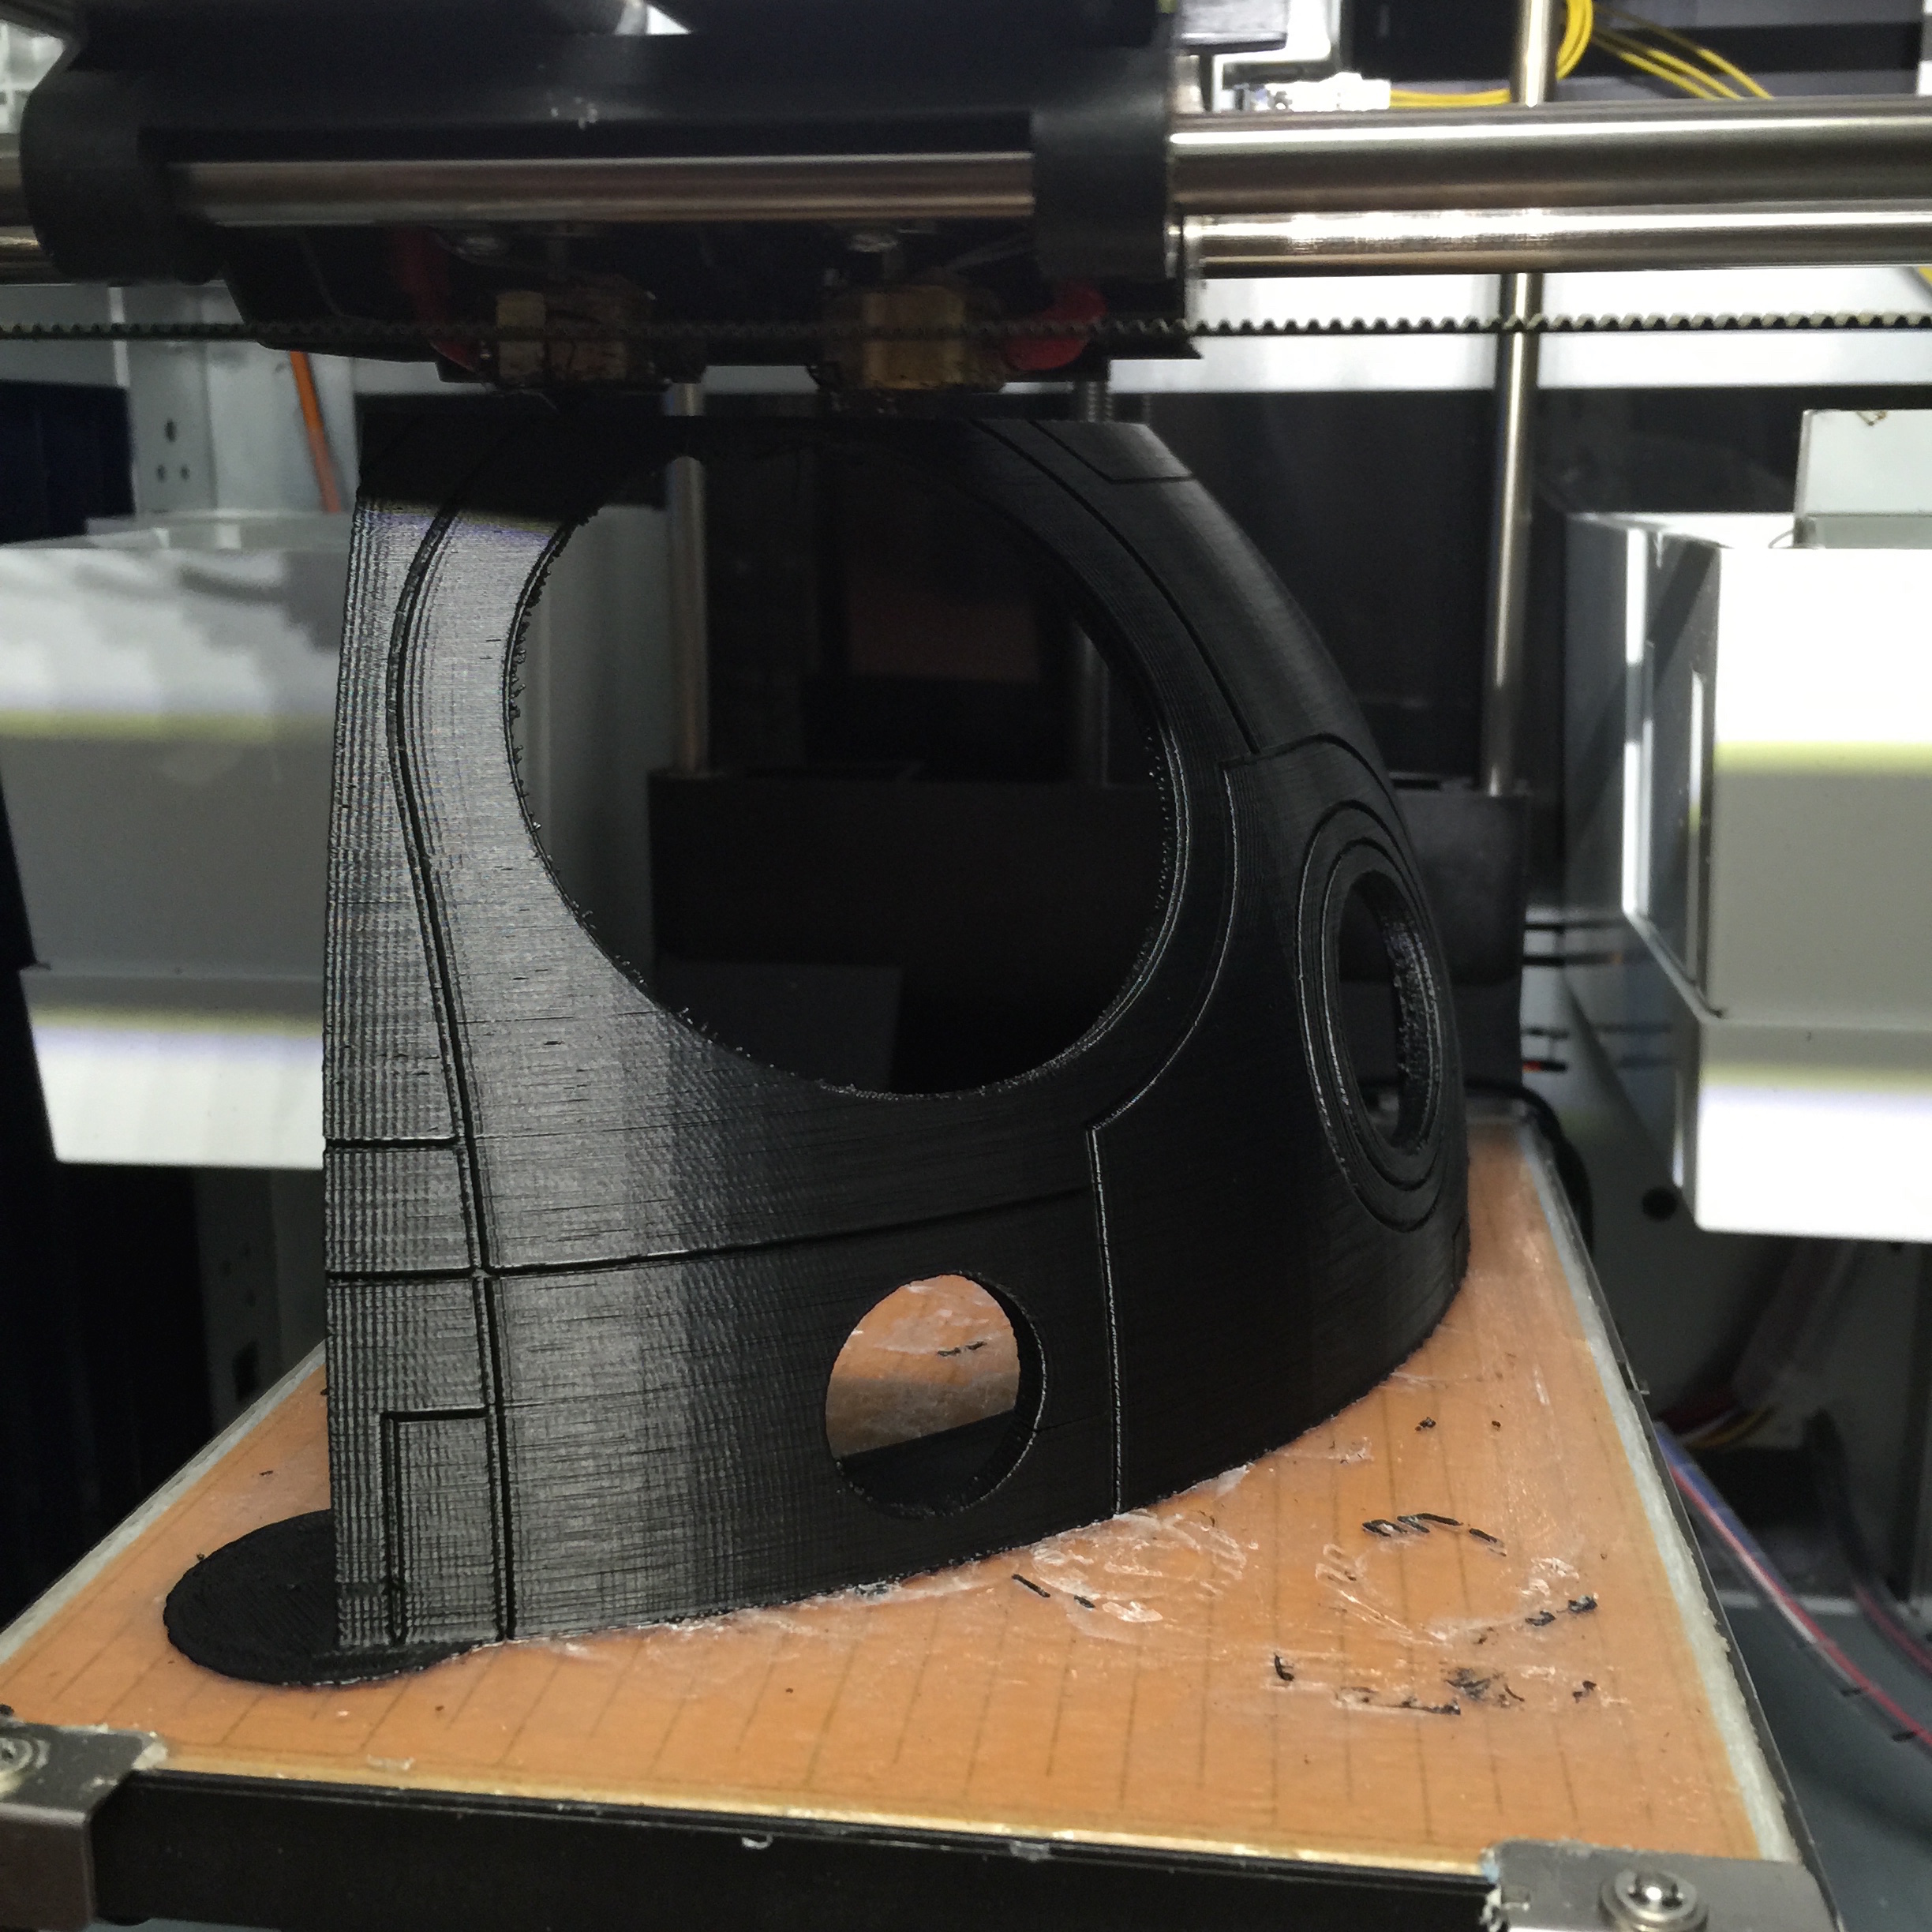
The head, or dome as we refer to it, slowly took shape in the form of panels. After 14 hours of printing, the first panel was ready to be sanded, then the second, third, and fourth. Each one took what seemed like a lifetime to smooth.


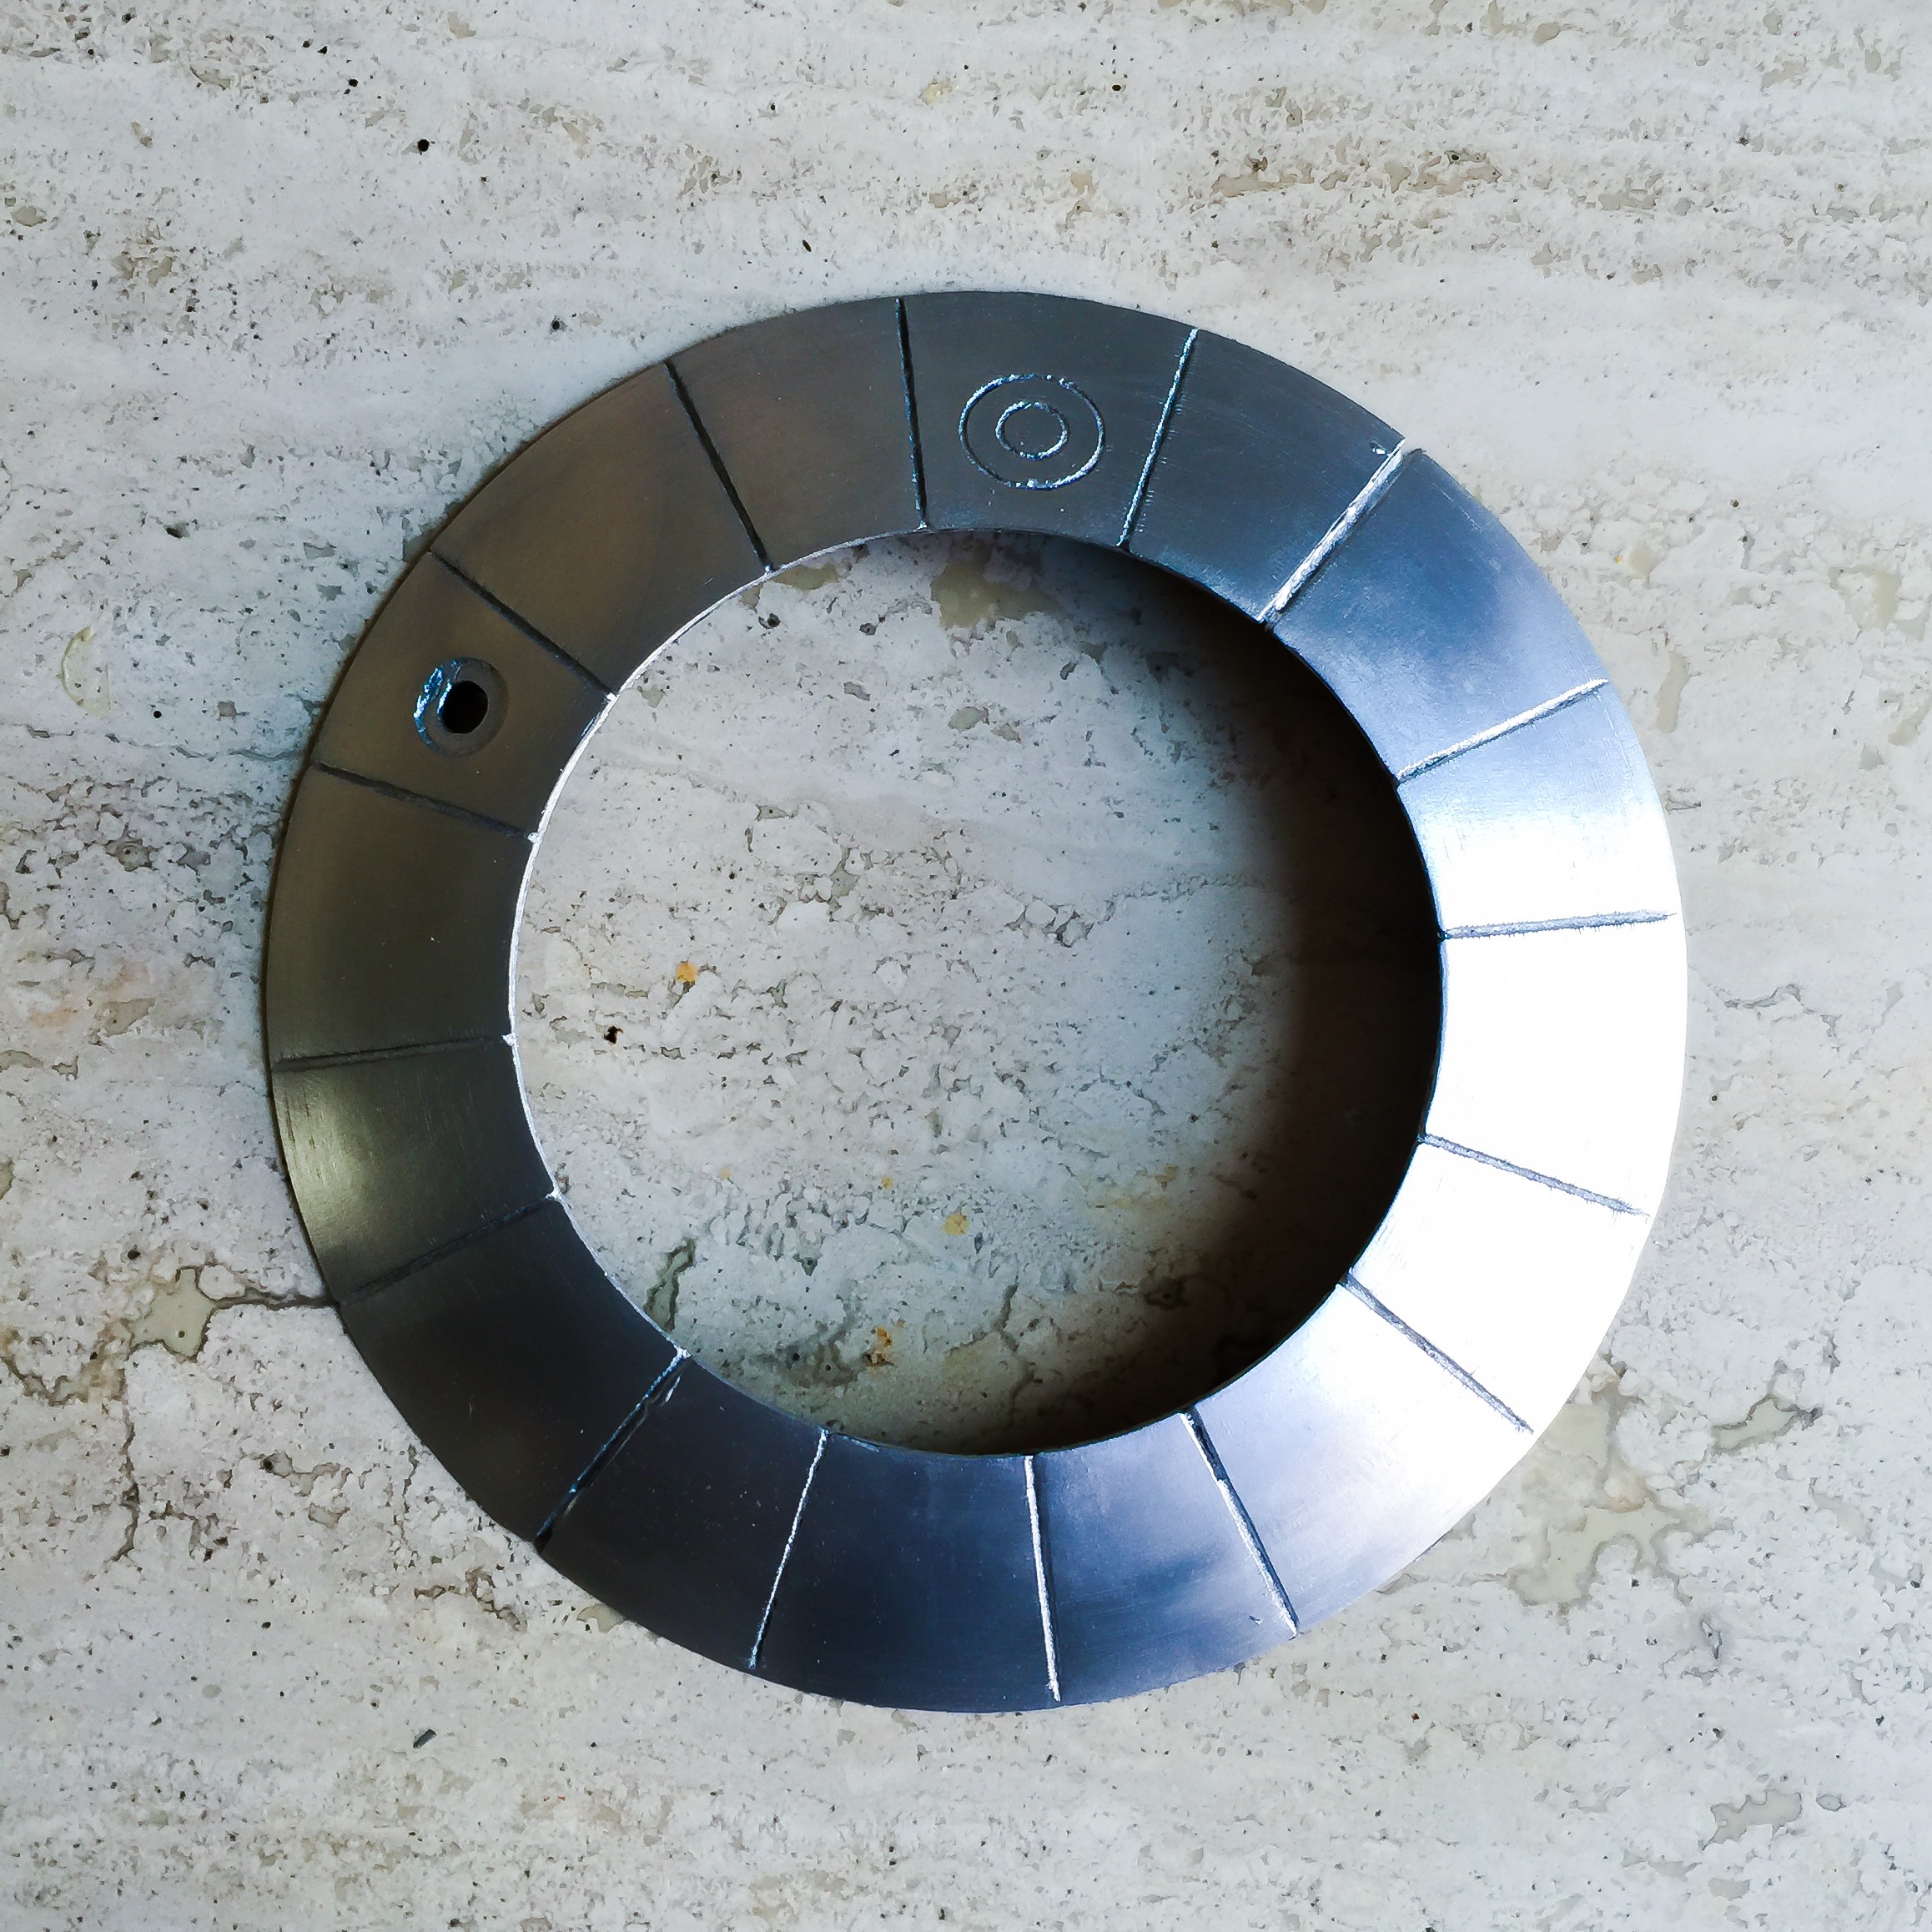
Toward the top of BB-8’s dome is a silver ring section that is referred to as the pie panel. This piece had to look as though it had been made from brushed/polished metal. After printing the pie panel and speaking to a few of the club members, I tried a product I had previously dismissed: Rub’n’Buff.
Wow, this “paint” does wondrous things to a surface. It is applied with a finger and then rubbed onto the chosen surface to create friction. As a result of the friction, heat is formed which is what activates the different compounds within the paint to create a fantastic silver metallic effect!


I sanded this surface back to the raw print a few times until all traces of printing lines were gone.
At this point of the build I decided to assemble the parts I had already made. First I glued the 4 dome sections together.

Then I inserted magnets into the integrated holes that are built into the pie panel and dome panel tops. This method created a wonderful way to access the dome internals ready to install electronics. Once the dome panels were fixed, I moved onto smoothing the seams. Extensive use of model putty, coupled with the trusty orbital sander soon had them vanish into the void.

All that was left was a smooth dome that, after a single coat of primer, appeared to be created as one piece. Just to make sure all the stepping lines had vanished from my prints, I repeated a duo process of priming and sanding a handful of times before finally laying down my first coat of white.


“Wow, now the dome looks like one single piece!” was all that filled my mind at this point of the build. However, there was no time to waste; I needed to move onto to sorting BB-8’s orange parts. After a trip down to my local hardware store, I paid for what I thought to be the perfect shade contained within a spray can. Two coats later it became apparent that I then had a BB-8 dome with florescent orange markings.

Time to rethink! After doing a spot of researching and chatting to my fellow builders, a couple of them managed to narrow it down to a Pantone color. You can’t get any more helpful than that! I found the appropriate orange online and within 24 hours I had it in hand ready to correct the luminescence of his markings.

Success! Everything began looking a lot more screen accurate now that the colors matched.

But no time to lose! By this time it was mid November 2015, and the film premiere edged forward day by day, so I was quick to move onto the next part. I began printing the “DMM,” or to people not in the club, the dome base plate that houses the magnets and rolling balls that allow the head to “float” and glide over the body. I set my printer to work on these parts and went back to concentrate on finishing the paint job on the head.

My next task was the weathering. I asked myself, “Right, BB-8 lives in the dessert…” (or so we thought) “What type of weather would he need?” After studying the screenshots from the movie, I set to work on the slow process of applying watered down washes of browns onto the dome and immediately dabbing them off with a kitchen towel, building up layers around the areas that I thought would get the most dirt and grime, where the oil might build up, etc.

It soon became time to start fixing it all together. Having printed the magnet mount for BB-8, I inserted my four CRAZY strong magnets and three Teflon balls. I glued all the parts together and wow! A complete BB-8 head with integrated rolling mechanisms and built in magnets! How cool is that!?


I couldn’t stop there. After purchasing a more high end printer, the Lulzbot Taz 5, I then had to figure out a way that best suited all of my printers to print the body panels and it frustrated me. Failed prints mixed with mediocre prints ruled my life for the next few days… Eventually it all came together, and I began printing perfect panels.

So many panels, day after day. I had to try and find time between pieces of work for customers to tend to it all. The orange rings came out in quarters day by day, the center circles printed in halves, and the white “triangles” came out in thirds.


After a while I had a pile of panels that I needed to make a start on. My trusty orbital sander came back out and I went to work on each section of the panels, sanding, sanding and more sanding. I test fitted them as I went to make sure everything went together snugly.


Amongst the other builders, it became standard to use a specific acrylic ball made by a company in the U.S. It’s the opinion of the club that these particular spheres are the ones that were used in the movies. They’re created using molds so that the size is consistent. Sold as two hemispheres, they come together to form a near perfect ball that the 3D printed panels are then applied over the top of, forming a skin.
Sadly, with the need to get BB-8 completed ASAP I had to think of a temporary solution due to the sheer cost of one of these acrylic balls. A quick search online led me to a polystyrene ball of the same size as that could serve as a temporary body base — at least until I could get an acrylic one shipped over to the UK. This also meant that BB-8 wouldn’t be remote controlled, instead he would just be a static display piece. I wasn’t disheartened though, I’d still have a full sized BB-8 and it wouldn’t be static forever.
My body sphere arrived and looked amazingly in proportion with BB-8’s head. The dome “floated” perfectly over the body at around the right height. My next step was to finish the body panels and paint and assemble them.


After nights and nights of printing I had a complete set of middle panels as well as a nearly complete set of orange rings. But it was now December, and I was running out of time to have my BB-8 ready before the movie came out.

I didn’t finish BB-8 in time for the premiere. Nonetheless, he is well on the way. With a few white triangle panels left to print, I can soon put the entire body together and marvel at all the BB-8 goodness in front of me!
Here’s to the continuing build…
5 thoughts on “What I Learned 3D Printing My Own BB-8”
Comments are closed.
ADVERTISEMENT
Join Make: Community Today


Wow…what a build!
Awesome! Be sure to post your final result :)
A few days ago new McLaren F1 subsequent after earning 18,512$,,,this was my previous month’s paycheck ,and-a little over, 17k$ Last month ..3-5 h/r of work a day ..with extra open doors & weekly paychecks.. it’s realy the easiest work I have ever Do.. I Joined This 7 months ago and now making over 87$, p/h.Learn More right Here
es
➤➤
➤➤➤ http://GlobalSuperEmploymentVacanciesReportsWorld/GetPaid/98$hourly…❦.❦.❦.❦.❦.❦.❦.❦.❦.❦.❦.❦.❦.❦.❦.❦.❦.❦.❦.❦.❦.❦.❦.❦.❦.❦.❦.❦.❦.❦.❦.❦.❦.❦.❦.❦.❦.❦
A few days ago new McLaren F1 subsequent after earning 18,512$,,,this was my previous month’s paycheck ,and-a little over, 17k$ Last month ..3-5 h/r of work a day ..with extra open doors & weekly paychecks.. it’s realy the easiest work I have ever Do. I Joined This 7 months ago and now making over 87$, p/h.Learn More right Here
vs……
➤➤
➤➤➤ http://GlobalSuperEmploymentVacanciesReportsuk/GetPaid/98$hourly…❦.❦.❦.❦.❦.❦.❦.❦.❦.❦.❦.❦.❦.❦.❦.❦.❦.❦.❦.❦.❦.❦.❦.❦.❦.❦.❦.❦.❦.❦.❦.❦.❦.❦.❦.❦.❦.❦
Just use a thick filler before you sand anything, then sand it and fill it again. That would have saved you a lot of time!