Who doesn’t love LED throwies? And who can resist adorable sea creatures?

Here’s how to make a jellyfish-shaped casing for LED throwies that you can stick to any metal surface. The throwies are easily removable so you can "refill" the jelly and use it over and over.

Project Steps

Cut out pieces

Print and use the attached pattern templates to cut out 1 circle of batting (~5.5″ diameter) and 2 circles of fabric (~8″ diameter).

These templates are made for plastic bubbles that are about 2″ in diameter. If you have a bigger or smaller bubble you can adjust as needed.

Cut some pieces of ribbon for your “tentacles.” I made mine ~6″ long. The number will depend on your personal tastes and the size of the plastic bubble. This example has about 9 tentacles.

Attach Tentacles

Take the plastic bubble and glue your ribbon tentacles to the clear top section.

Make sure not to glue the top and bottom of the bubble together – you’ll want to be able to open it up and place your throwie in later on. I drew a line to help keep my tentacles even and out of the way.

Sew the body

Place your batting, centered, on top of the 2 pieces of fabric. Fold the fabric over the batting and pin.

With a needle and thread, sew through your layers of fabric and batting ~ 1/4″ from the edge of your overlap. Be careful not to do any back stitching. When you are finished, pull the thread to gather the fabric and make a scrunchy jellyfish shape (do not knot or tie off just yet).

Glue the body

Place your jelly body over the top of the plastic bubble. If you need to, adjust the gather so that it is snug and tie a knot to finish it.

Glue the fabric to the plastic bubble, covering the tops of the ribbon tentacles. Again, make sure not to overlap the bottom; leave ~1/4″ of space to work with.

Get those LEDs ready

Take your LEDs and use a pair of pliers to bend the leads at right angles, with the anode (longer lead) on “top.” This will give you more space inside the bubble and also point the light upwards. Leave ~1/8″ space between the leads, just enough to slide the battery between them.

Add a drop of hot glue between/around the leads before the bend to make sure they don’t accidentally touch.

Make throwies

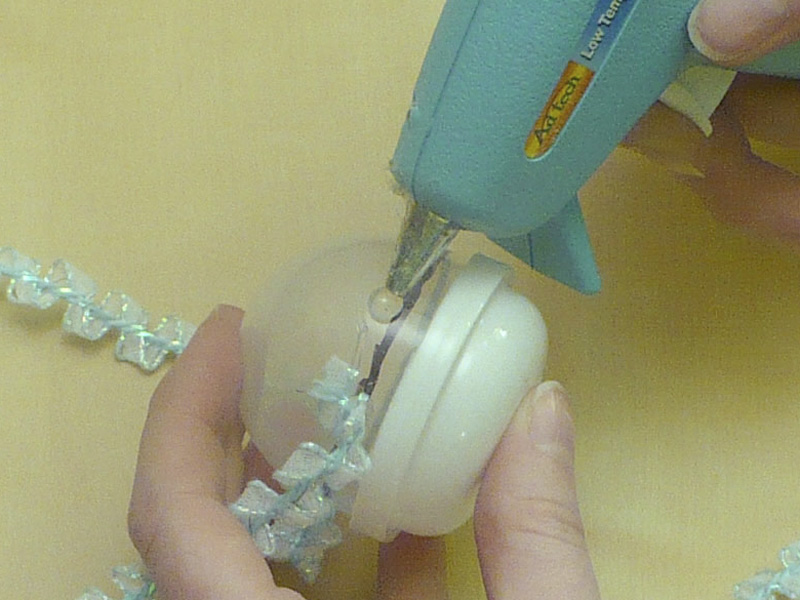
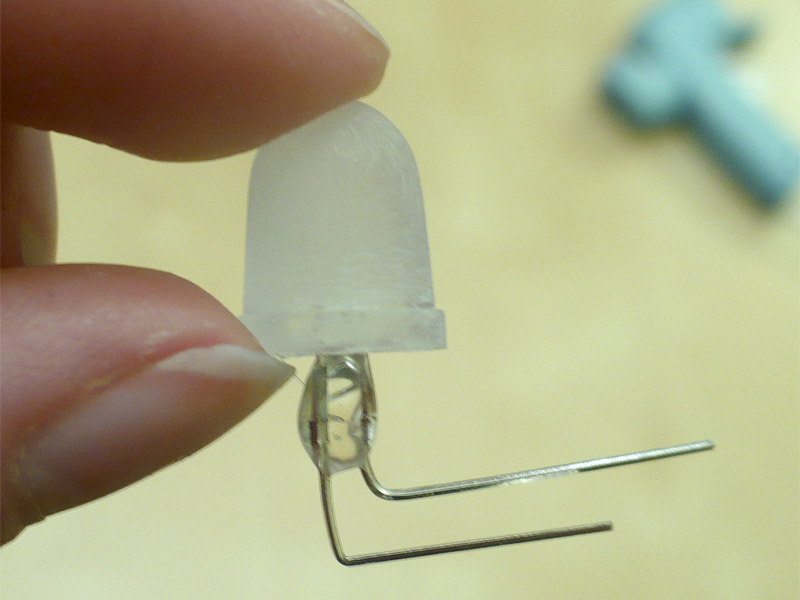
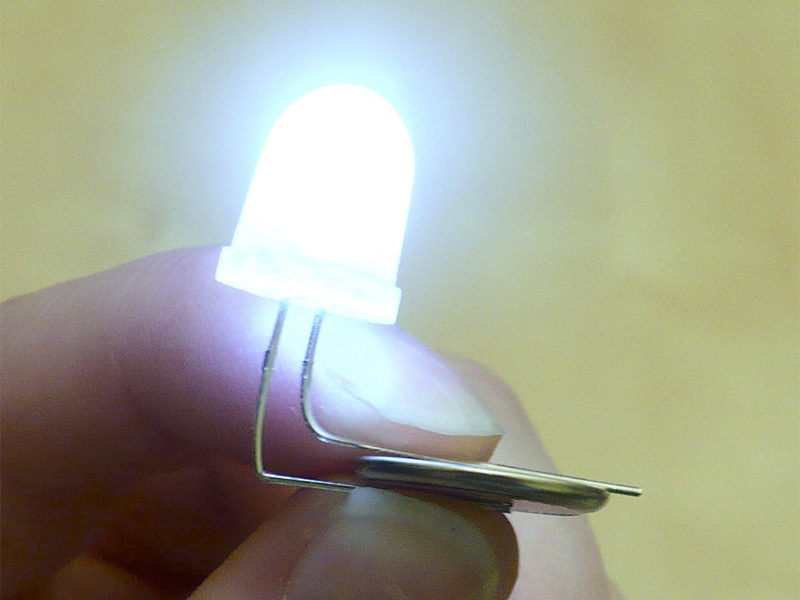
Step A: Slide an LED onto one of your batteries (if the leads extend past the battery, shorten them with some wire cutters).

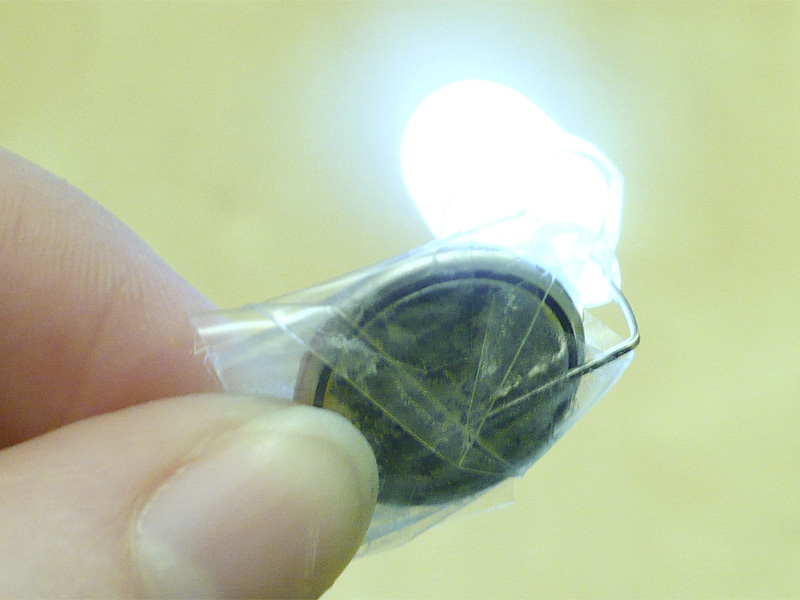
Wrap it up in tape (same as original Throwie tutorial), making sure that it is nice and secure and doesn’t flicker.

Place one of your magnets on top (positive side) and wrap up some more so it doesn’t slide.

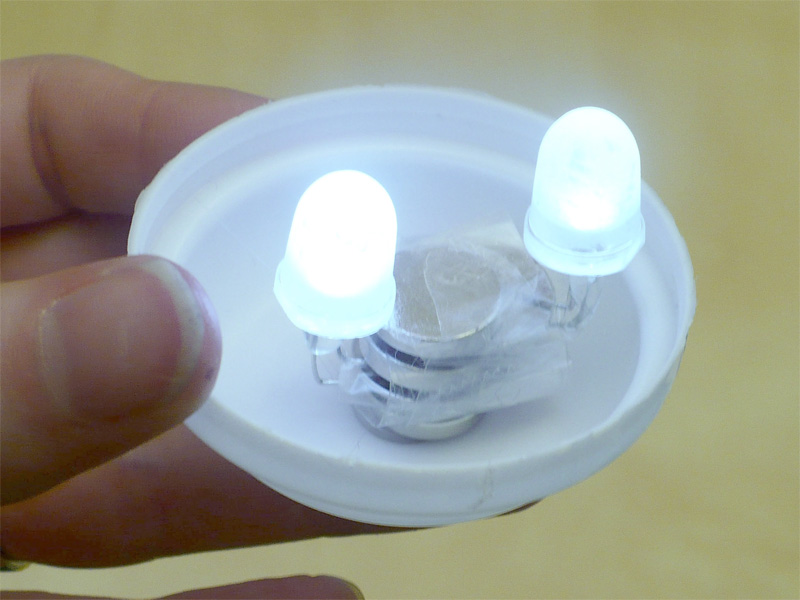
Repeat Step A with your second LED, and place it on top of the magnet.

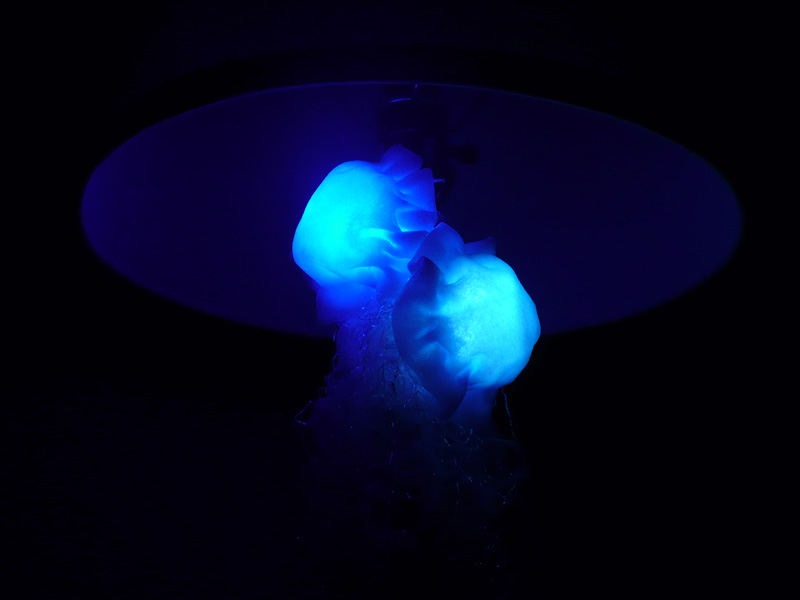
I oriented my LEDs opposite each other to cast more light throughout the jelly. Place a second magnet on top of that and wrap up with more tape.

You don’t really need this other magnet, but it adds a little extra holding power.

Assemble the jelly

Your final magnet will attach to the bottom of the plastic bubble and hold your throwie in place. Make sure it is oriented the right way before gluing by testing it out on the bottom of the throwie “pile.”

Hot-glue the magnet to the center of the inside of the plastic bubble and place your throwie on top. Then just snap the top of the bubble back on and enjoy!

At this point you can add some finishing touches; maybe some embroidery or a happy face. I separated the strands of my ribbon tentacles to get more of the wispy/stringy look. You can also try out different combinations of LED colors and plastic bubbles.

Although these are throwies, the plastic bubbles are pretty brittle. I don’t recommend tossing them at things. I had a few bounce off surfaces and break when the magnet didn’t catch.