


I completed my first stained glass project in fourth grade with the help of a neighbor who had a small glass studio in her home. It was monstrous work, but I thought it was beautiful and I proudly displayed it in my room for years. I have no idea what happened to it, but I do remember how proud I was that I built it myself. I loved choosing from all the gorgeous colors and glass textures — and I was trusted with all those fancy tools. I knew how to do something no one else did.

With a passion to create those same feelings in my students, I began a stained-glass program 13 years ago in a portable classroom at On Track Academy in Spokane, Washington. I have crawled on hands and knees through barns, garages, and yards across the Inland Northwest to stockpile stashes of glass and tools.
Once the supplies are in place, students learn how to stay safe: Broken glass is sharp and soldering irons are hot. Chemicals do not belong in your mouth and safety glasses are our friend. They learn the science of how glass is made, how it gets color and texture. We discuss why glass is important to humans; and then we create with it.
Stained glass is a craft that is hard and unusual. It’s one part art and one part science. It requires several steps and it’s expensive. Even with patience and skill you will at some point start over. Repetition is your ally. Dreams, and monstrosities, are built here. Both are welcome.
GIRL POWER
When I was in high school in the early 90s, girls were still steered to home economics and boys to industrial arts. Girls were not taught to build — but here I am now teaching girls to solder. It’s really something special when I have a room full of young women soldering.
One of my prized students, Claire, lives for it. “The only thing better than soldering is when I get to teach the boys to solder,” she says with an animated grin. Daily, she wields an 800-degree soldering iron with confidence and skill and says that teaching others to use it is her favorite part of the day.
I affectionately call Claire a “2.0” — one of several returners to the program after a year in it. She is proficient in stained-glass building and has mastered complex designs. Others like her have passed a series of tasks and tests, and in this capacity, they can help co-teach and share what they know with their peers.
“CREATE WHAT’S NEXT”
I am part of a teaching team that includes yearbook, 3D modeling, laser cutting, and rapid prototyping. The stained-glass program began as a “something-different,” so to speak, activity for students to try. We wanted to build something not offered anywhere else. I don’t think anyone ever imagined it would one day be an award-winning part of our material science program.

Stained glass is just one of our tools to help students stay connected and “create what’s next” — our motto — in their lives.

I want to be clear; we are not trying to create future stained-glass artists. We are engaging students to stay in school and grow the confidence to find their way to post-secondary education and ultimately a career they will enjoy. We operate on a block schedule, so students have the time to focus on projects and master skills before moving to their next activity.
At On Track Academy, we serve the underserved. which includes any student looking for something different than a traditional high school can provide. In the process of engaging those who had been labeled un-engageable, we found ourselves serving a broadening population of students with needs that the stained-glass elective program fulfills. No matter their background, they all share one thing in common: Our students have grit.
STUDENTS BECOME TEACHERS
The days of portable classrooms are over. We’re now housed in a brand-new, multi-million-dollar school building that is state of the art. In my classroom, we now have access to a kiln and will incorporate glass fusing into the program this year. When the weather is nice, we can open the garage door and take in fresh air. We got a chance to put it on display to the public last spring when we expanded our role by offering a night class for adults. Once a week for nine weeks, the 2.0s taught stained glass to adults in our community.
The students shined brighter than the glass.
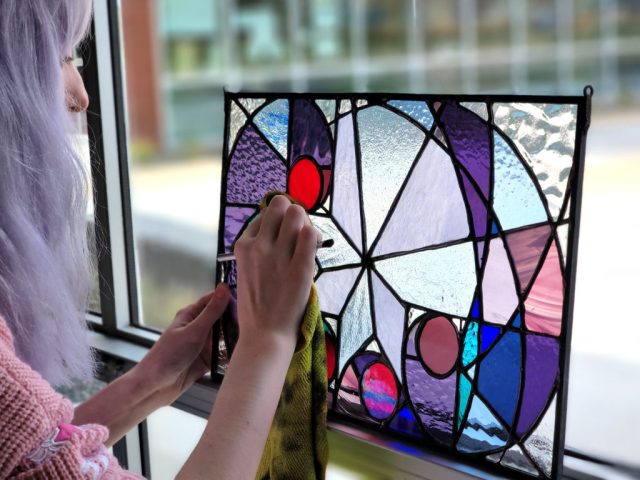
Fellow teachers, a couple of architects, and even college professors, furrowed their brows, dug in, and … proceeded to struggle. They didn’t have to look far for help though. A 17-year-old with purple hair and lavender boots with 6-inch heels was there to the rescue. She had the skill set to cut even the most persnickety pieces of glass we have to offer.
Their voices quivered a little during week one as they explained the different types of glass and the science behind how they are created. The following week, my students were showing their adult pupils how to solder and cautioning them on what to do if they burned themselves. It was a beautiful sight.
Making a Stained Glass Window
Here is the 10-step process we follow to make stained glass windows.

1. COLLECT THE TOOLS
Safety glasses, glass cutters, various glass breaker pliers, glue sticks, and you’re going to need a soldering iron and solder, and probably Band-Aids. These are just the basics. You will add to your tool kit as you improve.

(I asked the students what Step 1 should be and one said, “Get a small loan, because everything is so expensive.”)
2. MAKE YOUR PATTERN

Sometimes we use a pattern we found, but I teach my advanced students to start designing their own. You can find countless options online, but our endgame is to create original work. Our students like to create their patterns using Procreate, a popular digital illustration app.
3. TRANSFER TO GLASS
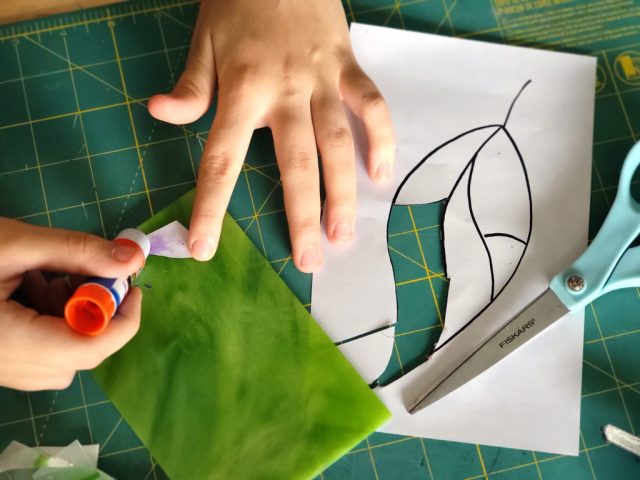
There are different ways to tackle this step, but the technique we use is to cut out the pattern and glue it on the glass.
4. CUT

You don’t cut the glass like a piece of bread. You use your glass cutter to score the glass in the direction you want to cut, then break it neatly along that score line. With practice, deep curves and other detailed breaks can be made. We use breaker pliers to finish the job, and sometimes we turn the glass over and tap the other side to finish breaking a score.
5. GRIND

We use a grinder to get the glass to the exact size for the pattern. We can now smooth out rough edges and snags. We then clean and dry each piece of glass.
6. COPPER

Each piece must now be wrapped in copper foil tape. This is because we will next solder the glass together — and solder won’t stick to the glass. It will, however, stick to copper. The foil is sticky on one side and we burnish the tape — that is, rub it using a burnishing tool — to the glass so it is secure. If it’s not, your piece will fall apart.
7. SOLDER

Soldering alone has several steps and it takes a lot of practice. The solder is one part tin and one part lead, and it will stick to the copper foil, but only after you apply a layer of a chemical called flux. We use the soldering iron to melt hot solder to strategic spots on the piece to tack them all in place so they won’t move. Then, completely cover any copper we can see by soldering a smooth “bead” line down each seam. If the glass gets too hot, it can crack. If you use too much flux, your solder lines will bubble and not look as neat. Soldering is an art form.
8. CLEAN

We use Dawn and baking soda to scrub the piece clean. It’s important for it to be clean and flux-free for the chemical process in the next step to work.
9. PATINA

Patina is now applied to the clean solder lines. Patina creates a chemical reaction that instantly gives the solder lines the nice, dark finish that naturally would occur over time. We rinse the piece clean one more time.
10. POLISH

We polish our pieces using black car polish, if our solder lines have been stained black with patina, or with other products if we left them natural silver. This step is most important because when you’re done, you then show it to everyone who will look, and brag about how awesome you are. You also take pictures and post on social media and let everyone bask in your coolness.
• • •
Since this all began, there has never been a year in which I did not find myself marveling at the efforts and abilities of my students. Their tenacity and determination transfers to building glass creations, beautifully. Despite their challenges, they cheerfully “rise and grind” for the chance to build something magical out of stained glass. And they can tell you in detail and with confidence each step they took along the way.
ADVERTISEMENT
Join Make: Community Today


