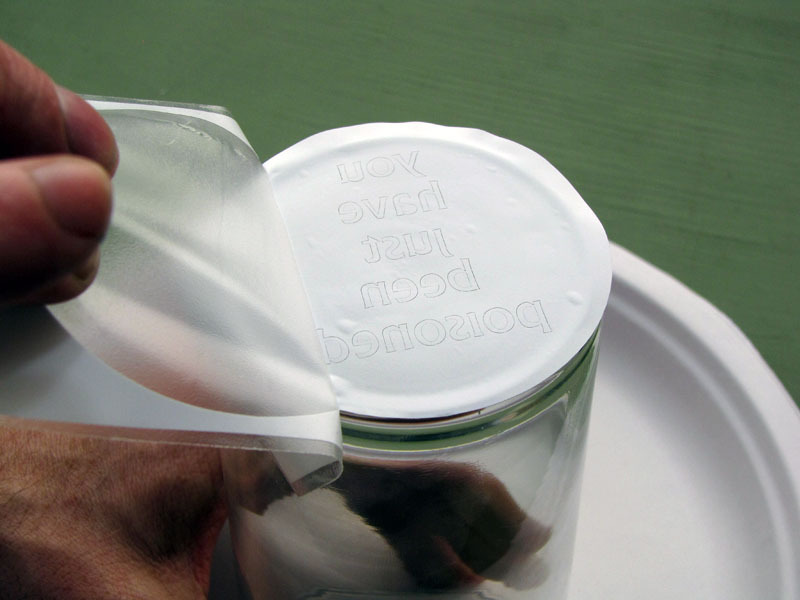
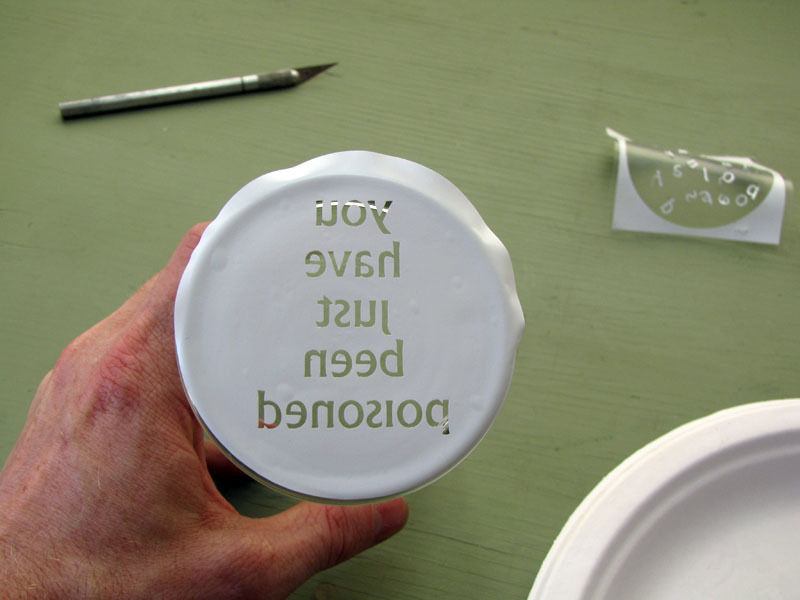
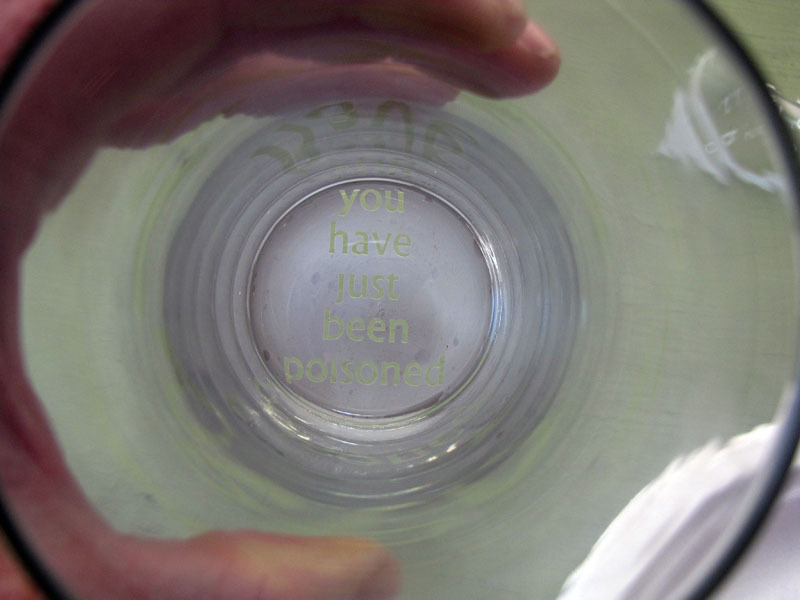
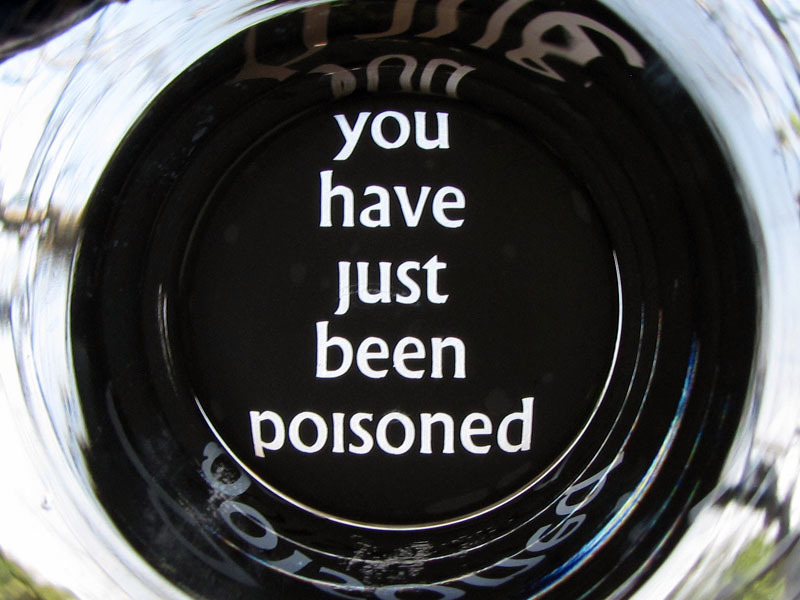
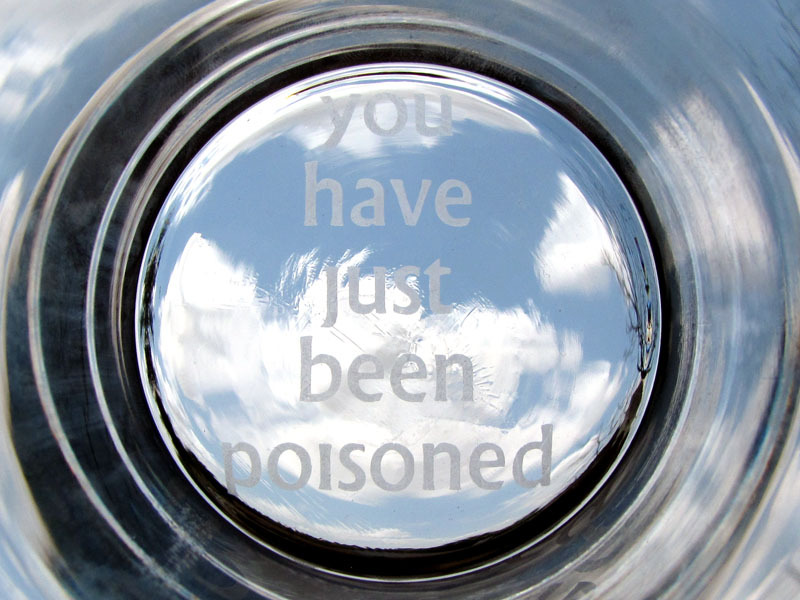
Fans of Patrick McGoohan’s classic BBC spy series The Prisoner will recognize this gimmick from Episode 15, “The Girl Who Was Death.” This is a pint glass with words etched on the bottom (in authentic “Village” font) that appear line by line as the liquid is imbibed.

Update: Got lots of folks asking to buy these, and I finally managed to get a couple dozen made and posted in my Etsy shop. Thanks for all your positive comments.

Update 2: Etchworld has started carrying these stencils in their online catalog, so those of you who want to DIY should now have a much easier time sourcing the vinyl. Thanks, folks!

Project Steps

Clean bottom of glass

Moisten a paper towel with rubbing alcohol and wipe the bottom of the glass squeaky clean.

Position stencil

You may find backlighting makes it easier to position the stencil accurately. I put a small flashlight inside the glass, as shown, to shine up through the bottom.

Peel off the stencil’s opaque backing sheet and set it aside, but do not discard it. It will be used in step 3.

Carefully align the stencil over the bottom of the glass, centering the text as best you can.

Apply stencil

Once you have it lined up correctly, press the center point of the stencil into place on the glass. Then smooth the rest down by working from the center out to the edges.

You may get some small bubbles under the stencil. These are only a problem if they interfere with the stencil art. “Trapped” bubbles may be annoying, but will make little difference in the long run.

Carefully peel off the stencil’s clear carrier sheet. Go slowly where the stencil has lots of detail. Small “islands” may be prone to lifting, at this stage. Use a toothpick if necessary to hold them down and/or reposition them as you remove the carrier.

Once the carrier is removed, take the backing sheet you set aside in step 2 and lay it waxy-side down over the stencil. Rub the rounded point of a marker or other similar tool over the backing sheet, applying pressure through it to “burnish” the stencil and make sure all parts of it are well-affixed to the glass.

Remove areas to be etched

Use the point of a sharp hobby knife blade to pierce and lift the “positive” areas of the stencil free of the glass.

The clear carrier sheet makes a handy place to deposit the scraps.

You may want to repeat the burnishing operation from step 3 before proceeding.

Apply etching cream

Etching cream contains salts that slowly dissociate to give hydrofluoric acid (HF), which is what actually etches the glass. Wear gloves and goggles and follow all directions on the bottle closely.

Whatever applicator you use should only be made of plastic and/or wood. Metal, glass, or ceramic parts will react with the etching cream.

Daub the etching cream generously onto the stencil with the applicator, being careful to thoroughly cover all positive areas and also to avoid getting etchant on the exposed sides of the glass.

Remove etching cream

Allow the etching cream to sit undisturbed for five minutes (or whatever it says on the bottle directions).

Thoroughly rinse the etching cream off the glass under a strong stream of warm water. Use a sponge to make sure all parts of the stencil are cleaned.

Once all visible etchant has been removed, thoroughly rinse the sides of the glass. Move carefully around the entire diameter of the glass, rinsing down the side, to make sure that all traces of the etchant have been washed away.

Without inverting the glass, wipe it dry with a paper towel then set it aside, on another paper towel, to completely air dry.

Verify that the etch is complete

When the glass is completely dry, hold it up to the light and inspect the etch closely to verify that you haven’t missed any spots.

If there are flaws in the etching, simply reapply etching cream and rinse as in steps 5 and 6.

Repeat until the etch is complete to your satisfaction. Mine did not need any retouching.

Remove the stencil

Once you are satisfied with the etch, turn the glass over and remove the stencil. I have found scraping with a razor blade is the fastest way to do this.

Squirt some Goo-Gone on the bottom of the glass to soften any remaining adhesive.

Let the Goo-Gone work for about five minutes, then wipe the bottom of the glass clean with a paper towel.

Run the glass through your regular dish-washing procedure once before using.

Conclusion

The stencil I used was laser cut from adhesive-backed vinyl with a transparent "carrier" sheet that makes it easy to apply the entire stencil, "islands" and all, at once. I ordered four of them from Etchworld for $1.76 apiece.

The stencil art is attached to this project as a .PDF file. You can also download it as an .AI, .SVG, or .DXF file from Thingiverse.

You can, of course, make your own stencil design. For it to read correctly from inside the glass, it needs to be reversed left-to-right. The reproduction "Village" font I used is freely available here.