


T-Shirt Quilt
by Michelle Kempner

I have always enjoyed cooking and baking with a recipe. I like to follow exact instructions and then, hopefully, there are no surprises. Other people like to make it up as they go along, adding dashes of different flavors until they arrive at a taste they like. However, I have made a few t-shirt quilts following specific directions and they never turn out the way I want. They always end up too square and blocky. Since I had a number of cute t-shirts that I didn’t wear anymore (from the cluttered days of my Threadless addiction), I decided to experiment with making a freestyle, dash-of-this-pinch-of-that t-shirt quilt.
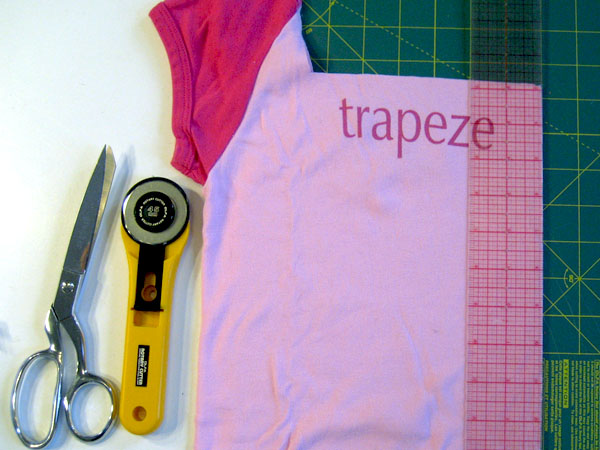
Materials
T-shirts around 20
Thread
Seam guide
Clear sewing ruler
Rotary cutter
Cutting mat
Scissors
Pins
Hand sewing needle
Plain cotton woven fabric or a flat sheet
Iron
Sewing machine
Directions
This quilt consists of five blocks, each including material from 4 to 7 t-shirts.
Tip: Light weight t-shirts are hard to press and tend to “grow” as you sew them. It can also be difficult to sew together t-shirts of varying weights. For this project, I used t-shirts that were all made of a similar medium-weight material.
Step 1: To make a block, pick two t-shirts that you think will go well together. Lay one t-shirt flat on your cutting mat and cut out the desired area in a rectangle using a ruler and a rotary cutter. Try to keep your lines as square as possible so as to end up with true right angles at each corner. Be creative while cutting the shirt. You don’t have to cut each piece as a 13″ by 13″ square and you can cut right through the middle of a graphic.
Step 2: Take the second t-shirt and repeat the process. Make sure the dimensions of one side of the second t-shirt match the dimensions of one side of the first t-shirt, where you want them to attach. Place the right sides of the cut t-shirts together and pin along one edge to sew.

Step 3: Sew the t-shirts together at the pinned edge with a 5/8″ seam allowance. After sewing press the seam open. You can continue the process by cutting additional t-shirts and adding them to any side of the block. Just make sure that you are always joining pieces with a dimension in common with the block. Don’t make blocks with more than 4 or 5 pieces because it will become difficult to work with. Also, remember to press all of your seams open.
Blocks
Make as many blocks as you need to get the size quilt that you want. I wanted almost all of my pieces to have graphics on them, so I made a small child-sized quilt. You can make a larger quilt by using more t-shirts or making use of the backs that usually don’t contain graphics. The key to this quilt is to not plan to far ahead, but you should keep in mind that the blocks will eventually be pieced together so make sure you end up with sizes and colors that will eventually fit together.
Sew Together
When you have your blocks ready, you can sew them together. Take 2 blocks that share a common dimension, and lay them flat with their faces together. It is really important that the seams are pressed open for this step. Pin one edge of the blocks together and sew with a 5/8″ seam allowance. Press this seam open. Continue to combine blocks until you have the face of your quilt.

This image illustrates how to join pieces together to form blocks and how to sew blocks together. The blue rectangle and the white rectangle are blocks. The pieces within them were joined in alphabetical order. First A to B, then A-B to C and then A-B-C to D. Once the face is done lay it out flat with the right side up and make sure the edges are squared. You may need to do some trimming.

Trim a flat sheet or some woven cotton fabric to match the size of your quilt. Lay it out flat on top of your quilt with the right side down. Smooth the fabric and then pin it around all the edges of the quilt. Sew around the edge of the fabric with a 5/8″ seam allowance leaving about a 12″ section open. Be careful to keep all the seams open as you sew over them. Trim the seam allowance about a ¼” and clip off the fabric at the corners. Turn the quilt right side out.

Quilting
At each intersection in the quilt design, use a hand-sewing needle and thread to sew through the front of the fabric to the back making an X. Use the opening in the quilt to hide the starting and ending knot. Work your way from the farthest corner across until you have joined the front and back at each intersection.
Finishing the Quilt
Close the opening that you left in the quilt with a whipstitch.
About the Author

Michelle Kempner’s goal in life is to have as little free time as possible. She works in technology at an interactive agency in New York during the day while sewing, knitting, baking, blogging, running, swimming and biking her weekends away. If you can think of any new activities for Michelle…
18 thoughts on “T-Shirt Quilt”
Comments are closed.
ADVERTISEMENT
Join Make: Community Today


Love this idea! I have seen a t-shirt quilt with old jeans as the back and in between the t-shirts. I need to make one!!
Definitely trying this one out! :)
check out stitch’T if you’re not up for DIY. http://www.stitchT.com
I made one and then had it quilted by CampusQuilt.com for a good price. They specialize in making t-shirt quilts but will also just quilt it for you if you don’t have a long arm machine.
I have been wanting to make an I-spy quilt for my 3yo son. I am using his old pj’s plus a few extra fabrics to make sure I have wide selection of images to play with. I am not a quilter or a sewer, just an adventurous Mom with too little time to actually do this project! So I had been put off by the block-i-ness of most quilts I have the experience to do, and I want this to be a little more artistic. So all that to say – I am SO excited to have found this idea. I especially like the idea of not having any batting, minimal quilting. I think I can handle this and I am now excited (not intimidated) to give it a shot! Thanks!!!!
I really like your quilt! And especially the tee with the whale graphic.
Since they’re stretchy and different weights, try mounting rough cuts of the shirts to a one-sided fusible interfacing FIRST. Then cut out to a more finished size. It prevents the edges from fraying on you too, and allows the “shirts of different weights” thing to be a non-issue.
have you made any more T-Shirt quilts??? this is a project I’ve been wanting to do for a long time now and have never started.
You’ve inspired me to tackle the bin of “memory” T shirts that I’ve wanted to make into a quilt for 15 years. Will be 1st project of 2014.