Pinball Clock Box Finished!

If you haven’t read my project on building a clock out of pinball score reels you should head on over there first. This project builds on the previous and teaches us new skills that we can transfer to future projects we decide to devour.

There are many ways one can upcycle a pinball machine. Most projects deal with full blown machines, reusing their cabinets and/or accompanying artwork. This time though, since we like to nerd out about the inner workings (the stuff rarely seen by common folk), and the only parts we have are the score reels, we are going to have to make our own box. Along the way we are going to learn some design and woodworking skills.

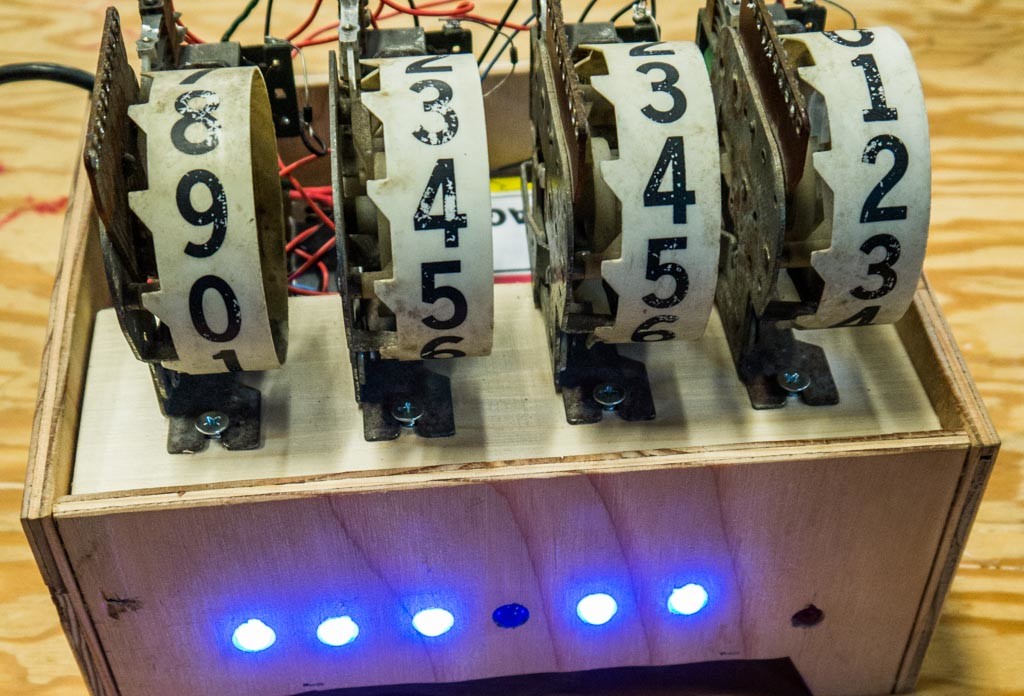
Now that we have this clicky madness that is an epic pinball score reel clock, it’s time to tackle building a case to put it in and proudly display it. Since the goal for this project was to preserve some electro-mechanical pinball history, I think the case needs to be as open as possible to show the glory of the score reels. The case should hide the modern circuitry that controls them, but show the time without distracting from the electro-mechanical aesthetic or cause a clash between the styles. I opted for a design slightly modern but inspired by old tube radios.

Project Steps

Sketch

Grab your pen and paper and sketch up some ideas!

Once you have a good idea of what you want to put it in, then you’ll figure out how the thing is going to go together.

Measure twice, cut once

Now it’s time to measure your parts, figure out the dimensions you’re going to need, and make a cut list/sketch.

Cheat

Ok so I lied, I’m going to measure twice and cut twice!

But my first measurements and cuts are for a mockup in cardboard. Build your box out of cardboard first so you can double check measurements, Plus see it all looks fantastic!

Cut with an X-acto and glue with hot glue. Remember that the cardboard might not be the same thickness as the material you’re going to make the final box out of. I got lucky and my cardboard was very close to the thickness of the wood I was going to use.

Bonus points if your mockup transcends its purpose and becomes a container for things!

Cut out the parts for your box again

Ugh I gotta cut it again? Yep!

But this time it will be using your beautiful material of choice for your final box.

Sanding and assembly

I sanded all my panels before and after assembly so the box is nice and smooth.

A square object can be perfect to clamp to in order to hold your panels just right for connecting together.

I decided to nail and glue my box together. If you go that route, take extra care not to send a nail out through the plywood, as this will diminish the beauty of your box, not to mention the nail might go though your finger.

Visualize and drill

Start visualizing where components will be and measure out where to drill holes for placement.

Templates

You’ll need to drill holes to mount the parts, but sometimes it can be hard to figure out where to drill those holes. One way to get around this is to use a piece of paper, cut to the size of the component, and poke holes in the paper using the X-acto.

Then you can lay this template on the surface you will be drilling/mounting the component to.

Add in the rest of the parts and wire up

I added a latching double pole double throw pushbutton that disconnects the + from the buttons for setting the time so the buttons are in effect disabled. This was done in order to prevent people from messing with the clocks time.

Connect reels and mount

You’re going to need some type of 3 wire connector to connect your reels to the electronics inside the box. This way when you need to get at things inside to, say, change the RTC’s battery, you can just unplug them from the rest of the circuity. I just used a 3 cell lipo balance plug since I have a bunch laying around.

The reels are bolted to a piece of 1×4 which attaches to the rest of the box with screws.

Finished!

Now it’s time to find a nice place on a shelf to display your magnificent clock.

Additional ideas

Now that this thing is completed I have some ideas of other things we can add to this clock for more interestingness.

How about using all those unused number output pins on the reels and connecting them to LEDs?

Another idea is to stain the box, or we can create a plexiglass box that goes over the top of this one to enclose the clock further but not hinder visibility of the reels.

Conclusion

Feel free to share your cases with all of us in the comments below.