CNC Drip Coffee Stand
Photo by Vishal Talwar.

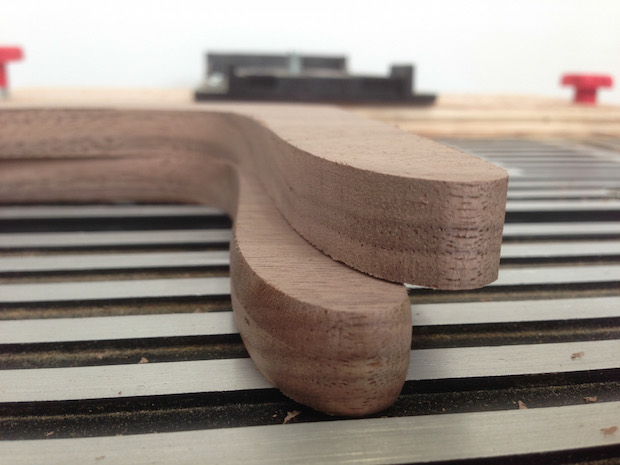
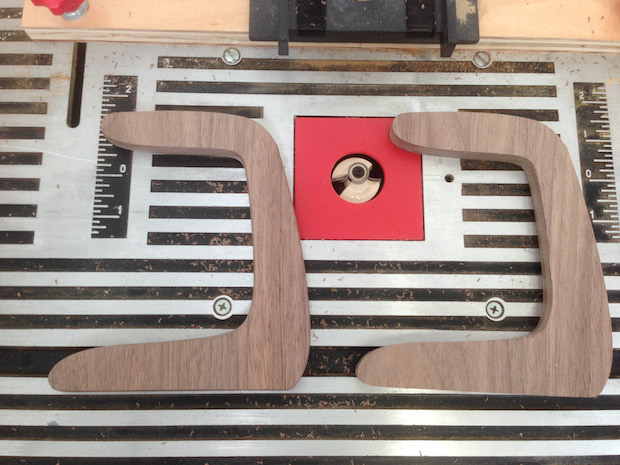
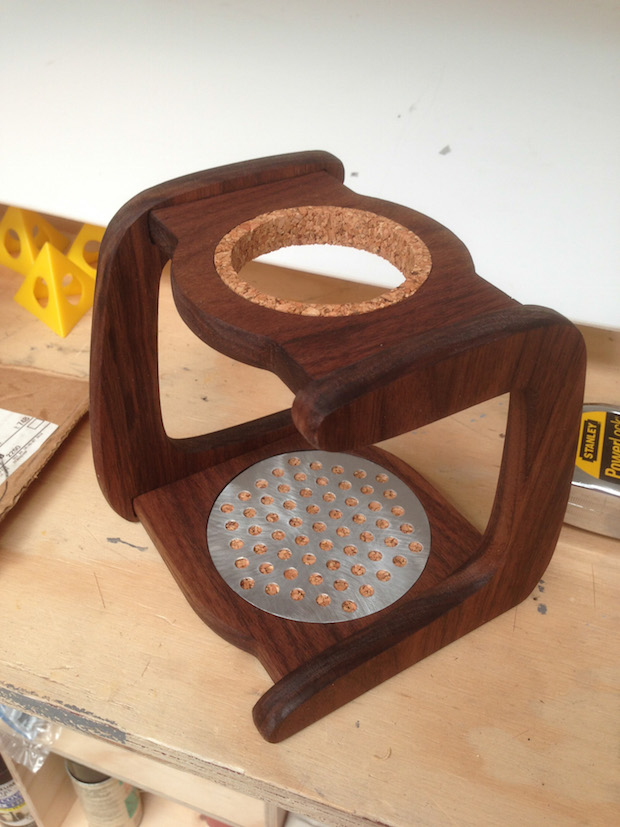
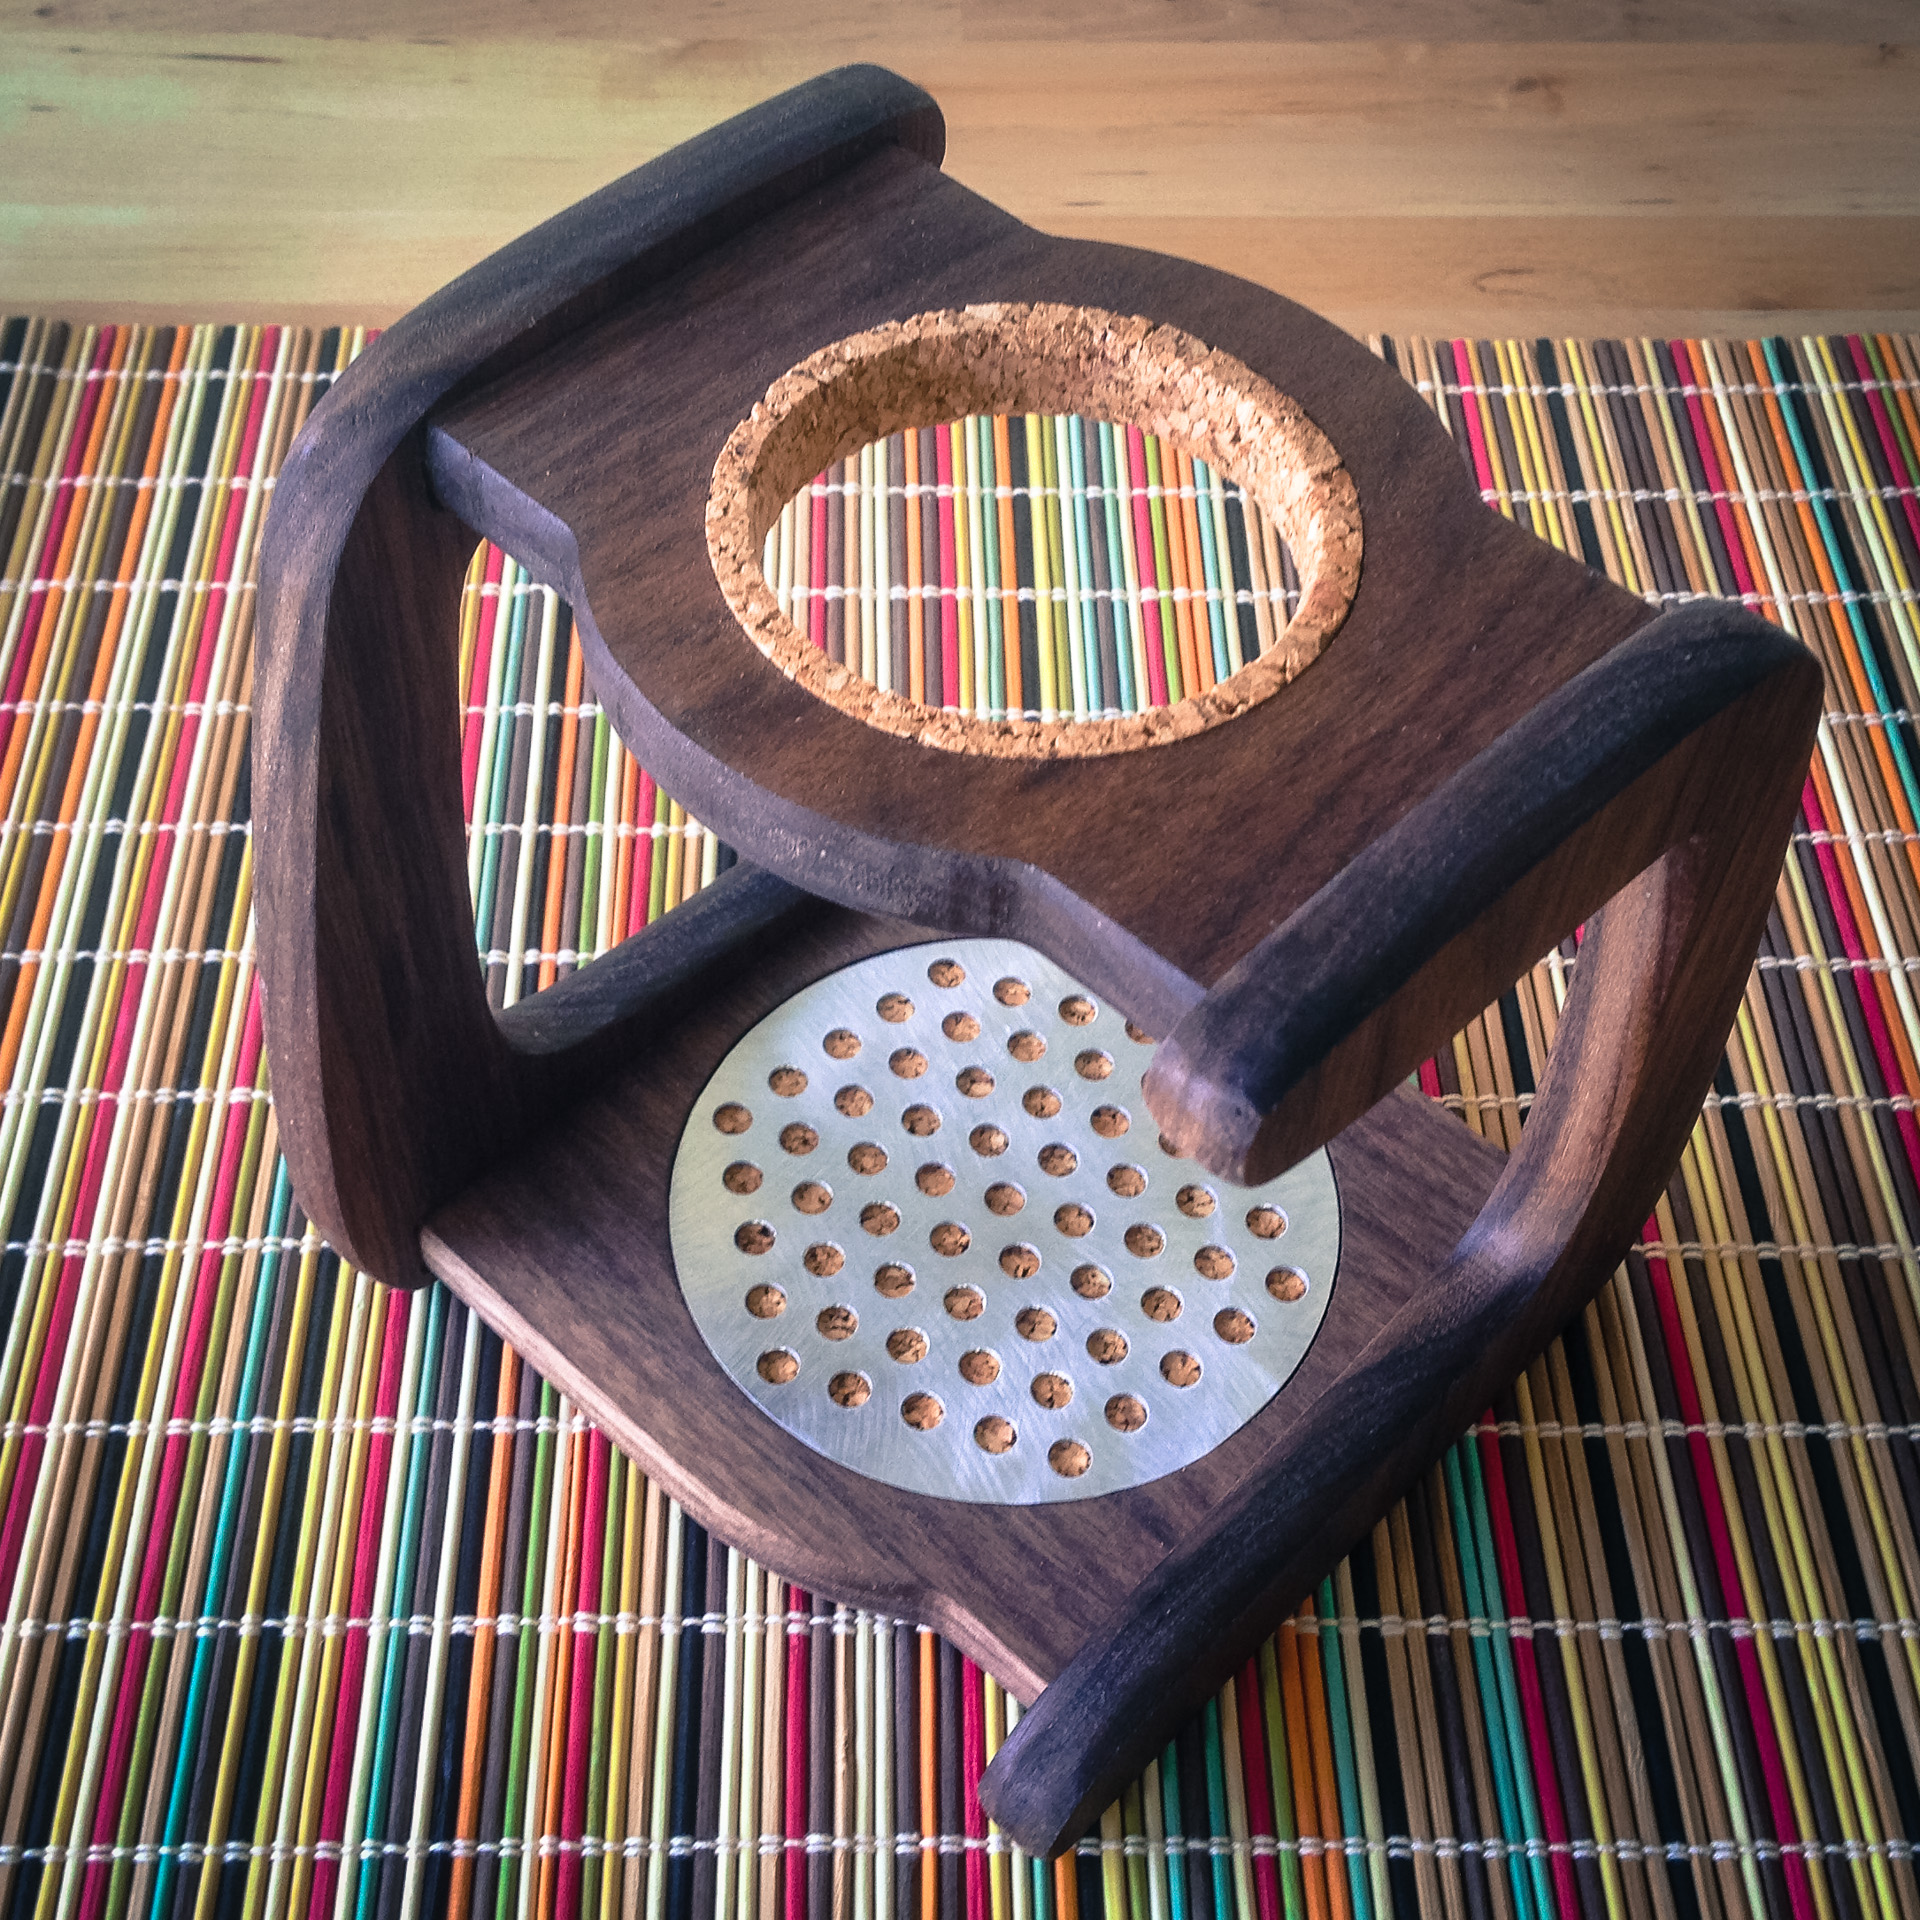
After setting his eyes on an expensive handmade drip coffee stand, a friend of mine commissioned me to create something similar for his Hario V60 Ceramic Dripper. The overall form is a very simple twist (literally) on other drip stands. I set three objectives for its design: it needed to be easy to clean, use only natural materials (no MDF or plastic), and not appear to be obviously made with CNC.

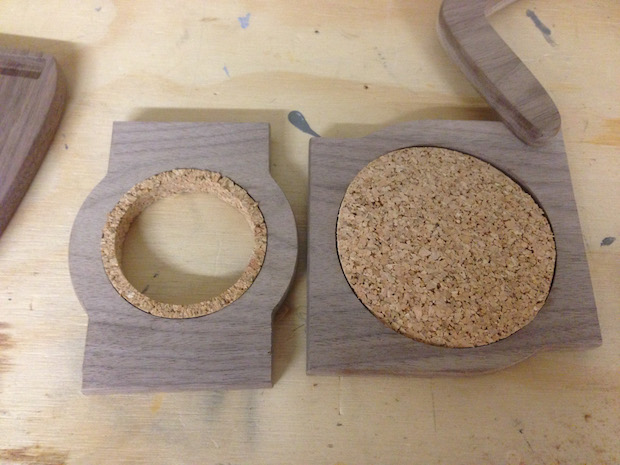
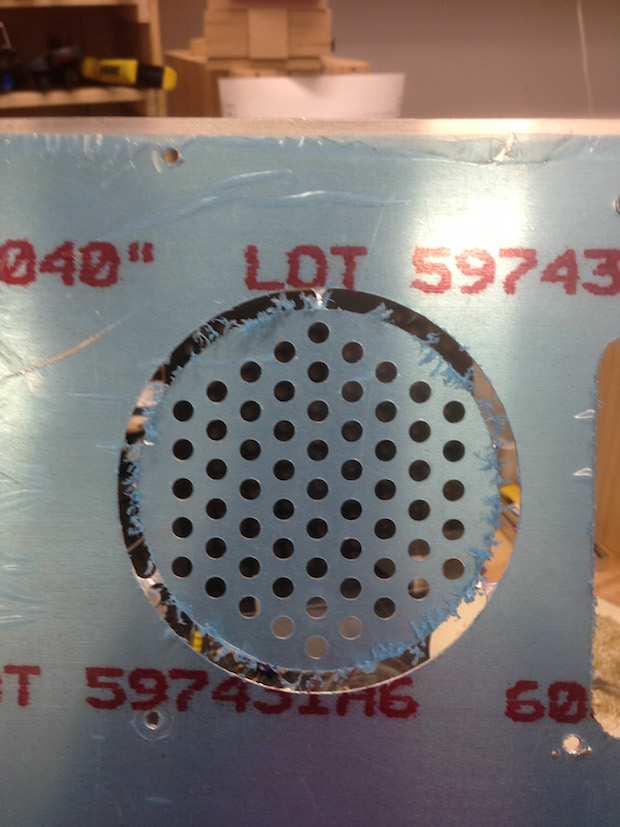
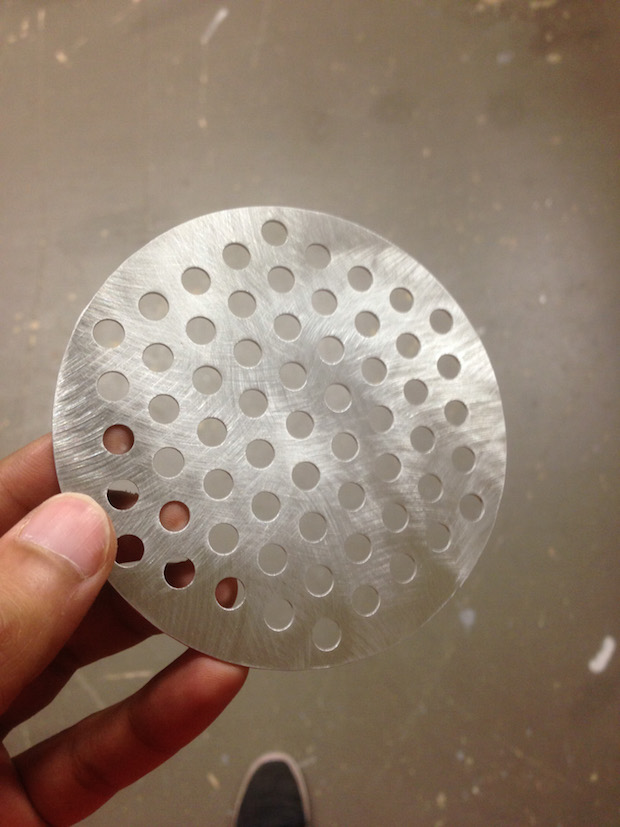
To these ends, the stand is made of walnut (a good wood for hiding coffee stains) and lined in a couple of places with removable — and washable — cork to absorb unwanted dripping. To add a high-end touch, I CNC milled an aluminum disk for the base.

Click here to download the templates and 3D model for this CNC drip coffee stand.

Hairo V60 Drip Coffee Brew Stand
Photo by Gunther Kirsch.

Project Steps

Cut the wood

Zero the bit on your CNC and make sure the plank you have is wide enough for all your pieces (at least 7″), in order to maintain a border around all your parts so that the wood doesn’t buckle under the force of the cut. I would also recommend screwing the plank into a larger, more easily secured piece of spoilboard.

You can find the DXF vector files, as well as VCarve CAM files embedded with the toolpaths I used for cutting out the various shapes, here on my Github page. The four main pieces include the top, two identical sides, and the base.

The top supports the ceramic dripper, so an inner circular profile cut is made to fit the dripper’s bottom flange. An additional pocket cut adds a lip for a cork inlay, which provides a pressure fit for the dripper (see second photo). To create a snug fit, you’ll need to make the radius of the inside hole exactly the radius of your dripper flange.

Simple rectangular pockets cut into each side fit the top and base, keeping the joints invisible from the outside of the stand. If you don’t plan to round the profile-cut edges over later (see Step 4), these rectangles should have overcuts in the corners, known as dogbones (see detail on third photo), because router bits can’t create perfect 90°corners for pocket cuts. A ⅛” bit should do the trick.

Cut the cork

For the cork inlay in the top, cut a long strip to the circumference of the inner circle, pocket cut it halfway to accommodate the lip, and then squeeze it into the hole. It is extremely hard to keep cork held down during a cut with a CNC router. Instead, I’d recommend using a router table for both the profile and the pocket cuts — or better yet, a laser cutter if you have access to one. A sturdy pair of scissors can also get the job done with the help of a template.

The cork for the base is simply a circle cut to fit the pocket, with a little extra room for expansion. If your cork doesn’t seem to want to stay flat, steam it for a few minutes and then flatten it under a heavy weight.

Cut the aluminum

Screw the aluminum into a piece of plywood spoilboard to keep it flat during routing. With a straight ¼” bit, drill holes — I used Grasshopper 3D to create and place the perforations in a honeycomb pattern — and cut out a circle to fit atop the cork in the base.

After cutting out the disk with shears, I deburred the edges with a flap wheel attached to a drill press.

Round over the edges

Use a router table equipped with a ⅜” roundover bit to soften the wood’s edges and give the piece a more handmade look. Another benefit of rounding the edges is that you don’t need to dogbone the corners of your pocket cuts in the side pieces, since you don’t have any 90° angles to account for. You can also use the roundover bit to smooth out the cork lining inside the top piece.

If you prefer a sharper edge to your design, or don’t have a router table at your disposal, you can skip this step.

Fit and finish

Before gluing the wood, make sure everything fits, including your favorite coffee mug and dripper. Sand the wood and cork to your liking. I used 150 and 220 grit sandpaper in that order until the wood was smooth to the touch.

I applied two layers of AFM Naturals Oil Wax to the wood and cork. The oils give a richness and luster to the surface that I preferred to synthetics I’ve used in the past. Leave oil out of any pockets if you plan to glue it all together.

Glue it together (optional)

With the precise cuts of a CNC router, it’s possible that your stand fits tightly together using only friction, leaving you the option of disassembling it later. That said, adding a little wood glue will strengthen the design, especially if it’s going to hold up to your daily coffee ritual.

Apply glue to just the rectangular pockets in the side pieces and then fit it all together. Wait 10 minutes, then clean off the excess glue with a scraper and wet rag.

Get brewing

Use your new stand to brew up some coffee! After all the work you put in, I guarantee it will be the best coffee you’ve ever tasted.