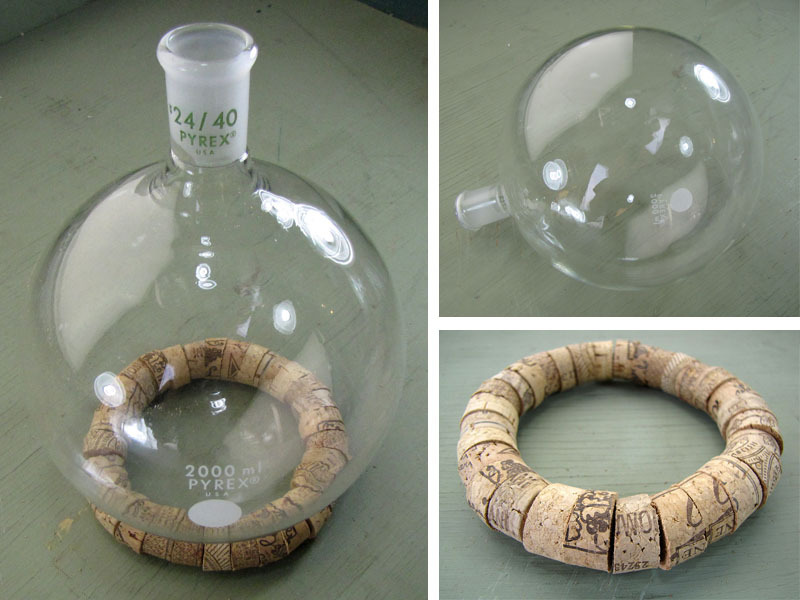
Round-bottom flasks offer many advantages for chemical work that requires heating a liquid, but suffer from a major storage and handling drawback: They don’t sit flat on a work surface. The common solution is to equip the bench with one or more cork rings that the flasks can sit in, as shown, to cushion them and keep them upright.

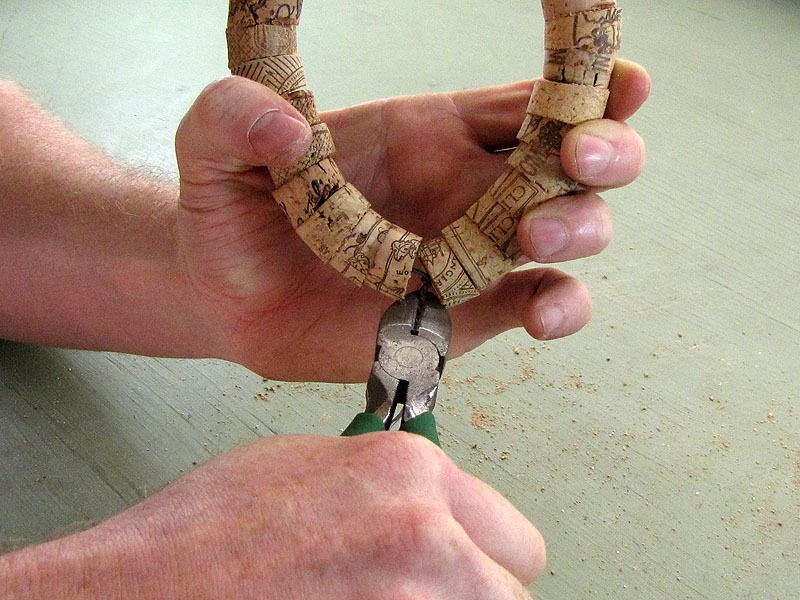
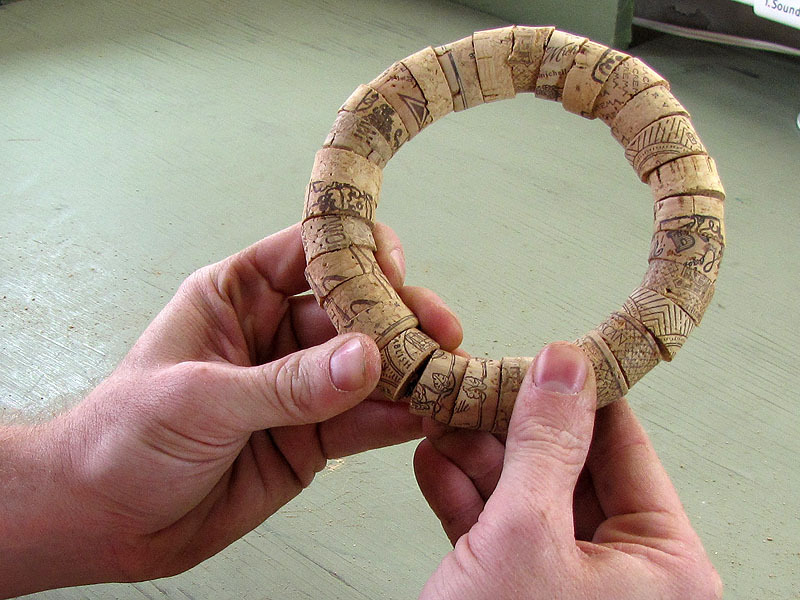
Like most lab equipment, however, purpose-made cork rings are surprisingly expensive. If you’re a hobby or amateur chemist (or just a really frugal one) you might reasonably prefer to save the money you’d otherwise spend buying “pro” grade cork rings to spend on other equipment, especially when it’s so easy to make your own cork rings from cast-off wine corks using this classic method.

Project Steps

Cut and drill cork sections

Use a razor saw to cut each cork at a 90-degree angle into two approximately equal-sized pieces.

Use a drill press, hand drill, or cork borer to drill a 1/16″ diameter hole in the eyeball-center of each cork section.

Cut each drilled cork section in the middle, again, using the razor saw, this time at a slight angle. Neither precision nor accuracy is critical, here; eyeball it at 5 degrees or so.

Form wire loop

Measure out and cut a length of 1/16″ diameter stainless steel or aluminum wire. The wire should be about 120% of the circumference of the finished ring. When in doubt, err on the long side. Wire is cheap!

Put a sharp 90-degree bend in the wire about 2″ in from one end. This will serve as a “stop” when you are beading on the cork sections later.

String corks on wire

Each cork section should have identifiable “flat” and “slanted” sides. Thread the unbent end of the wire through each cork section passing it from the flat side toward the slanted side each time. This will ensure that all of the cork sections can be oriented the same way.

“Bead” cork sections onto the wire until it is the correct length.

Put a sharp bend in the wire, towards the outside of the circle, after the last cork section is in place.

Bring the two bent ends of the wire together, closing the cork ring, and wrap the two bend ends around each other three or four times in a clockwise direction using your hands.

Tighten and trim wire loop

Go around the ring and rotate each cork section on the wire so that its thicker edge is toward the outside of the ring.

Grasp the protruding twisted wires with a pair of pliers and continue to twist them together in a clockwise direction, tightening the loop an additional three or four turns. Don’t overdo it, or the wire may snap.

Compress the cork ring slightly with one hand, as shown, and insert a pair of wire cutters into the open gap between the first and last cork sections.

Cut the pair of twisted wires off to a length within the outer radius of the cork ring.

Use it

Restore the ring to its circular shape and press the first and last cork sections together firmly to conceal the cut end of the twisted wires between them.

Set the completed cork ring on the benchtop. It should lie more or less flat. If not, adjust as needed.

Set a round-bottom flask into the cork ring, as shown. It should sit upright without wobbling.