


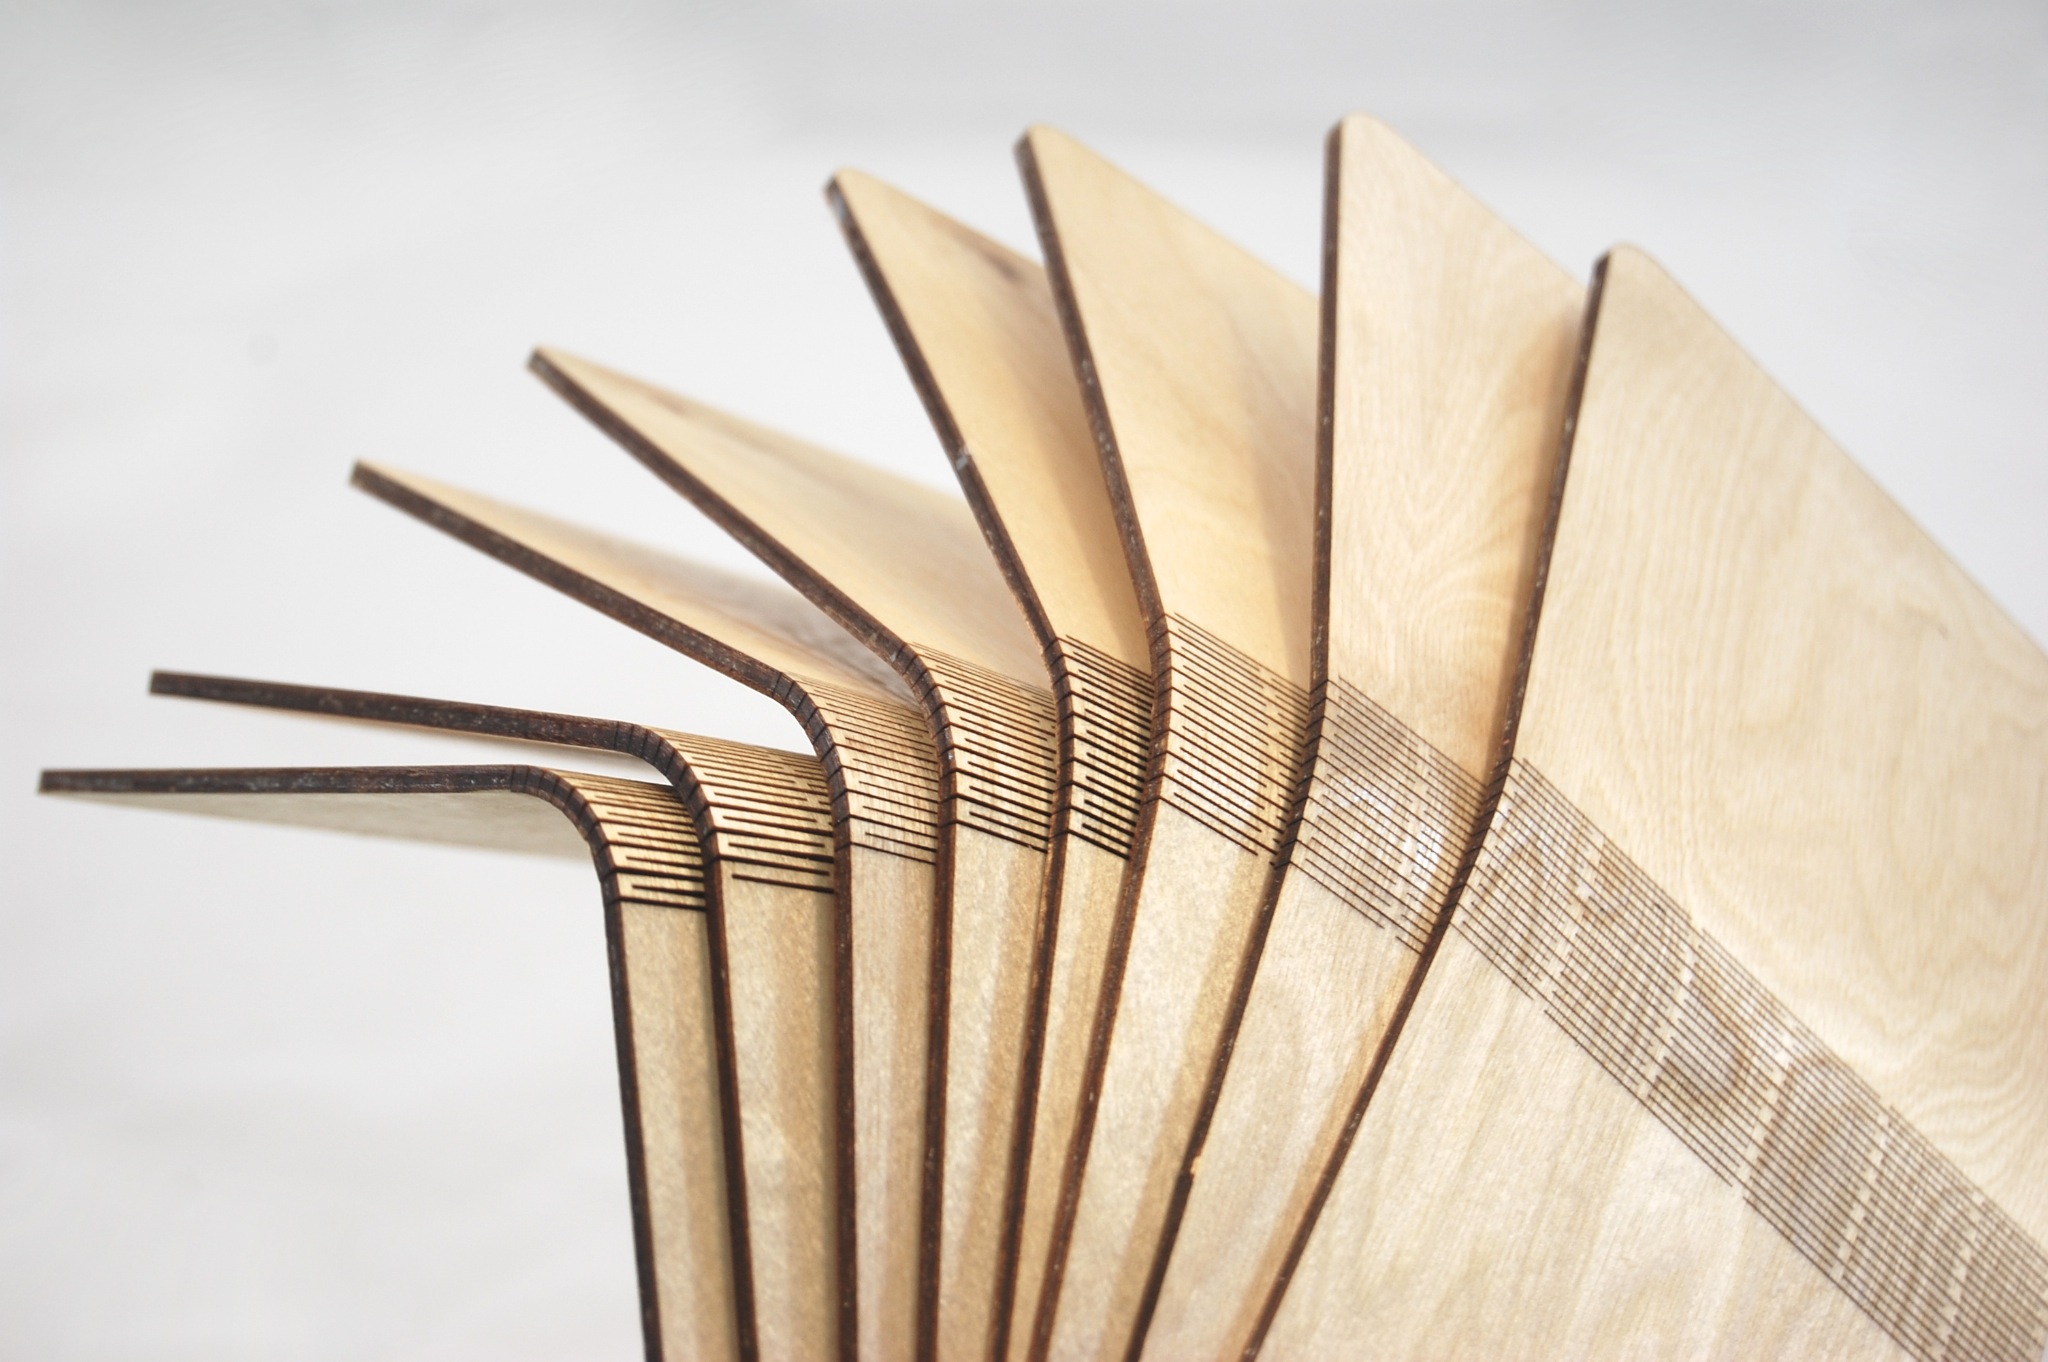

By making a pattern of laser cuts in a flat piece of wood, you can easily create hinges, clamps, and other features. We made wooden booklets, each with a hinge and a notepad holder. The hinge can be fully bent in both directions repeatedly without breaking. How is that possible? First, wood has the strength to withstand repetitive bending and twisting. It won’t break as long as the stresses stay under a certain limit.
The trick to making the wood flexible is to break it up in a lot of small pieces that can all twist a little. All these tiny twists add up so you can bend the sheet without stressing the material too much.
Imagine it like this: when you twist a matchstick with your hands, you can twist it maybe 1 of a turn before it breaks. Imagine now you have a matchstick 10 times longer. You can twist it 10 times as far, more than a full turn. That’s how the hinge we use here works. When you look closely you can see that the cuts leave a pattern of interconnected small “sticks.” When you bend the cover, you’ll see them all twisting a little bit
There are several patterns that will allow bending. The simplest one is a set of shifted cuts. The longer or wider you make the piece, the softer it gets. This pattern yields a very springy hinge that you can move in all directions.

To make the hinge stronger, you can add some tabs in each line. This gives the hinge a lot more strength while still allowing you to bend it.

Inside the cover is a clamp that holds the notepad with two flexible “arms,” cut so they’re slightly smaller than the notepad. When you insert the notepad, the arms press on the sides, keeping it firmly in place.


MAKE Volume 33 features our special Software for Makers section covering apps for circuit board design, 3D design and printing, microcontrollers, and programming for kids. Also, meet our new Arduino-powered Rovera robot and get started with Raspberry Pi. As usual, you’ll also find fascinating makers inside, like the maniacs on our cover, the hackers behind the popular Power Racing Series events at Maker Faire.
Try your hand at 22 great DIY projects, like the Optical Tremolo guitar effects box, "Panjolele" cake-pan ukelele, Wii Nunchuk Mouse, CNC joinery tricks, treat-dispensing cat scratching post, laser-cut flexing wooden books, sake brewing, growing incredibly hot “ghost chili” peppers, and much more.
On newsstands now, by subscription, or available in the Maker Shed


