Solar TV Remote

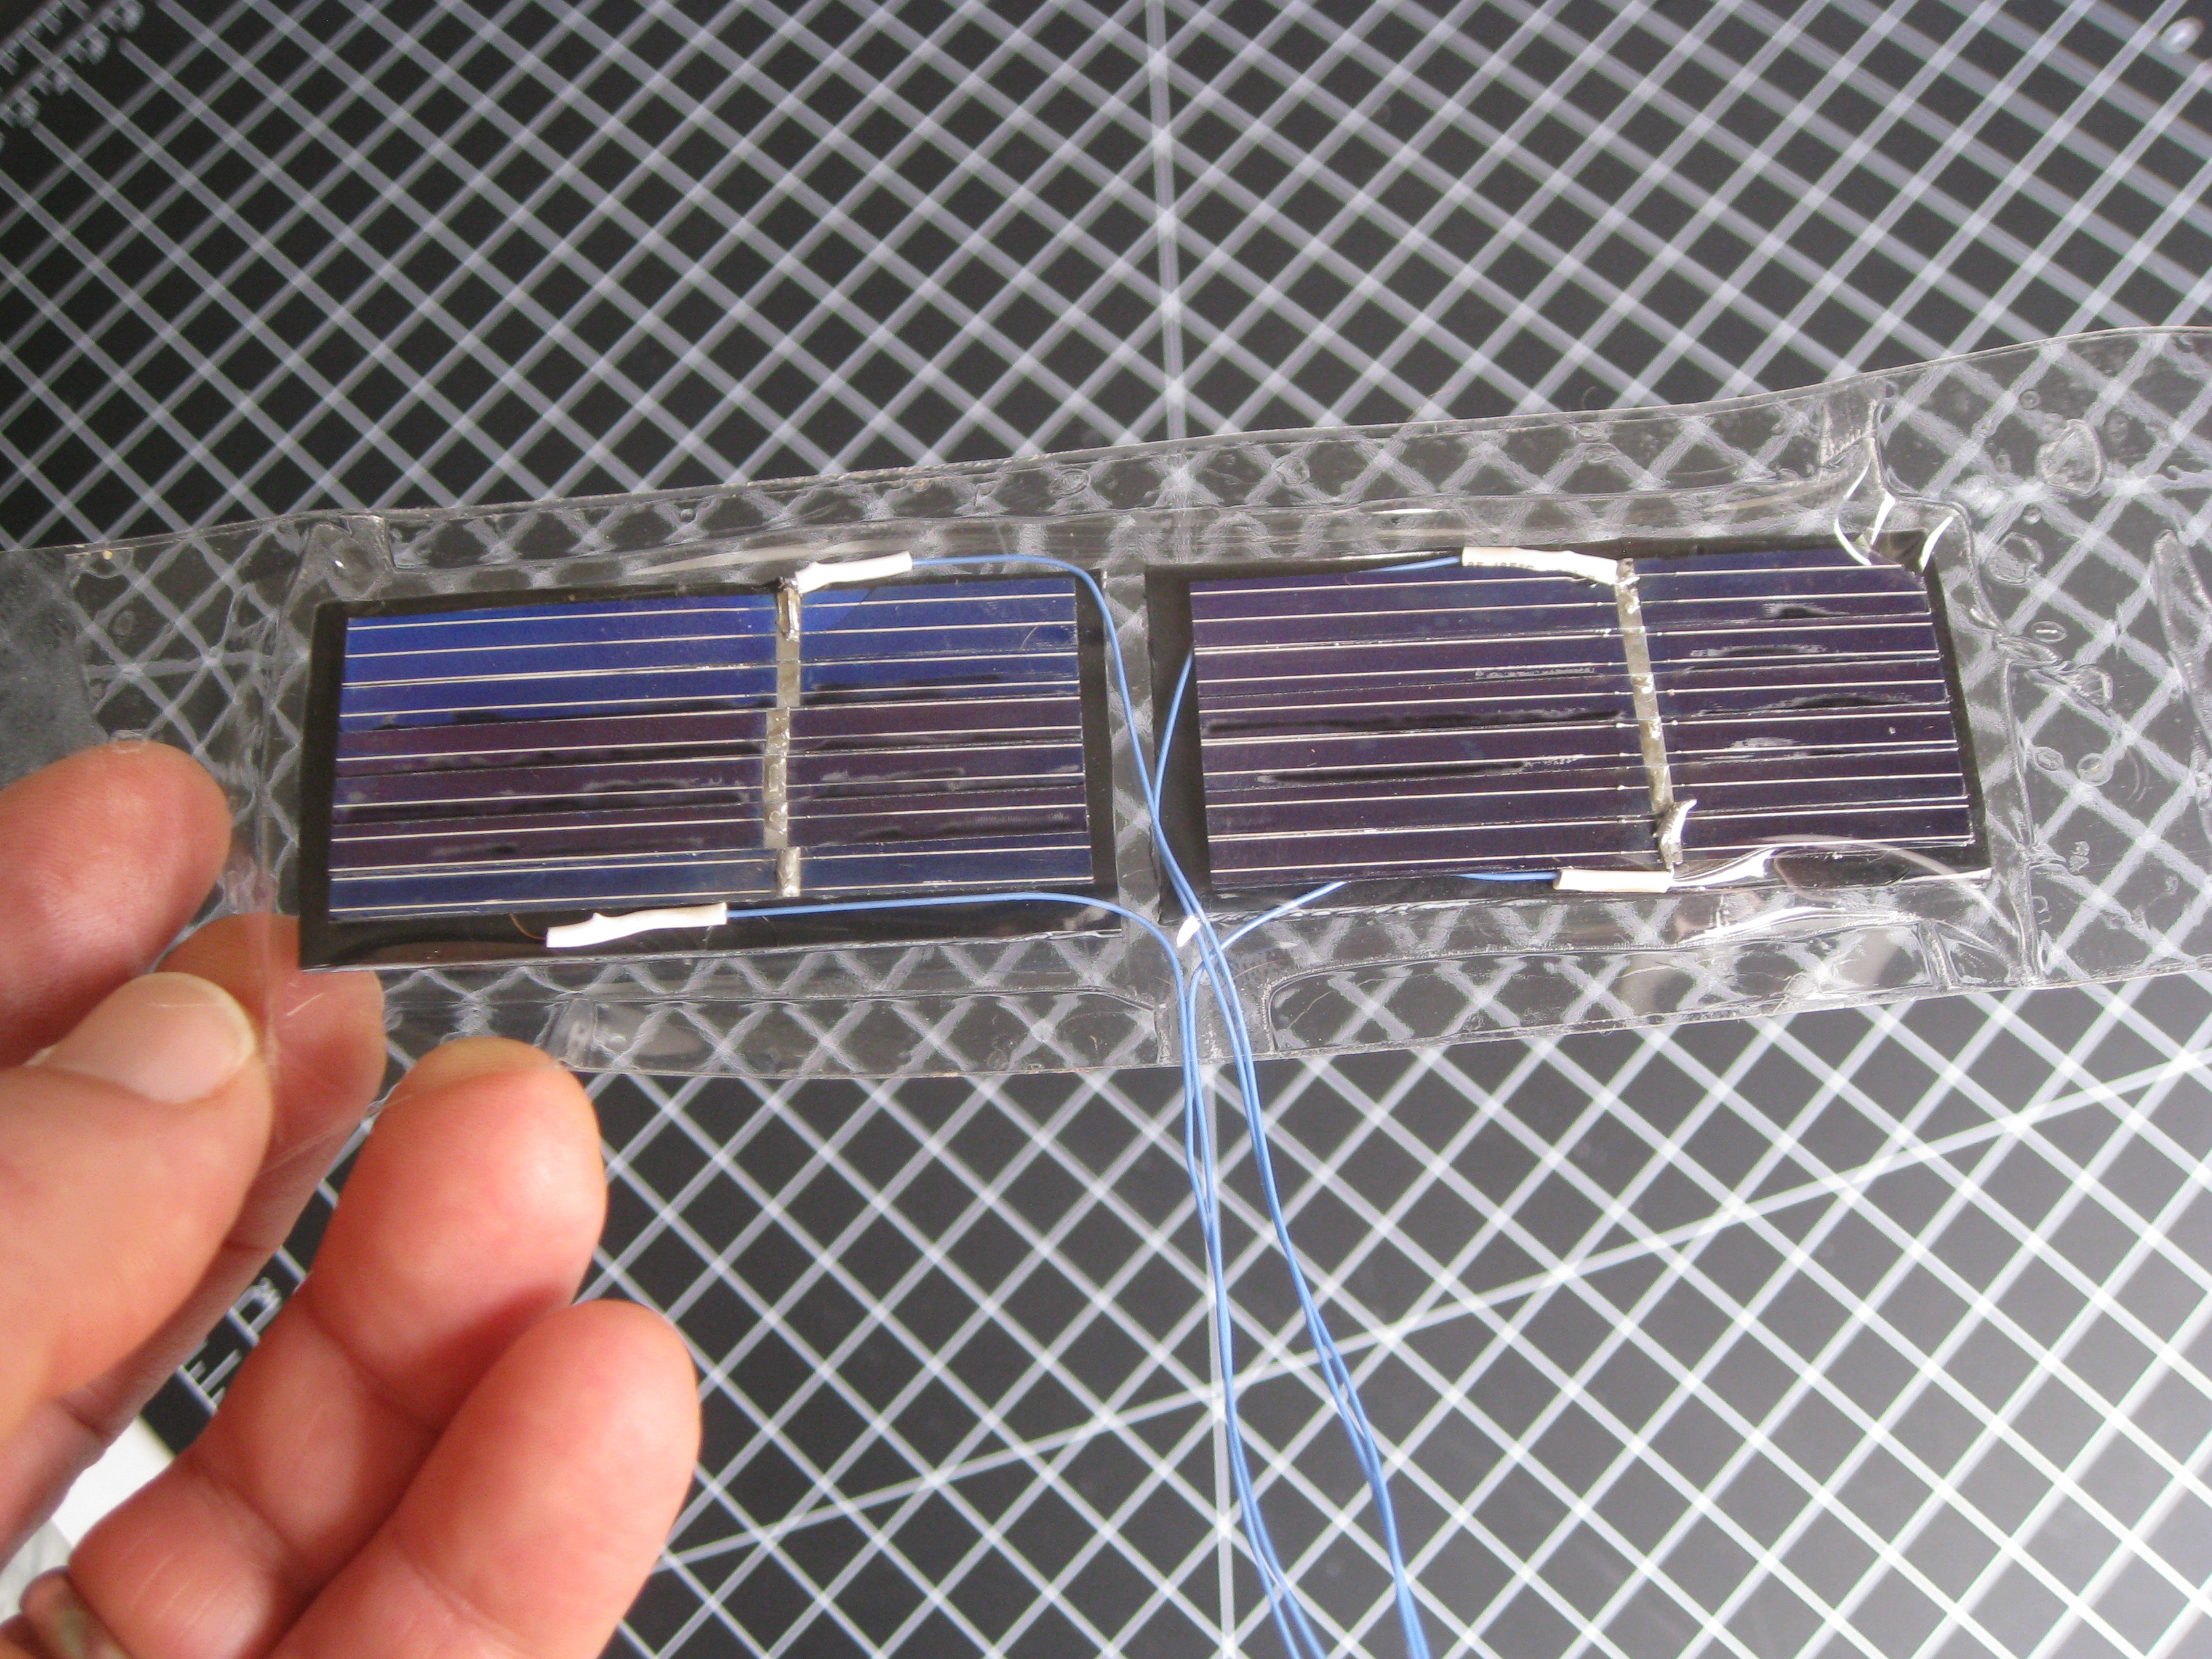
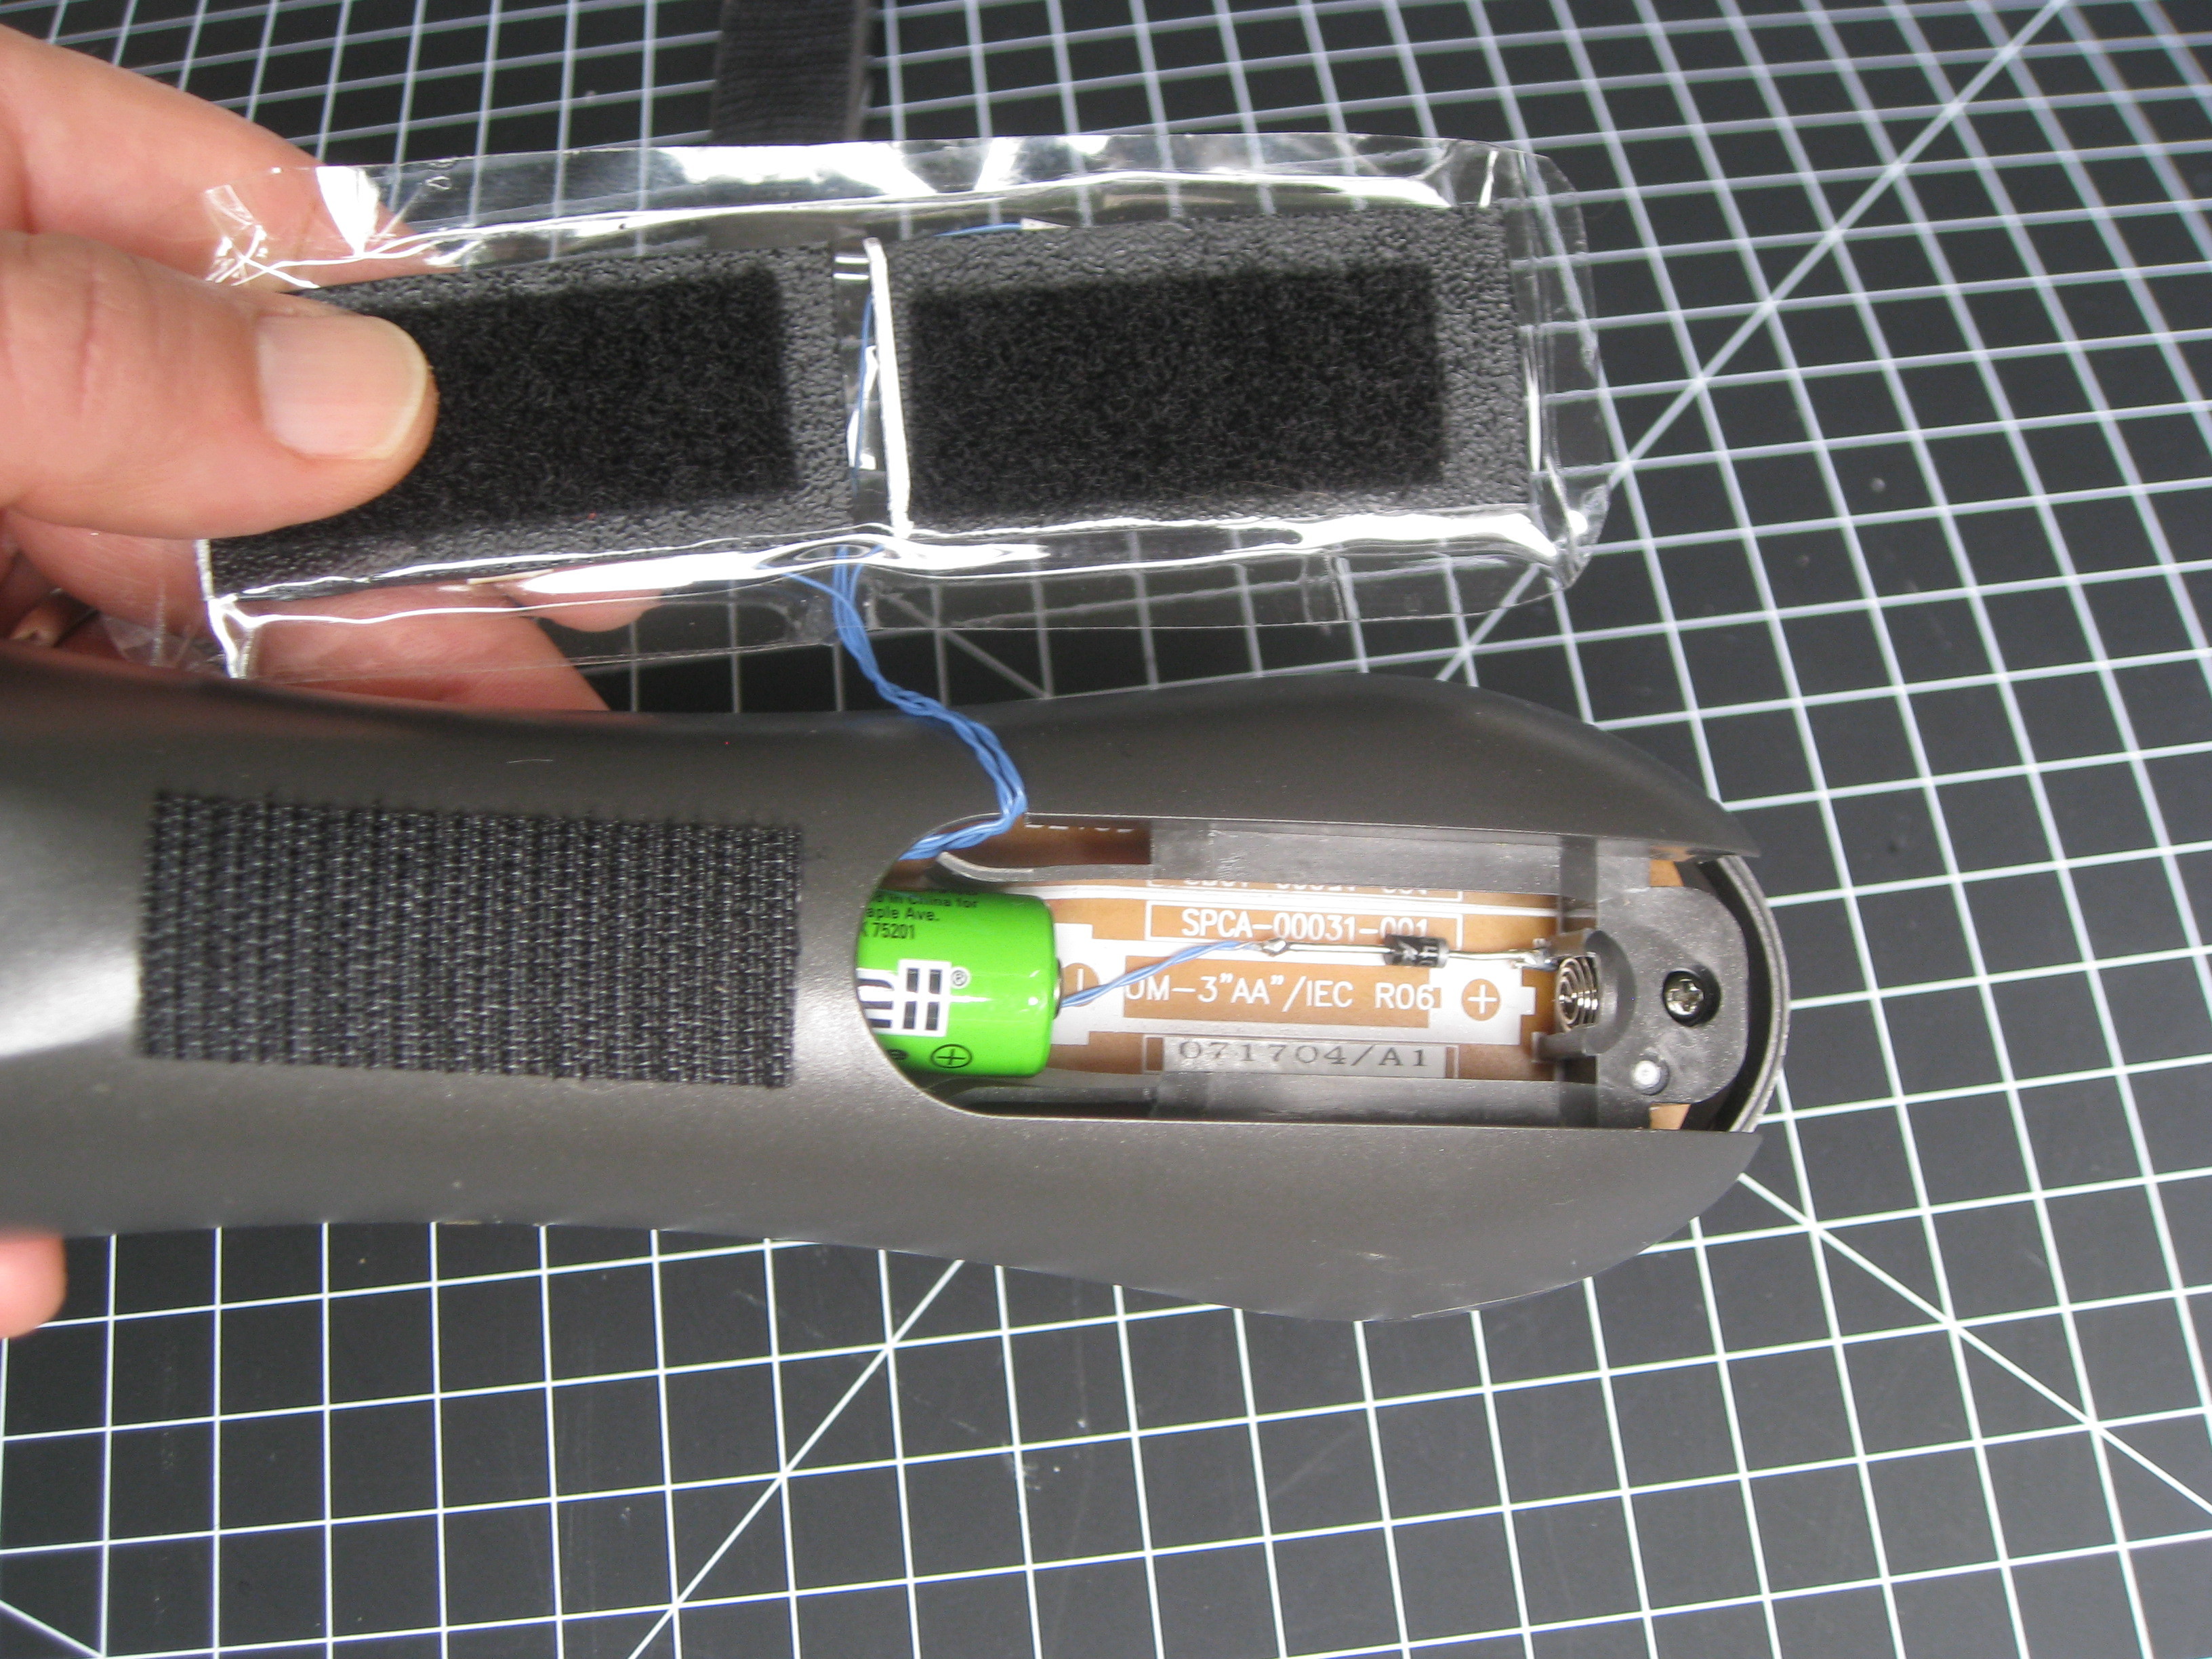
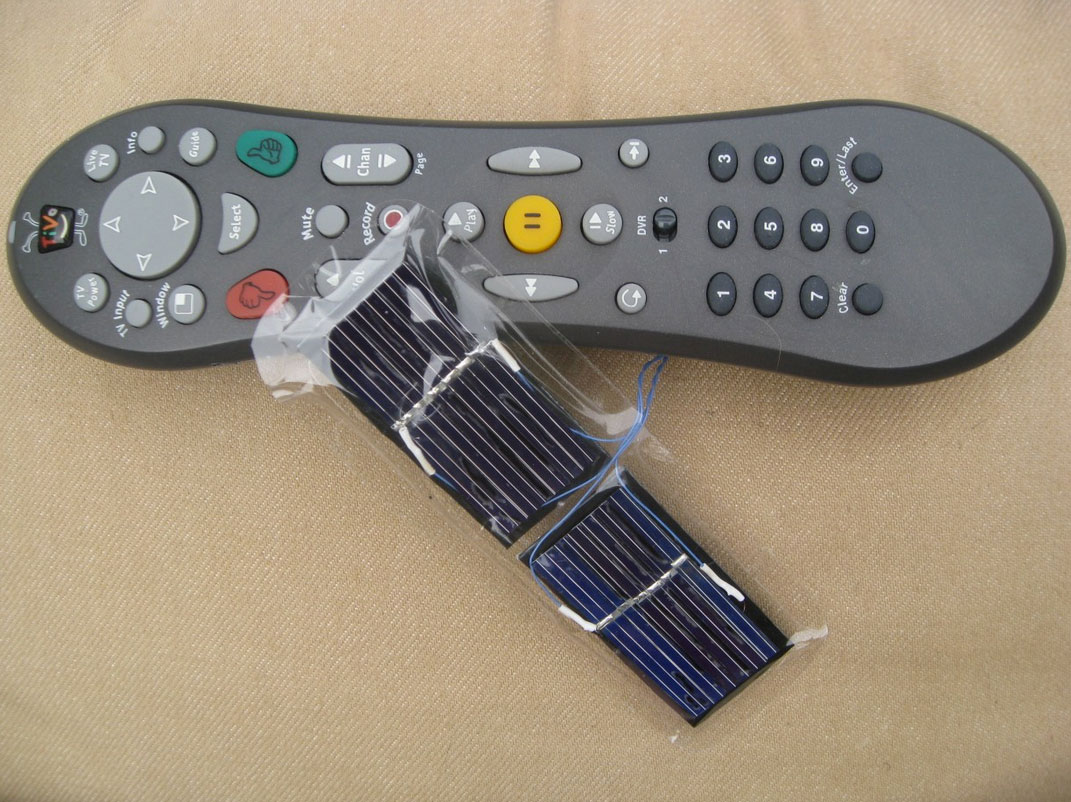
Powering a TV remote with the sun means you won’t have to buy batteries every six months to surf from your sofa. Low-voltage devices that use power only occasionally, like remotes, are good candidates for a solar-powered trickle-charge. Here’s how we modded our remote to live off of the sun, using rechargeable batteries connected in parallel with a small solar cell and a diode to keep any power from trickling back out.

Check out more Weekend Projects.

Project Steps

Uncase the Solar Cells

The 6V solar cell module consists of a hard plastic case with two 3V solar cells connected in series inside. To charge our 3V remote, we’ll disconnect these 3V cells and rewire them in parallel rather than in series.

Use a small slotted screwdriver to pry the clear cover off of the case.

Use pliers to bend away the rim of the case and breaking it off all of the way around.

Cut the Cells Apart

Use a hobby knife to cut the three thin copper wires that connect the solar cells, the one running between the cells and the one going to each to the red (+) and black (-) leads.

Mark with tape or otherwise note which lead runs to (+) and which runs to (-). You will need to know this later.

Leave some length of wire where possible for soldering.

Use heavy-duty scissors to cut out the plastic backing behind each solar cell.

The bare solar cells are brittle silicon and they break or chip easily. As you cut the plastic, avoid bending it behind the cells or scraping against the cells with the scissors.

If you look closely at the sides of the cells, you will see that they consist of six thin strips bonded together back-to-front and offset, like a staircase. Each layer contributes about 1/2V, and so the 6 “steps” stacked together generate a combined 3V.

Connect Wires to the Cells

Cut four lengths of 30-gauge insulated wire, and strip the ends. The wires should be long enough to reach from the battery contacts inside the remote’s battery compartment out to the back of the remote where you will mount the cells. It’s a good idea to cut the wires at least as long as the remote itself.

Solder one wire to each of the thin copper wires attached to the solar cells. The wires from between the cells are short, which can make connecting to them a challenge. Have patience; this is the most difficult part of the project. After this, you’re home free.

A good way of soldering two thin wires together is to use pliers or tweezers to fold a little hook at the end of each, then loop the two hooks together and solder the joint.

Finish the solar cell leads

Clip any extra copper wire length from the solar cells.

Cut short lengths of 1/8″ heat shrink tubing and slide them over the solder connections.

Use a pocket lighter or heat gun to shrink the tubing over the joints.

If you use a lighter, hold the flame just above the heatshrink tubing, not below.

Happiness is… learning that the pocket lighter your teenager has is only for shrinking heatshrink tubing in electronics projects.

Connect the Diode

Disassemble your remote enough to let you access the wire or metal spring contacts in the battery compartment, (+) and (-). With the TiVo remote shown here, this required removing the printed circuit board.

Find a good place to connect the diode to the (+) battery contact, where it won’t get in the way of reassembling the remote. Here, the diode had room alongside one of the batteries.

Use a knife to cut away any plastic needed to clear a path for the diode to connect to the (+) battery contact.

Trim the lead on the diode’s cathode (-) side, marked with a stripe, and solder it to the (+) battery contact.

A diode is a component that only lets electricity run through it in one direction only, from its anode (+) to its cathode (-). This project uses one to ensure that solar cells will charge the batteries, but that the batteries cannot discharge (lose power) through the cells.

Package up the Cells

With clean hands, cut a strip of clear packing tape longer than both solar cells laid end-to-end, and lay it down sticky side up.

Carefully place the solar cells down on the tape, centered end-to-end. Orient them such that wires that had originally connected to the red (+) and black (-) wires are diagonally opposite each other.

Gently bend and route the four wires together so that they run off of the tape in two pairs, (+) and (-) .

Each cell has a (+) and (-) lead, so the lead opposite the red-connected wire is (-) and the lead opposite the black-connected wire is (+).

Cover the cells with a second strip of packing tape aligned sticky-side down over the first. Smooth down and squeeze the tape together to laminate the cells and wires neatly.

Trim the tape around the cells with scissors, and twist the wire pairs together.

Connect the Cells

Route the wire pairs to the remote’s battery contacts the way they would go with the remote reassembled. With the TiVo remote, this meant threading them through the battery compartment cover opening in the bottom half of the remote’s plastic case.

Twist together the stripped ends of the (-) wire pair and solder it to the (-) battery contact.

Twist together the stripped ends of the (+) wire pair and solder it to the free end of the diode.

Final Assembly

Use a knife to cut a notch in the remote case, just large enough to let the wire pairs exit through.

Use scissors to trim the tape around the cells.

Cut two Velcro tape pairs. Stick one side on the backs of the solar cells and the other side aligned on the back of the remote.

The Velcro lets you detach the solar panels in order to access the battery compartment and to position them directly facing the sun, for maximum charging.

Use it

Finally, load your rechargeable batteries. A typical remote will take 4–5 hours to charge its batteries fully in sunlight, but it never gets low as we leave it by the window.

As a build alternative, you can use a 3V flexible film solar cell from a specialty electronics supplier, instead of hard silicon solar cells.

Based on a project by Sparkle Labs.