One crisp Autumn afternoon I had the privilege of joining MAKE founder Dale Dougherty as he used his wooden apple press to make cider from the apples that grow on his property. Dale has been making cider for over 20 years and since this was only my second time making cider he was kind enough to share his technique as we worked together.

Project Steps

Harvest and Wash the Apples

Collect your apples for making cider and move them to a central location. We used a blend of Jonathan, Golden Delicious and Rome apples that grow around Dale’s property.

Most of the apples that we used were leftovers from the fall harvest and did not look very appetizing.

Don’t worry about worm holes or small bruises; they add to the complexity and flavor of your cider.

Before tossing the apples into the apple grinder, wash them in a tub of water to remove any dirt.

The Apple Press

We used an wooden apple press with an electric-powered apple grinder. A press like this can be purchased from a store, or you could rent a similar press from your local homebrew shop. Better yet, make your own!

The 120V electric motor is a very handy feature and makes quick work of grinding up the apples. Other units use a large mechanical crank that the operator turns to spin the blades. The motor is directly connected to a wooden cylinder that has sharp metal blades secured to its surface.

The apple grinder sits at the bottom of the wooden chute and grinds the apples (everything, the core and all) into a chunky pulp consistency that then falls into a wooden basket.

There is a thick wooden cap that fits inside the wooden basket. A metal plate is screwed to the top of the cap; this is where the metal press contacts the cap and pushes down to squeeze the juice out of the apple pulp.

Sanitize the Equipment

This is a powerful, non-chlorine iodine based sanitizer. Simply add 1/4 oz to 2.5 gallons of cold or warm water, submerge items for 1-2 minutes, and allow to air dry.

Use a this solution to clean all of your pots and pans, the strainer, and any utensils that will come into contact with the cider.

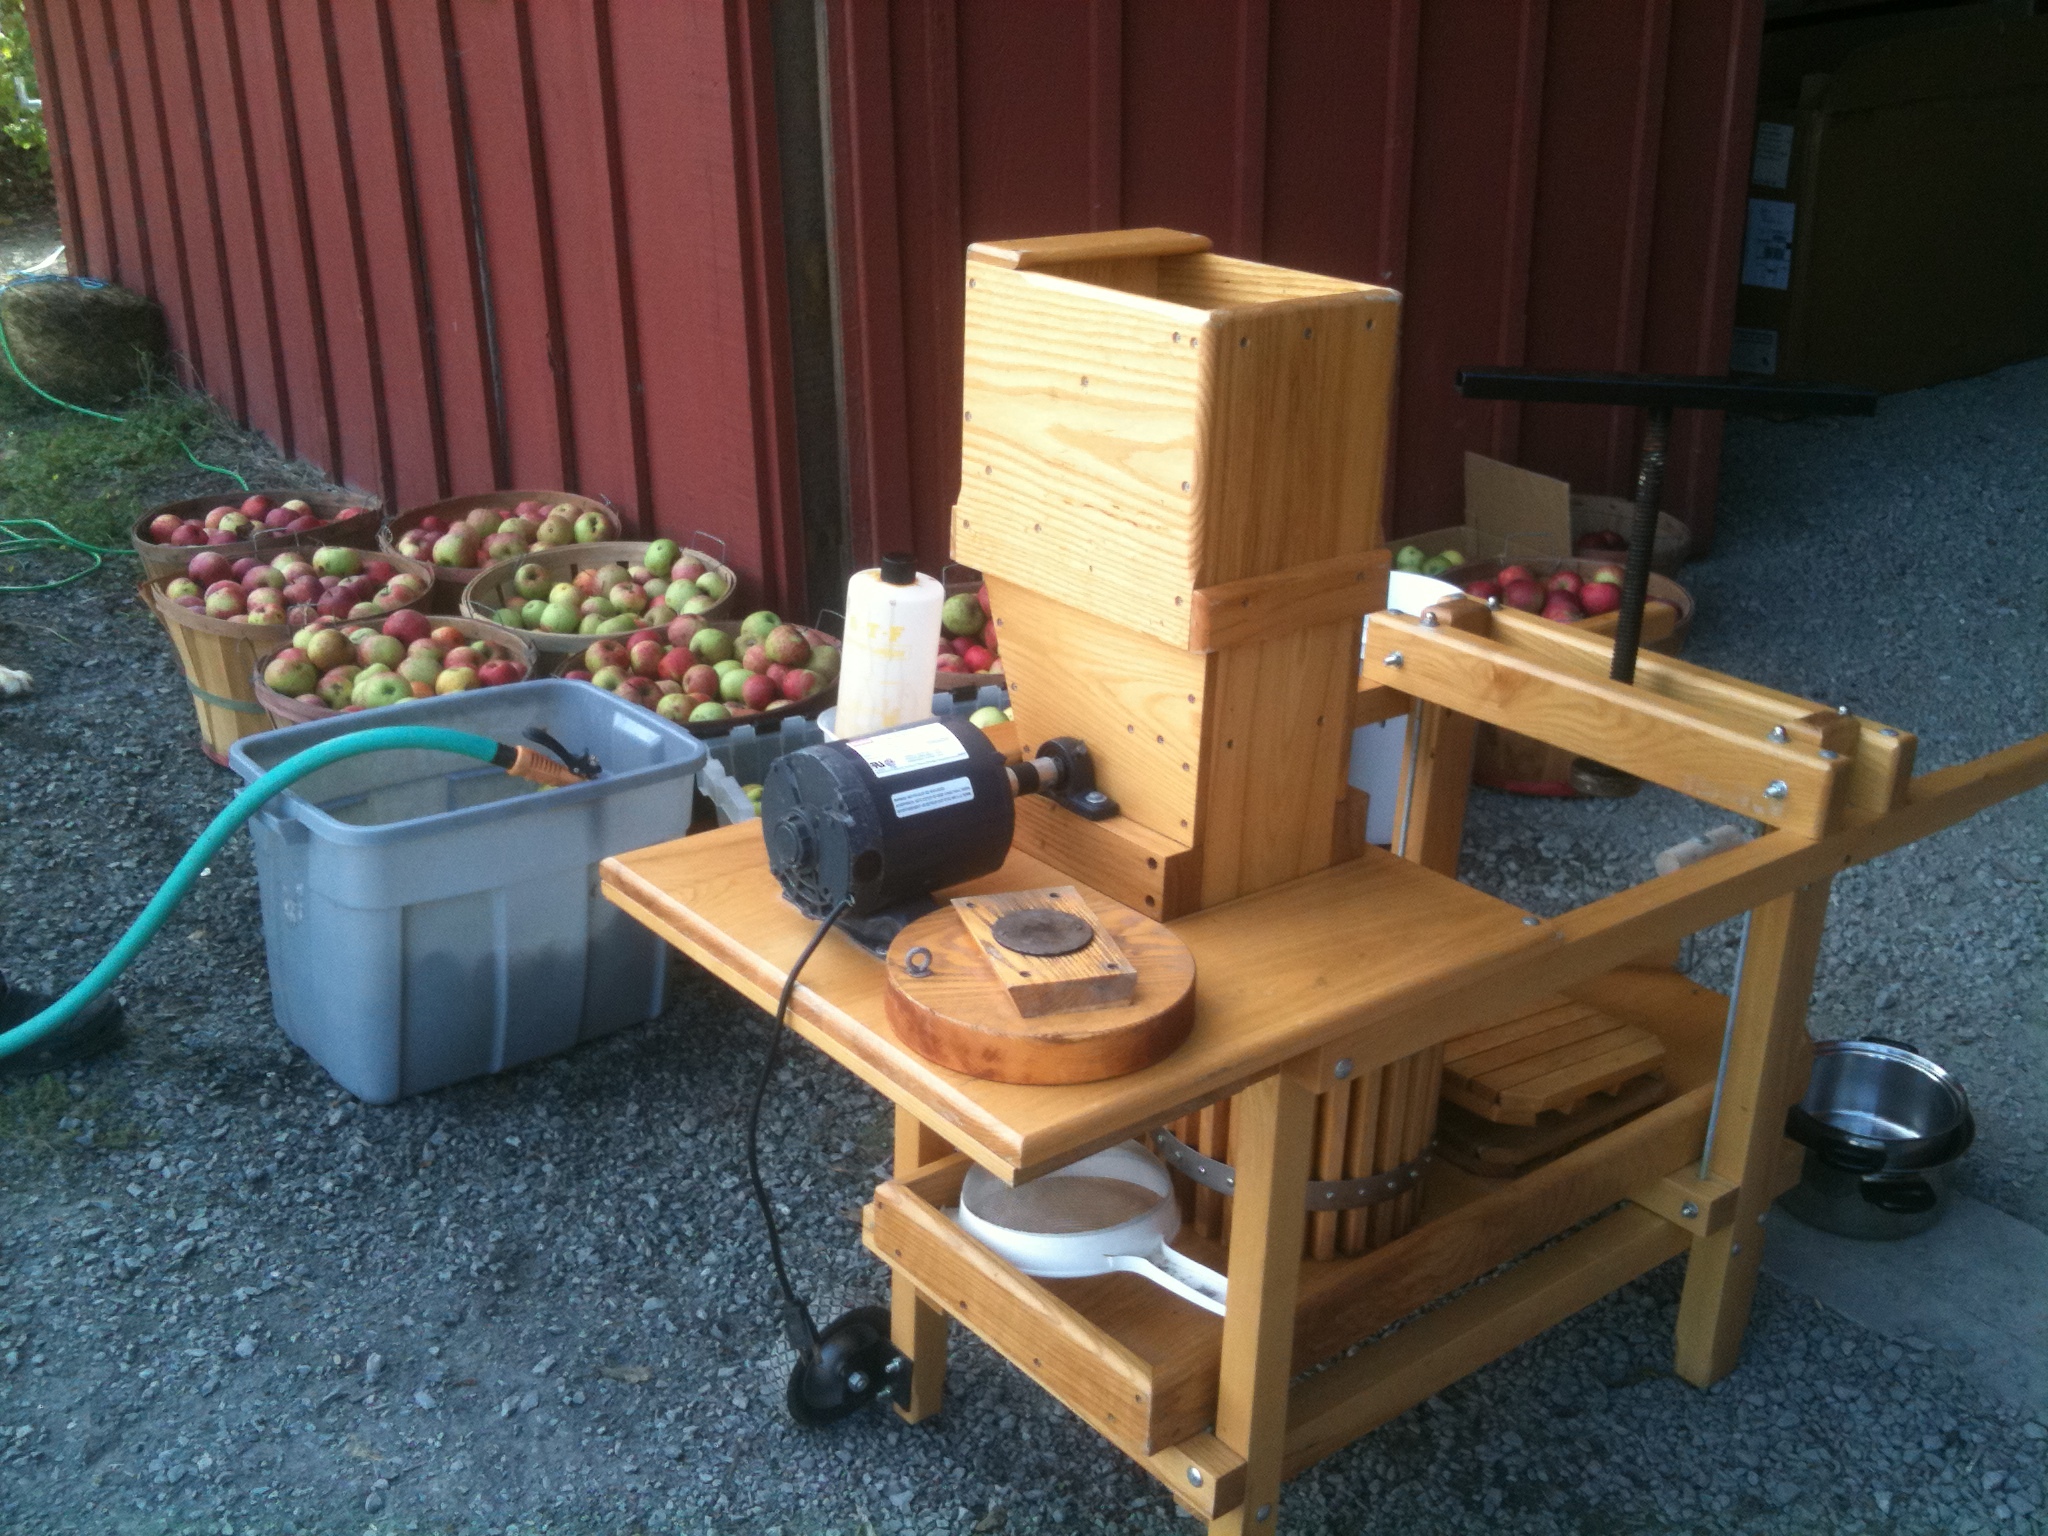
Take a clean rag and soak it in the solution. Wipe down the surfaces of the apple press, especially the channel where all the cider will flow and be collected.

Any containers that you plan to fill with cider should be properly sanitized prior to filling it with liquid. Use the sanitizing solution and pour a generous amount into the container. Swirl the sanitizer around the inside the conainter to coat the entire surface. Dump out any excess sanitzing soluion and allow to air dry before filling with cider.

You do not want bacteria to grow inside your cider (unless you are performing a wild fermentation). For this reason all your equipment should be thoroughly sanitized to ensure that your hard work is not ruined by these unwanted microorganisms.

Chop Up the Apples

Once everything has been sanitized and air dried, place the basket onto the platform and slide it under the the apple grinder.

There is a platform that the wooden basket sits on top of which makes it easier to slide the basket from its location under the apple grinder to the press without spilling the apple pulp or making a big sticky mess.

Turn on the motor and drop the washed apples into the chute. If you pick up an apple and notice that it is mushy, don’t bother adding it to the grinder. These apples usually do not taste good in the cider. As you add apples to the apple grinder, keep an eye on the level of apple pulp in the basket below.

When the apple pulp is almost to the top of the basket, turn off the motor and slide the platform out from under the apple grinder and move it under the metal press.

Press the Apples

Place the wooden cap inside the basket with the metal plate facing up. Align the apple basket so that it is centered with the metal press and begin to spin the handle clockwise.

Continue to rotate the handle. You should notice a flow of liquid running down the channel and into the pot at the bottom of the press. Have a second pot handy so that you can quickly replace the pot once it is full.

Eventually the flow of cider will slow down and come to a stop once you have squeezed all the liquid out of the apple pulp. At this point you should stop spinning the press clockwise. For this apple press, we would continue to turn the handle until the wooden basket would start to creak and groan under the pressure; then we would know it was time to stop pressing.

Spin the handle counter-clockwise to release the pressure. This should be easy to spin now that you are not applying force to the apple pulp.

With the press fully raised, remove the wooden cap. You can see that all the apple pulp has been squished into a large dense disc that sits at the bottom of the basket.

Transfer Cider to Storage Container

Take the cider that you collected in the small pot and pour the liquid through a large strainer and into a large sanitized pot.

During the pressing process, small chunks of apple can squeeze through the cracks of the wooden basket and platform. These bits will end up in the liquid in the pot. Filter the cider, several times if desired, using a very fine kitchen strainer. Be sure to sanitize the strainer before use, even if it came from your home kitchen, and clean out the large chunks of apples each time before pouring more liquid through.

If you plan on making a large volume of cider, you might want to use a large container that has a pour spout at the bottom to help dispense the cider to smaller containers. Take the filtered cider and pour it into the large container. Using a funnel for this step really helps. This process is very helpful if you want to fill glass jugs or large carboys with cider. Cider always tastes better if you share with friends, so host a cider party and have everyone bring their own jug.

Remove Apple Solids

Once all the liquid has been squeezed out, remove all the material from inside the basket. This byprodcut is rich in nutrients and makes great plant mulch or fertilizer.

Barnyard animals love this stuff too! Pigs, goats, sheep. There is no need to put this wonderful rich apple goodness in the garbage.

Repeat Process

Repeat this process until all your apples are gone, or you run out of storage room.

Invite a friend to work with you. Not only will they help clean up but they can take any extra cider home!

This is Maddox. He likes apple cider too.

Clean the Equipment

When you are all done, clean off any large chunks of apple and wipe down all the surfaces with a wet rag.

Be warned, apple pulp is notorious for embedding itself into cracks and sticking to everything. It is only upon closer inspection that you notice just how messy it all is.

Check to make sure that the motor is unplugged, and then rinse everything down with a hose. Do not forget to clean under the apple grinder and inside the chute. Rinse the platform, basket and wooden cap as well. If you do not rise all your equipment thoroughly it will be very sticky the next time you go to use the press.

Allow all everything to air dry.

Optional: Make Hard Cider

Hard cider is the term used for cider that has undergone the process of fermentation. The process for making “hard cider” is fairly simple with a plethora of information avaliable either online or at your local homebrew store.

Put very simply, you add a yeast to your cider and this bacteria converts the natural sugars (glucose) into ethyl alcohol and carbon dioxide.

The carboy on the left is filled with the cider that we pressed that day. Notice the dark color; this is due to the cider interacting with the oxygen in the air as we made the cider and undergoing an oxidization reaction.

The carboy on the right is from a batch of cider that was pressed six days earlier. Dale added Brewer’s Yeast to the carboy that same day. Notice the color difference. As the yeast converts the glucose into carbon dioxie and ethyl alcohol it consumes the avaliable oxygen within the liquid. There is an air-lock on top of the carboy that ensures any buildup of CO2 gas can escape; however, the mechanism does not allow oxygen or particulates to enter. As the yeast consumes the oxygen we can see the color change.

Also notice the amount of activity at the surface of the second carboy. This is the yeast in action. The bubbles form from the release of CO2 gas. Then there is also the thick layer of sediment at the bottom. Most of the sediment is merely a collection of particles that were not filtered out before we transferred the cider to the storage container and that are no longer suspended within the liquid. Some of the sediment is dead yeast; as they continue convert glucose to ethyl alcohol many will die and fall to the bottom. This is all part of the normal fermentation process.

Enjoy Your Cider

It is recommended that you drink your fresh homemade cider within one week of pressing.

If you make a large batch and do not plan on drinking all of your cider for a while, you can freeze it and save it without greatly affecting the taste.

If you get tired of drinking cider, make spiced cider, which is especially tasty around the holidays or when sitting around a fire.

That’s it! Now that you know how the process works it really isn’t that scary anymore. What are you waiting for? Go find some apples to press!

Conclusion

Special thanks to Dale Dougherty for taking the afternoon to share his process for making cider. Before leaving I was able to try a batch of hard cider that had been fermented last year and it was tasty. I took a gallon of cider home with me that day, and it was gone within three days.

Hopefully, after seeing this project someone will be inspired to make their own apple press and document their project and share it on Make: Projects. Have fun!