diyspaceweek_1_jbr2-short

Astronaut-ice-cream-freeze-dried-ice-cream

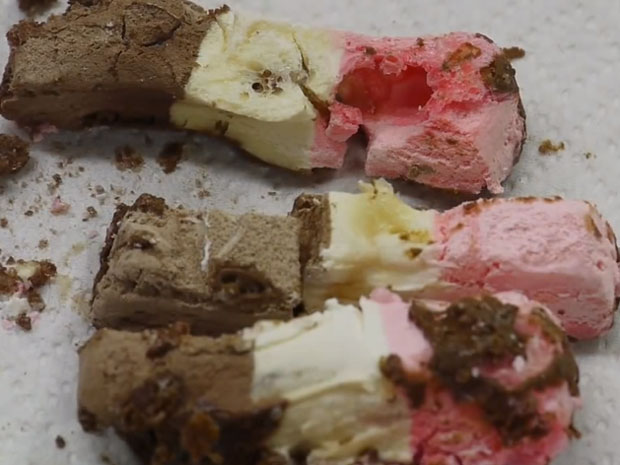
“Astronaut ice cream” is one of those museum gift shop novelties that sticks in one’s childhood memory, just as the ice cream itself sticks to one’s teeth. This treat has an unusually brittle, crunchy quality, but quickly melts in the mouth into a sweet, sticky variation of the real thing. Despite its name, astronaut ice cream was never eaten by astronauts in the form currently sold in gift shops. The brittle, crumbly nature of the food would be hazardous in zero-gravity because the loose crumbs could be inhaled as they floated around the spacecraft. Apollo 7 astronauts did have a ground-up, compacted version of freeze-dried ice cream, gelatin-coated to contain the crumbs, but many subsequent missions have instead included traditional, frozen ice cream for the crew.

The novelty ice cream is created by freeze-drying, a process in which ice cream is dried in a controlled environment. At the proper conditions of low temperature and low pressure, the ice crystals in the dessert convert directly to vapor without melting into water. Thus, the physical structure of the ice cream is preserved because the ice crystals turn directly into gas, leaving tiny voids in their place instead of melting into a thick liquid which would allow collapse of the overall shape and an increase of the density. The same process occurs slowly to uncovered food that’s left in a frost-free freezer, and is known as freezer-burn.

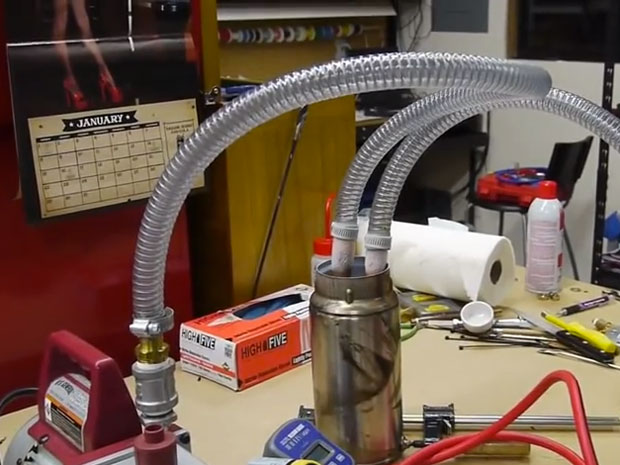
I’ve wanted to make my own astronaut ice cream for quite some time, and one day realized that I had amassed all of the required parts by building and dismantling other unusual contraptions in my shop. The key pieces of equipment I needed to freeze-dry the ice cream were: a vacuum pump, large-diameter vacuum tubing, a cold-trap made from copper pipe and an insulated flask, a glass jar to hold the ice cream, and a tungsten light bulb. Here’s my basic procedure, which I developed by reading online sources of information and by trial-and-error.

Project Steps

Set up a vacuum pump.

First, we need a vacuum pump to lower the pressure of the whole freeze-drying system. The transition of ice into vapor is called sublimation, and can only occur at low pressures.

If we put a scoop of ice cream in a dish on the kitchen counter, it will melt because a liquid is the state of matter that thermodynamics prefers for water at room temperature and pressure. If we do the same thing at a lower pressure, the laws of thermodynamics will prefer that the ice transition directly from solid to gas.

The exact temperature and pressure points at which a substance will preferentially sublimate instead of melt depend on the type and number of atomic bonds in that substance. Luckily for lovers of astronaut ice cream, water allows sublimation at relatively easy-to-achieve conditions, around –15°C (5°F) and 500 millitorr.

The first time I did this, I chilled the ice cream down to –30°C (–22°F) using a modified water cooler with ethanol and dry ice — but I don’t think that’s necessary. Your ice cream should work fine straight from your freezer, which is probably –15°C or a little colder.

Connect a cold trap.

Once we lower the pressure, we need to provide a place for the water vapor to collect. One undesirable option is inside the vacuum pump itself. As the pump lowers the pressure in the system, water vapor will condense in the pump, and may cause rust or other damage. Instead, we can add a cold-trap, which is a chilled section of pipe or a chamber, to the vacuum hose going between the pump and the ice cream. If we sufficiently chill this section of pipe, the water that sublimates from the ice cream will refreeze into ice crystals inside the pipe and not contaminate or destroy the vacuum pump.

I built my cold trap from a U-shaped piece of ¾” copper pipe that I submerged in an insulated flask containing alcohol and dry ice. This mixture is colder than the ice cream, and any water vapor in the system will preferentially freeze inside the cold trap. It will be effectively trapped here because the extremely low temperatures (–70°C / –94°F) will nearly prevent sublimation of ice in the cold trap.

The vacuum hoses need to be fairly large in diameter since the water vapor doesn’t travel easily at such low pressures. I used ¾” vacuum hose that I purchased at McMaster-Carr (mcmaster.com), which is a great resource in general for construction projects.

Connect the freeze-drying chamber.

Once the pump and cold-trap were set up, I put a scoop of ice cream in a glass jar, and connected it via the vacuum hose to the cold trap. I turned on the pump, and lowered the pressure to about 1/2,000 of an atmosphere (380 millitorr).

At this point, the ice cream started to freeze-dry — but the very act of sublimation will cool down the ice cream (similar to evaporative cooling), and slow the process of sublimation.

Therefore, in order to perform the freeze-drying in a reasonable amount of time, we need to gently heat the ice cream to make it sublimate at a reasonable rate. I used a 40W tungsten light bulb to radiate heat through the glass jar onto the ice cream.

The result — in about 12 hours! — astronaut ice cream. It tastes just like I remembered it.