IMG_20150126_144738

Surf the Internet securely with your very own portable WiFi VPN/TOR router. You can configure a Raspberry Pi with Linux and some extra software to connect to a VPN server of your choice. The VPN connection encrypts your internet traffic so that hackers and spies can’t figure out what web sites you are visiting, and the web sites you are visiting can’t tell which computer you are surfing from.

Not sure what board is right for you? Make:’s interactive Board Guide lets you dial into the field to find the best one for your needs.

The router is small and portable, so you can plug it in anywhere, adding secure internet browsing to any occasion, from your room to the café. You can even connect WiFi devices that don’t support VPN, like your Chromecast or Pebl.

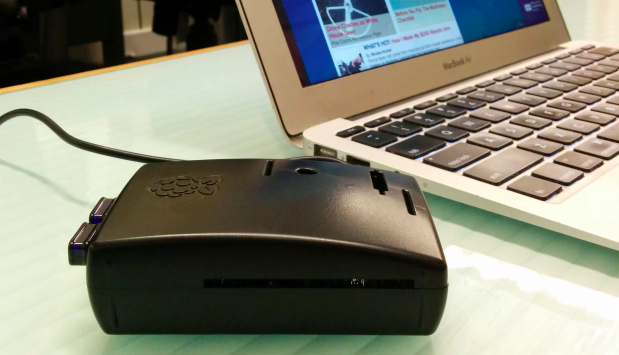
The project consists of a Raspberry Pi, two USB WiFi dongles, an SD card, and a power plug.

If you don’t have Ethernet available, your router can connect to a WiFi network in addition to creating its own, acting as a bridge between your personal WiFi access point and an insecure WiFi. The range of this router is just enough to fill a single room.

Once built, any WiFi device has a passive VPN connection. If the VPN connection disconnects, so does your connection to the internet, guaranteeing that unencrypted data is not leaked.

If you are so inclined, we can set it up your router to support TOR, so that you can dive deep into the internet within the internet.

Using open-source software, we can handle WiFi connections from your devices, connect to another WiFi access point, and encrypt your internet through a VPN anywhere you are.

When your friends come over, they will also be on a secure Internet connection, even if they don’t know how to set one up themselves. Additionally, you can access Hulu, Netflix, HBO, or your favorite team’s game while traveling overseas. If you want to take it further, you can add domain-based ad blocking using bind to stop web advertisements dead in their tracks.

Enjoy setting up your very own portable WiFi VPN/TOR router!

  • Difficulty: Intermediate
  • Cost: $60-80
  • Time: 1-4 hours

All images courtesy of NetNinja

Project Steps

Flash SD Card

Plug your SD card (and card reader) into your computer.

We will be using Raspbian Linux for this project. It is a small, Debian-compatible Linux distribution for Raspberry Pi. Go to raspberrypi.org/downloads and download the Raspbian ZIP. When the download is complete, unzip it to reveal an img file. You need to copy this disk image onto the SD card.

The Raspberry Pi website has excellent tutorials for how to install a disk image. Essentially, you can use Terminal on Mac or Linux with a command like this: $ sudo dd if=/path/to/raspbian-image.img of=/dev/name-of-sd-card-disk

On Windows, you can use a program called Win32DiskImager that lets you drag-and drop the Raspbian image file to the destination disk.

When the disk is finished copying, you are ready to assemble. Snap your Raspberry Pi into the case and plug in the WiFi adapters and the SD card. Plug the Pi into a monitor, keyboard, and power adapter, and start it up.

Boot Up the Raspberry Pi

When you boot the Pi for the first time, it will guide you through a setup process called raspi-config. This lets you change your user password, overclock your Pi, and set up the desktop environment.

For this project, you should change your user password, expand the disk, and choose “command line” as your Boot environment. If you live outside of the UK, you should change your internationalization options (keyboard, time zone, and locale) to match.

You may want to enable SSH, so you can access your Pi after you disconnect its monitor and keyboard.

When you exit, you will be brought to a console, ready to go. Log in with the username “pi” and the password you chose for your Pi.

Connect to the Internet

Connecting to Ethernet is simple; simply plug in an Ethernet cable and your Pi will figure out how to connect. Connecting to WiFi is a little more challenging. There are several WiFi network types and encryptions available, and each one is configured slightly differently in Linux.

To tell your Pi how to connect to WiFi, you’ll have to edit the /etc/network/interfaces file.

$ sudo nano –w /etc/network/interfaces

In this file, you can set rules for how to connect to a WPA, WEP, or an open WiFi network.

Depending on the encryption of the WiFi access point, you’ll need to configure this file differently.

[protected-iframe id=”37bc87e7b65f9fcd08c96ae5c3c32bdd-30206320-62929444″ info=”37bc87e7b65f9fcd08c96ae5c3c32bdd” ] For example, if you are connecting to a WPA WiFi network, your /etc/network/interfaces file will contain something like this:

allow-hotplug wlan0 # detect WiFi adapter

iface wlan0 inet dhcp # connect WiFi with DHCP

wpa-ssid "myhostnetwork" # WPA access point name

wpa-psk "myhostpassword" # WPA access point password

Manually restart WiFi to connect the Raspberry Pi to the Internet.

$ sudo ifdown wlan0

$ sudo ifup wlan0

You can validate that you have a WiFi connection by pinging a website or running the command: $ ifconfig wlan0

Create an Access Point

Before proceeding further, update apt-get. $ sudo apt-get update

An access point allows a computer to connect to a network over WiFi. On our Pi we will be using hostapd to create the access point and isc-dhcp-server to give IP addresses to computers that connect to our access point.

Install access point: You will need a custom version of hostapd, the access point software that supports the Edimax cards you have. Installing hostapd takes about 10 minutes.

$ wget https://github.com/jenssegers/RTL8188-hostapd/archive/v1.1.tar.gz

$ tar -zxvf v1.1.tar.gz

$ cd RTL8188-hostapd-1.1/hostapd

$ make

$ sudo make install

Tell hostapd the name and password of our access point and the name of the device we are using to host WiFi connections: $ sudo nano –w /etc/hostapd/hostapd.conf

Change three lines in /etc/hostapd/hostapd.conf to: interface=wlan1

ssid=mySecureRouter

wpa_passphrase=mySecurePassword

Finally, start hostapd and add it as a service on boot: $ sudo service hostapd start

$ sudo update-rc.d hostapd enable

Install DHCP server

Install dnsmasq:

$ sudo apt-get install dnsmasq

We will tell our DHCP server that it controls an IP address range between 192.168.0.10 and 192.168.0.200, with our Pi router having the IP of 192.168.0.1. It will be configured as an “authoritative” server acting on the wlan1 device, meaning that it will force clients to discard expired IP addresses.

$ sudo nano –w /etc/dnsmasq.d/dnsmasq.custom.conf

Add the following to /etc/dnsmasq.d/dnsmasq.custom.conf: interface=wlan1

dhcp-range=wlan1,192.168.10.10,192.168.10.200,2h

dhcp-option=3,192.168.10.1 # our router

dhcp-option=6,192.168.10.1 # our DNS Server

dhcp-authoritative # force clients to grab a new IP

Configure the DHCP server to use wlan1 as the device that manages DHCP requests: $ sudo nano -w /etc/resolv.conf

In the file /etc/resolv.conf, add the following this line, pointing DNS to the Google public DNS servers: nameserver 192.168.1.1

nameserver 8.8.8.8

nameserver 8.8.8.4

Now configure the wlan1 device to load at boot with a static IP address of 192.168.0.1.$ sudo –w nano /etc/network/interfaces

Add the following lines for wlan1: iface wlan1 inet static

address 192.168.0.1

netmask 255.255.255.0

Finally, restart the wlan1 WiFi adapter: $ sudo ifdown wlan1

$ sudo ifup wlan1

Now start the DHCP server and add it as a service at boot: $ sudo service dnsmasq start

$ sudo update-rc.d dnsmasq enable

You should now be able to see “mySecureRouter” as a WiFi access point from your computer. You can connect to it with WPA2 encryption and the password “mySecurePassword.”

Connect to a VPN or TOR

Now we are getting to the meat of this project – the encrypted connection to the internet! VPN and TOR are both encryption technologies that hide your browsing activities from prying eyes. It’s not easy to use TOR and VPN on the same network connection, so you should choose which one you want to use on your Pi.

TOR vs VPN:

TOR, or The Onion Router, is an encryption technology that encrypts and distributes your internet data across a network of computers on the way back and forth to a website, like in image 1.

Tor is very easy to install. To use it, you need to also surf on a special TOR-enabled web browser. TOR is relatively slow because it encrypts and routes your Internet traffic over several random nodes on the network before connecting your computer to a web site. TOR also gives you access to a hidden layer of the internet, called the Dark Web, which is unavailable over VPN.

VPNs, or Virtual Private Networks, work passively in the background by creating a single encrypted tunnel between your computer and a website, like in image 2.

VPNs can be more secure than TOR if you trust your VPN server. A VPN is harder to configure, but don’t require any other special software to use correctly. To use them you must have an account on the VPN server and several files generated on the VPN server that validate your account. You should trust that your VPN server is not recording you or publishing your private information.

If you don’t want to pay for a VPN service or you just want to learn to make your own, you can Roll Your Own OpenVPN Server here.

To install TOR, install the TOR software: $ sudo apt-get install tor

Start TOR and set it up as a service at boot: $ sudo service tor start

$ sudo update-rc.d tor enable

Lastly, on the computer you will be browsing on, you will have to install the TOR web browser from torproject.org.

Installing VPN: Linux supports OpenVPN easily. Many VPN providers also support the OpenVPN protocol. To connect to a VPN, you will need some information from your VPN provider. This may include a CA certificate, and possibly a username and password. You will also need to know the domain name of the VPN server, the port (typically 1194) and protocol (typically UDP).

Install OpenVPN: $ sudo apt-get install openvpn

If you were provided a CA certificate by a VPN service, save it as /etc/openvpn/ca.crt. If your VPN service provides you with a username and password, put it in /etc/openvpn/auth.txt. auth.txt will look like this: myVPNUserName

myVPNPassword

Configure the OpenVPN settings to connect to your VPN server. $ sudo nano –w /etc/openvpn/client.conf

Although your VPN configuration will depend on your server’s settings, your /etc/openvpn/client.conf should look something like this: client # client mode

dev tun

proto udp # this must match the server’s protocol

remote vpn-server.example.com 1194 # must match the server

resolv-retry infinite # reconnect when disconnected

nobind

persist-key

persist-tun

ca ca.crt # this file is given by the server

#cert client.crt # uncomment if the VPN server requires a client.crt

#key client.key # uncomment if the VPN server requires a client.key

ns-cert-type server

#comp-lzo # uncomment if the server supports lzo compression

#auth-user-pass auth.txt # uncomment if your server requires a username and password

script-security 3 # must match the server’s script security setting

keepalive 5 30 # keep connection alive

verb 3

log-append /var/log/openvpn-client.log

OpenVPN will not work without a matching timestamp. Since Raspberry Pis don’t have a real-time clock, you’ll need to use the Network Time Protocol (NTP) service. $ sudo service ntp start

$ sudo update-rc.d ntp enable

Start the OpenVPN client and set it up as a service at boot: $ sudo service openvpn start

$ sudo update-rc.d openvpn enable

Once you are connected, you can use traceroute to test out your connection by mapping your Internet connection’s path to makezine.com. The first step should show that you are connecting to your VPN server on 10.0.0.1.

Set up Routing

Routing is what connects your computer to the internet. It takes packets of data that your computer sends to the Pi, then forwards it on to a website. When the web site responds, packets of data are sent back to your Pi across the internet. Your Pi figures out which WiFi client the response is intended for, and passes it forward to your computer.

If you have VPN or TOR configured, these packets will also pass through an encrypted service within the internet. This is done using software called iptables. We must enable and configure the rules that allow our Pi to know how to route packets of data the right way.

Let’s enable routing: $ echo 1 | sudo tee /proc/sys/net/ipv4/ip_forward

Tell Linux to remember this change: $ sudo nano /etc/sysctl.conf

In this file, uncomment the line: net.ipv4.ip_forward=1

Depending on how you are connecting to the Internet on your Pi (VPN, TOR, Ethernet, or WiFi), you will be routing through one of several devices. Choose the device to route through based on the connection method: [protected-iframe id=”65ac4502bc06dd3c23837be5405ed3e6-30206320-62929444″ info=”65ac4502bc06dd3c23837be5405ed3e6″ ]

Tell Linux to masquerade as your computer on the internet: $ sudo iptables –t nat –A POSTROUTING –o tun0 -j MASQUERADE

Tell it to forward all traffic to the Internet: $ sudo iptables –A FORWARD –i wlan1 –o tun0 -j ACCEPT

Finally, tell it to forward returning Internet data to the appropriate client: $ sudo iptables –A FORWARD –i tun0 -o wlan1 –m state --state RELATED,ESTABLISHED –j ACCEPT

Save these settings for the next reboot:$ sudo sh –c “iptables-save > /etc/iptables.restore”

$ echo “up iptables-restore < /etc/iptables.restore” | sudo tee --append /etc/network/interfaces

Connect a WiFi client

Go on your computer and try to connect to your WiFi access point.

Access point: mySecureRouter

Password: mySecurePassword

You’ll be able to see the computer that just connected on your Pi using the arp command: $ sudo arp –i wlan1

If you set up TOR on your Pi, you’ll have to also install the TOR browser on your computer.