photo 4

As vendor of new and used mannequins, I have a ringside seat for all the non-traditional ways people use mannequins. And the maker community is repurposing them to create lamps and furniture.

Most people associate leg lamps with the one seen in the movie A Christmas Story. But they are not just for Christmas, and there are infinite varieties — just get creative. With this tutorial, both novice and experienced makers can put a contemporary spin on the traditional mannequin leg lamp.

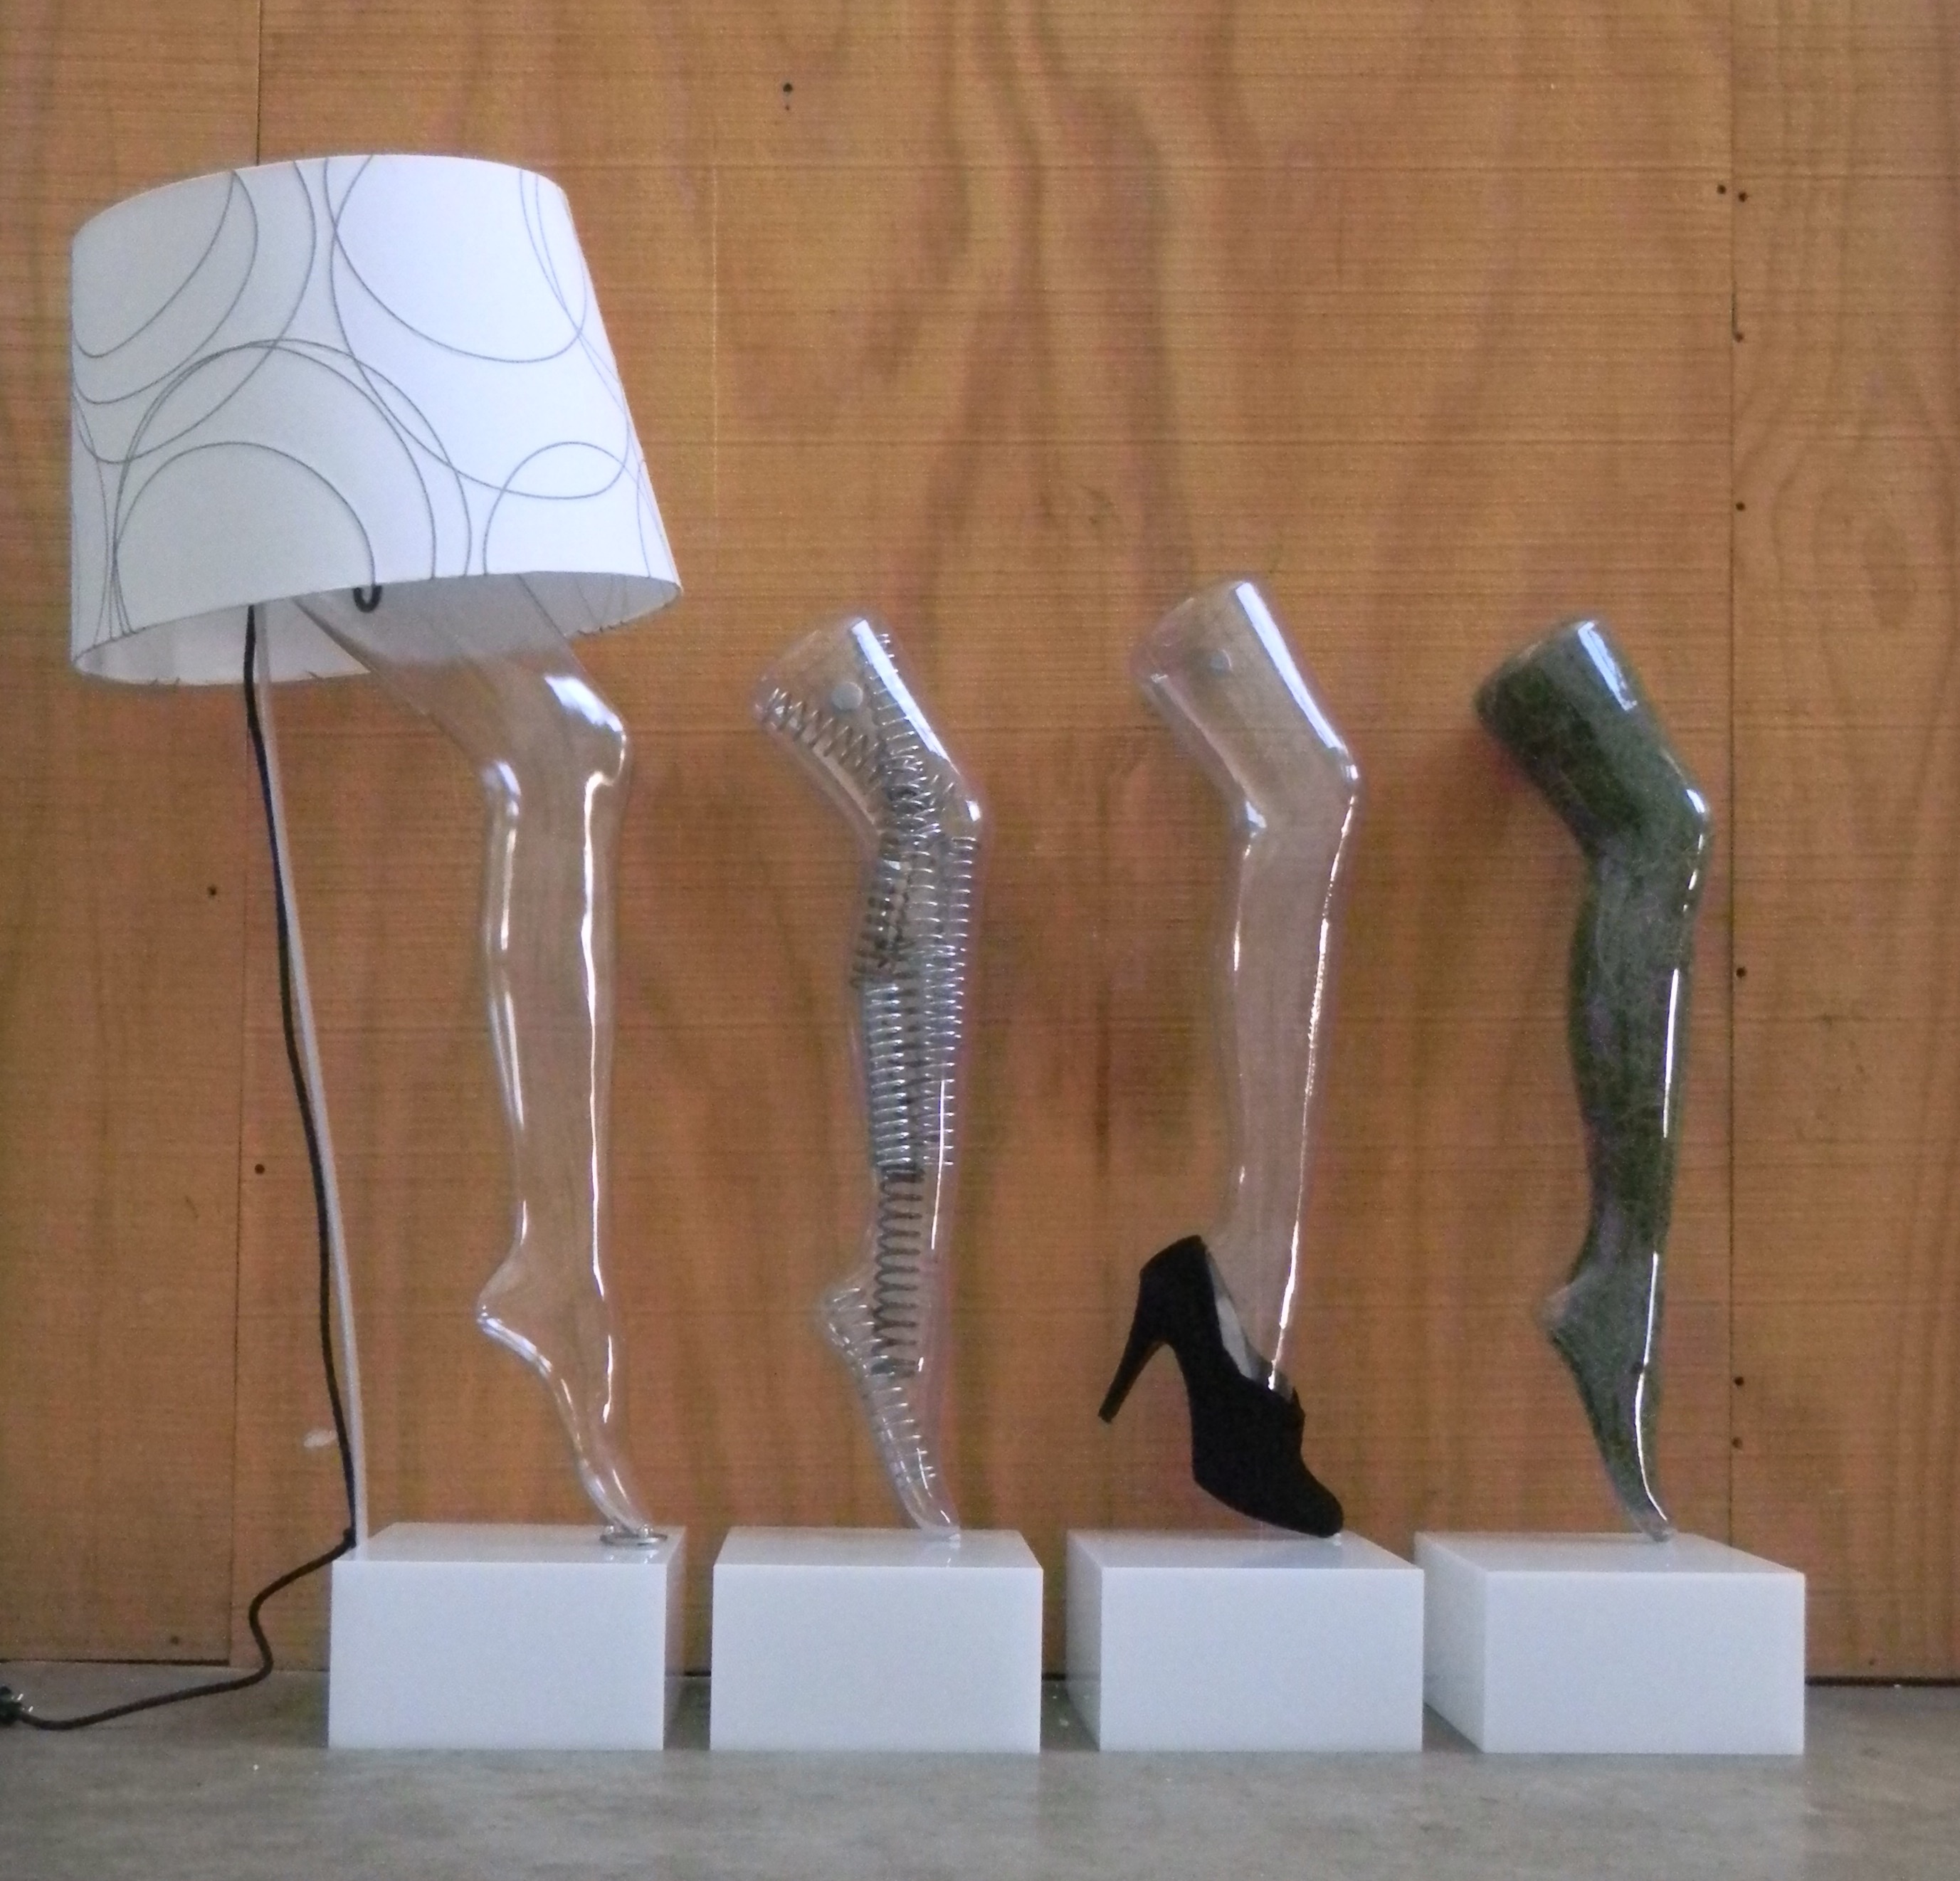
Hosiery Leg Notes: Most clear hosiery legs are either plastic or acrylic. We used an acrylic leg, the one the far left. Although it is more expensive than the plastic leg — the second from left — it is sturdier and heavy enough to hold objects inside the leg.

The shape of the acrylic leg is slightly different from the plastic leg. The acrylic leg is flat at the top versus the plastic leg which has almost a 45-degree angle at the top. That 45-degree angle will prevent the lamp shade from sitting upright; instead it will be tilted.

photo 3

If you use flesh-tone hosiery legs (right) which have a weighted toe, all the steps on this tutorial apply, except you will not need the washer to hold the leg in place.

A clear leg gives you the option of adding objects inside the leg in addition to putting a shoe on it. Once these objects are put inside the leg, they will remain part of the permanent design — you will have to take the leg apart to remove the objects.

You can find such legs at our website, Mannequin Madness, or at garage sales, fashion store closings, Craigslist, or Amazon.

photo 2

Difficulty: Easy/Moderate
Time required: An afternoon
Cost: $60-100


Lamp design and photos by Tracy Blanks, a designer, prop stylist and photographer in the retail industry. Tutorial by Mannequin Madness

Project Steps

Measure and Cut

Place the leg on the lucite base and measure from the top of the leg to bottom of the base. If you are planning on putting a shoe on the leg, put the shoe on the lamp and take your measurements with the shoe on. Record this number.

Measure the top of the leg from front to back. Add this number to the measurement of the leg on the lucite base to get the exact length needed for the flat rod.

Mark that length as a cut line on the flat rod with the Sharpie and cut off any excess with the hacksaw.

Shape the Flat Rod

Place the leg upside down on top of the flat rod that you just cut. Using the Sharpie, mark the shape of the front edge of the leg on the flat rod. File the flat rod to the shape of the contour.

Cut the Leg to Accept the Rod

Place the flat rod against the upper back of the leg. Mark the width of the flat rod in the center of the back of the leg with the Sharpie.

Using the marks on the back of the leg to guide you, cut an opening with the hot knife deep and wide enough so you can insert the flat rod.

Shape the Flat Rod (Part II)

Slide the flat rod into the leg opening you just created. At the point where the flat rod extends beyond the leg, add 1/4” and mark this spot on the flat bar with the Sharpie pen. This will be your bend line.

Remove the flat rod from the leg and gently bend the flat rod to a 90-degree angle on the bend line.

Prepare Rod for Pendant Kit

Insert the shortest length of the flat rod into the opening you created, and mark the opening of the leg on the flat rod with the Sharpie. This is where the pendant kit will be attached.

Using a drill, create a hole in the center of the marking large enough for the base of the pendant lamp to fit into. Cut an access point and bend it back with pliers to provide enough space for the electrical cord to thread through the flat rod.

Thread the cord of the pendant kit through the access point on the flat bar to make sure the cord fits through this space. Then remove the pendant kit, it will be permanently attached later.

Prepare Base and Rod for Screws

Place the flat rod against the center back of the base and mark where the flat rod meets the base. To indicate where to place the screws that will attach the flat rod to the base, make three marks — two near the top and one near the bottom — on the flat rod with the Sharpie.

Drill holes through the marks on the flat rod large enough for the screws to snugly fit through.

Place the flat rod on the base and using the holes as a guide, mark on the base where the screws will be placed.

Drill holes in the base.

Clean all marks off the flat rod with steel wool.

Decorate Inside, and Place and Glue Rod

If you want to put objects inside the leg, do it now.

Insert the flat rod in the opening in the back of the leg. Epoxy the flat bar to the top of the leg. Let Dry.

You need access to the inside of the base to place and tighten the screws. Turn the base on the side and cut a hole in the bottom of the base large enough to reach inside and insert the screws. Place the flat rod with the leg on the base and screw the cap nuts through it. Attach the cap nuts to the screws and tighten with pliers.

Add the Lamp

Stand the base and the leg upright and epoxy the base of the pendant kit to the flat rod. Let dry.

Position the Toe

The toe of the mannequin leg will be dangling on the front edge of the pedestal. To hold the leg in place, place the washer on the center of the base, as close to the front edge as possible. Attach the washer to the base with epoxy. Let Dry.

Put a fish weight on the washer to hold it in place as it dries. We added cap nuts on the washer for aesthetic purposes. After the washer has dried, gently position the toe inside the washer.

Finishing Touches

If your pendant kit came with hooks for the cord, attach them to the center back at the top and bottom of the flat rod with epoxy. Let dry.

Place the shade on the lamp and secure it with the plastic washer that came with the kit. Place your bulb of choice, plug in lamp. Enjoy!

Get Creative

We had so much fun making this lamp we made a second lamp with a slight variation. We turned the leg sideways, attached the flat rod and made a hole in the top of the leg for the pendant lamp kit. Before installing the pendant kit we filled the leg with moss and in lieu of a lamp shade we used a low-voltage decorative bulb.

For other examples of mannequin leg lamps (and furniture made with mannequins) check out my Pinterest board
.