gettingstartedwitharduino

This project has been excerpted and modified from Make: Getting Started with Arduino — 3rd Edition.


What You’ll Be Making

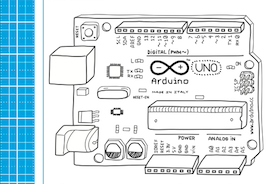
After you learn how to make an LED blink with your Arduino, you’re ready to tackle this project.

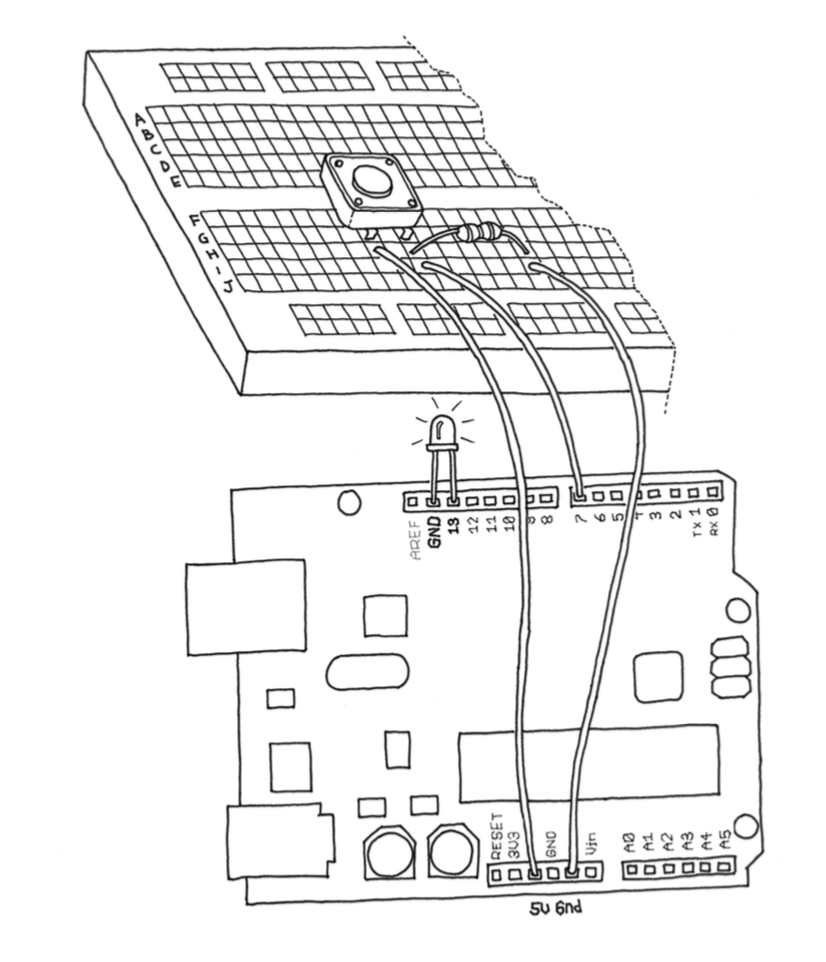
In this project you’ll learn how to turn your light on and off via a switch. You probably wouldn’t stay sane if your lamp were to continuously blink so it’s a good idea to learn how to control it.

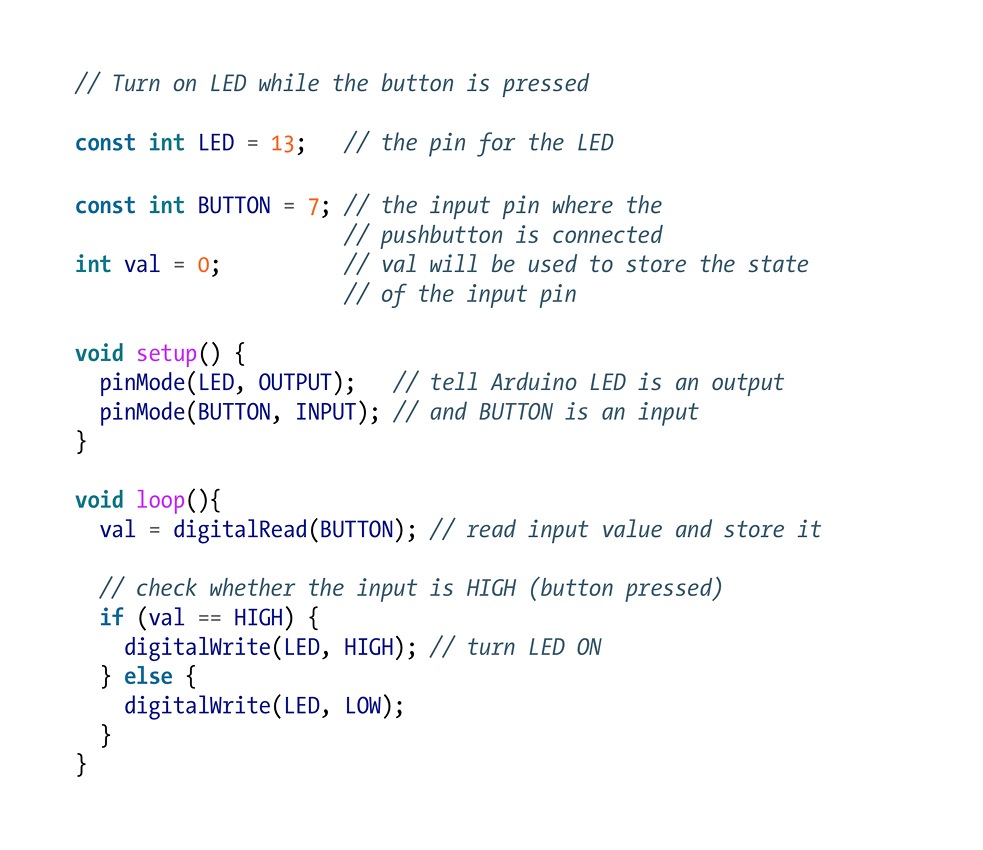
When you learned how to make an LED blink, the LED blinking was your output. What’s missing was an input to control your output. We’ll use one of the most common and simple inputs: a pushbutton switch.

If you were to take apart a pushbutton, you would see that it is a very simple device: two bits of metal kept apart by a spring, and a plastic cap that when pressed brings the two bits of metal into contact. When the bits of metal are apart, there is no circulation of current in the pushbutton (a bit like when a water valve is closed); when you press it, you make a connection.

All switches are basically just this: two (or more) pieces of metal that can be brought into contact with each other, allowing electricity to flow from one to the other, or separated, preventing the flow of electricity.

How This Project Relates to the Real World

From vending machines to car stereos, many of the objects we interact with have pushbutton switches. Understanding how a button works with a microcontroller is fundamental to understanding how gadgets work, and ultimately, to making gadgets of your own with Arduino.

Project Steps

Understanding the digitalRead() function

To monitor the state of a switch, there’s a new Arduino instruction that you’re going to learn: the digitalRead() function.

digitalRead() checks to see whether there is any voltage applied to the pin that you specify between parentheses, and returns a value of HIGH or LOW, depending on its findings.

The other instructions that you’ve used so far haven’t returned any information — they just executed what we asked them to do. But that kind of function is a bit limited, because it will force you to stick with very predictable sequences of instructions, with no input from the outside world.

With digitalRead(), you can “ask a question” of Arduino and receive an answer that can be stored in memory somewhere and used to make decisions immediately or later.

Build Your Circuit

The pushbutton switch and 10 Ohm resistor should be placed on your breadboard. The jumper wires will connect your breadboard to your Arduino board; you can use any jumper wire. Where you place the jumper wires in the breadboard doesn’t matter as long as you line them up as shown in the image.

GND on the Arduino board stands for ground. The word is historical, but in our case it simply means the negative side of the power. We tend to use the words GND and ground interchangeably. In most circuits, GND or ground is used very frequently. For this reason, your Arduino board has three pins labeled GND. They are all connected together, and it makes no difference which one you use.

5V Pin — the pin labeled 5V is the positive side of the power, and is always 5 volts higher than the ground.

Creating Your Code

Now you’re ready to write code that will turn your LED on while the button is pressed.

  1. In Arduino, select File→New (if you have another sketch open, you may want to save it first).
  2. When Arduino asks you to name your new sketch folder, type PushButtonControl.
  3. Type the code into Arduino as shown in Image 1.

Checking and Uploading Your Code

Now that the code is in your IDE, you need to verify that it is correct.

  1. Click the Verify button.
  2. If everything is correct, you’ll see the message “Done compiling” appear at the bottom of the Arduino IDE.
  3. Once your code verifies correctly, you can upload it into the board by clicking the Upload button.

Troubleshooting:
If you get an error uploading to your Arduino board it may be related to how you installed the Arduino IDE. Refer to the section in Chapter 3 starting with “The Software Integrated Development Environment (IDE)” for guidance.

Your Code at Work!

If everything is correct, the LED will light up when you press the button.

Troubleshooting: If the LED does not turn on when you push the pushbutton, turn it 90 degrees and see if the LED starts working. Because the pushbutton is square, it’s easy to put it in the wrong way.

Understanding Your Code

To understand your code in detail, refer to Make: Getting Started with Arduino — 3rd Edition. Start with the section in Chapter 4 titled “How Does This Work?”

It’s important to realize that the switch is not connected directly to the LED. Your Arduino sketch inspects the switch, and then makes a decision as to whether to turn the LED on or off. The connection between the switch and the LED is your sketch!

More Projects to Control Your LED

Holding your finger on the button for as long as you need light is not practical. Although it would make you think about how much energy you’re wasting when you’ve left a lamp on, we need to figure out how to make the on button “stick.”

For more projects on controlling your LED, refer to Make: Getting Started with Arduino — 3rd Edition. Start with the section in Chapter 4 titled “One Circuit, a Thousand Behaviours.”