This project is excerpted from Canine Couture by Lilly Shahravesh (St. Martin’s Griffin).

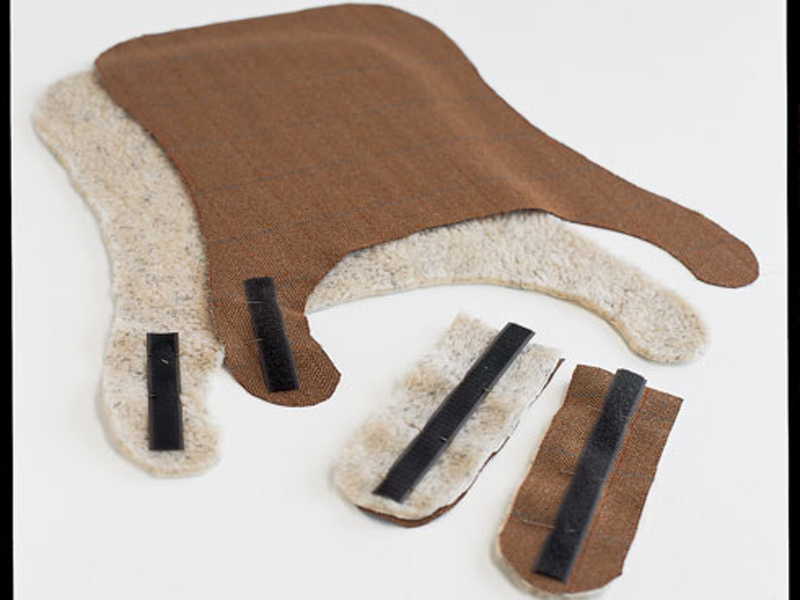
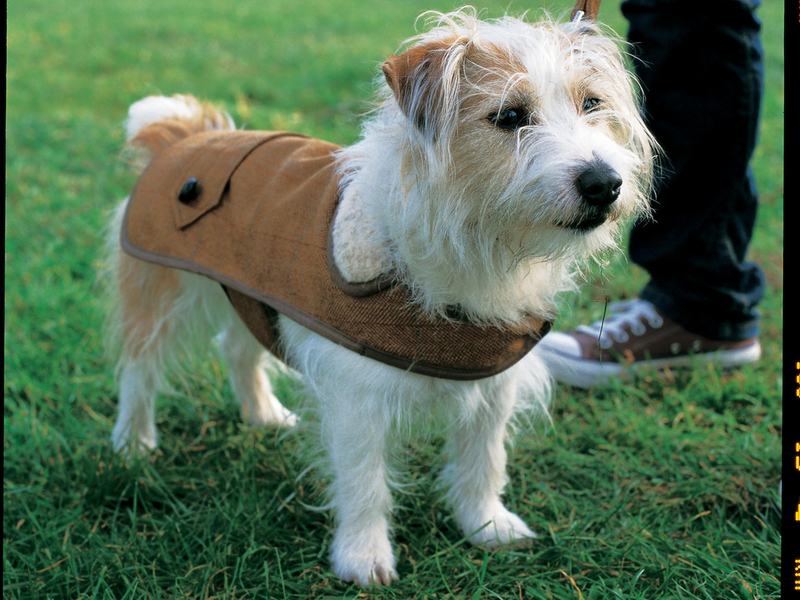
My dogs love this traditional tweed coat for weekends in the country when the weather is crisp. Short-haired breeds and older dogs, in particular, benefit from an extra layer to keep them warm in winter. This coat’s woven tweed keeps out the chill on cold days, while its fleece lining makes it extra snuggly and soft to wear.

Tweed is the ideal choice for a country dog — perfect for romps through the woods and fields — but you can use any wool fabric for the outer layer. Something with texture and a pattern will make more of a statement, so think about your dog’s coloration, and choose a fabric that will complement his markings, to ensure that he’s the best-dressed hound on the hillside.

Be sure to visit LoveMyDog for more fabulous pet couture!

Project Steps

Size the coat and cut the fabric.

Determine your dog’s coat size by measuring his back from approximately 1″ (2.5cm) below his collar to 2″ (5cm) from his tail. On a computer or copy machine, enlarge the template for the body of the coat by 400%, then by another 110%. Then reduce or enlarge as needed, so that the length of the pattern block matches the length of your dog’s back. Enlarge the remaining sections of the pattern by the same percentage.

To check the fit and work out the position for the belt and belly straps, cut out the shapes in paper and tape them together, then place the paper mock-up on your dog. Make any alterations, and mark the positions for the belt and belly straps, adjusting the length as necessary.

If your dog has a long back but a small girth (like a miniature dachshund, for example), you may need to reduce the length of the paper pattern by 2″–4″ (5cm–10cm) to get the right fit around the neck, then lengthen the back end of the coat only. Or draw around the template with a marker and cut off the excess areas.

Once you’re happy with the fit, cut out the fabric using the paper mock-up as a pattern. A 1⁄2″ (1cm) seam allowance is required only for the belt piece. Cut all the pieces for the coat as follows: 1x main body with integral neck straps (in top coat and lining fabrics); 2x belly straps (in top coat and lining fabrics); 1x belt (in top coat fabric and iron-on inter- facing); 1x collar (in top coat and lining fabrics).

For the belt, cut out a rectangle in pattern paper, sizing it in proportion to the rest of the coat. Fold the paper in half lengthwise, then crosswise, and cut off the short ends on the diagonal to make a point on each end when it’s opened out.

Attach the velcro.

Place the top coat on your dog to check where the neck straps meet under his chin. Using pins or a fabric-marker pen, mark the position for the length of velcro you’ll need to fasten the straps.

Cut the velcro to length. Pin and machine-stitch 1 piece onto the right-hand side of the neck strap (on the right side of the fabric). Pin and stitch the corresponding piece onto the right-hand side of the lining (again, with the right side of the fabric facing you), making sure that the velcro pieces are attached in the same place on the straps so that they’ll match up when the lining and top coat are sewn together. (The top coat and lining will be sewn together with right sides facing out, so the strips of velcro will end up on opposing neck straps.)

For the belly straps, cut the velcro to length. Pin and sew it centrally onto the right side of 1 top coat piece and onto the right side of 1 lining piece.

Make and attach the belt.

Sew zigzag stitches around the top coat belt piece to prevent fraying. Following the manufacturer’s instructions, back it with iron-on interfacing. Sew a small hem around the belt.

Position the belt on the back of the top coat body piece, making sure that it’s straight and centered. Pin it in place, then sew a neat line from point to point down the middle of the belt to attach it. Sew the buttons onto the belt, positioning them on the central line of stitching at an equal distance from each end of the belt.

Join the top coat and lining pieces, then attach the collar and belly straps.

For each piece of the coat in turn — the main body, collar, and 2 belly straps — place the corresponding pieces of fabric and lining together with wrong sides facing. For the belly straps, make sure you pair 1 top coat piece that has velcro with 1 lining piece without velcro, and vice versa. Pin around the edges of each piece, then machine-stitch.

Pin, and then sew bias tape around the edge of the collar and the long U shape of the belly straps. Place the collar centrally, fleece side up, at the front of the top coat, with the collar’s inner edge lined up with the neck of the body piece, and pin.

Turn the coat over so that the fleece lining is facing up, and position the belly straps opposite each other, folded inward with the lining facing down so that the velcro meets. Line up the raw edge of the belly straps with the edge of the body piece, and pin. Sew the collar and belly straps securely to the main body.

Edge the coat.

Conceal the raw edges of the coat with bias tape. Sew as close to the edge of the bias tape as you can, ensuring that you catch both sides in the stitching.

Conclusion

This project first appeared in CRAFT Volume 10, pages 108-109.