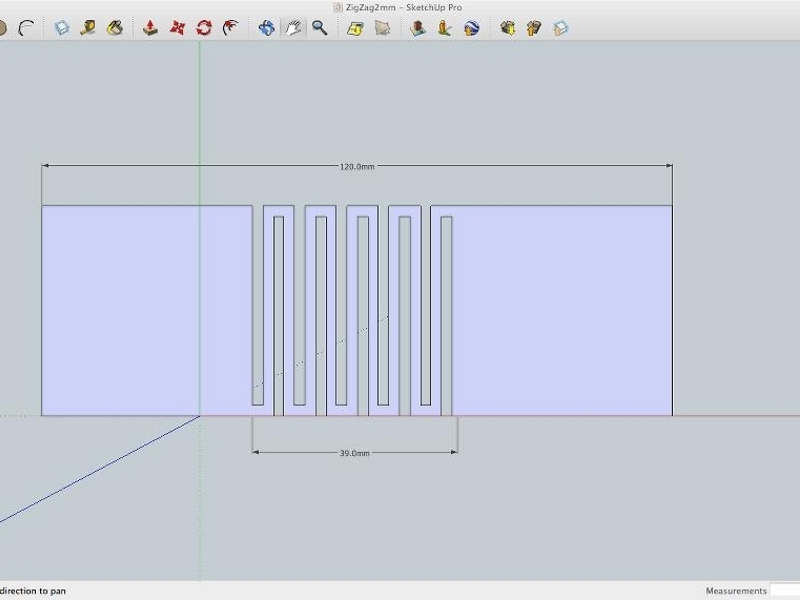
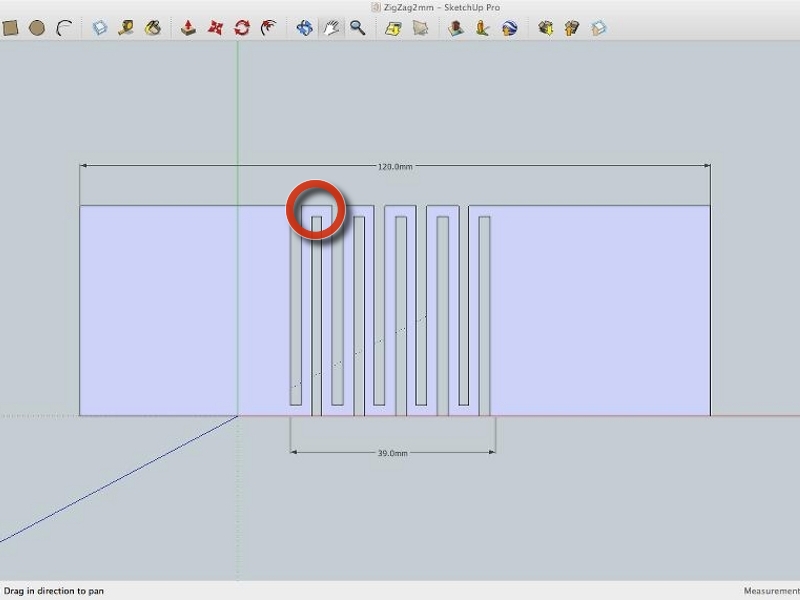
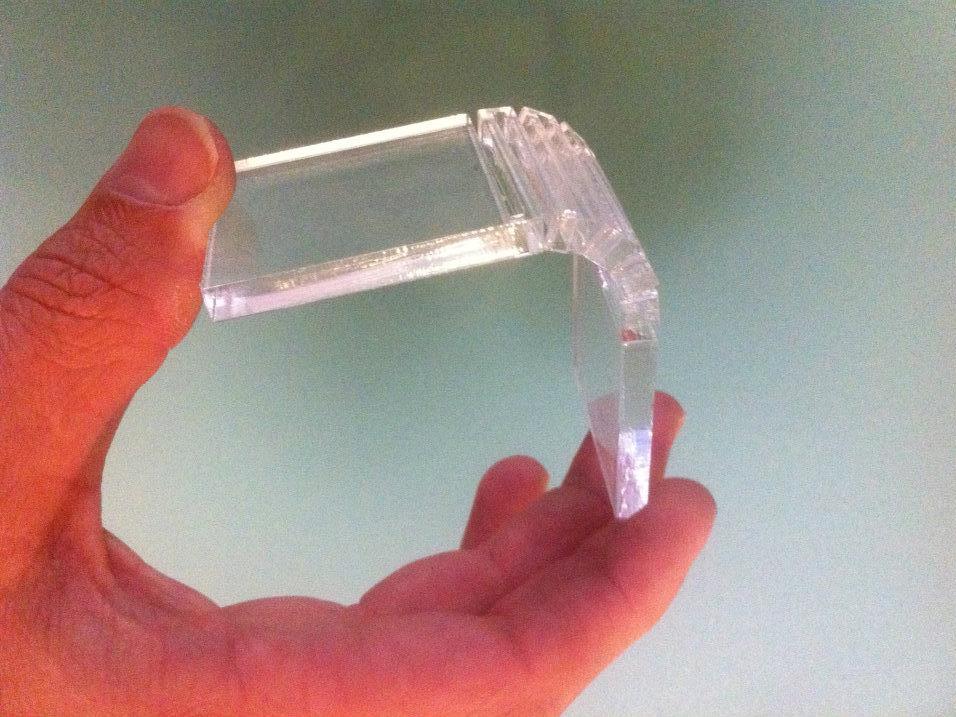
I have a particular interest in discovering new ways to push the limits of material fabrication with my laser cutter. In this guide I’m going to give you an overview of living hinges that will allow you to make bends (and springs!) in a single piece of rigid material. Wood and acrylic are particularly amenable to this technique, and the result has an artistic aspect that’s pretty cool as well!

More importantly, I’m going to try to add a bit of theory to this so that you can extend these techniques in new and better ways.

Project Steps

What does it mean for a material to be rigid in the sense I’m using the term? A rigid material is one that has very limited ability to bend over a given length of that material

Acrylic is RIGID. Very, very little flexibility, but it’s a beautiful material. So how do we get it to bend?

The acrylic sample that I cut here has the ability to fold easily from fully open (flat) all the way to fully closed (180 bend) in either direction. It also can act as a spring along its length.

How does this work? Head to the next step for the physics and geometry of it.

I use Google Sketchup for my design work. Here’s a screen capture of the simplest method for making living hinges: a zigzag.

Remember how I defined “rigid” in Step 1? Acrylic will only bend naturally VERY slightly per unit length before it breaks (wear safety glasses if you test this).

Here the acrylic sample is 120mm long, 40mm wide and 5.5 mm thick. Maximum possible bend over the length is just a couple or three degrees without the living hinge.

What I’m doing here is effectively EXTENDING THE LENGTH of the acrylic to make a big bend in a small space. The “bend zone” in the image is only 39mm, but the zigzag means the bend is occurring over about 9 zigs of 40mm each (360 mm). In effect, the hinge is 3 times the length of the total piece.

Additionally, the 5.5 mm acrylic is now THINNER in the hinge zone since the zigzags are only 2mm wide. This also increases the amount of bend that is possible.

The problem with this design is that it is FRAGILE. Notice that throughout the hinge area that the amount of acrylic connecting the zigzags to each other is only 2mm thick.

Also, that 2mm of acrylic only exists at the top or the bottom of each zigzag — that’s about as fragile a place as they could possibly be!

Finally, this design (while VERY flexible and easy to understand) allows a lot of rotation in directions outside of the hinge axis (i.e. you can twist it easily).

So… can we improve on this design now that we understand why it works? Of COURSE we can!

By essentially overlaying two zigzags in our design, we can maintain a high degree of flexibility in our hinge.

The extra connections this creates within the material greatly enhance the strength of the object.

This also reduces the ease with which the material can twist and stretch (and that may or may not be a good thing depending on your goals).

PROBLEM: One out of two zigs have TWO connections, but the other half have ONE. That means we STILL have weak spots.

SOLUTION: See how a pattern of offset gaps is emerging? Let’s take that one step further with a “Triple Zig” (next step).

Finally, this staggered layout which I call a “Triple Zig” is the strongest variant I’ve tried so far. I’ve seen other folks using similar cuts as well so I’m probably not the first to do it this way, though I haven’t see others doing exactly this cut in acrylic yet. Acrylic is a bit less forgiving than wood, so I ‘ve settled on the 2mm gap / 2mm zig width as working best with 5.5 mm (1/4-inch) acrylic.

Notice that each “zig” has TWO connections to its neighbors. This almost eliminates twist.

@solarbotics has had some luck with slits in acrylic and @9600 and @talldarknweirdo have been working in this area as well. I think we were all inspired by the work in wood done by snijlab here: http://www.snijlab.nl/?page_id=358

This pattern has good strength, good flexibility and low twist. It also looks great! I’m hoping to create some electronics enclosures with this technique in the near future.

I hope you found this technique and its explanation helpful. Please explore and build on it and share back what you learn with the Maker Community. Open Sourcing knowledge makes the whole world richer. Thanks!