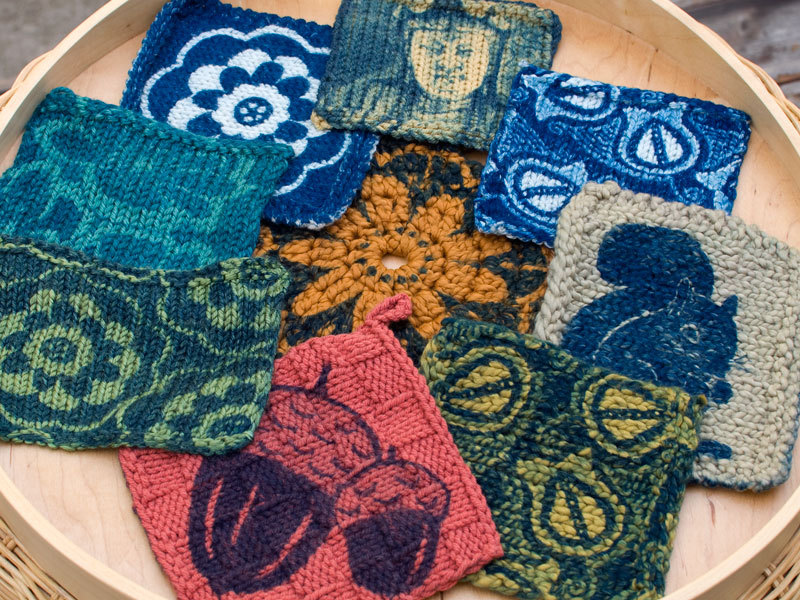
Materials

  • Knit or crochet piece for printing
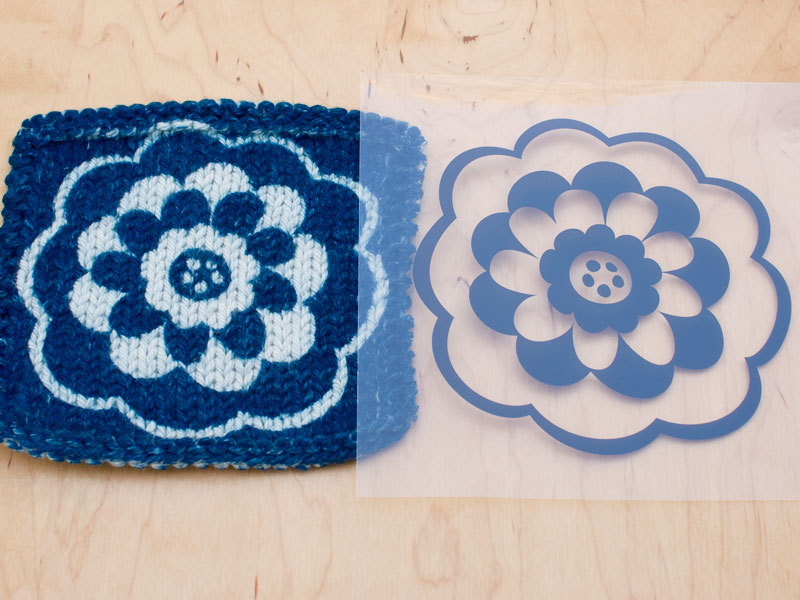
  • Digital artwork
  • Computer graphics program
  • Inkjet printer
  • Inkjet transparency film, available at office supply & photo stores
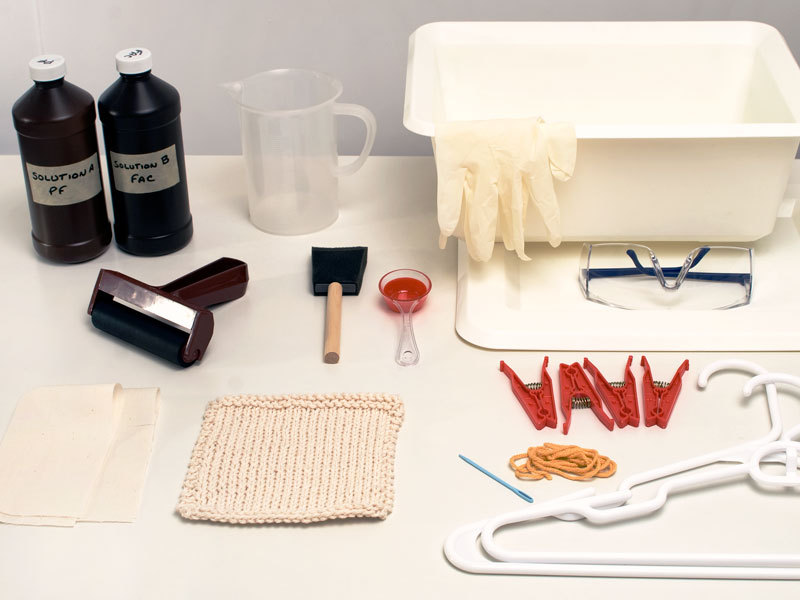
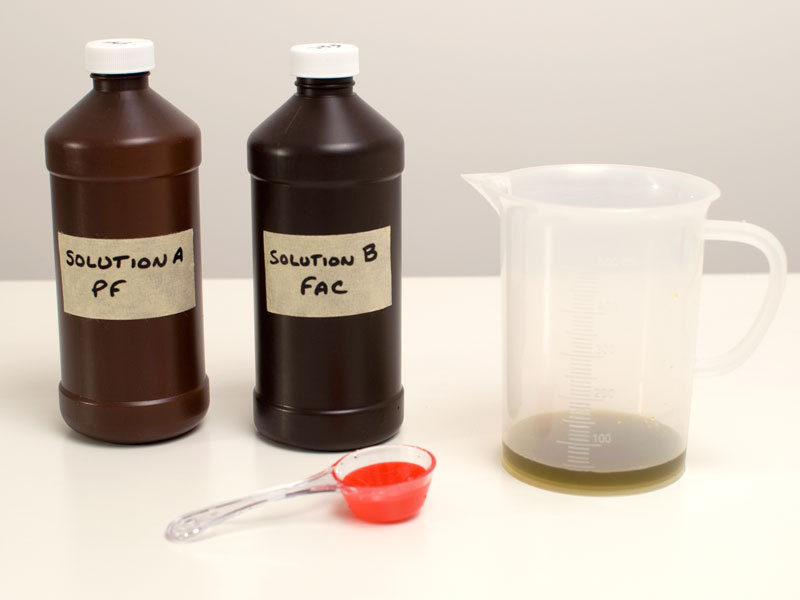
  • <a href=” http://stores.photoformulary.com/-strse-…>Original cyanotype kit</a, sold at photo stores
  • Measuring cup, plastic or glass
  • Measuring tablespoon, plastic
  • Plastic tray or small tub
  • 2″ foam craft brush
  • White muslin scrap, or other lightweight cotton fabric, about twice as big as your knit piece
  • Non-metal brayer, optional
  • Rubber gloves
  • Safety glasses and apron, optional – but a good idea!
  • Plastic clothes hanger and clips or a drying rack
  • Hairdryer or fan, optional
  • Lightproof black plastic bag, optional
  • Sheet of glass and backing board; a picture frame works well
  • White vinegar
  • Hydrogen peroxide

Project Steps

Choose your yarn and start knitting! Cyanotype printing is a lot more than just blue on white (nice as that is), and the same print can look vastly different depending on the color and texture of the underlying knit piece. Here are some tips for experimenting with different types of yarn, color, and stitches:

Fiber content: Cyanotype does not print on all types of yarn equally, so be sure to test a small swatch before printing a large project. The best prints are on yarn with high amounts of cotton, bamboo, rayon, or silk. Acrylic yarn does not work because it cannot absorb the dye; however I have gotten good results with 50% cotton / 50% acrylic yarn. Wool yarns do not work well because they tend to felt up with all the washing, and the natural oils in the wool resist the dye, producing a very poor print.

Yarn color, weight, and stitch texture: Get creative with printing on different colors of yarn. Vary the texture with thick or thin yarn, or a creative knitting stitch. The possibilities are endless and are part of the fun of cyanotype printing. Keep in mind that the rougher the texture of your knitting, the bolder you will want to make your artwork.

Create a digital negative of your artwork. Cyanotype is a photographic printing process, and the image is formed by controlling how much light reaches the sensitized fabric. There are many ways to create an image with cyanotype printing, including shadowgrams and cut stencils, but I like to use digital negatives. Digital negatives are exactly like old black and white film negatives, except they are created by printing on inkjet transparency sheets.

Cyanotype is similar to black and white photography: where the negative is clear, the most amount of light is let through and the fabric underneath will turn dark blue. And where the negative is black, the light is completely blocked and the fabric will remain its original color. Likewise, where the negative is gray, the fabric will turn a shade of blue corresponding to how much light is transmitted. This way it is possible to get a full tonal range in the cyanotype print.

Now it’s time to set up a workspace for coating your knit piece with the cyanotype sensitizer. Ideally, you need a work area that has little or no sunlight (work at night or use curtains), but you can work under regular incandescent or compact fluorescent bulbs. You also need to protect your workspace from splashes, because the sensitizer will leave dark blue stains on any porous surface. I recommend working in a garage, laundry room, or bathroom near a sink.

Use plastic or glass measuring cups, trays etc. Metal can contaminate the sensitizer. Work on a plastic tabletop, or protect the work surface with a plastic drop cloth. Protect yourself with gloves, an apron, and eyewear. Cyanotype chemistry is relatively low-toxic, but you should avoid working in the kitchen, and any cups or trays used for cyanotype should not be used for food preparation afterwards.

If you bought the dry cyanotype kit linked above, then mix each stock solution following the directions in the kit. Be sure to keep the stock solutions separate and uncontaminated until you are ready to coat your knits.

When you are ready to coat the knit fabric, mix equal amounts of Solution A and Solution B together in a measuring cup. For small amounts, you can use a plastic tablespoon, and for larger amounts a measuring cup. Once mixed, the active sensitizer is light-sensitive and only good for about 30 minutes. The amount needed depends on the absorbency and size of the knit piece. For the example swatch of 6″ x 6″, I made 2 tablespoons of active sensitizer.

Tip: It’s better to mix slightly too much than too little!

Conclusion

To reassemble your device, follow these instructions in reverse order.