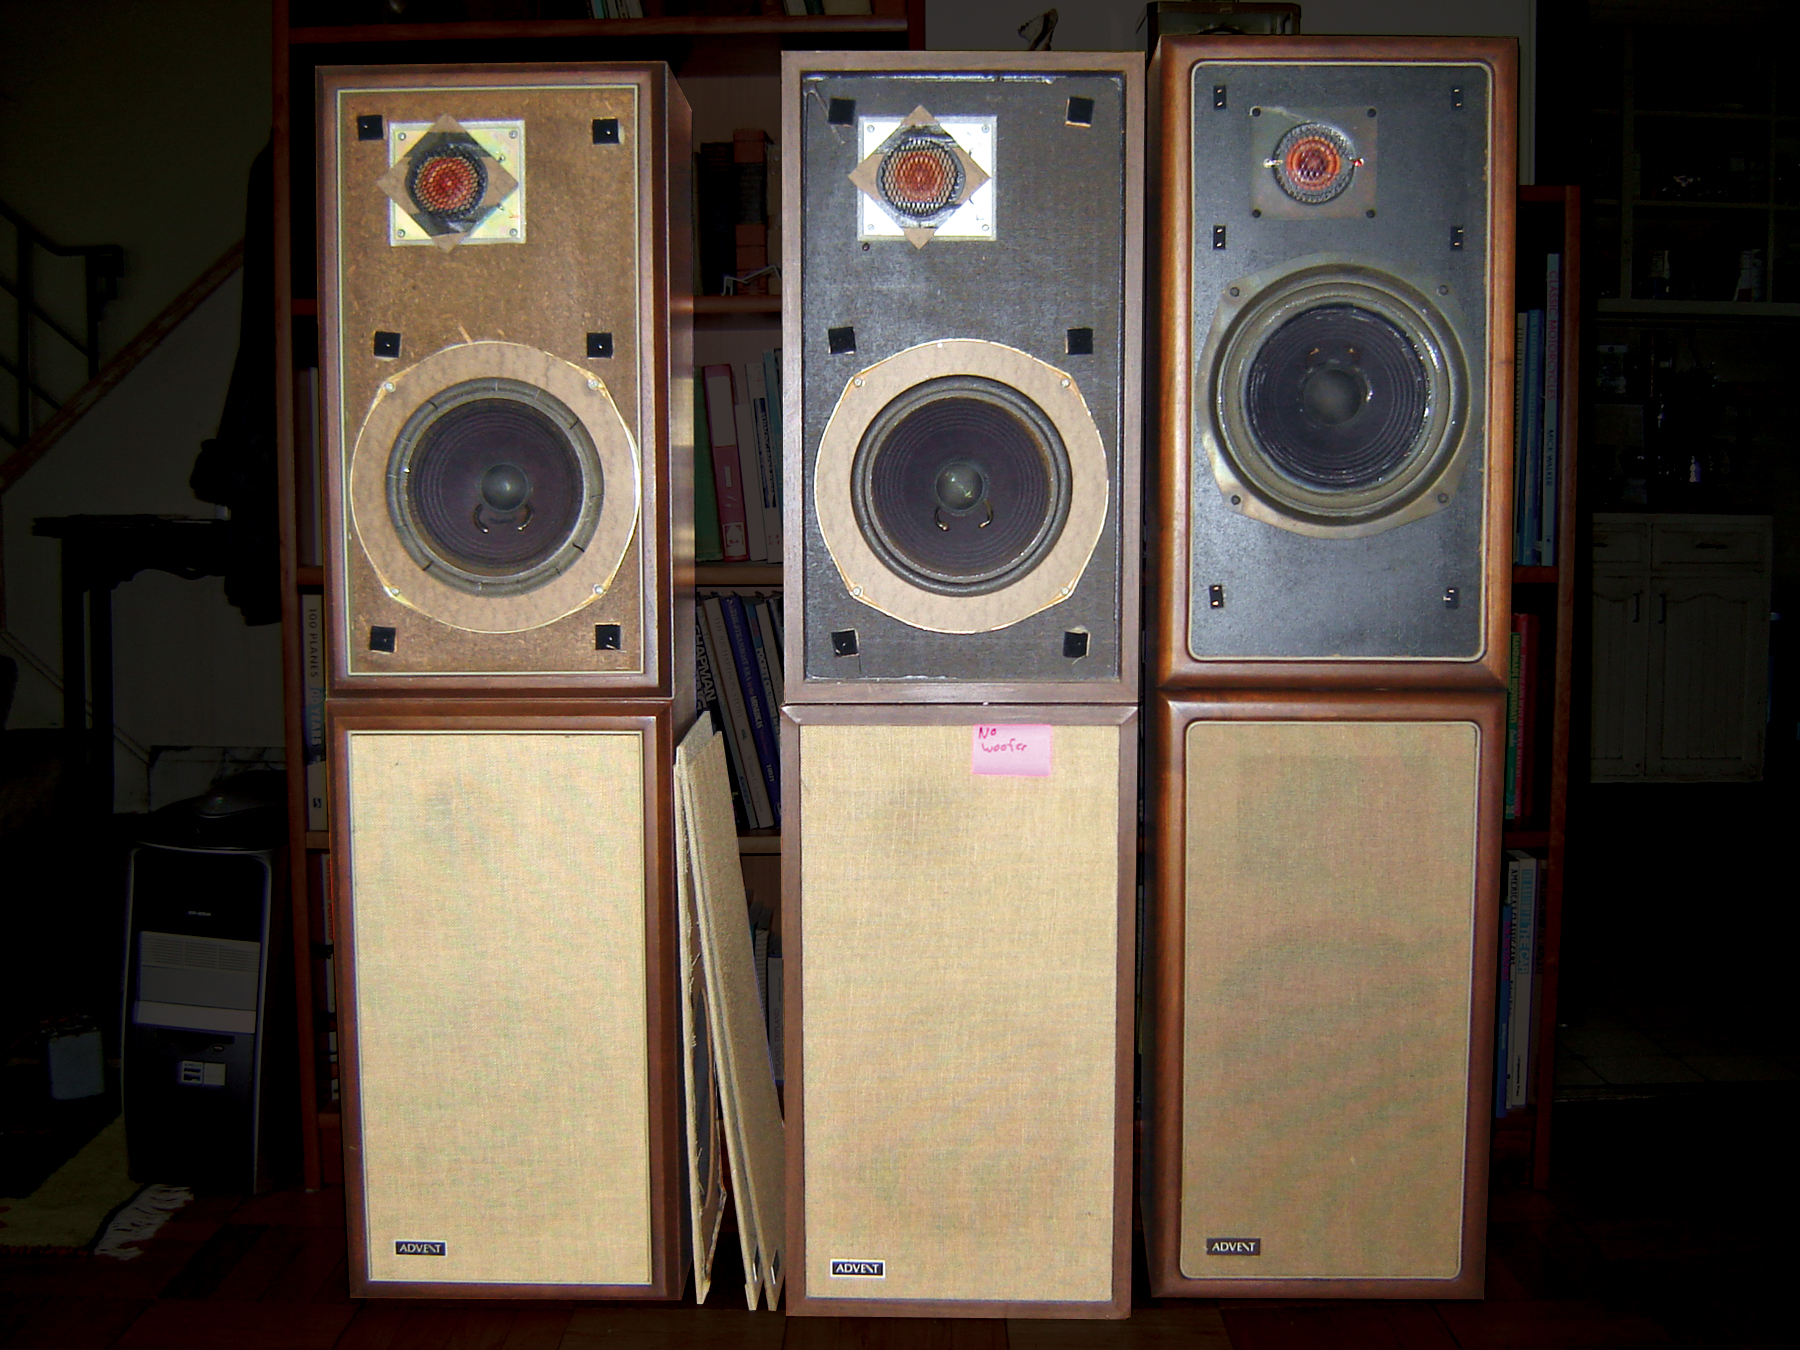
Last year on the Audiokarma (http://www.audiokarma.org) discussion boards, members Zilch and Jackgiff shared a project that rocked the online audiophile community. They designed a treble waveguide and crossover system that greatly improves the sound from older speakers with “fried egg” style tweeters.

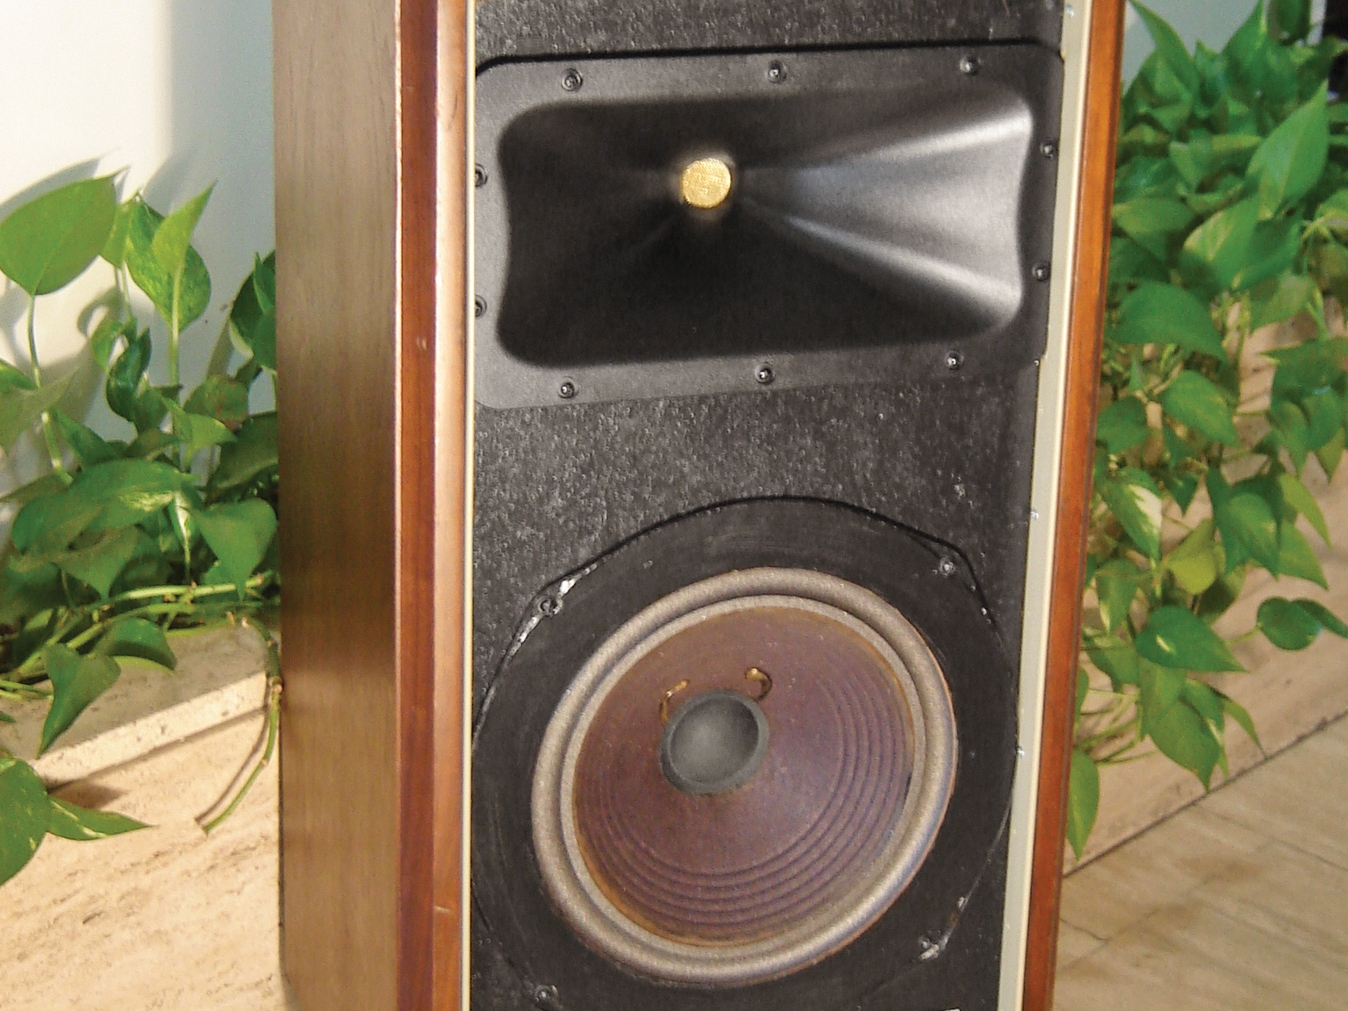
Waveguides are horns that disperse high-frequency sounds evenly over a wide area, rather than letting them fall off at the sides. This gives the speakers “constant directivity,” which means they sound more natural to listeners who aren’t in the center sweet spot, between and in front of the speakers.

Zilch and Jackgiff also designed a replacement crossover circuit that balances the sound across the new combination’s optimal 1,600Hz crossover point, routing low frequencies to the speaker’s great original woofers and high frequencies to the new compression drivers. Zilch sells PCBs for building this crossover.

I tried the conversion myself on some 1970s-era Advent Large speakers. It cost a couple hundred dollars, but the results were outstanding: the modified old Advents performed like thrillingly clear, state-of-the-art speakers that audiophiles pay thousands for. Since then, I’ve built and sold a second pair, and many other Audiokarma members have built multiple pairs of these speakers.

Project Steps

Take them apart.

Pull off the speaker grilles and then wrench off the grille attachment blocks that are stapled and glued to the baffle. Unscrew and pull out the woofer and tweeter, cutting their wires. Pry off the plastic trim.

Wearing a dust mask and gloves, pull out the fiberglass batting and set it aside in a closed bag.

Pull out the staples and chisel off the glue inside to remove the original crossover circuit. Sand off any glue residue. Repair and refinish the cabinet as desired.

Tip: Never use steel wool on a loudspeaker; it sheds steel particles that clog the driver’s magnet gap.

Note: On old speakers, the foam around the woofers may have cracked and disintegrated. This compromises the air seal essential to the bass performance and makes the woofer rattle and sound bad. Fortunately, it’s 100% repairable. You can use a kit to replace the foam surround yourself (see Parts list), or take them to a repair shop; I like Audio Atlanta (http://www.audioatlanta.com).

Cut the waveguide holes.

In each speaker baffle, cut a 10½”x5″ clearance hole for the new waveguide, aligning the top edge with the existing tweeter hole. I taped off the area, drew cut lines, and used a jigsaw with a 3″ blade.

Tape over the cabinet rim and hold the jigsaw above it to avoid scratching it. Drop the waveguide in.

Mark and drill the ten 1/16″ mounting holes.

Build the crossover circuit.

Assemble a crossover circuit for each speaker, referring to the schematic. It’s easiest to build them on the printed circuit boards from ZilchLab, which come with instructions, but the circuit is simple enough to wire together neatly on plain breadboard.

Solder three 8″ single wires running offboard for the L-pad tweeter volume control. The L-pad uses 2 potentiometers, a series and a shunt, to let you adjust the tweeter’s volume without changing its overall impedance.

Also solder two 24″ 2-conductor speaker wires for the woofer and tweeter, and mark the positive (+) lead on both.

Crimp the slide-on connectors provided with the compression driver onto the tweeter leads.

Mount the electronics.

Note: The crossover circuit, L-pad, and speaker terminals are mounted to a 5″x5″ square of plywood inside the cabinet.

Drill a 3/8″ hole through the plywood for the L-pad knob shaft, and 9/32″ holes spaced 3/4″ apart for the speaker posts, close enough to the L-pad so they’ll all fit through the cabinet’s original terminal hole in back. Also drill a 1/8″ hole at each corner of the plywood panel, for mounting it.

Solder the L-pad wires to the L-pad terminals, following the schematic and labels 1, 2, and 3 on the board. Rim the cabinet’s terminal hole with foam gasketing tape, and then mount the plywood panel to the speaker with screws.

Position the crossover board on the inside of the panel, and screw on the knob and posts on the other side, using washers if necessary. Secure the crossover board over the speaker terminal shafts using the supplied nuts.

Finally, screw down the free edge of the crossover board, opposite the terminal shafts, with #6×3/4″ wood screws and plastic-tubing spacers cut to size.

Final assembly.

Pull the speaker leads through their baffle holes, leaving plenty of slack inside, and tape them to the edge of the cabinet. Carefully replace the fiberglass batting, loading it evenly. Replace the cheesecloth behind the woofer hole, and rim the woofer and waveguide holes with more foam gasketing tape.

Screw the compression driver to the waveguide, connect the tweeter leads, and mount the waveguide to the baffle with ten #6×5/8″ sheet metal screws and #6 washers.

The waveguide fits the Utility model without trimming, but the other speaker models require some more work. With the Original Large Advent, sand 1/16″ (or less) from both sides of the waveguide to make it fit. The New Large Advent has a bit less space, so you can trim  1/4″ off each edge of the waveguide, or get tricky with a router and undercut the walnut rim to make room to slide the waveguide edge underneath. I’ve seen both done, and I’d just cut away the plastic waveguide edge myself, rather than attempting fancy router work.

To reinstall the plastic trim, shave it down where necessary to clear the waveguide rim on each side. Nail in the top, bottom, and one side piece using  1/4″ brads, and screw in the other side so it can be removed for service.

Solder the woofer wires to their terminals, observing polarity. Screw the woofer down and replace the grille. That’s it!

Options

Here are some additional restoration options, mostly cosmetic, that won’t affect the speakers’ sound:

For a homogenous appearance, paint the cabinet back, woofer frame, baffle, and screws all black. You’ll need 1/2 pint of interior latex trim paint.

To mount the woofers more securely, drill out their screw holes to 7/32″ and press in eight 8-32 T-nuts.

Make new grilles using the Large Corner Grill Frame Kit and an extra set of corners (Parts Express #260-344 and #260-345). Choose thin, stretchy fabric, like polyester jersey fabric (1yd). Attach the grille with velcro tape, and the fabric with foam tape.

Conclusion

This project first appeared in MAKE Volume 20, page 150.