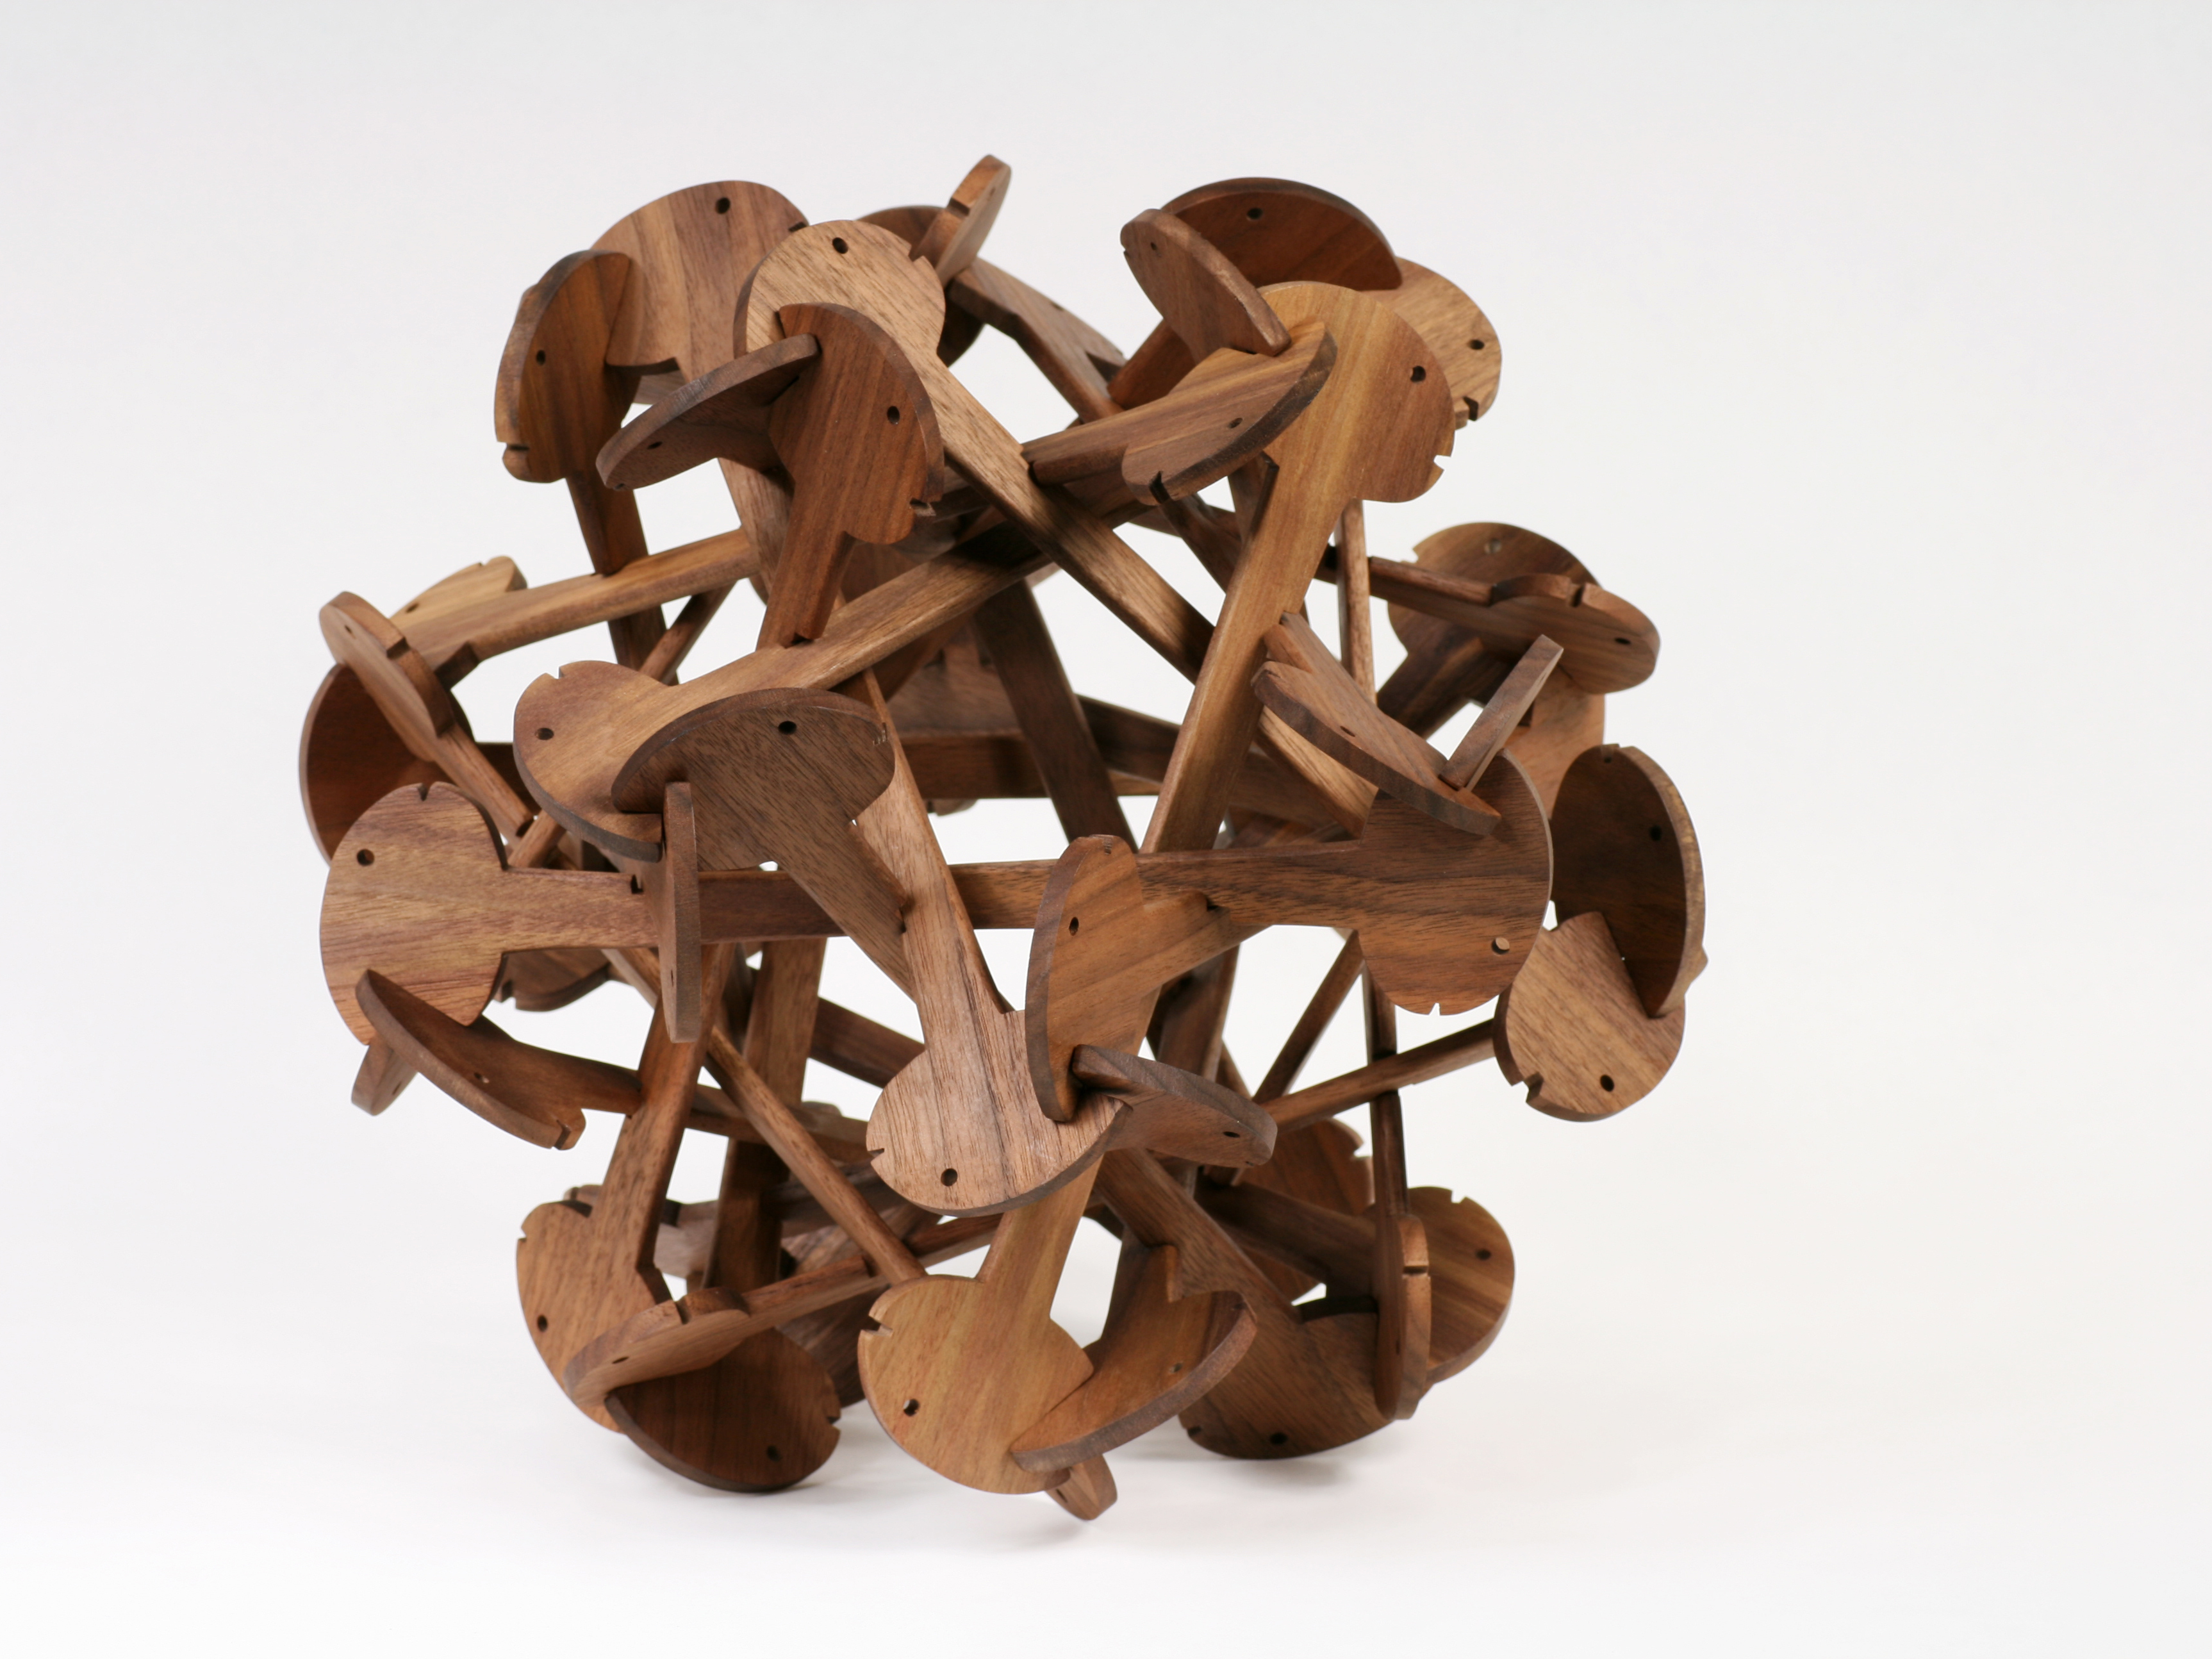
As a retirement present for Joe Malkevitch, a geometer friend who likes puzzles, I designed and built this 1′-diameter Egg Heads puzzle from ¼” walnut.

Many of my sculpture and puzzle designs require laser-cutting or other computer-guided fabrication technology to accurately produce intricate parts. But this design is simple enough that you can make the parts yourself with ordinary shop tools such as a band saw and belt sander.

The ease of fabricating the parts doesn’t imply ease of assembly, however. After cutting out the 30 parts, you’ll find it requires all of your puzzle-solving skills to interweave and interlock them into a symmetric structure. Here are instructions for making and assembling your own copy.

Project Steps

Start with a paper template.

The template can be scaled up to be 11″ long using a copier, or you can download the full-sized PDF version from the files section. The shape fits diagonally on a standard 8½”×11″ sheet of paper.

I designed a simple egg-shaped head that’s easy to saw, but you can personalize the face of yours if desired. However, don’t modify the neck notch or the 90° notch at the back of the head, which are carefully positioned for proper assembly.

Transfer the template to clear acrylic.

You could just trace the paper outline, but a more accurate technique is to do a hot toner transfer. Either print the template with a laser printer or, if you use an inkjet printer, photocopy the printed template so you have a toner-based copy.

Tape it, toner side down, to the acrylic and warm it with a heat gun as you rub the paper with the back of a spoon. Hot toner will melt and attach to the plastic.

Cut out the acrylic template.

Cut it with a band saw, just outside the line, and then sand it down exactly to the line.

You will trace this 30 times, so be sure it’s accurate. As a check, you can trace it onto paper, then rotate it 180° and trace it again.

Trace and cut the 30 parts.

With a pencil, lay out and trace 30 copies on ¼”-thick wood. Make a couple of extras, too. One advantage of using a clear acrylic template is that you can see through it to position it where you want, relative to the wood grain, thus avoiding knots.

For strength, align the template the long way, along (not across) the grain.

Use a band saw to cut the 30 parts just outside the pencil lines. Then sand to the line. Any disk or belt sander is fine for the convex portion at the tops of the heads. A thin belt sander with no backing is ideal for the concavities.

Drill the 60 eyeholes and sand for finish and feel.

For drilling the eyeholes, first make a simple drilling jig that you can clamp to your drill press table. A 1″ square of wood glued to a larger scrap of wood is sufficient for the jig.

You can hold the notch at the back of each egg head against this square to position the parts consistently under the drill bit.

Depending on your woodworking tastes, you may round the edges slightly, belt-sand the flat surfaces to remove any planer marks, and/or use an orbital sander with progressively finer grits, for a sensuous feel. Don’t alter the geometry of the crucial mating points at the backs of the heads and the fronts of the necks.

Cut the “key” part in half.

Use a scroll saw or fine coping saw to cut 1 piece along the line indicated in the key template.

Be sure not to cut the reverse of this curve, with the head facing the opposite direction. This is the final piece in the assembly.

Finish and assemble!

Apply an appropriate wood finish, e.g., tung oil, and allow it to harden.

While the above steps are largely mechanical for woodworkers, I guarantee you’ll find the assembly step to be a new intellectual challenge.

It would be easier if you were an octopus. When it’s done, the parts all interlock without any glue, but the whole thing wants to fall apart until the final pieces are positioned. So this is the true test of dedicated nerdiness. I’m sure you’ll succeed, because you have so much time already invested! Or perhaps have an Egg Heads party so you have lots of hands available to hold everything in place.

The entire puzzle can be scaled up or down, but you must scale every dimension, including thickness; for example, you might triple the size to a diameter of 3′ using ¾”-thick wood. Send me a photo if you do!

If you’d like to test your puzzle prowess, stop reading and try to assemble your Egg Heads based only on the final assembled image. If that fails, follow the step-by-step assembly instructions and photos in the next steps.

Follow the assembly instructions.

First observe how 3 back-of-the-head notches can meet and “mind meld” like the corner of a cube, with all 3 heads facing either clockwise or counterclockwise.

You can assemble the puzzle in either of 2 mirror-image solutions, but all mind melds must be the same. After finishing, you can disassemble it and try the other handedness. (For the other set of instructions, just look at these pictures in a mirror.)

Use 5 twist ties to hold together 1 pentagon cycle.

Make another pentagon interlocked with the first.

Position the 2 pentagons so that 2 heads of one do a mind meld with 2 heads of the other. At the opposite end of the pentagons, you can do the same thing.

A rubber band around the mouths can keep the heads together.

Continue adding parts, one at a time, making twist-tied neck pentagons and rubber-banded mind melds. The final few parts have to be carefully steered into position, but no force is needed.

The very last part goes in as 2 halves, one from each side, and locks together.

Conclusion

Resources

The mathematics underlying this puzzle is described in my paper for Joe Malkevitch’s Festschrift: George W. Hart, “Egg Heads: A Puzzle/Sculpture” in Geometry, Games, Graphs, and Education: The Joe Malkevitch Festschrift, ed. Sol Garfunkel and Rishi Nath, Consortium for Mathematics and Its Applications (COMAP), 2008.

This project first appeared in MAKE Volume 17, page 143.