Origami is an artistic tradition dating back at least 1,300 years (and probably more), and while it’s steeped in the naturalistic aesthetic tradition of Japanese culture, it has held an appeal for geeks as well. Perhaps it’s because of the link to Japanese culture. After all, geeks have a passion for manga and mecha and all things ninja. Maybe geeks appreciate the balance of the technical and the artistic. Case in point: I was the “president” of the Origami Club in my high school, and all the members were my buddies from playing D&D and AP Physics.

Origami can be something really fun to share with your kids, especially when they are younger. It’s about the least expensive art/craft you can try, and the creativity and imagination it involves – turning blank, 2-dimensional paper into fun, 3-dimensional forms – is potentially quite nurturing. And if your kids balk at the idea that folding paper into animals can be cool, just tell them to think of it as though they are making their own action figures, and promise you’ll act out Pokemon battles with them when they’re done.

But how can we make origami even geekier?

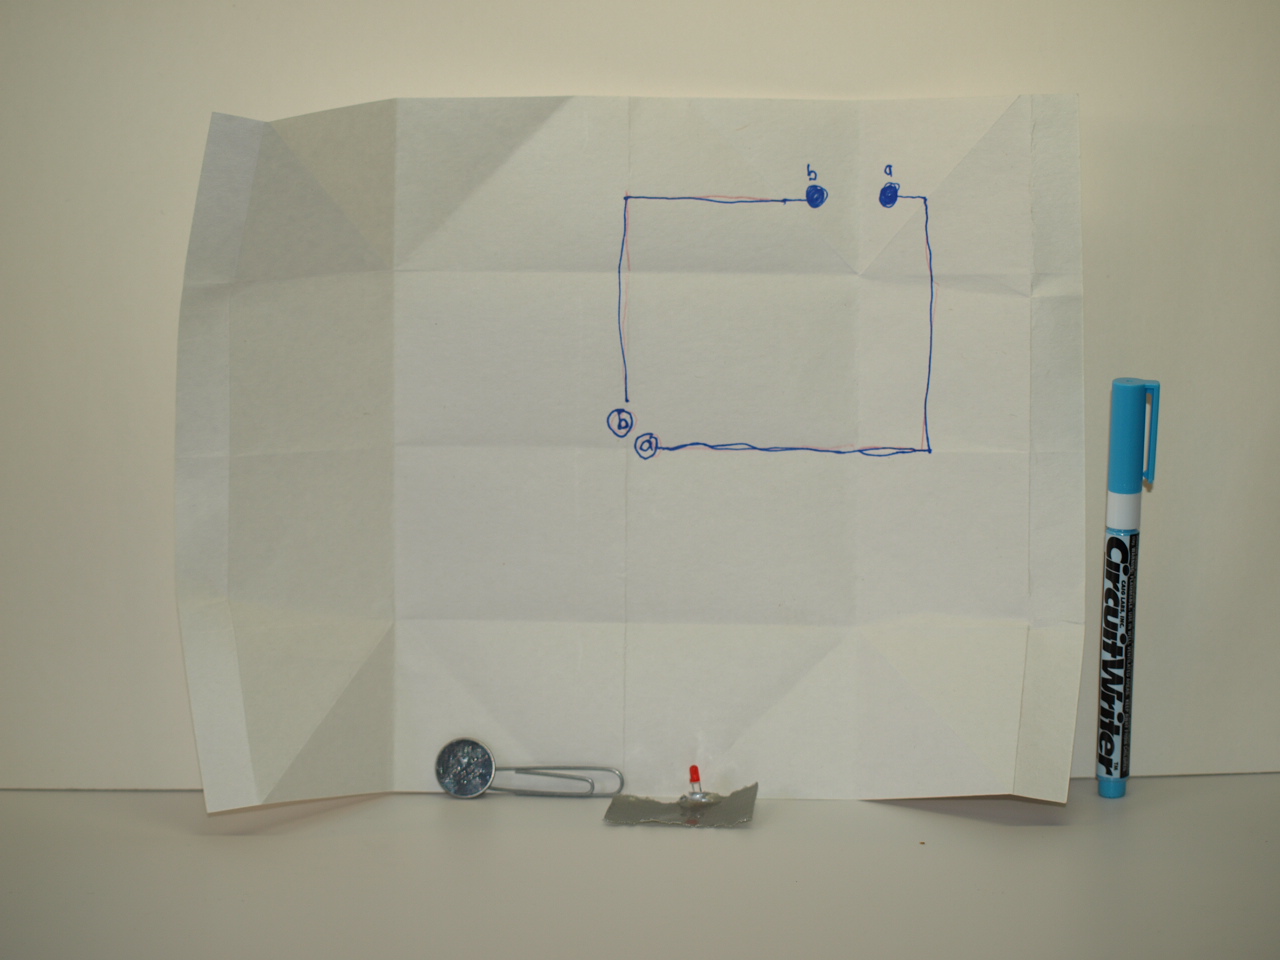
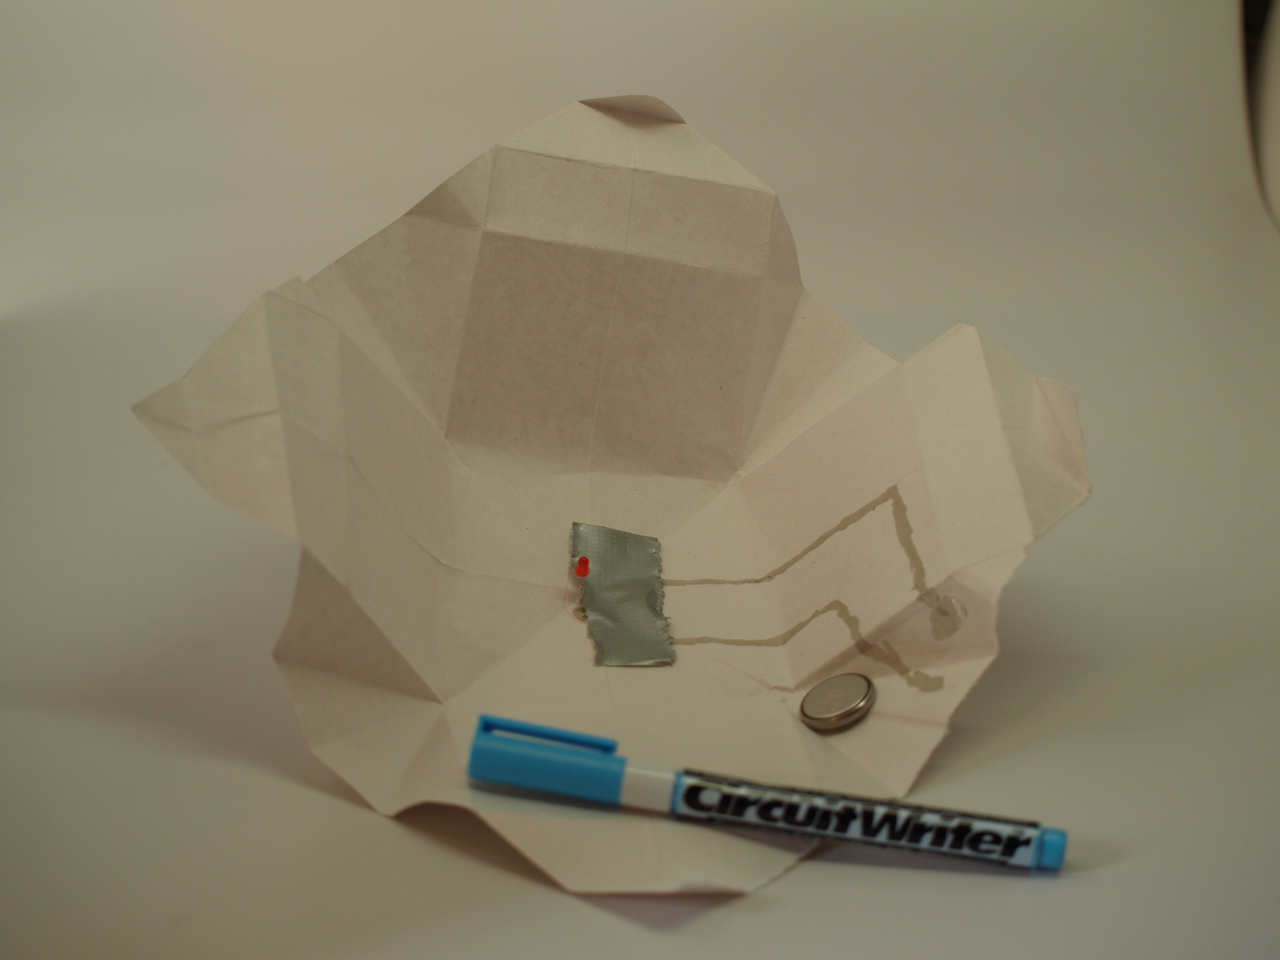
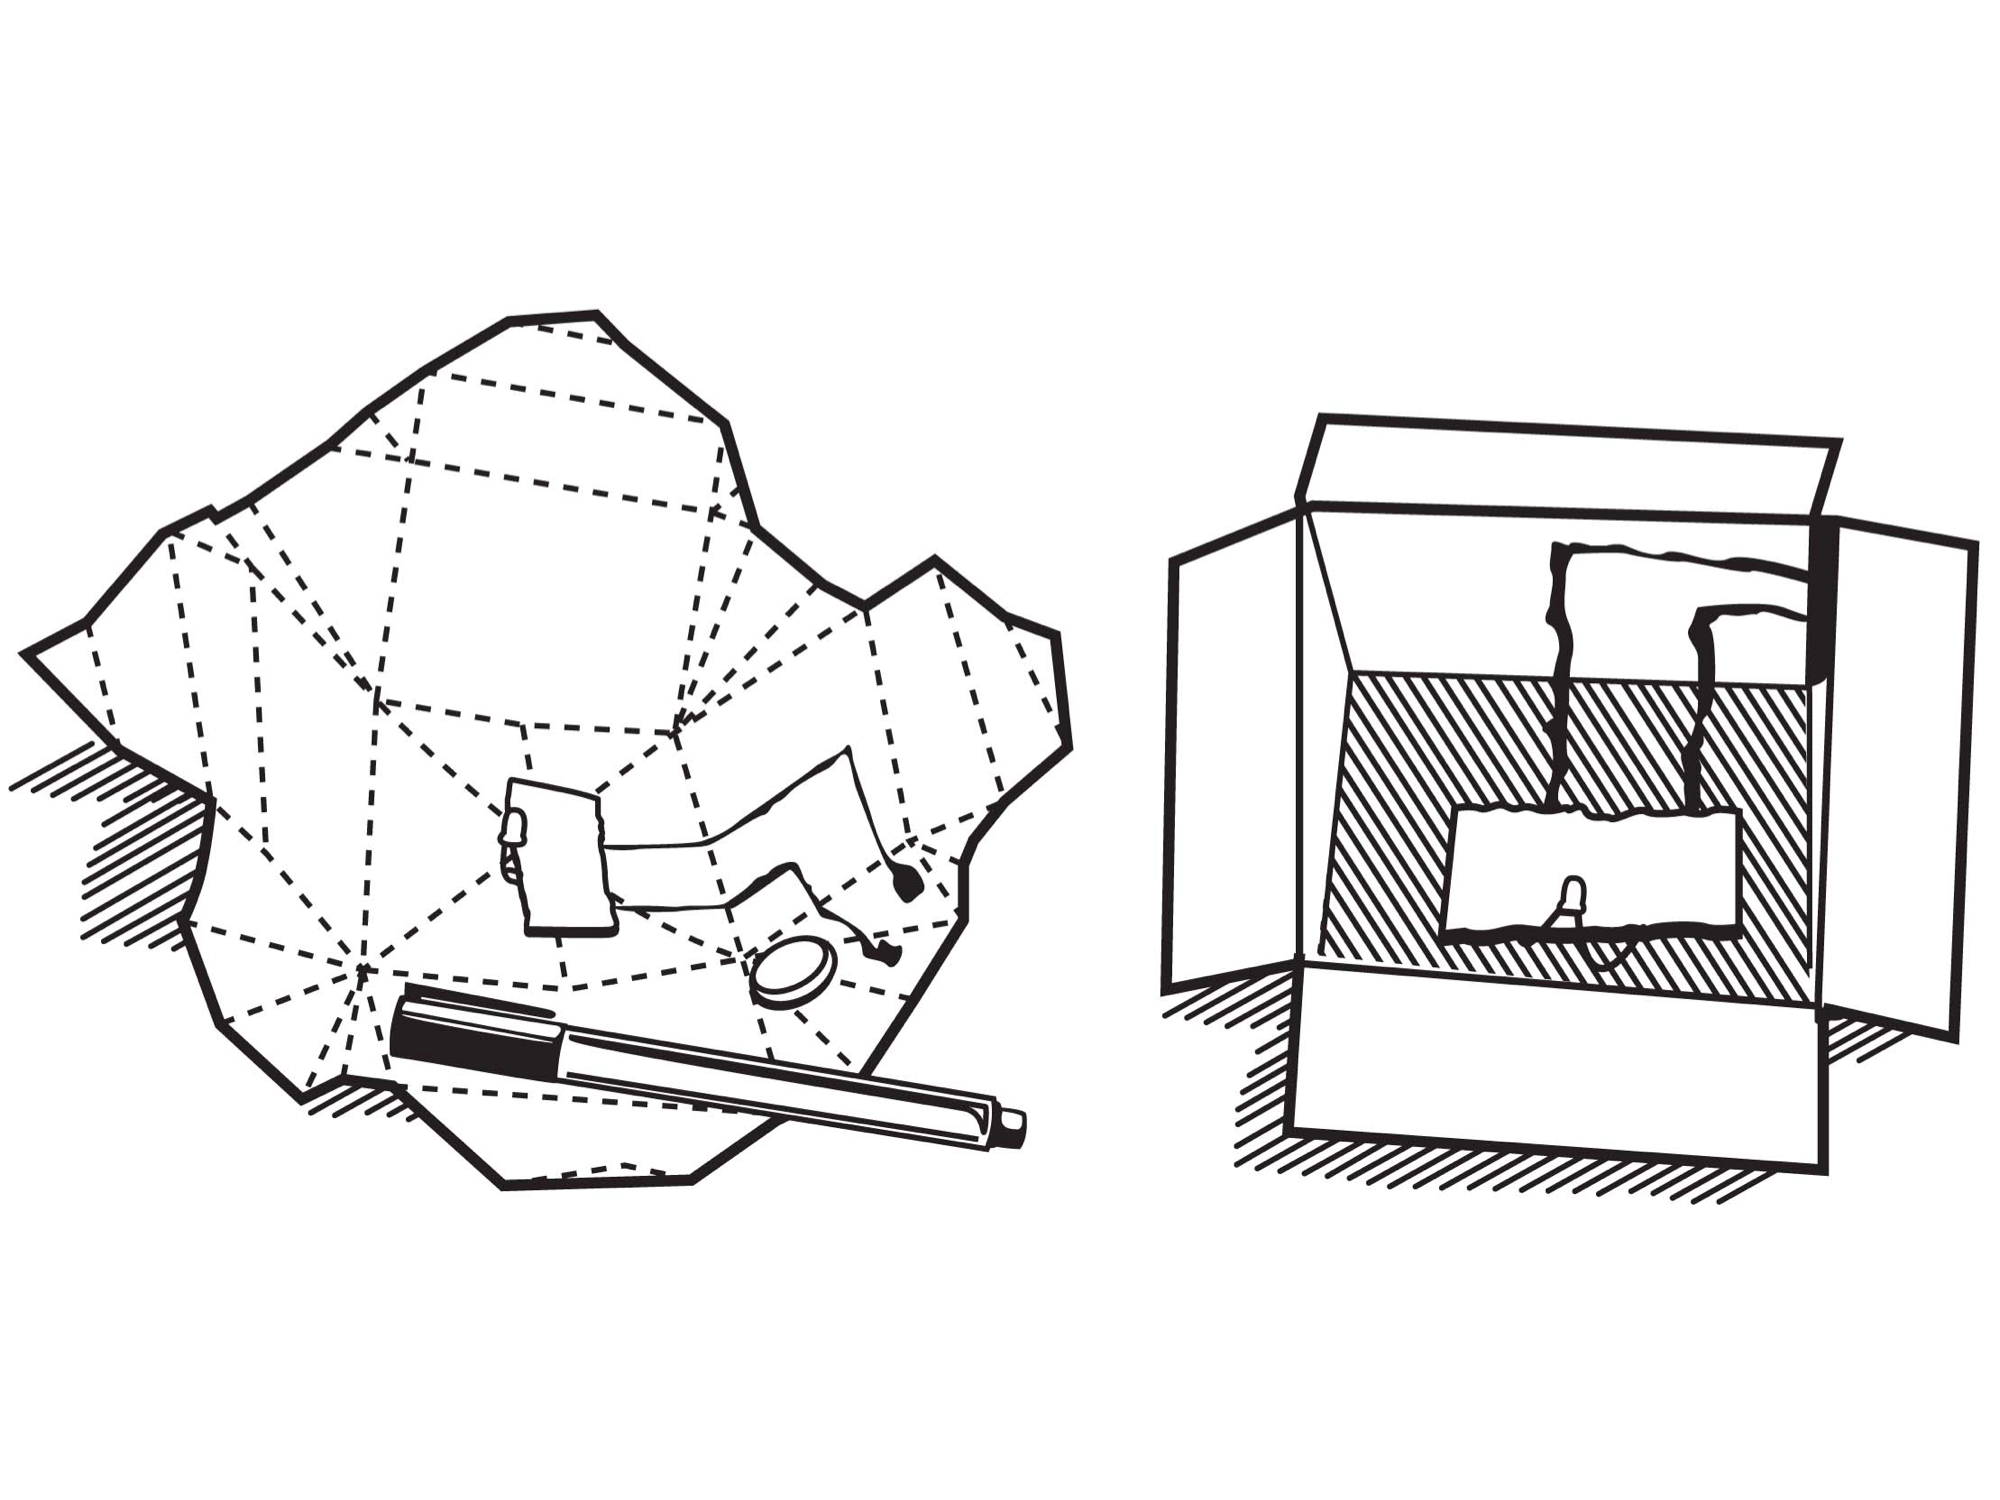
I was browsing the aisles at my local electronics warehouse one day, looking at parts and pieces, and I noticed a very interesting item called a CircuitWriter pen. If you remember those glitter pens that everyone loved to use in junior high school, this is the same idea. But the material is actually silver, in a suspension of acetone, resin, and a few other chemicals with big names. The idea is that you can use it to draw basic electrical circuits or fix broken traces without having to etch or solder; the pen’s ink works just like the thin conductive material on a circuit board, and will conduct electricity.

And that got me to thinking: what else could you draw on to make a circuit? What about paper? Could you draw a circuit on paper, and say, run an LED from a battery? And, if you could do that, what could you then do with the paper? All of which led me to this project.

Project Steps

This project will introduce you to the electronic origami concept — we’re going to keep things simple and build a box with an LED. If you’re creative with this idea, you could come up with faux tea-lights for decoration, or just emergency lamps.

Build your box, based on the instructions in the illustration. Use a straightedge to get good creases on your folds.

We have to identify where the path of the circuit lines are going to go, and this will take a little careful tracing. Take a pencil, and draw a small dot at the center of the inside bottom of your box to identify where the LED is going to sit. Now pick one of the corner sides of the box that will be where the battery slips in. You’ll notice there’s a pocket of paper on either side. Insert the tip of your pencil about halfway from the top of the corner, and rub it around a bit so that you make marks on both sides of the paper in the folded pocket.

Now come the electronics! Carefully unfold just the corner side of your box where you made the marks by lifting the adjacent top flaps and expanding the folded-over pockets at the corner. Where you slipped your pencil in, you should now see two distinct marks, one on either side of a fold – when folded, they face each other. These will be the contact points for either side of the battery.

Use the CircuitWriter Pen to trace out the two circuit lines. At each of the contact points on the corner, draw a pea-sized circle of the conductive ink, and then draw a line to down to the floor, and in towards the center. At a spot just to the side of the center, make a good pea-sized circle of circuit material to end your line. These will be your positive and negative ”wires.” They should not cross one another, but otherwise the path from corner battery contact to the floor where the LED will connect is up to you. Just keep it relatively short.

Let the page dry (use a hair dryer or fan for quicker drying). Check the lines for continuity and fix any thin spots. Once the page is completely dry, you can do a test run by holding the LED with its leads touching the contact points in the middle of the page, and then taking your battery and carefully folding it into the crease between the other two contacts. Make sure you have your positive battery side feeding to your positive LED lead. If all is right, you should see light.

Fold your corner back together. Looking inside the box, you can see the circuits you traced. Take your LED and, using a little tape, affix it to the center of the box with one lead on each contact. Where the circuit lines vanish into the corner folds, slip your CR-2032 battery into the fold, positive side to the positive contact, and negative to negative. To get the battery to fit well in the pocket, you may need to use an X-Acto knife to slit the paper along the adjacent fold so you can then slip the battery in from the outside under the top flap. Then hold it in place with a paper clip.

The LED will light up, and you have built your first piece of electronic origami!

This project is an excerpt from Geek Dad: Awesomely Geeky Projects and Activities for Dads and Kids to Share, Ken Denmead, Gotham Books. The website for the book can be found here.

Evil Mad Scientist Labs did an electronic origami project back in 2008. You can see their version here. They use an iron-on foil circuit trace, but they also have subsequently written about creating “soft circuits” using the CircuitWriter Pen.