You’ve got some eyeglasses, plastic frames, broken. On the internet you found a repair place. In two weeks you can get them fixed. But what if you can’t wait?

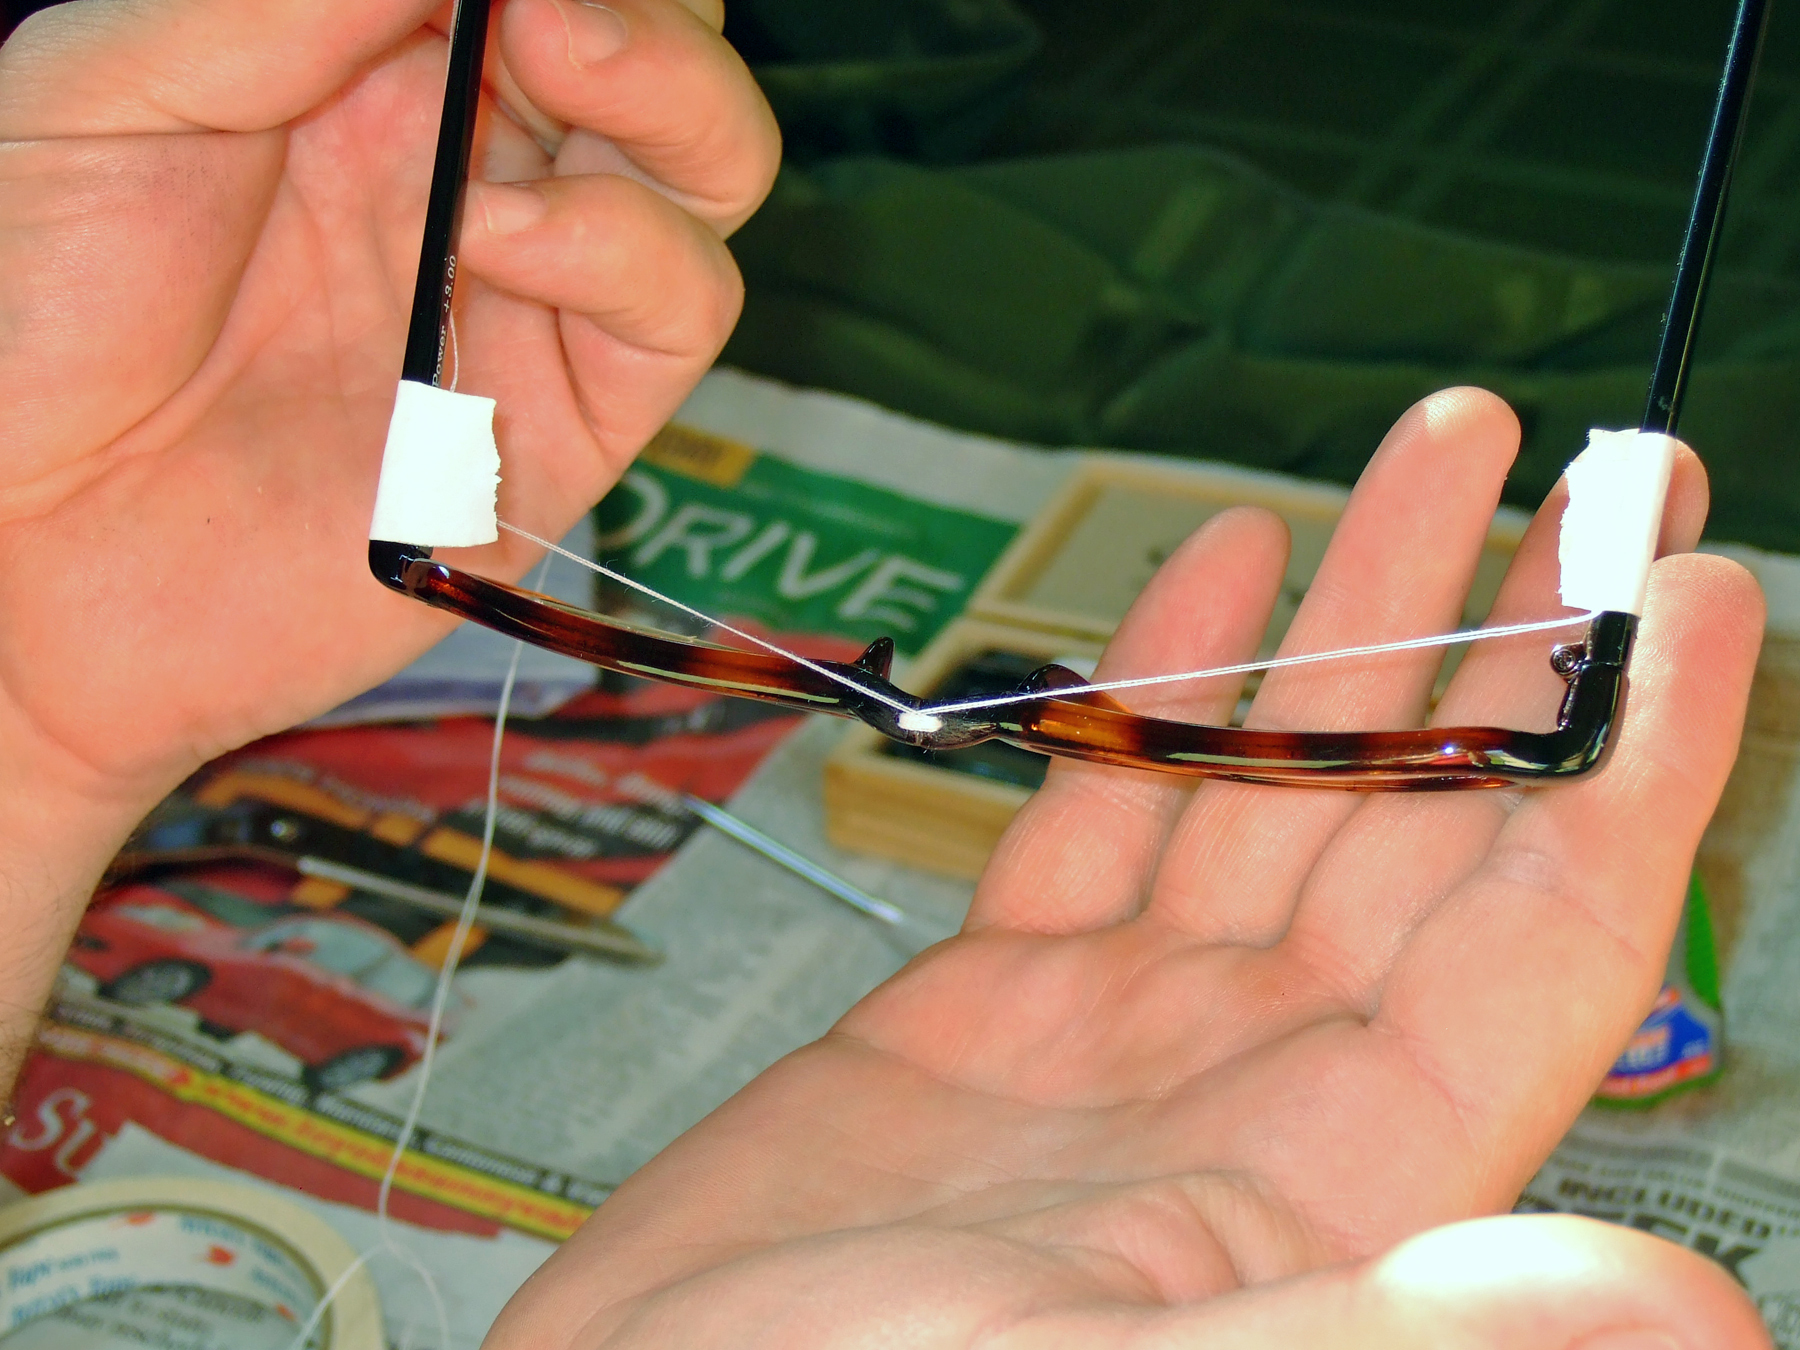
Follow along and fix your glasses at home — the only special tool you need is a commonly available small-gauge drill bit. If you’re willing to take a risk and trust in your skills, you can have your glasses fixed as soon as tomorrow!

Tips on gluing:

The secret to good gluing technique is the Three Cs:

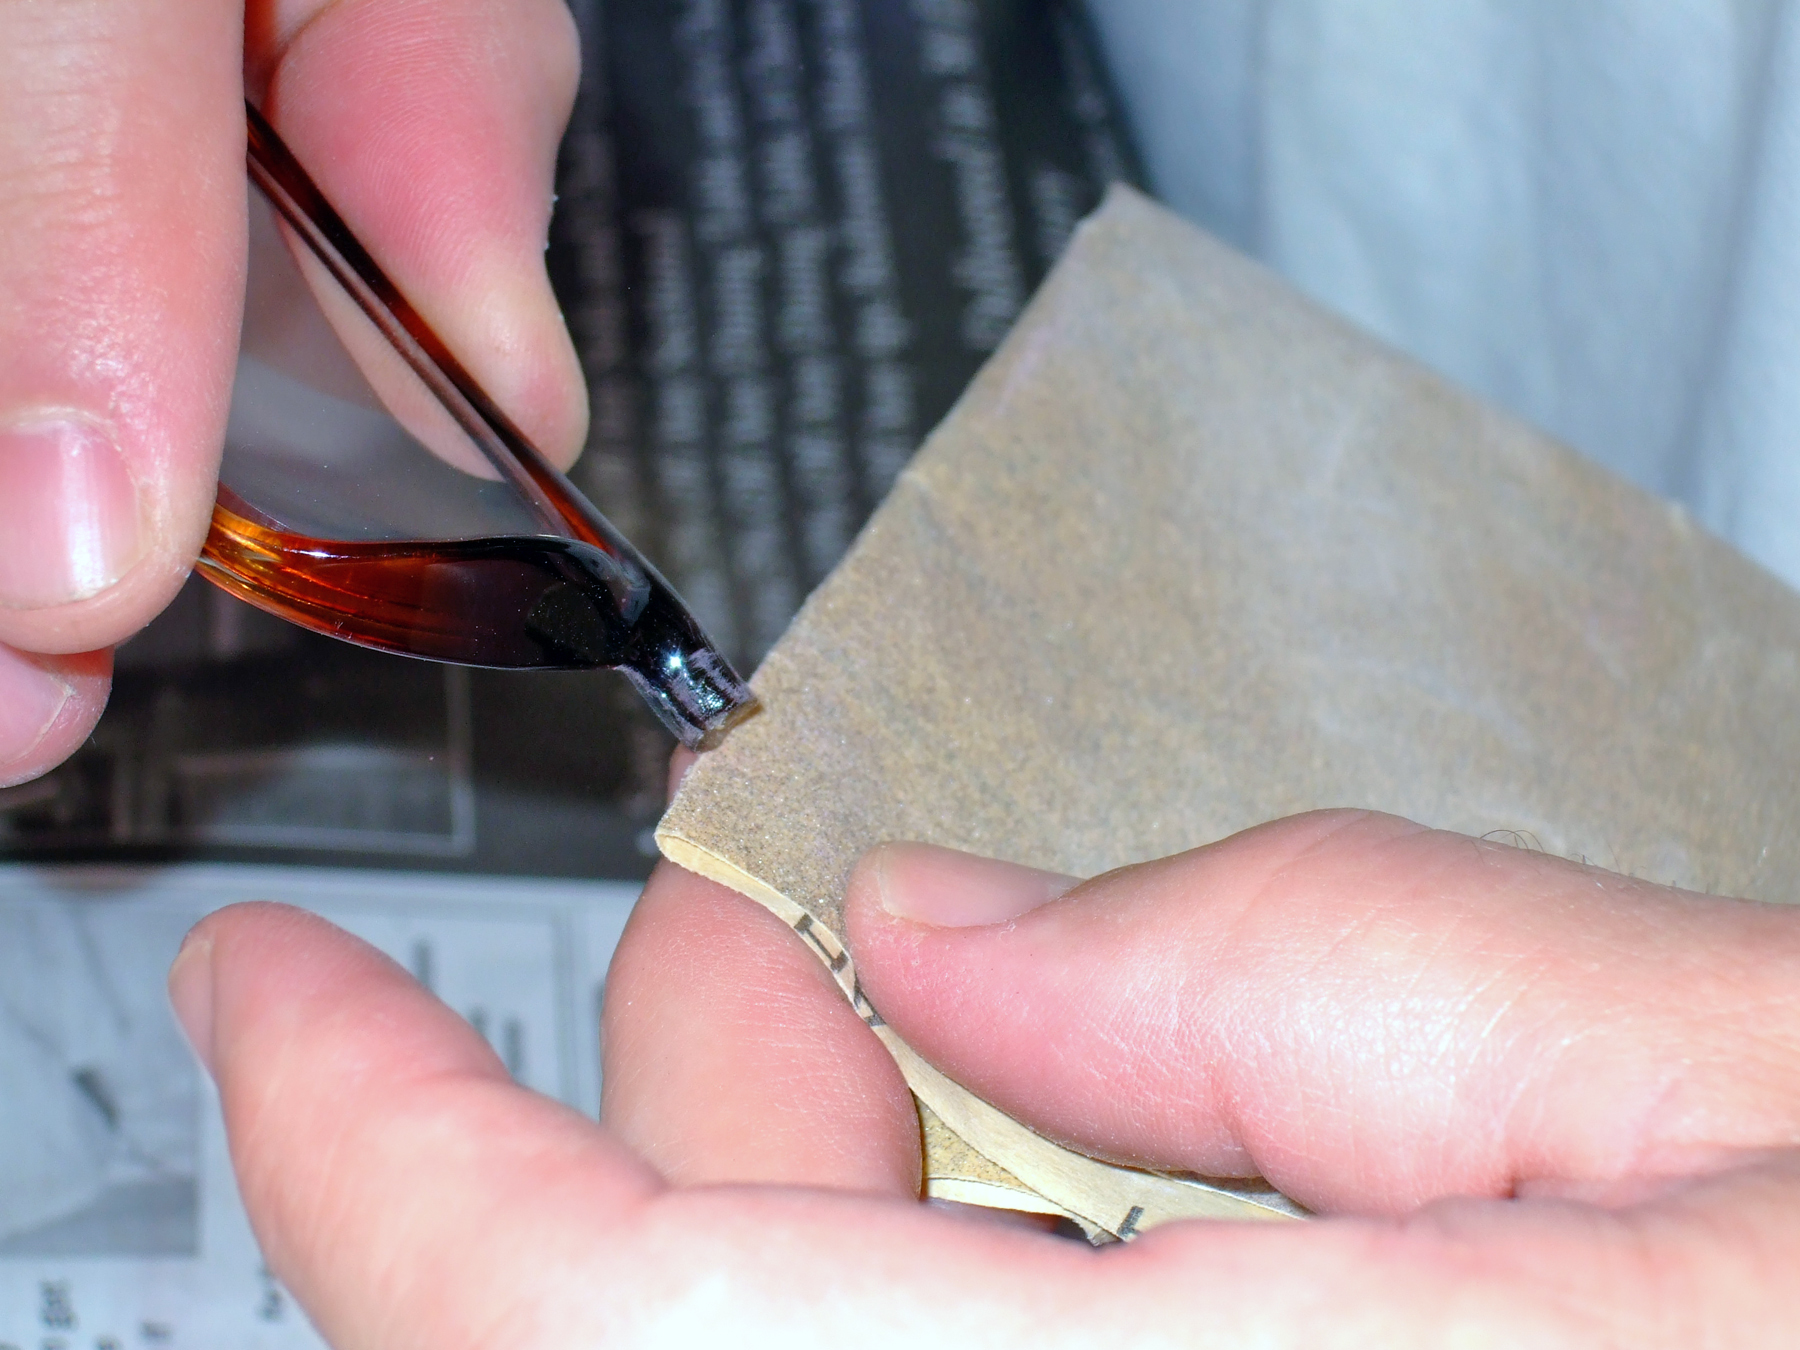
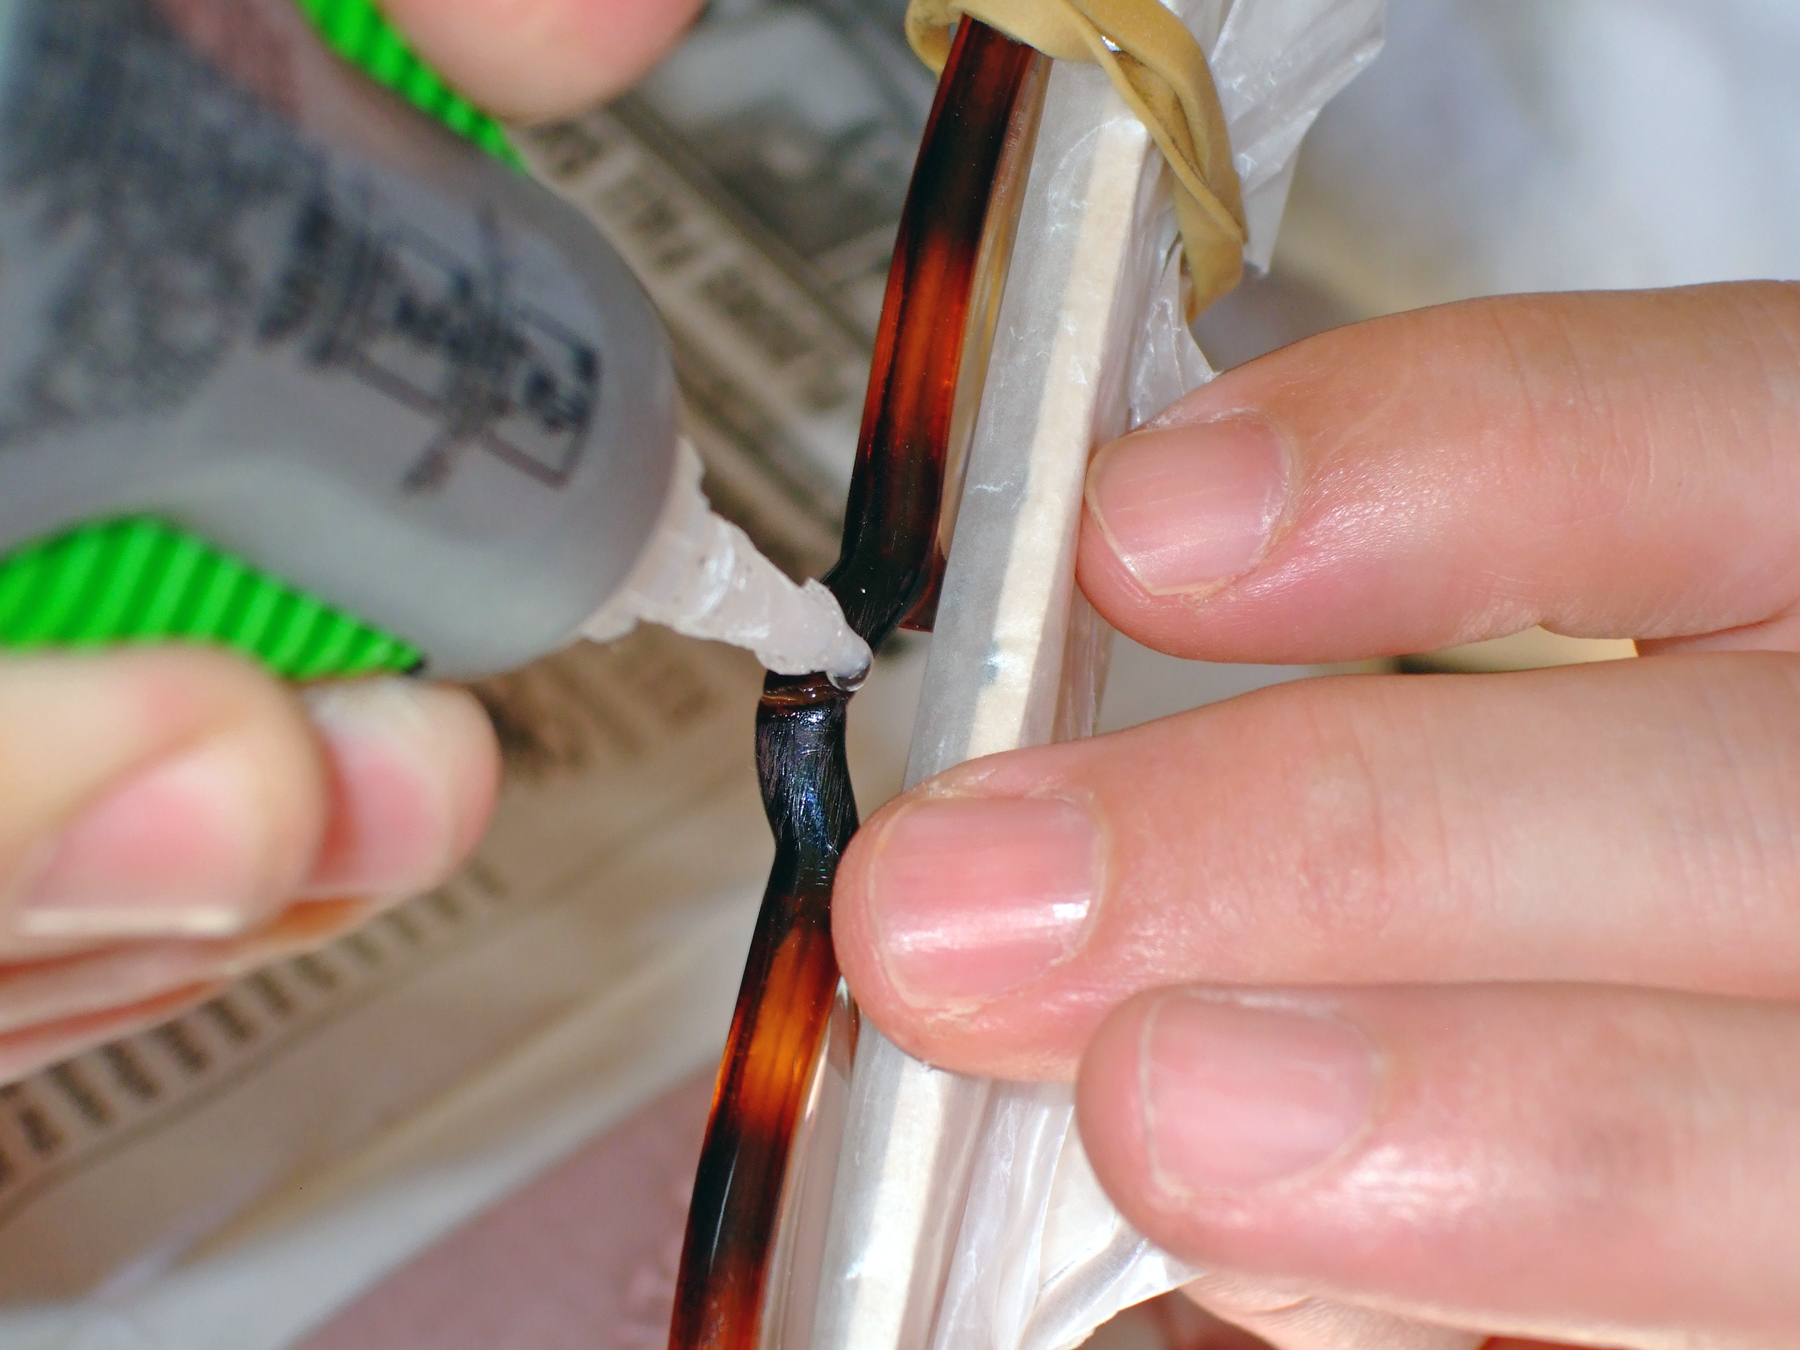
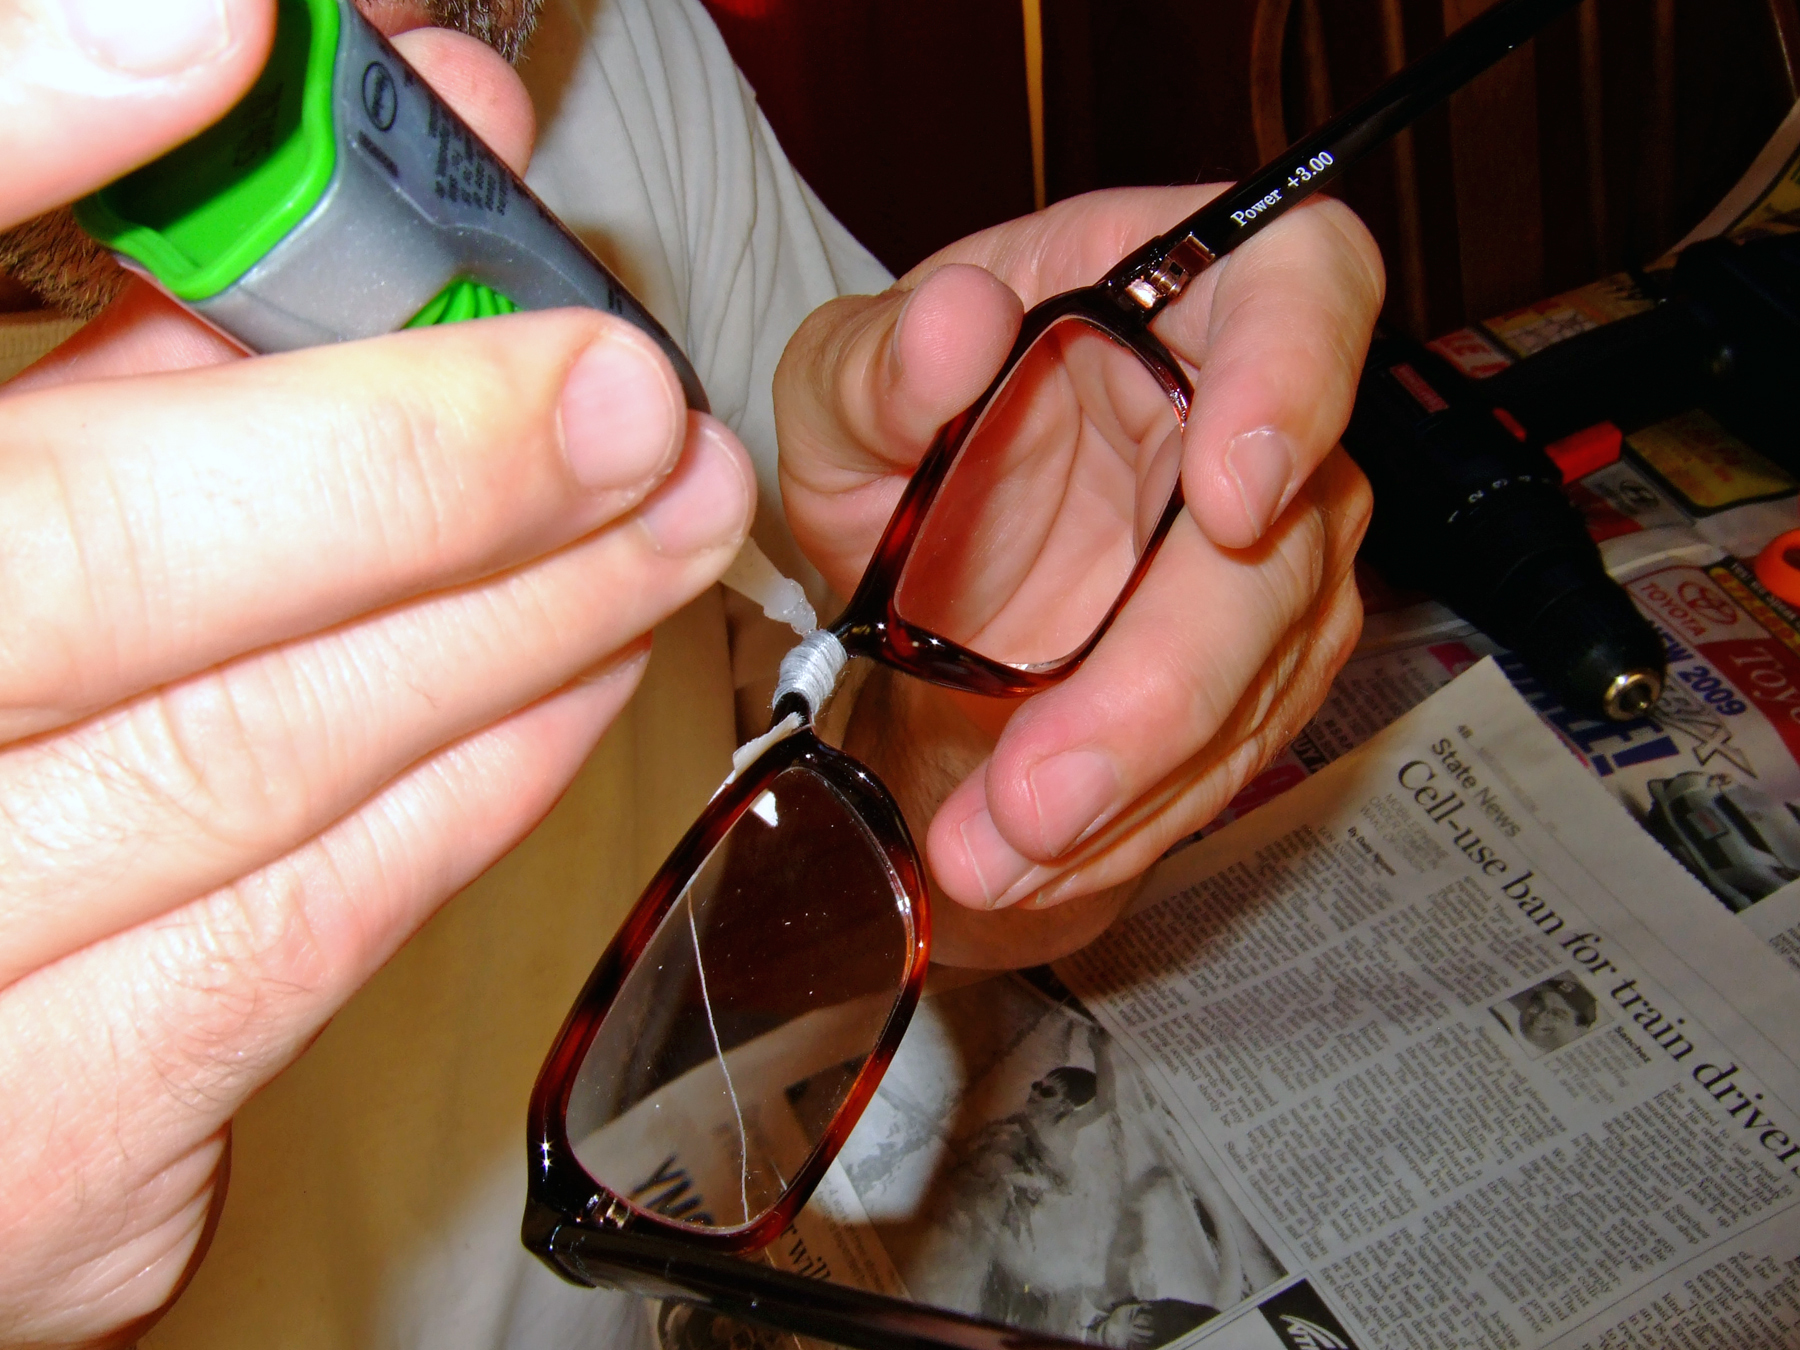
  • Cleaning: Surfaces should be clean and dry with a matte texture. The glue needs a solid, clean surface with a little “tooth” to bond to.
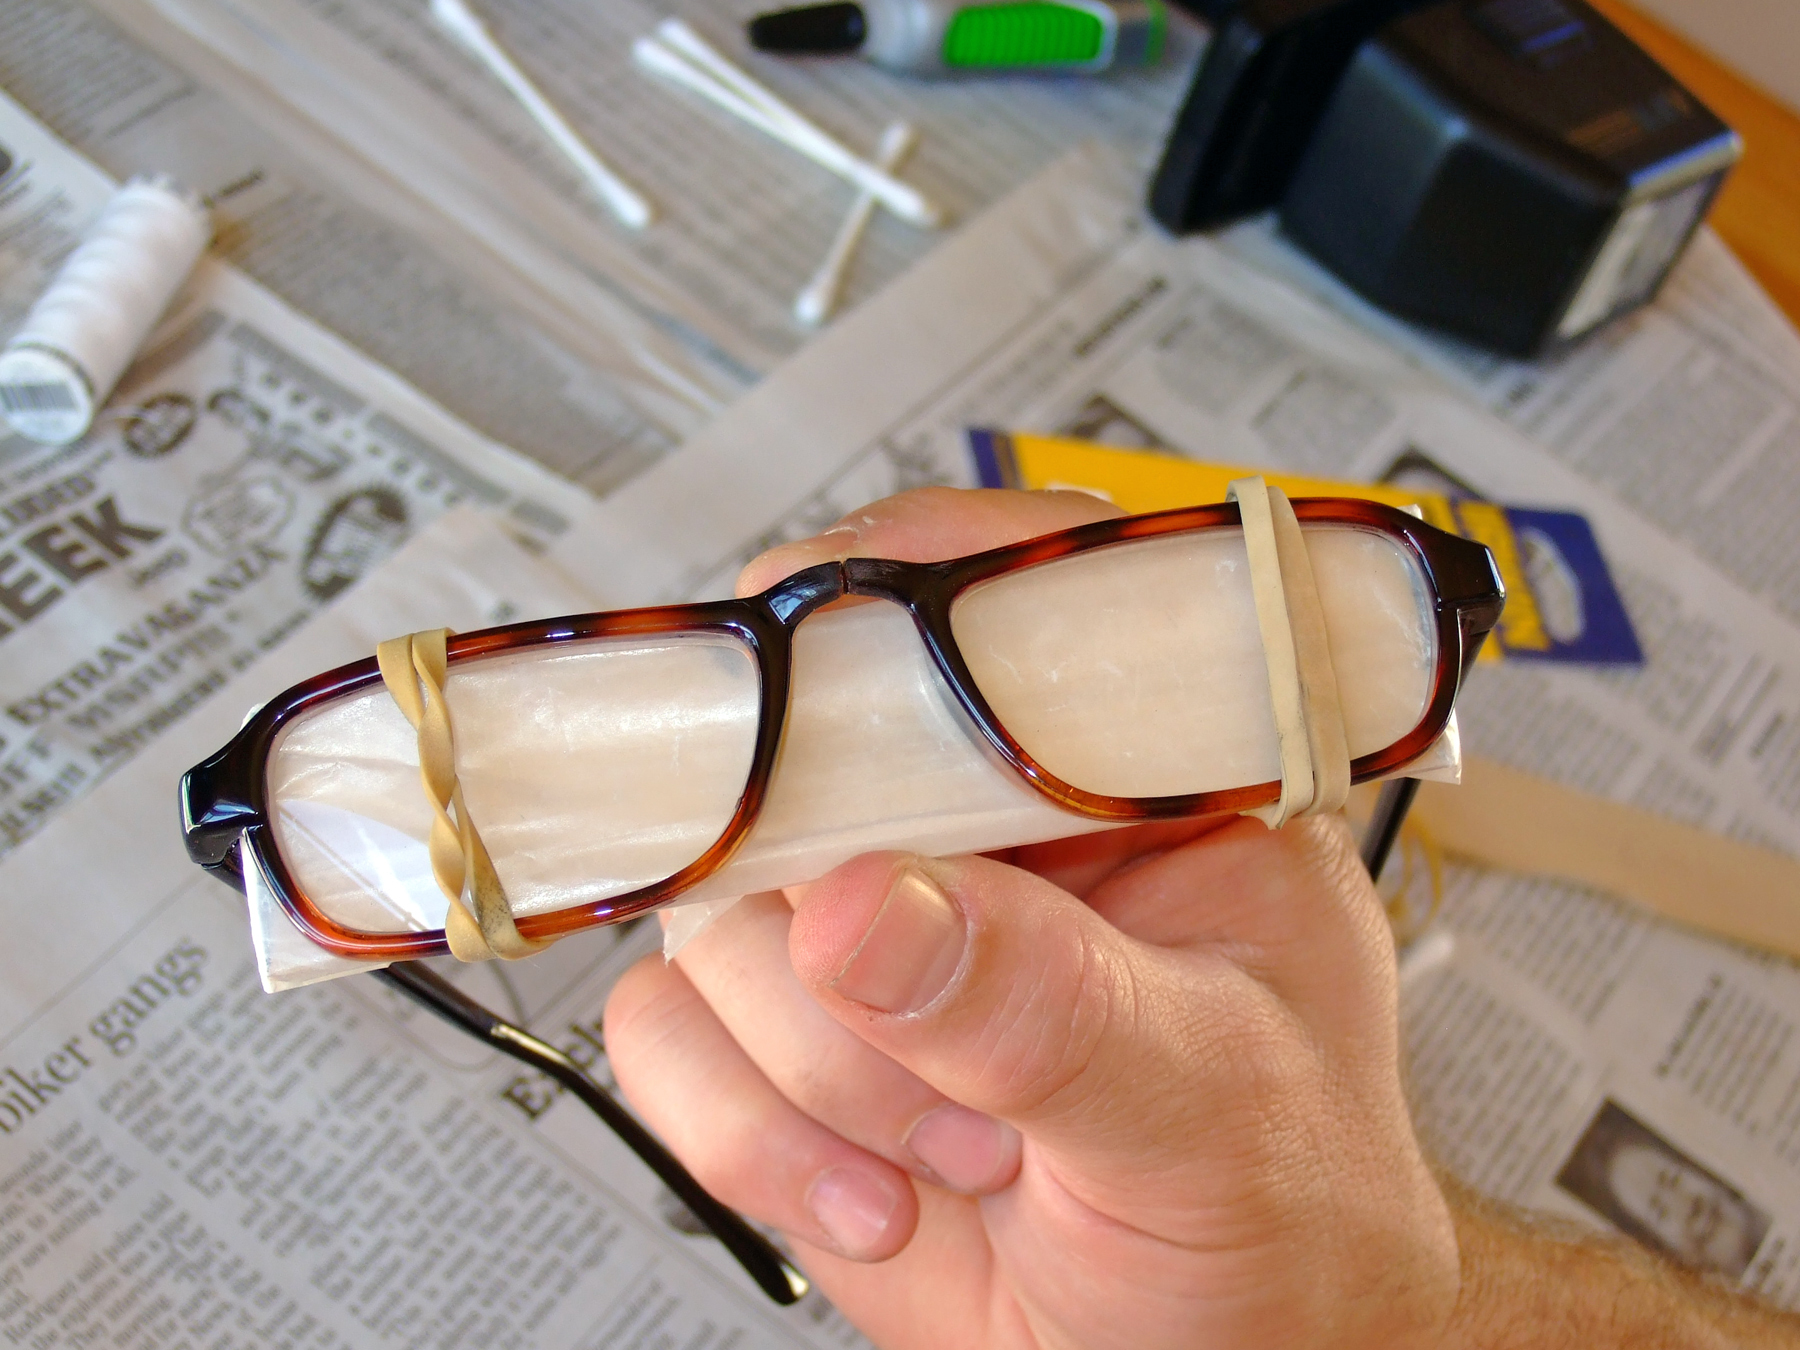
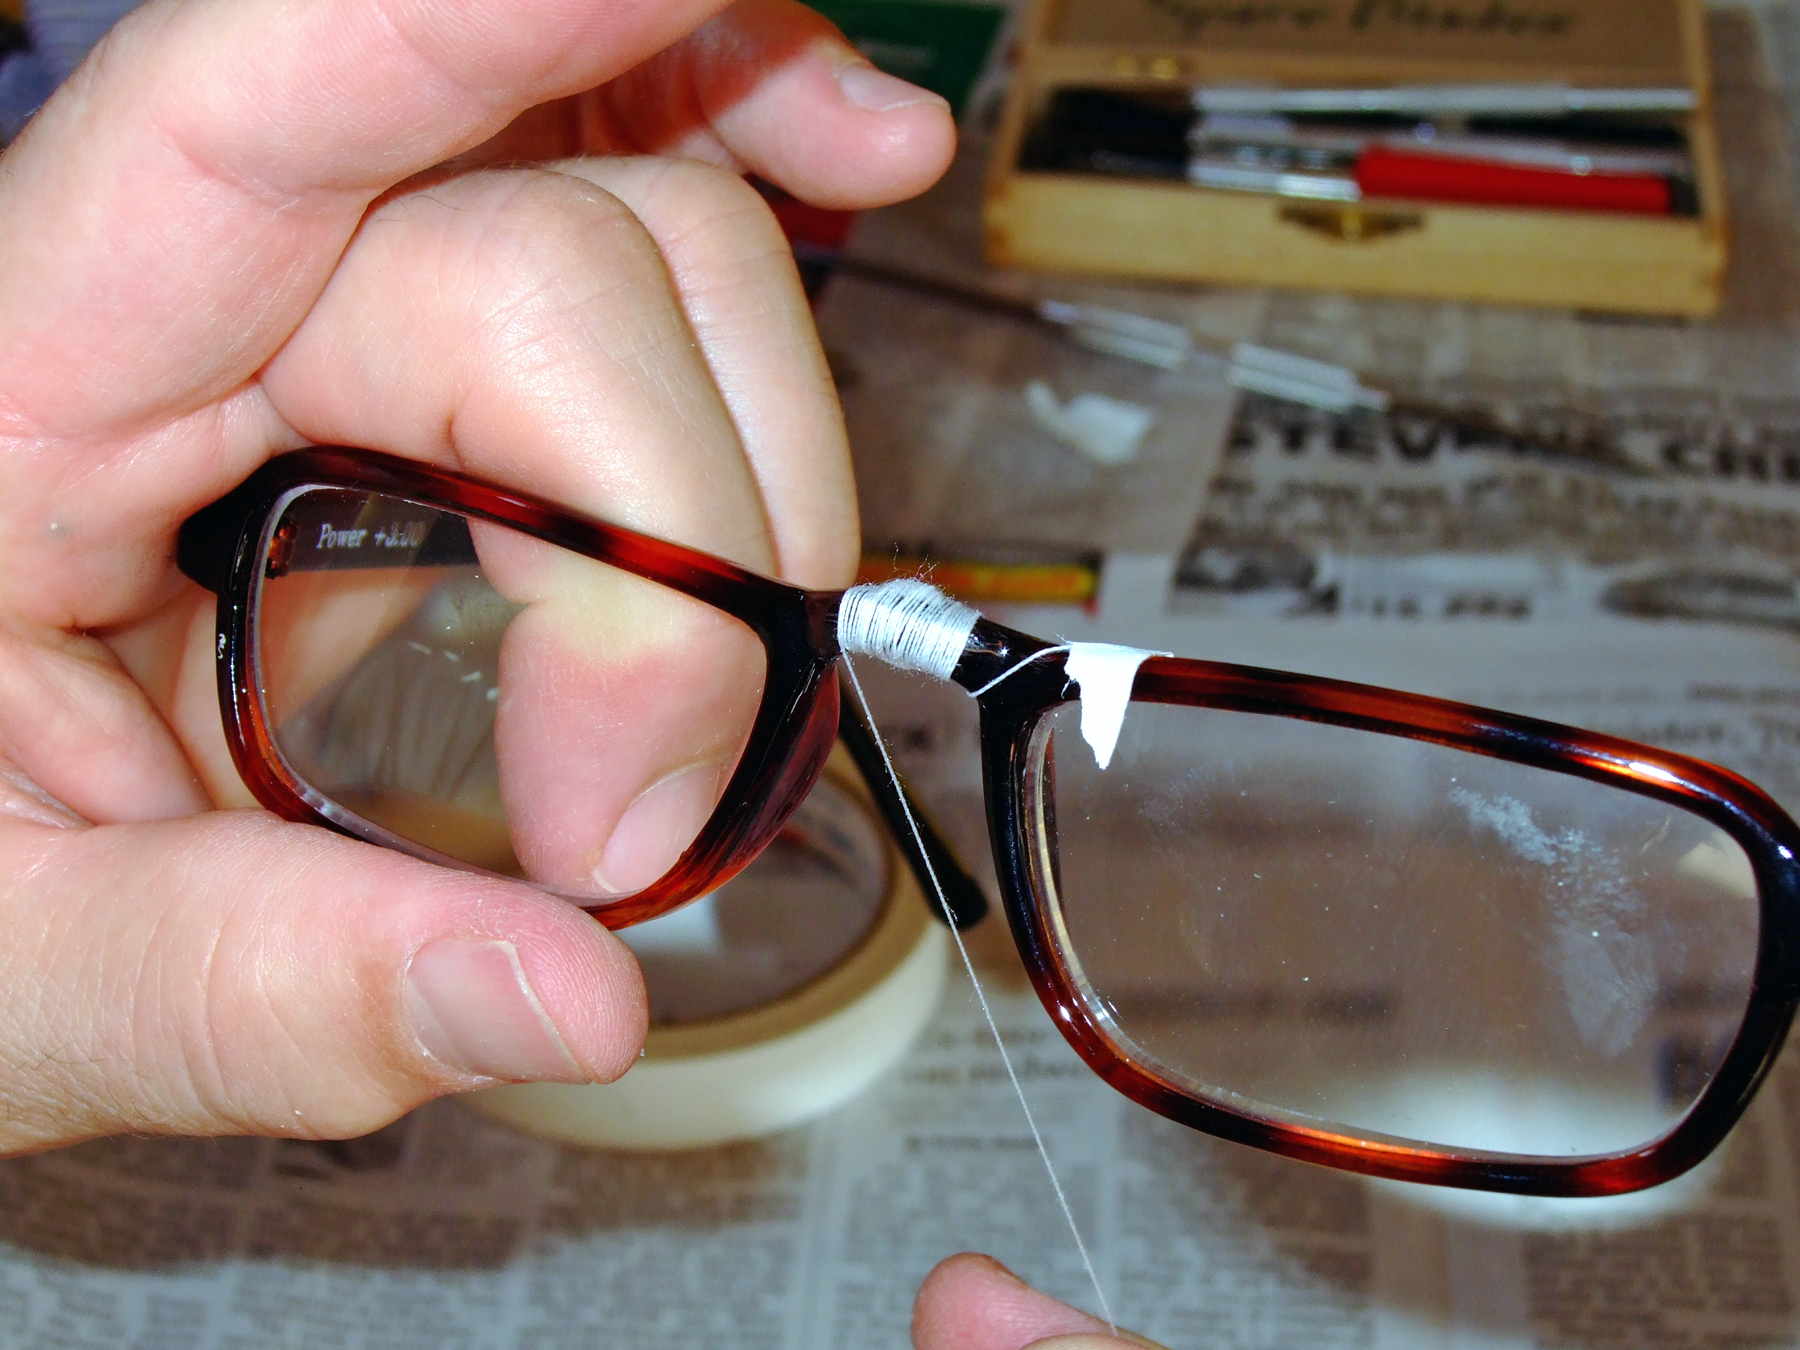
  • Clamping: Hold the parts steady while the glue sets, or the bond will be weakened.
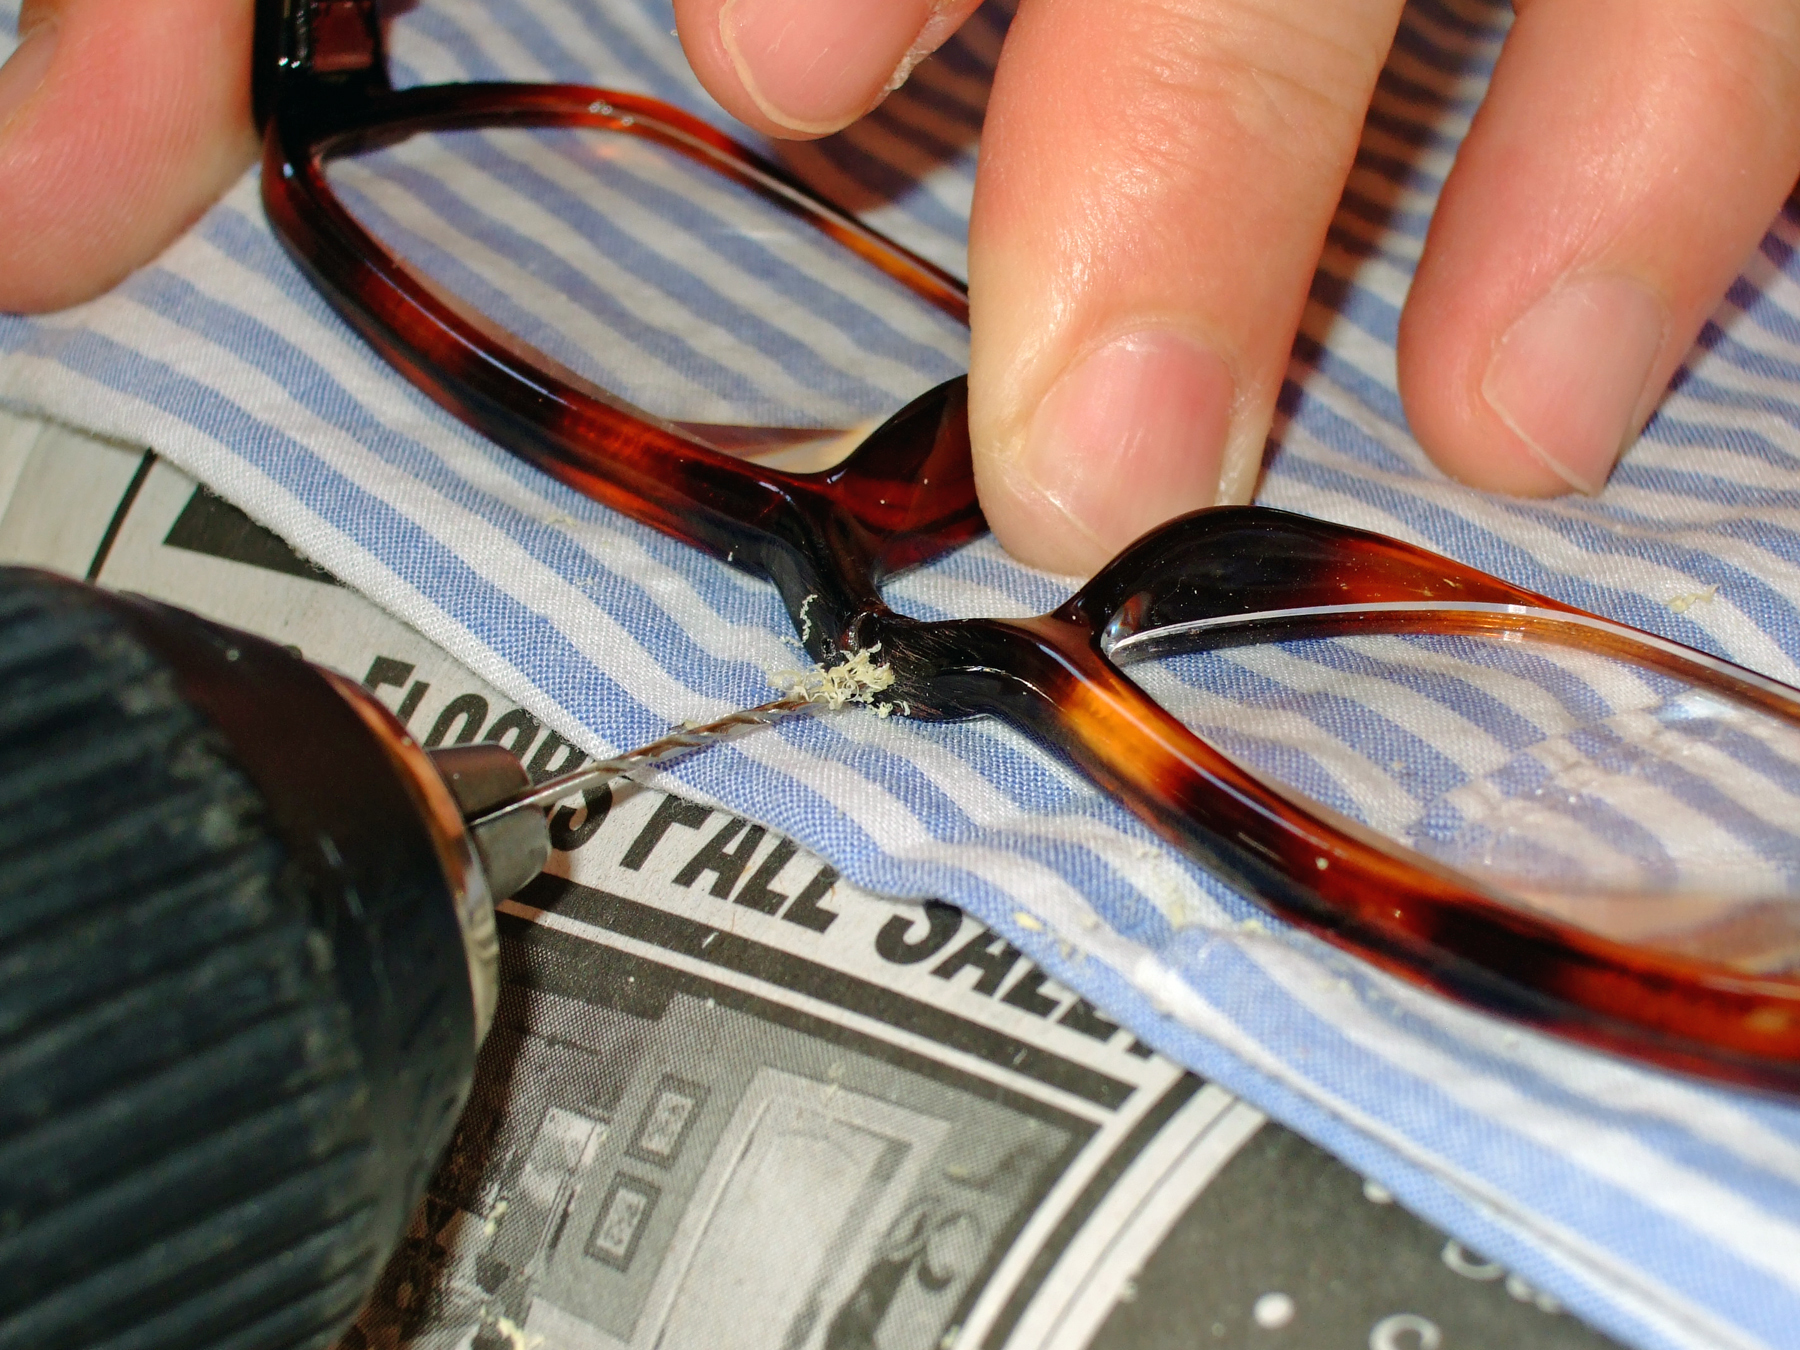
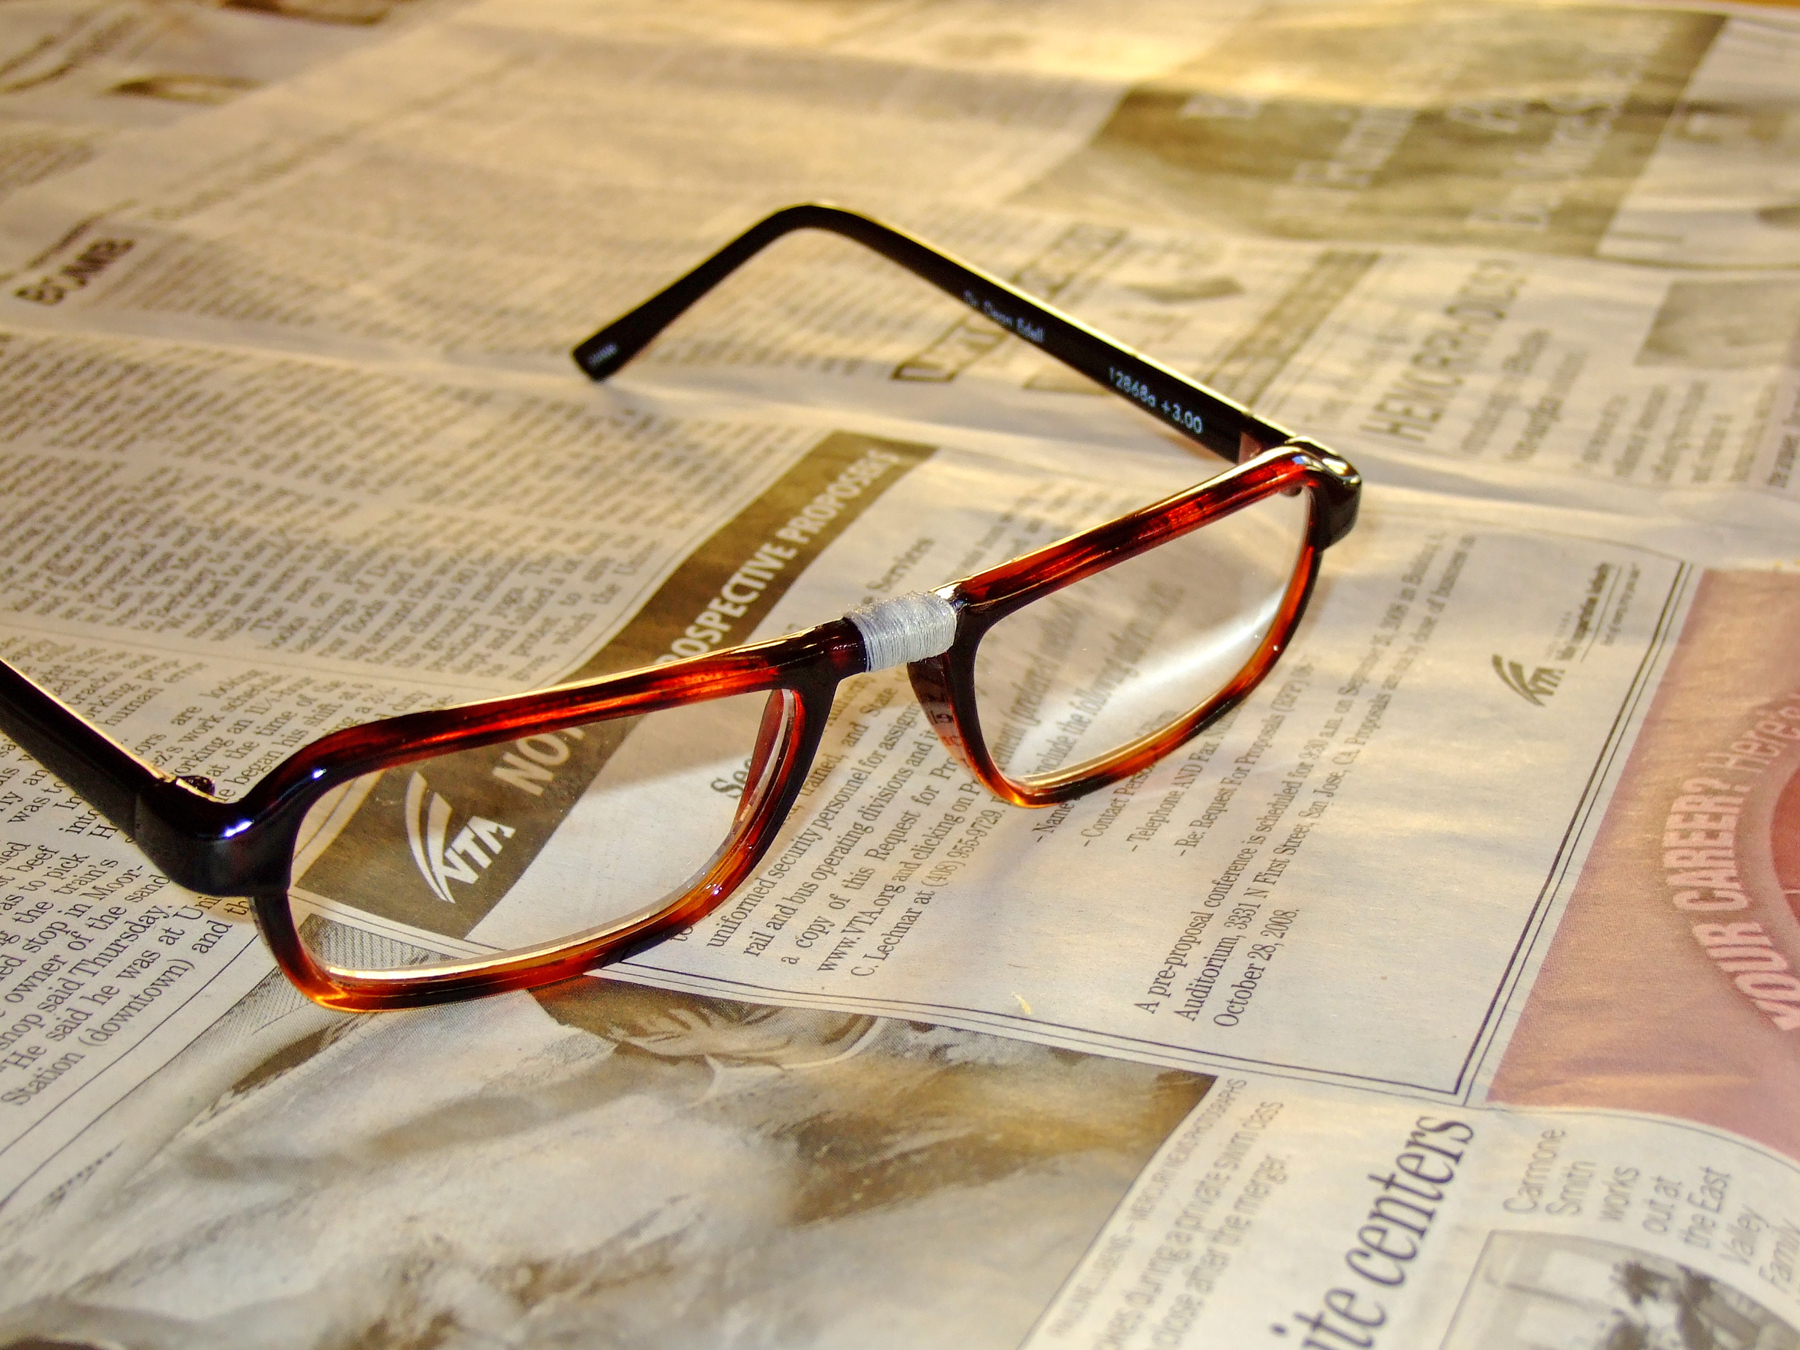
  • Curing: Give the glue time to set. If you strain the bond before it’s fully set, it will be weaker.

So, to sum up: Clean the joint, clamp it firmly, and let the glue cure, and you’ll have good results.

Project Steps

Sand and clean the repair area.

Use sandpaper to de-gloss the area of the repair. Lightly sand the break and scrape it with your hard pointy thing, to remove any loose pieces and to make sure it’s solid.

Use a swab and nail polish remover or rubbing alcohol to scrub the repair area. Get it clean.

Make a clamp, and clamp the glasses.

Cut a piece of stir stick to fit between the temples of your glasses, with some wiggle room. (You’ll want some overlap of the broken ends of the bridge, so you can clamp them together firmly.) Wrap it in wax paper or soft cloth to protect your lenses.

Double over a rubber band and slip it over one end of the stick, then slide the end of one half of your glasses under the rubber band. Repeat for the other half.

Scoot the 2 halves together, being careful not to mar the lenses, until the break is lined up and held snugly together. Small voids between the 2 sides are OK as long as there are some firm points of contact and things are lined up well.

Glue the core joint.

This is the heart of the repair. If you don’t make this joint good and solid, the entire repair is at risk.

Use enough glue so the joint is full, but don’t let any run out. Make sure there are no bubbles, voids, or gaps in the joint. Be neat. Gently roll the side of a cotton swab over the glue to absorb any excess; avoid moving the joint, and blot quickly before it gets tacky.

Gently set the glasses somewhere safe to cure for 1 hour. Keep kids and pets away.

Drill holes for the tension band.

Lay the glasses on a soft cloth and drill a hole on each side of the core joint, from top to bottom. Use a hobby knife to dig out little pilot holes before drilling. Place them far enough apart that the repair has a pleasing elongated shape, but not too far apart, or the band might sag.

Drill slowly and carefully. Don’t stress the core joint or drill holes in your fingers!

Sew the break shut.

The tension band is just thread that matches your glasses wound around the core joint through the holes you just drilled. It gives the repair strength.

Thread a fine needle with 4’–6′ of thread. Tape the loose end to one side of the frame so that you can wrap snugly. Make your wraps snug and tidy. At the same time, be gentle and don’t stress the joint.

Sew as many wraps of thread as you can. When the needle won’t fit through anymore, you’re done — pass the thread across the top and tape it to the opposite side of the frame.

Use glue to fill the drilled holes and soak the thread, making sure there are no air bubbles, then lightly blot with a swab. Let it cure 15 minutes, and then trim the ends, being careful not to nick the tension band.

Wind and glue the first radial wrap.

Tape one end of the thread above a lens, and wrap it carefully and completely across the bridge of the glasses. Tape the far end down to the frame, but don’t trim it. Neat little wraps, all smoothly aligned, are the ideal. A little crisscrossing is unavoidable, but aim to make the overall effect smooth.

Soak the wrap in glue, making sure it penetrates to the layers below, with no bubbles. Blot lightly and let cure 10 minutes.

Wind and glue the reverse

Untape the far end and neatly wind the reverse radial wrap, in the opposite direction. The point is to make the 2 wraps’ threads cross over each other to give the repair stiffness and strength.

Tape the loose end down and soak the final wrap in glue, as before. Let it cure 2 minutes and then trim the ends neatly.

Let it cure!

Set the glasses aside to cure for 24 hours. Skimping on cure time will weaken the repair.

Now your glasses are ready to wear. Enjoy!

Conclusion

This project first appeared in MAKE Volume 20, page 138.