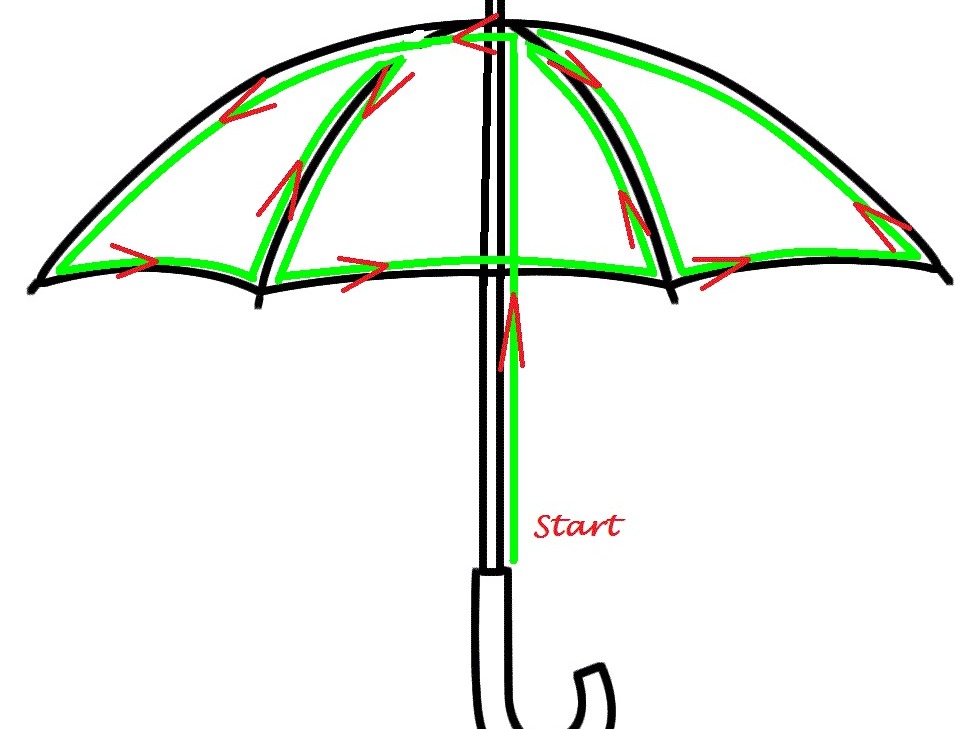
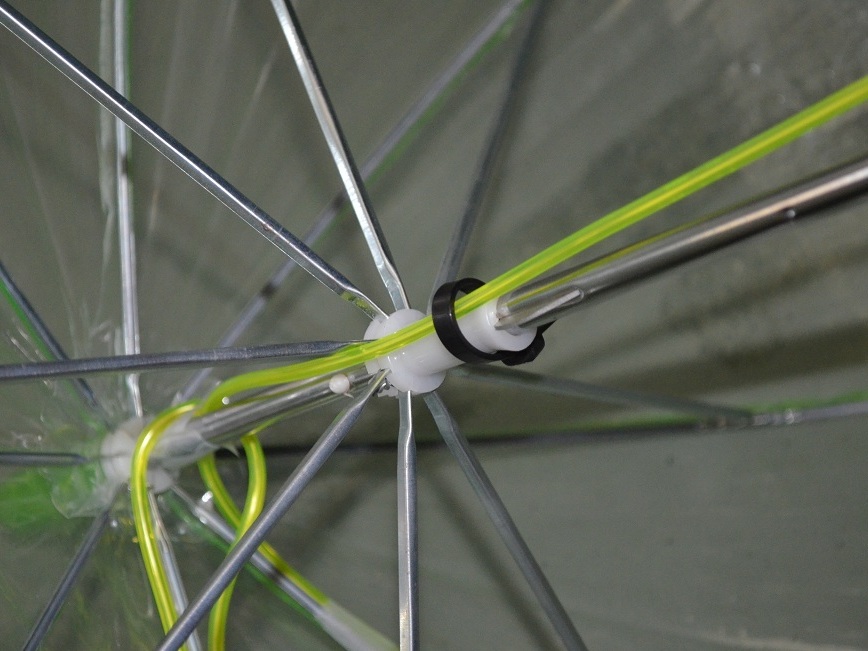
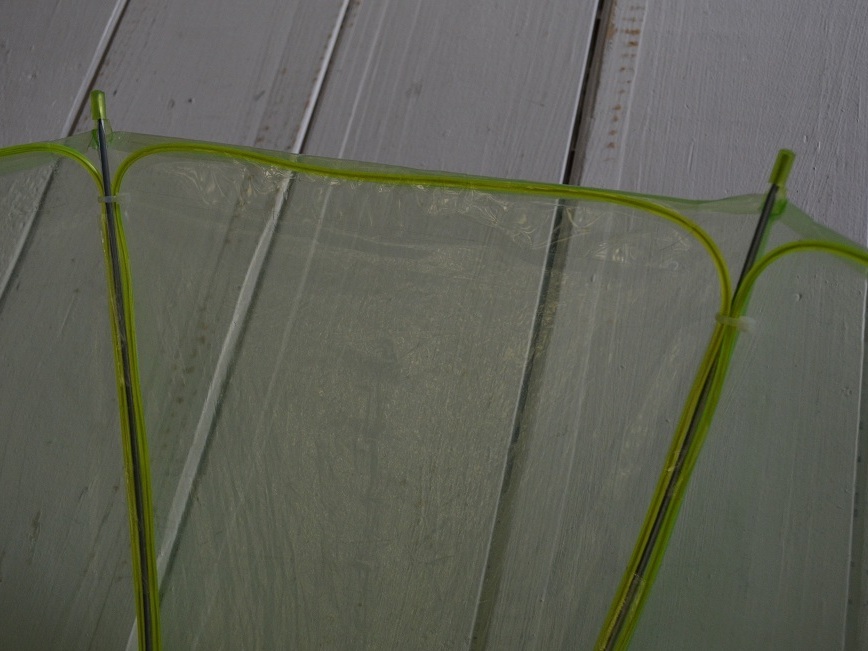
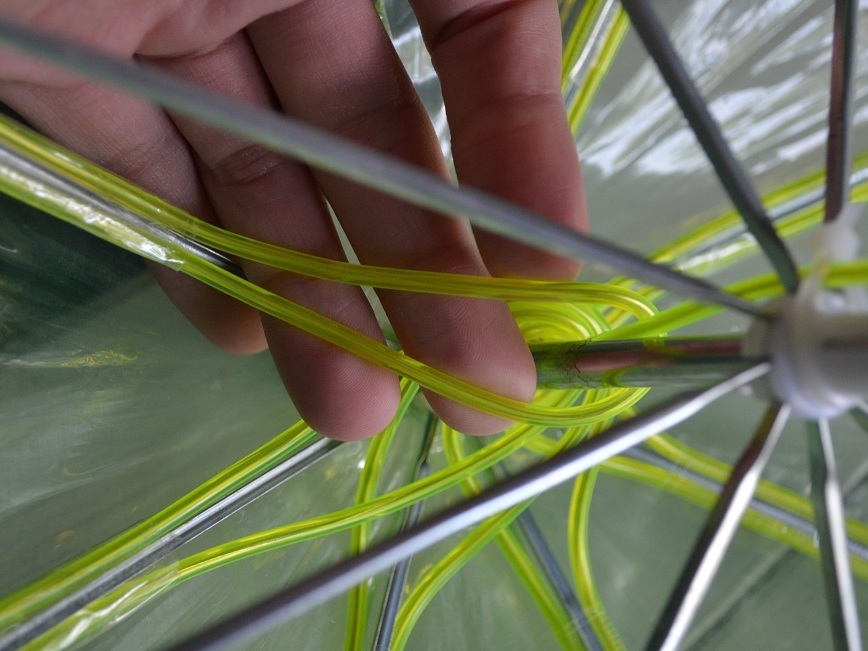
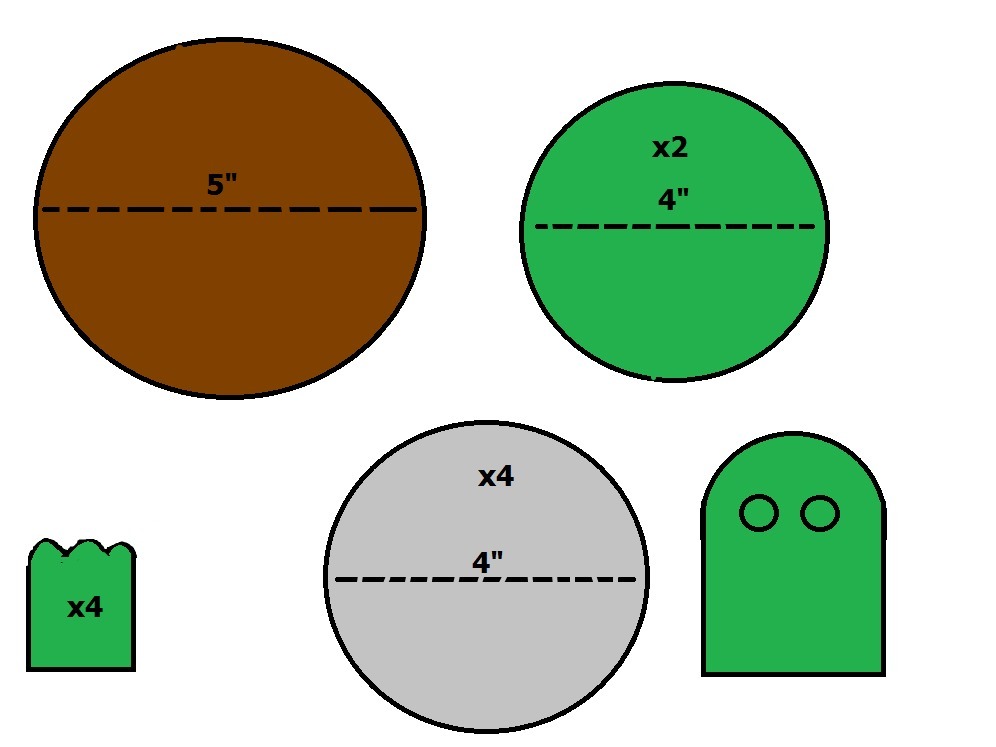
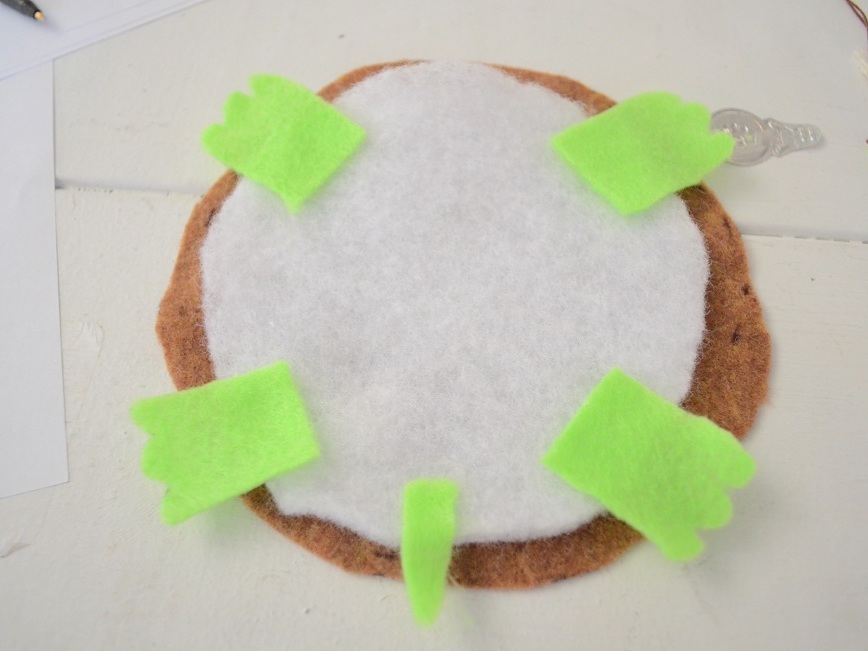
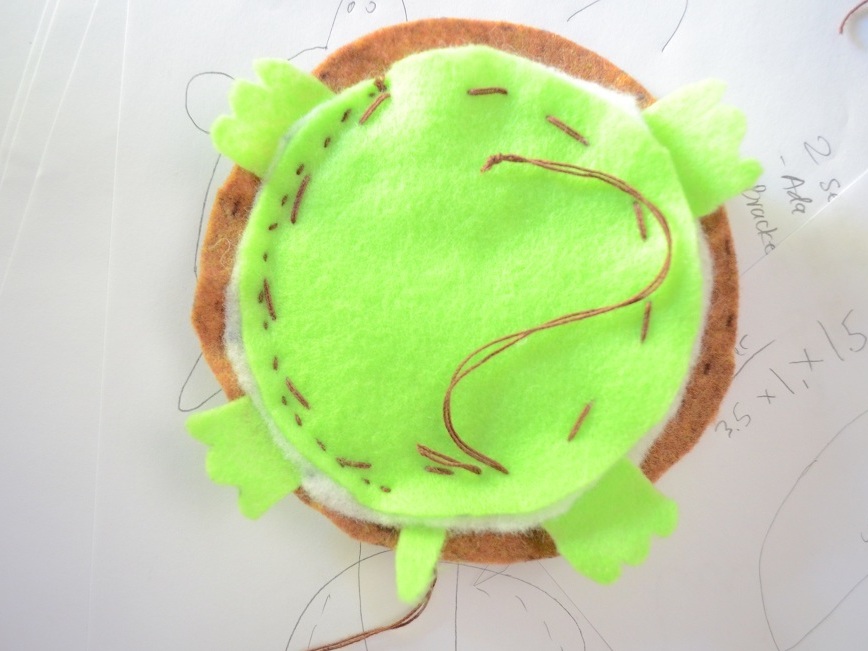
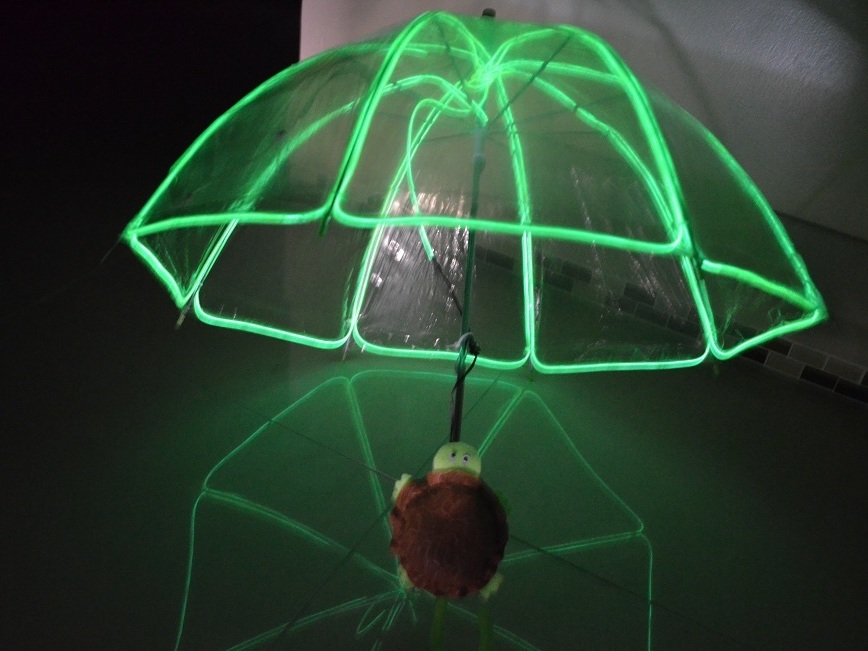
This guide will teach you how to make your very own children’s umbrella with EZ-EL Wire! For more cool ideas check out !

The EZ-EL Wire Kit you will need for this project can be purchased here.

Enter coupon code MAKEumbrella at checkout for a discount!

Project Steps

Here is what the finished product will look like.

If you like tutorials like this, get more inspiration at http://www.ez-el.com/tutorials

Start the wire near the handle of the umbrella, where the inverter will go, and move up the shaft to the neck. At the neck, tape the EL wire to it by wrapping tape around the shaft and wire.

At the end of the spoke, tape the wire across the edge of the umbrella. You can also zip-tie the wire to the spoke for added security and strength.

Tape EL wire down the next spoke over using the same technique as used in Step 2. At the top of the umbrella, loop the wire around the neck. Then tape the EL wire back up the same spoke towards the edge.

Tip: Make sure to leave enough slack in the loop to allow the umbrella to close properly.

Now cut out the shapes for the turtle. Cut out: 5″ brown felt circle, 4″ green felt circle, four 4″ quilt stuffing circles, four legs, and 1 head.

Place the pieces on top of one another in this order: Brown felt, 2 pads of quilt stuffing, legs and tail, 2 more pads of stuffing, and then the green felt.

Sew all the pieces together making sure you sew the legs and tail as well. Also sew the head to the bottom of the turtle’s shell. Make sure to leave a hole near the head large enough for the inverter to slip into the turtle.

Make two slits on the belly of the turtle to allow it to slide onto the handle of the umbrella.

Enjoy your awesome finished umbrella and turtle inverter-hider!