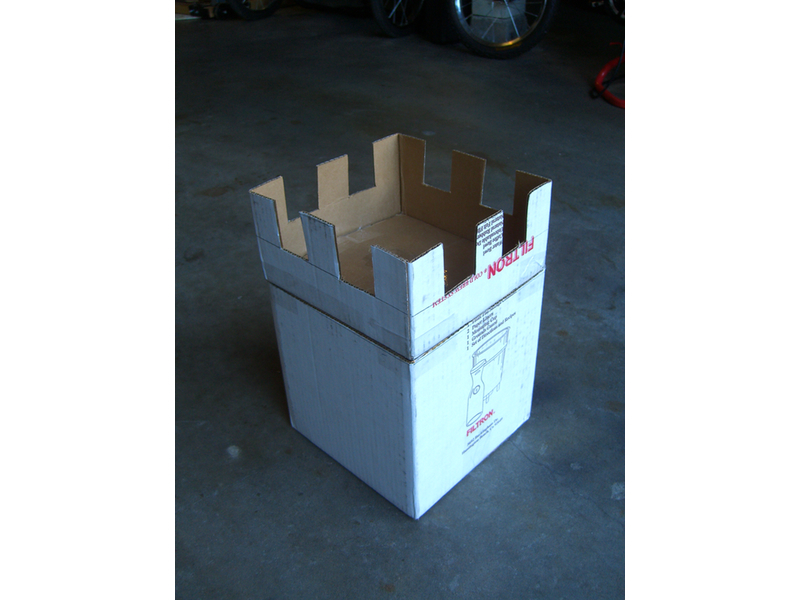
If you have kids, chances are at some point you’ve cut a couple of holes in an upside-down cardboard box and called it a “tunnel” for the train set, or a “house” for a doll family. Although kids seem to love them, these impromptu structures tend to be pretty forgettable. I’ve found that with some inkjet prints and spray adhesive, you can turn these quickie buildings into toys that, while still ephemeral, will hold your child’s attention for months rather than hours.

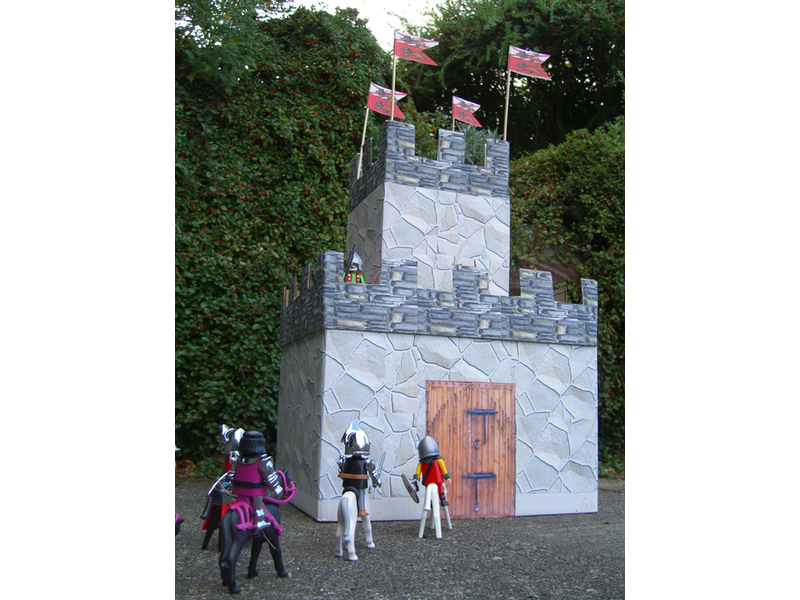
At our house, Playmobil knights and Vikings are all the rage, and while the Playmobil castle and fortress sets are thoughtfully designed and constructed, they are also pretty expensive for what will certainly be a short-lived obsession. By the time our cardboard fortress wears out, we’ll be on to the next thing. If not, we’ll just whip up another one for pennies on the dollar compared to commercial sets.

Project Steps

Making and printing the textures.

Once you decide what you’re going to build, poke around the web for appropriate “texture” images. A couple of handy sites are Mayang’s Free Texture Library and Image*After.

After you find a texture you like, you will probably need to manipulate the file a bit before printing it out to use on your project. At least you’ll need to resize the image to fit your printer paper, but chances are you’ll also want to tile the image to fill the page.

Typical file preparation involves the following steps:

Open a new document in your image-editing software and set document size to 8.5×11 at 150 dpi.

Open your texture image, choose “Select All,” and copy the contents of the image to the clipboard.

Paste the image into your new file. Repeat as many times as necessary to fill the page with the texture, butting the tiles against one another in a neat grid.

Print out as many sheets as you need.

Tip: Printing lighter-colored textures will be easier on your ink cartridges than dark, saturated ones.

There are simple techniques for creating seamless tiled images using Photoshop or other image-editing programs, but simply copying and pasting the image to fill the page usually suffices.

Using 8.5×11 plain paper, our example fortress required about 10 sheets of the main body stone, 6 sheets of the upper stone, and 4 sheets of “wood floor” texture for the deck surfaces. The bigger your building, the more prints you will need.

Build the basic structure.

Our basic fortress is comprised of 2 boxes: a file-archive box as the base, and a smaller box as the tower section. We started by cutting one third off one end of the smaller box and taping the flaps closed.

Form the tower battlements by cutting evenly spaced notches around the open end of the small piece. Invert this section and tape it atop the small box.

If your large box lends itself to this method, then repeat this same procedure to construct the main section of the castle. Our large box was different, having a separate lid, so we used scrap corrugated cardboard to form the main castle battlements.

Adhere the inkjet prints.

Trim your texture printouts to appropriately shaped panels and start decorating your building. Adhere the prints with a spray-on adhesive. For the paper to stick properly, spray the printout and area of the box where you’ll be applying it. First lay the print facedown on a large piece of cardboard to catch the over-spray, and spray a light coat of adhesive all the way to the edges. Then spray the building, using heavy paper or cardboard to protect the rest of the structure. Stick the print to the box and trim any overhang. Continue until it is entirely papered.

Final assembly and finishing touches.

You may decorate parts of your building prior to attaching them together, like areas where sections join or overlap. We finished the main decking and tower siding before taping them together. The rest was then papered, and the door added.

There’s no end to the amount of detailing and add-ons that you can do with this kind of model — if time and imagination permit, go nuts and add windows, walkways, ladders, and drawbridges.

As a finishing touch, we made inkjet flags on bamboo skewers to fly from the tower. To make the flags, print out a strip of 2 flag images, with one flipped horizontally. Apply adhesive to the back of the flag pair and fold it around a bamboo skewer.

Now sit back, and watch as tiny plastic Barbarians lay siege to a Roman stronghold.

Conclusion

This project first appeared in CRAFT Volume 02, pages 142-144.