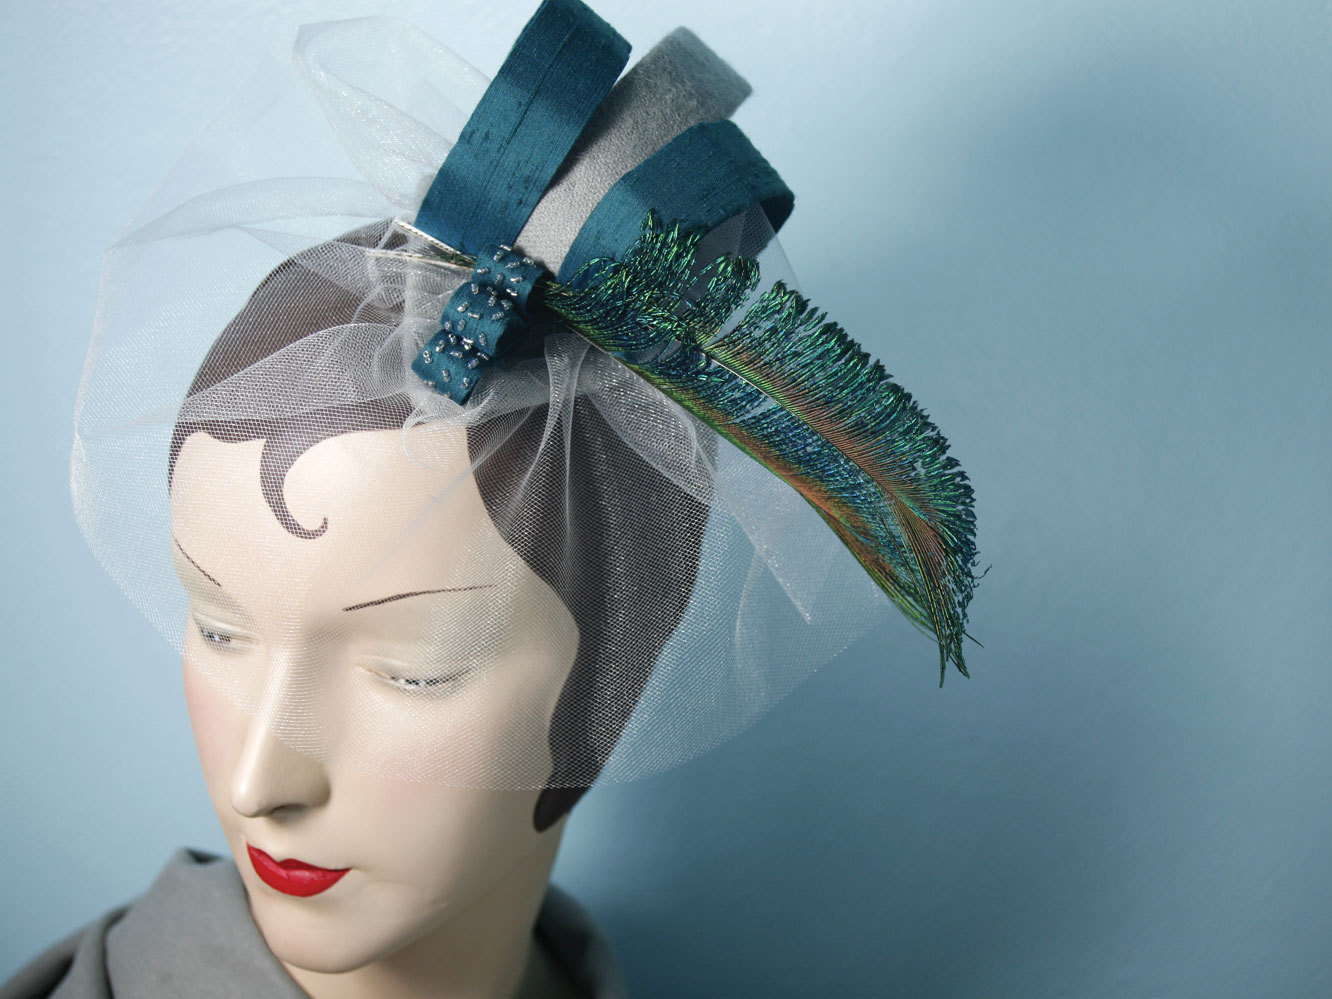
Every girl can add a bit of glamour to her life if she so desires, and it can be done with a fancy cocktail hat. Channel your inner vintage Hollywood starlet and stitch up a little hat that expresses your unique style.

There are many possibilities, from the sexy seductress to the whimsical yet worldly woman — it all depends on which fabrics you choose. Experiment with silk flowers, sequins, buttons, costume jewelry, or anything lightweight that you can stitch on. Be creative and let your inner star shine.

Project Steps

Cut out your fabrics and cover the hat form.

Fabric A: Lay your hat form on the wrong side of the fabric. Using the ruler and fabric marker, mark the fabric 3⁄4″ from the hat form edge, entirely around the fabric form. Cut it out. This piece should be 3⁄4″ larger than the form on all edges. Then cut one 4″×12″ strip.

Fabric B: Cut two 4″×12″ strips and one 2 1⁄2″×17″ strip.

Buckram: Cut three 1″×12″ strips and one 5/8″×17″ strip.

Felt: Trace the hat form shape onto your felt. Cut just inside your tracing. The felt should be 1/8″ smaller than the form on all sides.

Pin fabric A, with the right side facing up, to the outside center of the hat form. Then, with a needle and thread, do a running stitch 1⁄4″ from the edge of the fabric, around the entire piece. Gently pull the thread so that the fabric tautly wraps around to the underside of the form.

Once you’ve stitched around the entire piece, tie a knot. Then go around the form again, whipstitching the fabric’s raw edges to the underside of the form, being careful not to stitch through the top outside layer of fabric.

Cover the buckram with corresponding lengths of fabric strips.

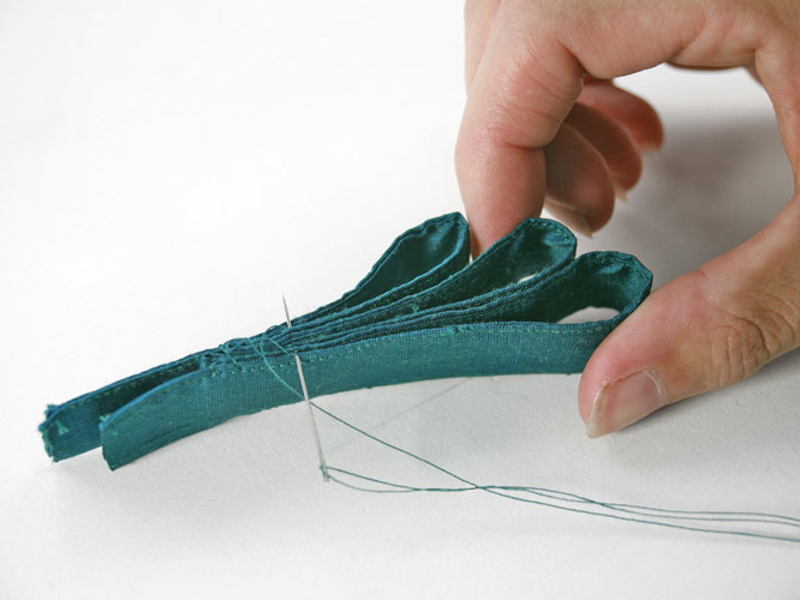
With your iron, press each fabric strip (1 of fabric A and 3 of fabric B) in half lengthwise, then open it up and fold both of the raw edges in to meet at the center crease, and press.

Insert a buckram strip under one of the raw edges of each fabric strip, then fold each strip in half again, along its original crease, and press. Slipstitch along the edge of each strip to enclose the buckram and the raw edges.

Embellish the covered hat form.

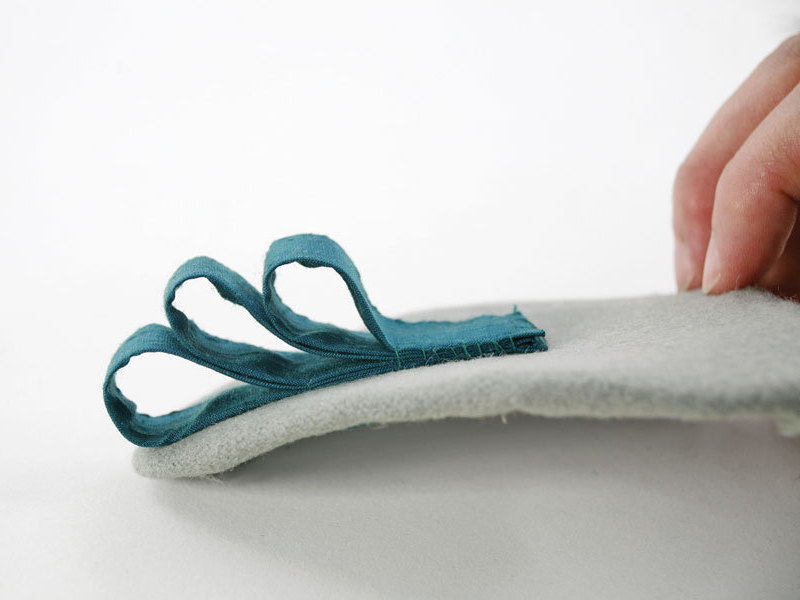
This is the fun part, and there are no rules. With the covered strips you can create rings and loops on the form. Once you find a pleasing design, stitch it to the form, through all the layers.

With the strips in place, you can now play around with the tulle. Remember, it’s up to you — you can have the tulle come down to cover part of your face, or tie it into a big bow, whatever you like. When you get the tulle in place, tack it to the hat, using small, hidden stitches. Place and tack the feathers in position and stitch some beads on for a bit of sparkle.

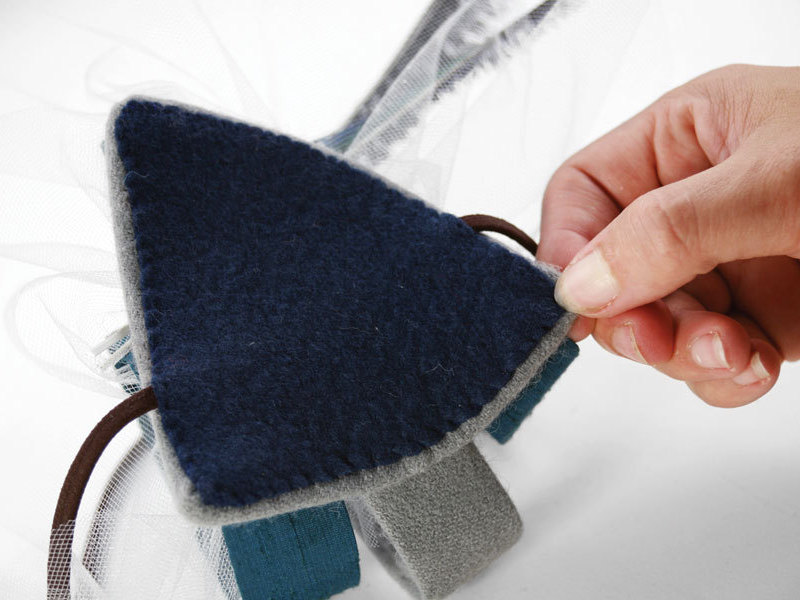
Attach headband and felt to the underside of the hat.

To cover up all the stitching on the underside of your hat, sandwich the headband between the hat and the felt piece. Then whipstitch the felt edges to your hat and tack your headband in place.

Presto! You’ve got a glamorous little accessory to add to your wardrobe.

Conclusion

This project first appeared in CRAFT Volume 10, pages 64-66.