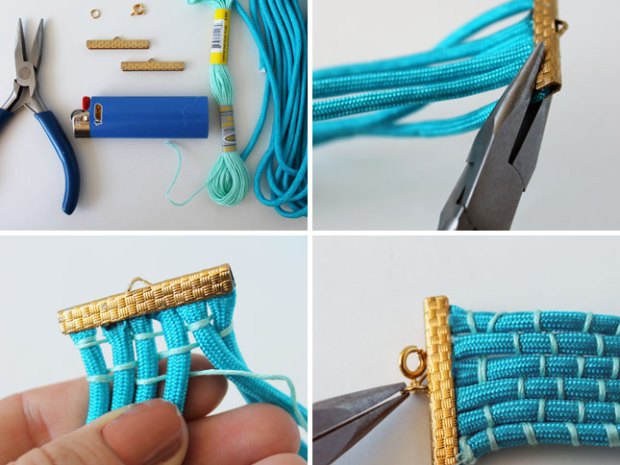
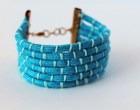
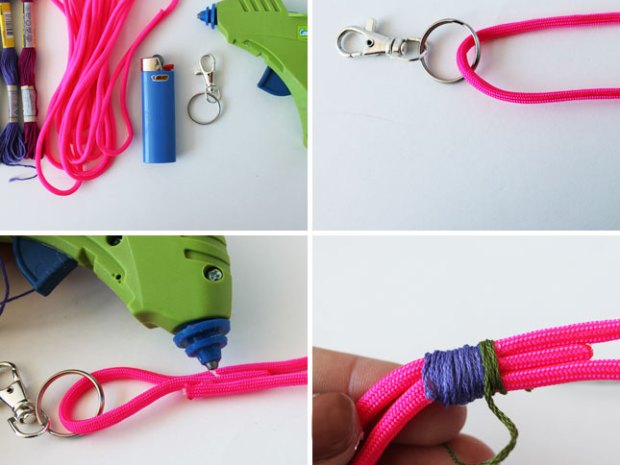
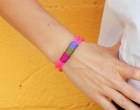
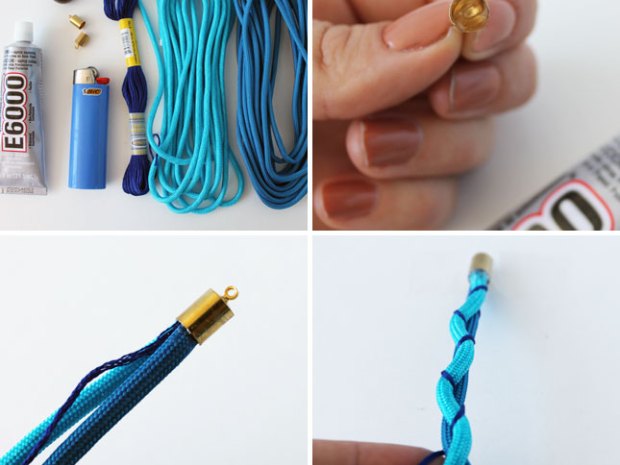
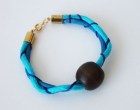
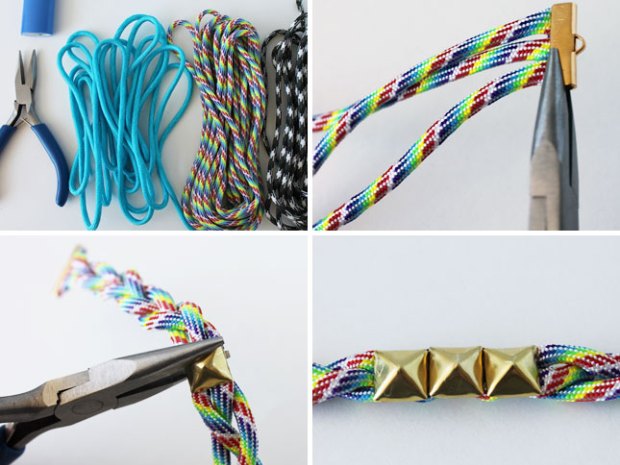
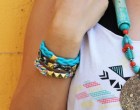
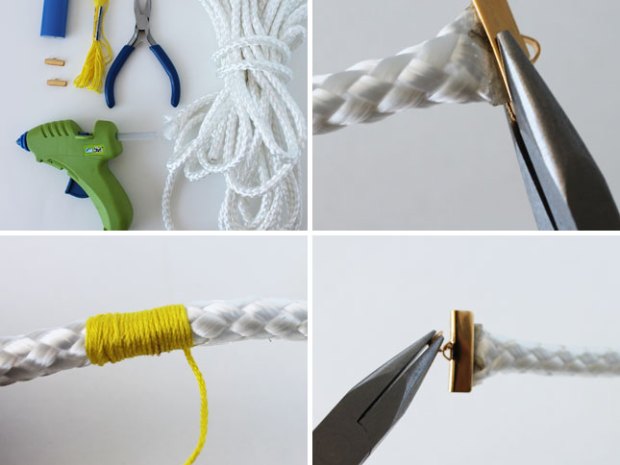
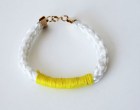
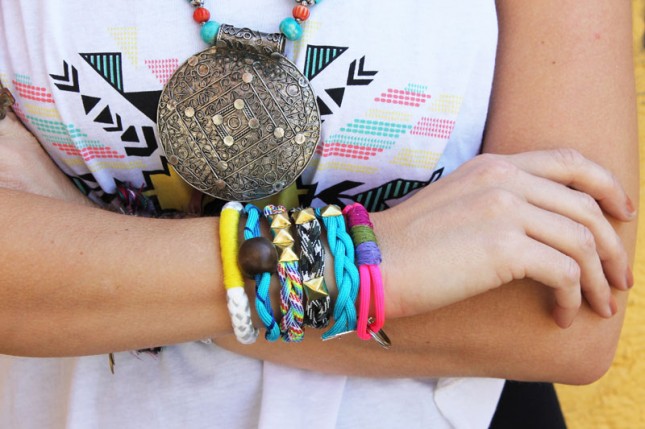
It’s summer and it makes sense that we return to a summer camp classic: the friendship bracelet. This time, we’re taking a chic, stacked, and studded approach that we think you’ll love.

Rope-2-Main-645x429

For all of these, you’ll need to use a lighter to seal the end of the rope after you cut it. So ask for help from an adult (if you’re not one yourself!)

Now, onto the bracelets!

Project Steps

Woven Cuff

cutting the rope and securing it to the cuff

finished product

In this tutorial, you’ll weave rope together to create a solid cuff. We went with two blue colors, but you could definitely get more contrast going if you like.

Cut six pieces of rope so that they fit around your wrist. Secure ends in a long cord end. Tie a piece of embroidery floss to the top of one piece of rope and start weaving in and out and across the pieces of rope. Once you get to the end, secure with another cord end and add a clasp.

Key Chain Loop

Using Rope, embroidery floss and old keychain to make the rope braceless

Finished keychain rope bracelet
For this one, we used an old keychain, hot pink rope, and embroidery floss.

Loop your rope through the keychain ring and then cross over so that there’s another loop at the other end. Glue to secure. Over the place where you glued, wrap embroidery floss. Clasp with the other end of the keychain.

Braided Bead Bracelet

Braiding two pieces of rope and embroidery floss with bead to make a bracelet

Finished Braided bead bracelet
This one is a braided number, made to look a little wonky on purpose by using two pieces of rope and 1 piece of embroidery floss.

Secure your three pieces in a cord end using glue. Braid! Then string on a bead – it’s best to use a bead that fits snugly on the bracelet so it doesn’t move around.

Studded Stack

Braiding three ropes and then adding studs

Finished studded stack rope bracelet
When it comes to studs, we always like to do a stack.

Secure three pieces of rope with a cord end. Braid and secure at the other end. Then add as many studs as you like. Repeat for as many bracelets as you’re making.

Wrapped Rope

Making the wrapped rope bracelet

Finished wrapped rope bracelet
This one is so simple, it takes less than 2 minutes to make.

Take a chunky piece of white rope and secure one end with a cord end. Add a dab of hot glue and wrap your embroidery floss around an inch or two in the middle of the rope. Secure at the other end with a cord end and you’re done.

Bonus: Corded iPhone Charger

Corded iPhone charger assembly
Select four colors of embroidery floss and cut to about four times the length of your cord. Tie on one end. Hold down the tied off end and start wrapping. Keep going until you reach the end. If you run out of floss before you’re done, simply tie on another set of four and keep wrapping. Tie a knot at the end and braid the remaining floss. We use the braided part to tie the cord together for easy storage.