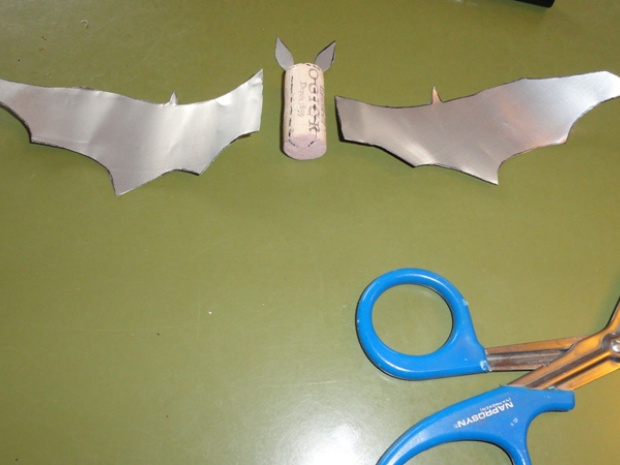
What do you do with all of those left over wine corks and beer cans from a summer of fun? Turn them into Halloween bats that fly around your house for your special party!
make_halloweenbadgeV2 (1)
This tutorial will show you how how to make wings and ears for simple bats that can be combined with wine bottle corks and hung with fishing line from the ceiling.

Cork and Aluminum can Halloween Bats

Project Steps

Obtain suitable quantity of wine corks and empty aluminum cans.

Disclaimer: Not responsible for any alcohol related injuries incurred from this step.

You will need one cork per bat and one can per set of bat wings if using the small wing and ear pattern shown here. Scale pattern from 100 DPI to 300 DPI to fit cut out can.

Cut the top and bottom off of a aluminum can as shown in the photo.

Disclaimer: I am not responsible for any injuries sustained if you do not wear leather gloves while handling cut pieces of aluminum. Do as I say and not as I do in the following steps.

After cutting off the top, cut down the side of the can to the bottom and then cut off the bottom without getting any of the curved bottom or top.

Print pattern out on paper and cut out wing patterns.

The dotted lines are the fold/bend lines. With a permanent marker, trace the pattern onto the unrolled aluminum can

Cut out wings and ears from flattened can.

Use drawing of cork cuts as a guide for the next step. For some bats I put slots on opposite sides of the cork so the wings are spread out more.

Use sharp knife to cut slots in the cork for inserting the wings and ears.

Picture showing slots being cut for wings

Picture showing angle cut for ears.

Using the edge of a table other surface with a sharp edge.

Fold, crimp the wings and ears with your finger pressing on the edge as per the dotted lines in the template. You do not need to bend the wings much to get the effect and make the wings stiffer. First fold of aluminum wing

Second fold of a wing

Third Fold of wing

Continue folding/crimping the aluminum wing to increase stiffness

Fourth fold of wing

Fifth fold of wing

Sixth fold of Wing

Continue folding/crimping aluminum wings

Continue adjusting until you get the wing looking how you like it.

Insert wings and ears into the cork.

I have not needed to glue them in as the cork holds them tight enough with just friction. Your call if you want to glue them.

Spray paint the assembly with flat black paint. Let dry.

Add puff paint eyes as per the drawing. Use the needle to make a hole on top of bat between the wings to press/ insert stiff fishing line. You may have to adjust front to back position of the fishing line to make the angle/balance of the bat in flight.

Sometimes I tie the line to the finger on the wing to make the bat swoop in flight. Hang them at different heights. I hung them in an arc from my front door to a door leaving the room.

That is it! I had a lot of fun preparing for the build and the room was a great hit at our annual party. Enjoy!

Last note: If you want to make some creepier bats, use this pattern that uses one aluminum can per wing so two cans are needed for one bat. Scale the Pattern from 100 DPI to 300 DPI to fit can.