A Hawaiian quilt is one of Hawaii’s cherished heirlooms, passed down through generations of families to tell the story of the quilter, the designer, and the receiver. Traditional designs include papayas, breadfruit, ti leaves, and taro roots, but can be anything that illustrates a love for nature, traditions, legends, or events.

I recommend that you explain your intentions to the person you’re making the quilt for, because we believe that if the receiver experiences the quilting process with you, they know that the quilt was designed with love, created with love, and given with love.

I remember during family gatherings and celebrations how my mother would carefully remove all of the quilts from the closet and place them gently on the beds in each bedroom. She would softly touch and sometimes hug the quilts as if they possessed some kind of magical power and spirit.

One day I asked her why she always displayed the quilts during these gatherings, and she told me that all of the quilts we owned were made by someone special, both family members and friends. She said during the family gatherings the quilts are displayed so that when people look at the quilt they not only admire the quilt, but they always remember the person who made it, making that person a part of the celebration.

She taught me that pictures are not the only form of remembrance — so are the quilts. One day when I’m long gone from this world and my quilt is displayed in the home, I too will be remembered.

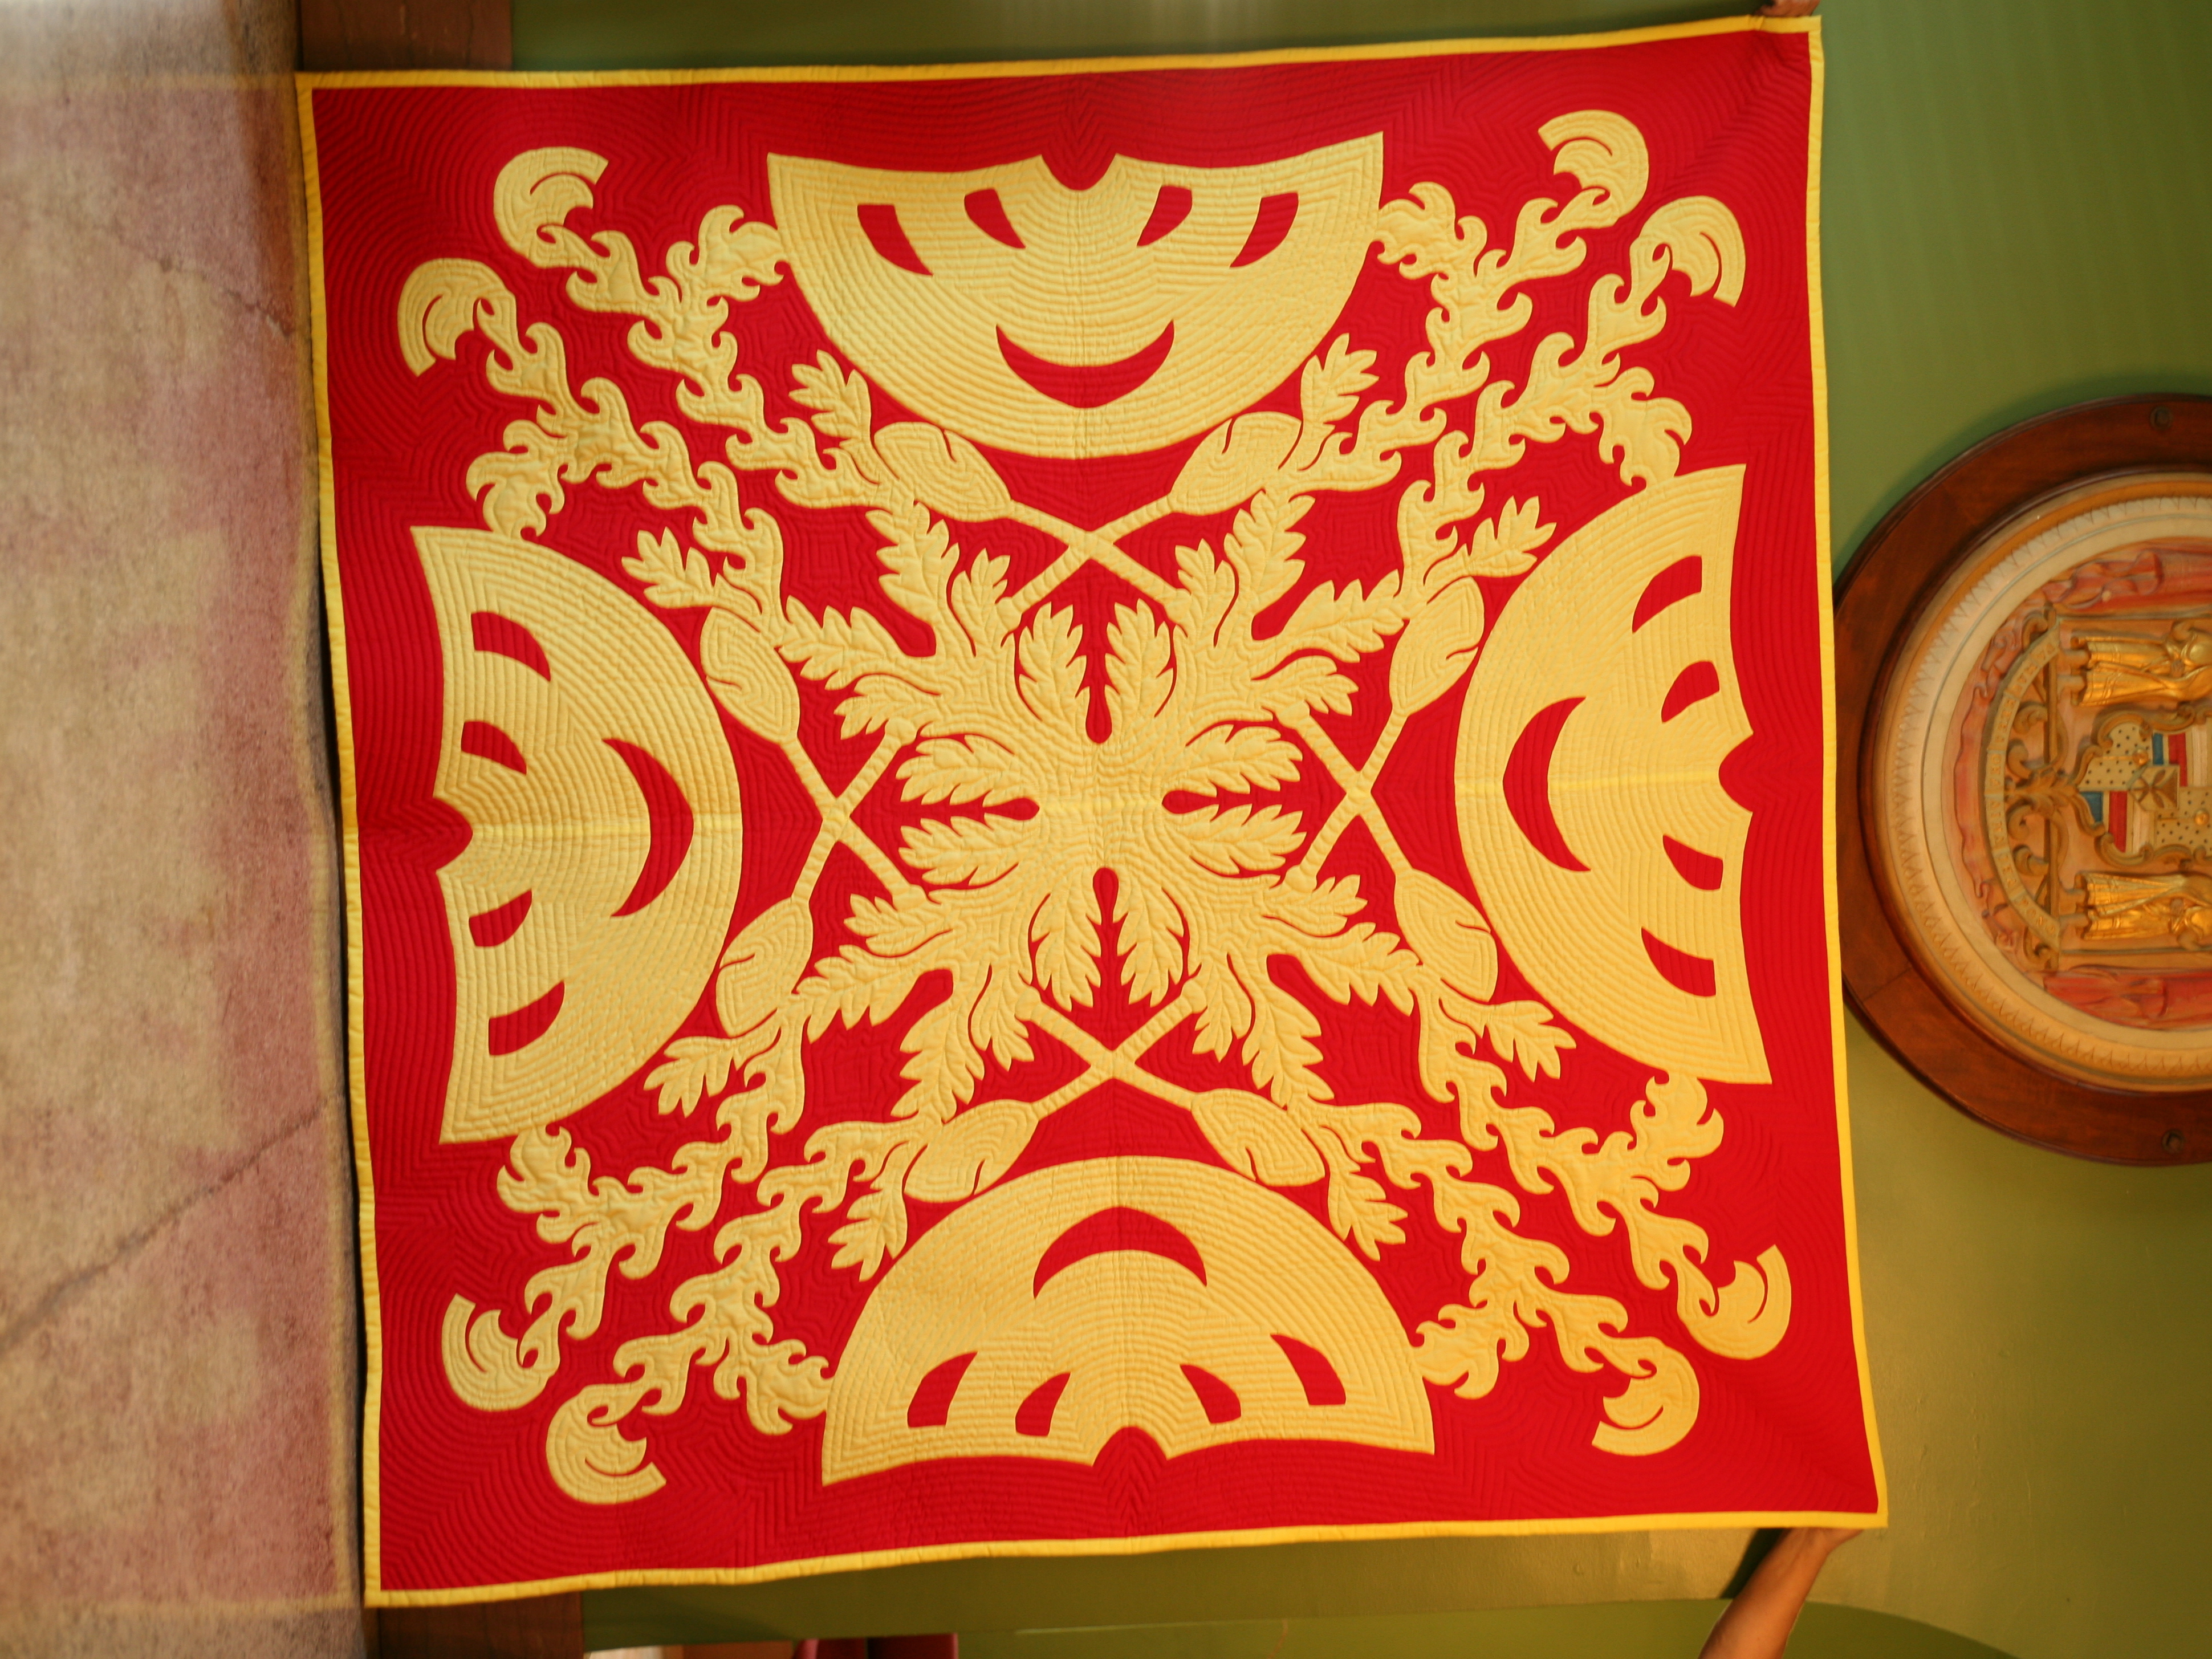
The beautiful quilt pictured here was quilted and appliquéd by Doris Shibuya and designed by John Serrao. Design: The royal Symbols of the first King of Unified Hawaii.

Project Steps

Create your design.

Join and tape together your paper to the exact size of the quilt.

The design can be a favorite flower, fruit, tradition, or even an event that you would like to record on a Hawaiian quilt.

Fold the joined paper to its 1 fold (fold it in half 3 times), then draw your design on the folded paper.

Once you’re completely satisfied, cut out the completed design and set your “template” aside. You’ll be using this pattern in a short while to cut out your fabric.

Don’t design to the complete outside edge of the paper — leave at least 4″ between the design and the edge of the paper for binding, and at least 5 rows of echo quilting.

Sew the seams.

Because the quilt is larger than the 45″ width material, you must join the fabric using 1⁄4″ seams before cutting out your design. You’ll need to do this for the design fabric, the design backing, and also the quilt backing.

For those making the queen-size quilt, cut 6 yards of fabric in half and join the 2 panels side by side. This will give you a 90″×90″ square fabric. And for those wishing to make a king-size quilt, you’ll need 9 yards of fabric cut into 3 panels 108″ long. Cut 1 panel down the center and it will give you two 22″ wide panels. Then simply join one 22″ panel in the middle of the two 45″ panels. This will make a 112″×112″ square fabric to make a king-size quilt.

Now iron open the seams.

Pin the design.

After the material is joined, fold it to its symmetrical 1 fold (as you did to the paper). Make sure to fold with the seam out and the correct side of the fabric in.

Place your folded paper template on top of the folded fabric and pin it down. Some quilters like to pin the paper just inside the solid lines following the pattern. This makes cutting the design easier.

Cut the design.

After pinning the pattern to the folded material, it’s time to cut out the design. You’ll be cutting through all 8 layers of material, so use sharp scissors and remember to cut out all of the solid lines.

Some quilters like to place their material on a large piece of cardboard, so instead of moving their bodies they can easily move the cardboard into position for cutting.

Lay out the design.

After the design has been completely cut out, remove all the pins — you are now ready to open your design on its backing fabric.

Open the pattern from its eighth design to its quarter design. Place the quarter design in the center of the backing fabric. Start laying out the quilt from its center to its outside branches.

After the quarter design has been set, begin to open the fabric to its half design.

Be sure to lay out your fabric seam on seam. The seam on your design should match the seam on your backing fabric.

From the half design, open the pattern completely and begin to pin. Remember to pin the center of the design first, then work to the outside edge of the design, carefully pinning and laying the fabric flat. Pin with the sharp point of the pin facing out.

Baste the design.

After the design is completely laid out and pinned, carefully baste it 1⁄4″ in from the outside edge of the design. This will help you with tucking and sewing during the appliqué stage. Start from the center and work out.

Once the design is basted onto its backing fabric, remove all the pins.

Appliqué the design.

With your needle, tuck about 1/8″ of the raw edge of your design under the basting line. Place your first stitch between your top and bottom fabric, between the folded raw edges, and hide your knot. Your thread should now be on the folded edge of your top fabric.

You’ll tuck 4-6″ of your design at a time, stitch, tuck, etc. Until the design is completely stitched.

Slowly, using small stitches, sew the bottom piece of fabric to the top piece. Never letting go of your needle, place the point of your needle on the bottom fabric right next to the folded raw edge, push your needle through the bottom fabric, and bring your needle back up through the bottom fabric and on the folded edge of the top fabric, about 1/8″ from the last stitch. Push your needle and thread through. You should have a straight stitch on top of your appliqué design and a slanted stitch on the back.

Continue this process until the design is completely appliquéd to the backing fabric with intricate stitches. Once it’s complete, remove the basting stitches.

Join the batting.

Sometimes the batting is too small for a large quilt. If this is the case you must join the batting together. Panel the batting the same way you paneled your fabric. Join the batting by using a whipstitch, sewing the panels together side by side, not on top of each other.

Prepare the quilt.

Center your designed top fabric on the batting and back material. Baste all 3 layers together.

Starting from the center, grid out and then baste the outside edge. Each grid should be about 1-2 hand spans apart. Now you’re ready to quilt.

Quilt your quilt.

Place one hand under the quilting hoop and use your index or center finger to make a hill where you will be quilting. This bottom hand and finger is used to stop the needle from coming too far out the back of the quilt. Your top hand and fingers will do the actual quilting stitch.

Place a thimble on the index finger of your top hand. Hold the needle using your thumb and middle finger with the thimble finger on top of the needle. You only need 3 fingers to quilt. Place your wrist on the top of the hoop and position your fingers to make your quilting stitch.

Hawaiian quilts are always made with a hoop or quilting stand. When using a hoop, remember to check the back and smooth out the fabric — this is done to prevent puckering on the back of the quilt.

Place the needle in front of the last stitch, then slowly push the needle through all 3 layers of fabric and batting. As soon as the needle touches the bottom finger, release your top fingers from the needle, except for the thimble finger. Rock the needle with the thimble finger away from you until the needle is almost horizontal, then slowly push the needle back up through the top of the quilt. Use your top hand thumb to help make the stitch smaller by placing your thumb in front of the needle as it comes through the bottom fabric.

Always quilt the center of your quilt first. And remember, place, rock thumb, push, and never drop the hill of your bottom finger.

After the center of your quilt is complete, start quilting its branches. You can now work from the center out.

When quilting your design, you may want to use a definitive quilting style by making the design look like the actual flower, or use the traditional echo design by just following the pattern in a wave-like ripple.

Once you’ve quilted the branches, quilt in the ditch. To do this, quilt outside the design on the background fabric very close to the design. Use the same color thread you used to quilt the design.

Now that you’ve quilted your design and stitched in the ditch, you can begin to echo quilt the outside edge. Follow the design of the pattern to its outside edge by using your fingers as a guideline. The spacing between the lines of the echo quilting should be no smaller than the width of your baby finger, and no larger than the width of your index finger, or about 1⁄2″. You have a choice to use the same color thread as the design to give the quilt a shadow-like effect, or switch to the same color thread as your backing fabric.

Quilting has been an integral part of Cissy’s family since her maternal great-grandmother took it up over a century ago. Her father, John Serrao (pattern designer for the family business), sees significance in every part of the quilt. For instance, the center of the quilt is the piko (navel), the source of all love and compassion.

Remember the back of the quilt should look just as beautiful as the front of the quilt. No knots. All knots are hidden between the batting.

Bind your quilt.

After the quilt is complete, don’t forget to bind your quilt. Rounded, squared, or mitered — the decision is yours. After the edging of your quilt is complete, you still have one last step to finish your Hawaiian quilt in the tradition of Hawaii. You must now sleep with the quilt for one night to bind your love and spirit into the quilt.

Conclusion

This project first appeared in CRAFT Volume 02, pages 76-83.