An ideally energy-efficient house should be tightly sealed, to hold cool air inside during the summer and keep it out during the winter. The trouble is, we need to circulate some fresh air to remove odors, bring in oxygen, and reduce the risk of mildew and mold growth.

Is there a way to move air in and out of a house while minimizing the heat moving in and out?

One simple gadget can do it: a heat exchanger, aka “heat recovery ventilator.” Instead of letting air run in and out freely, the exchanger uses two small fans to draw incoming and outgoing air through parallel interleaved ducts. The two flows don’t mingle, but heat passes between them through the thin metal walls of the ducts.

In the winter, warm air going out through the heat exchanger gives up its heat to cold air coming in, and during the summer, cool air blown out through the heat exchanger steals heat from hot air coming in, so that by the time the incoming air enters the house, it isn’t hot anymore.

Heat recovery ventilators are cheap to run, because they only contain a couple of fans. But they can be costly to buy, retailing for $450 and up.

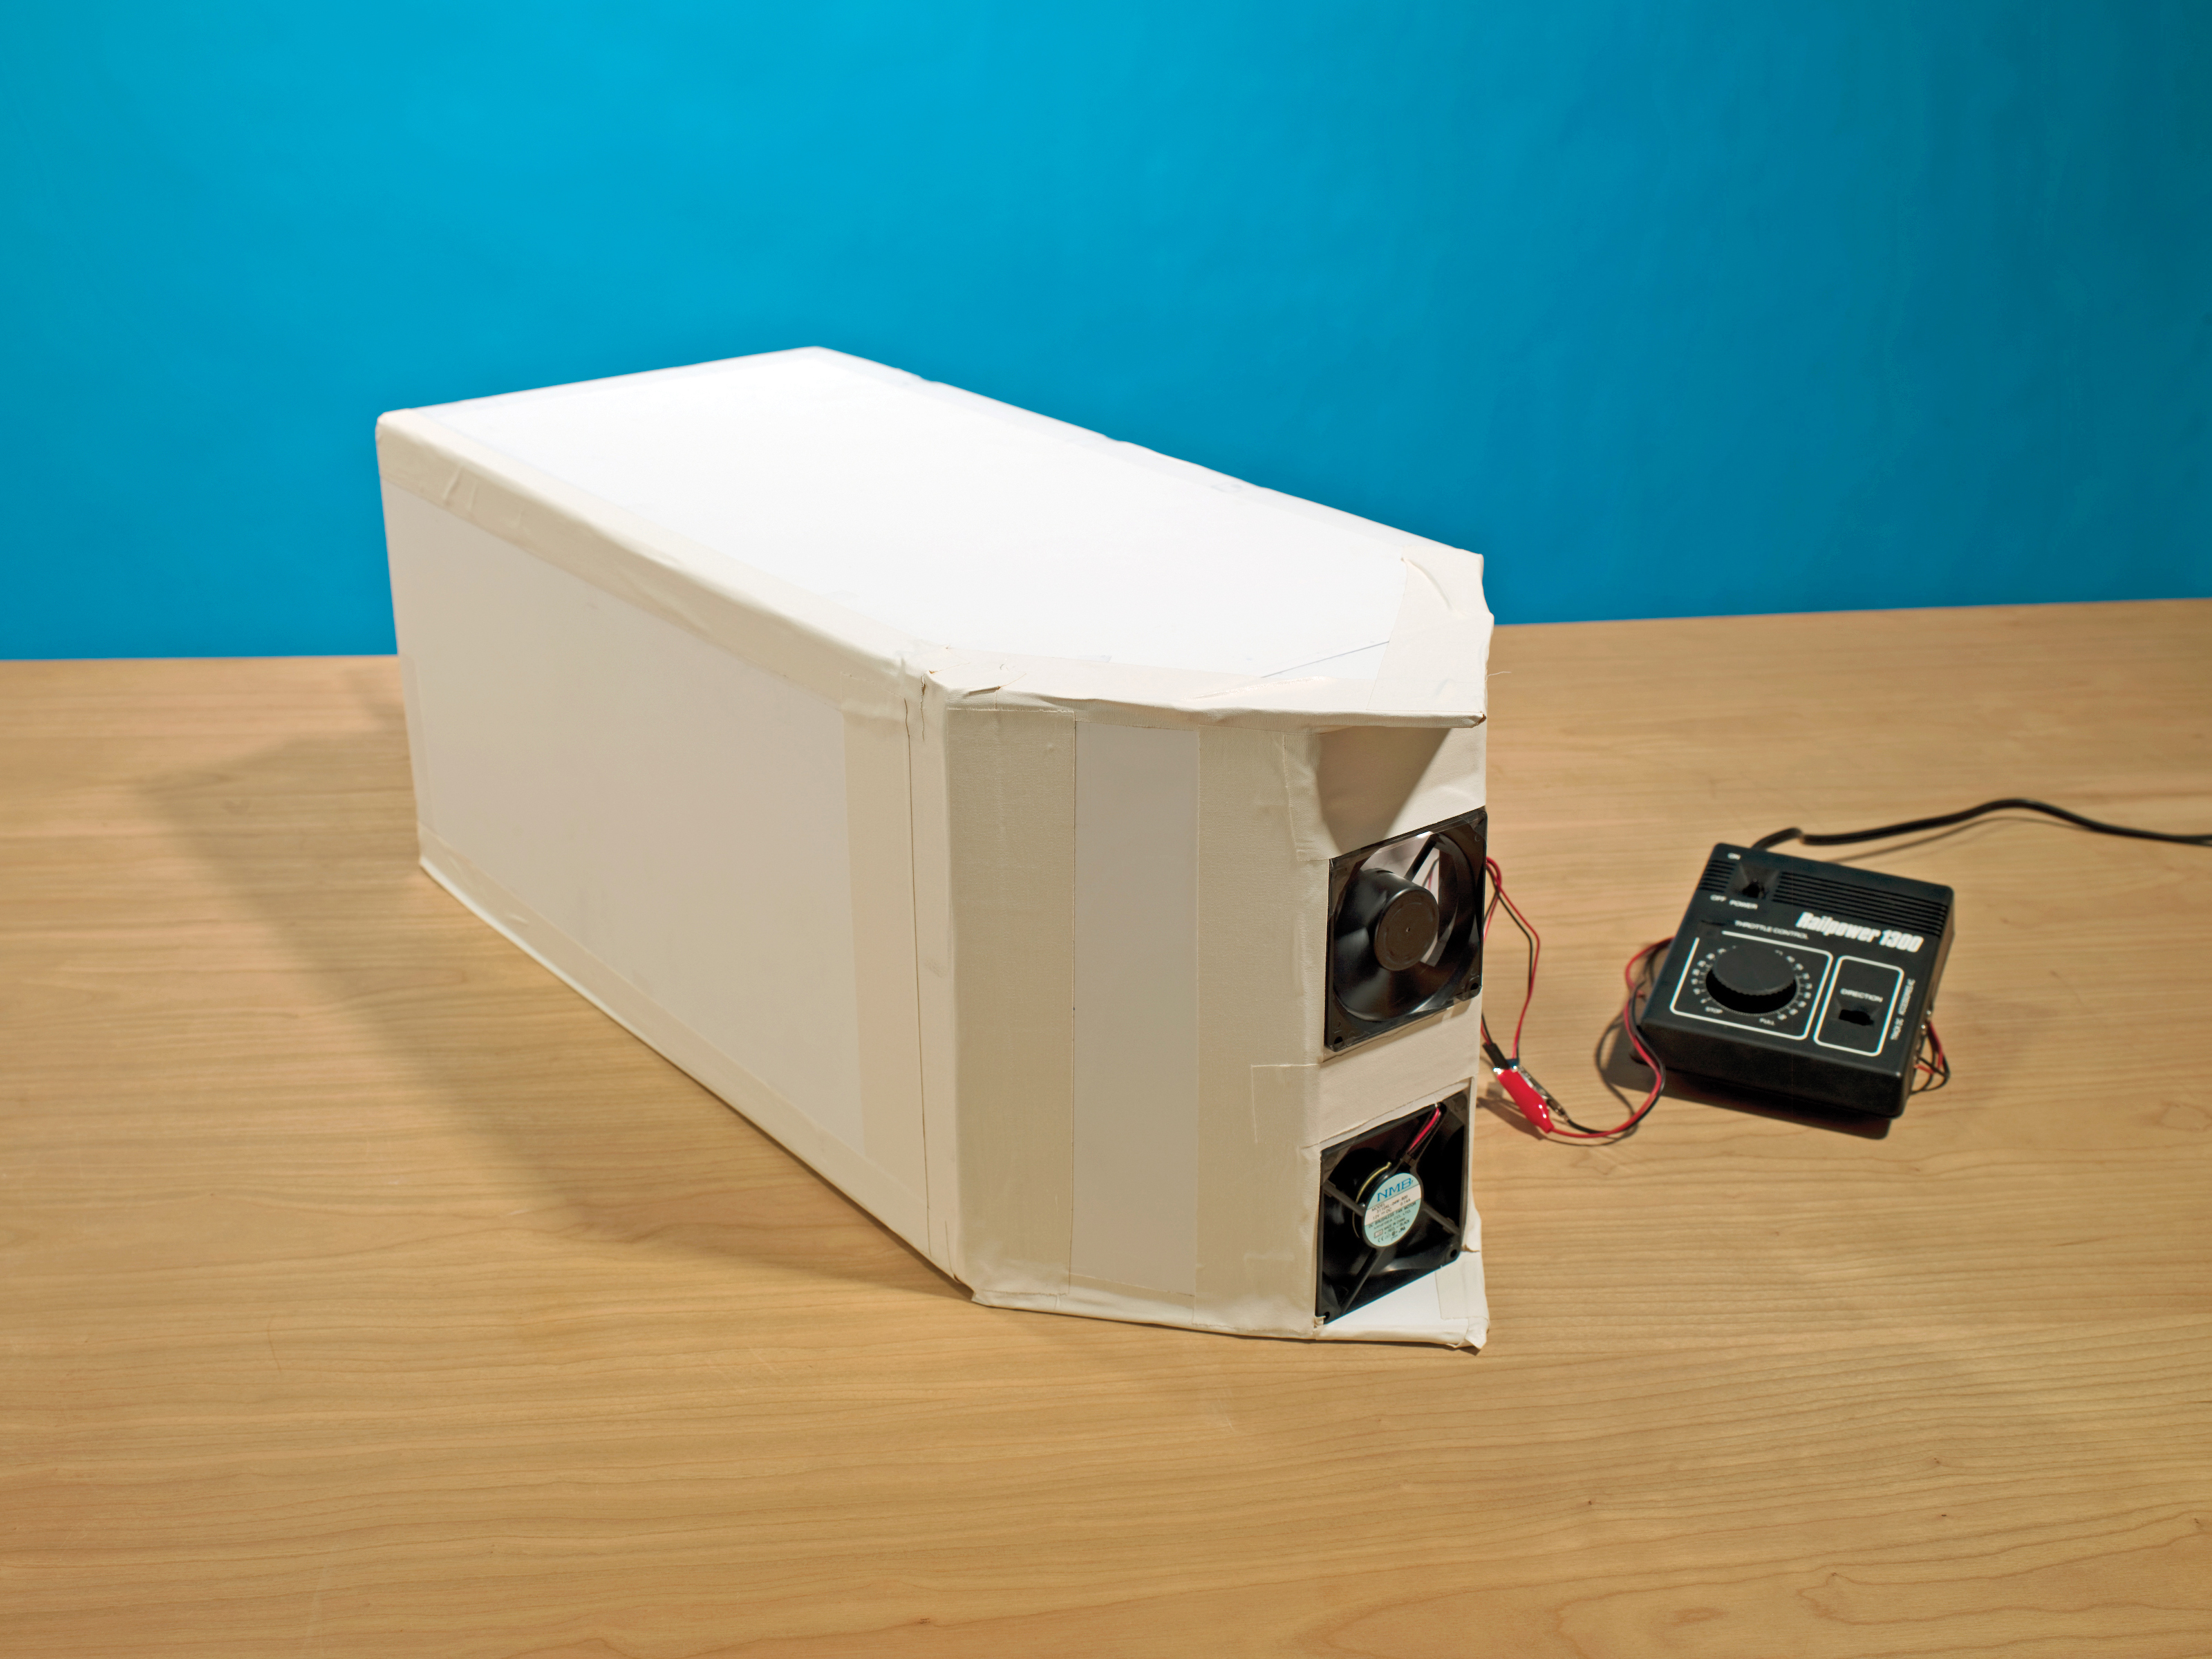
Here’s how you can build your own for radically less, $50 to $100, depending on how many materials you already own. This is my first design attempt, and it works, but I don’t pretend that I optimized it. Feel free to make it better.

I am very grateful to MAKE intern Eric Chu for tackling the hard work of fabrication and testing, using plans that I drew.

Design

These are the crucial design features to get the most out of a heat exchanger:

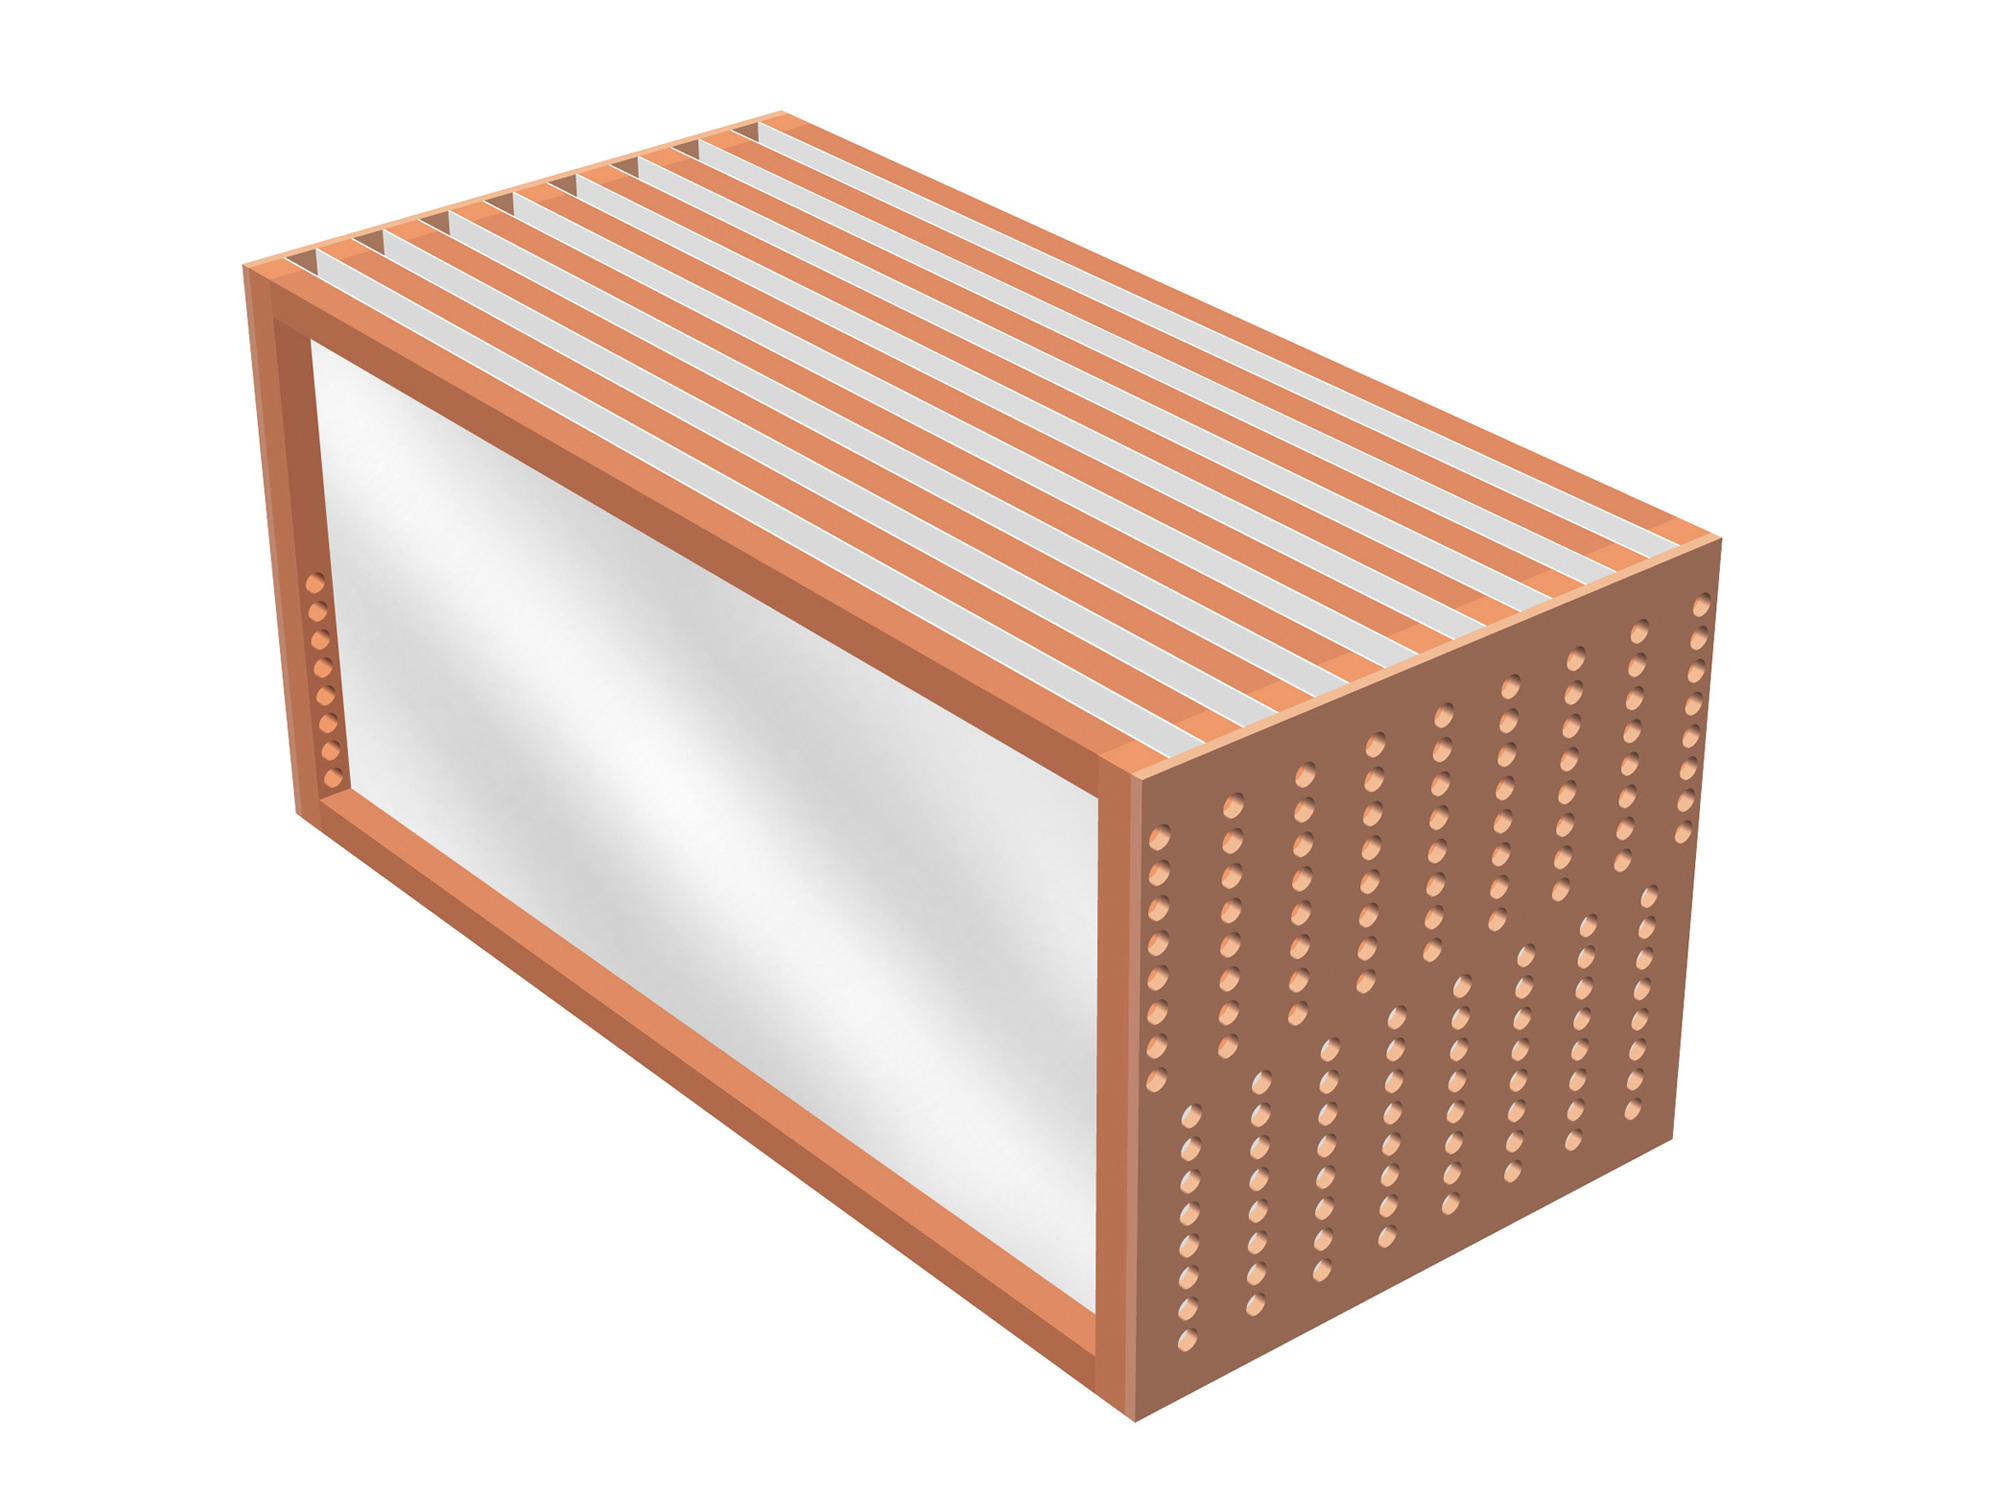
  • Interior panels should have maximum surface area relative to volume.
  • Panels should be made from thin, thermally conductive metal.
  • Incoming air and outgoing air must move in opposite directions.

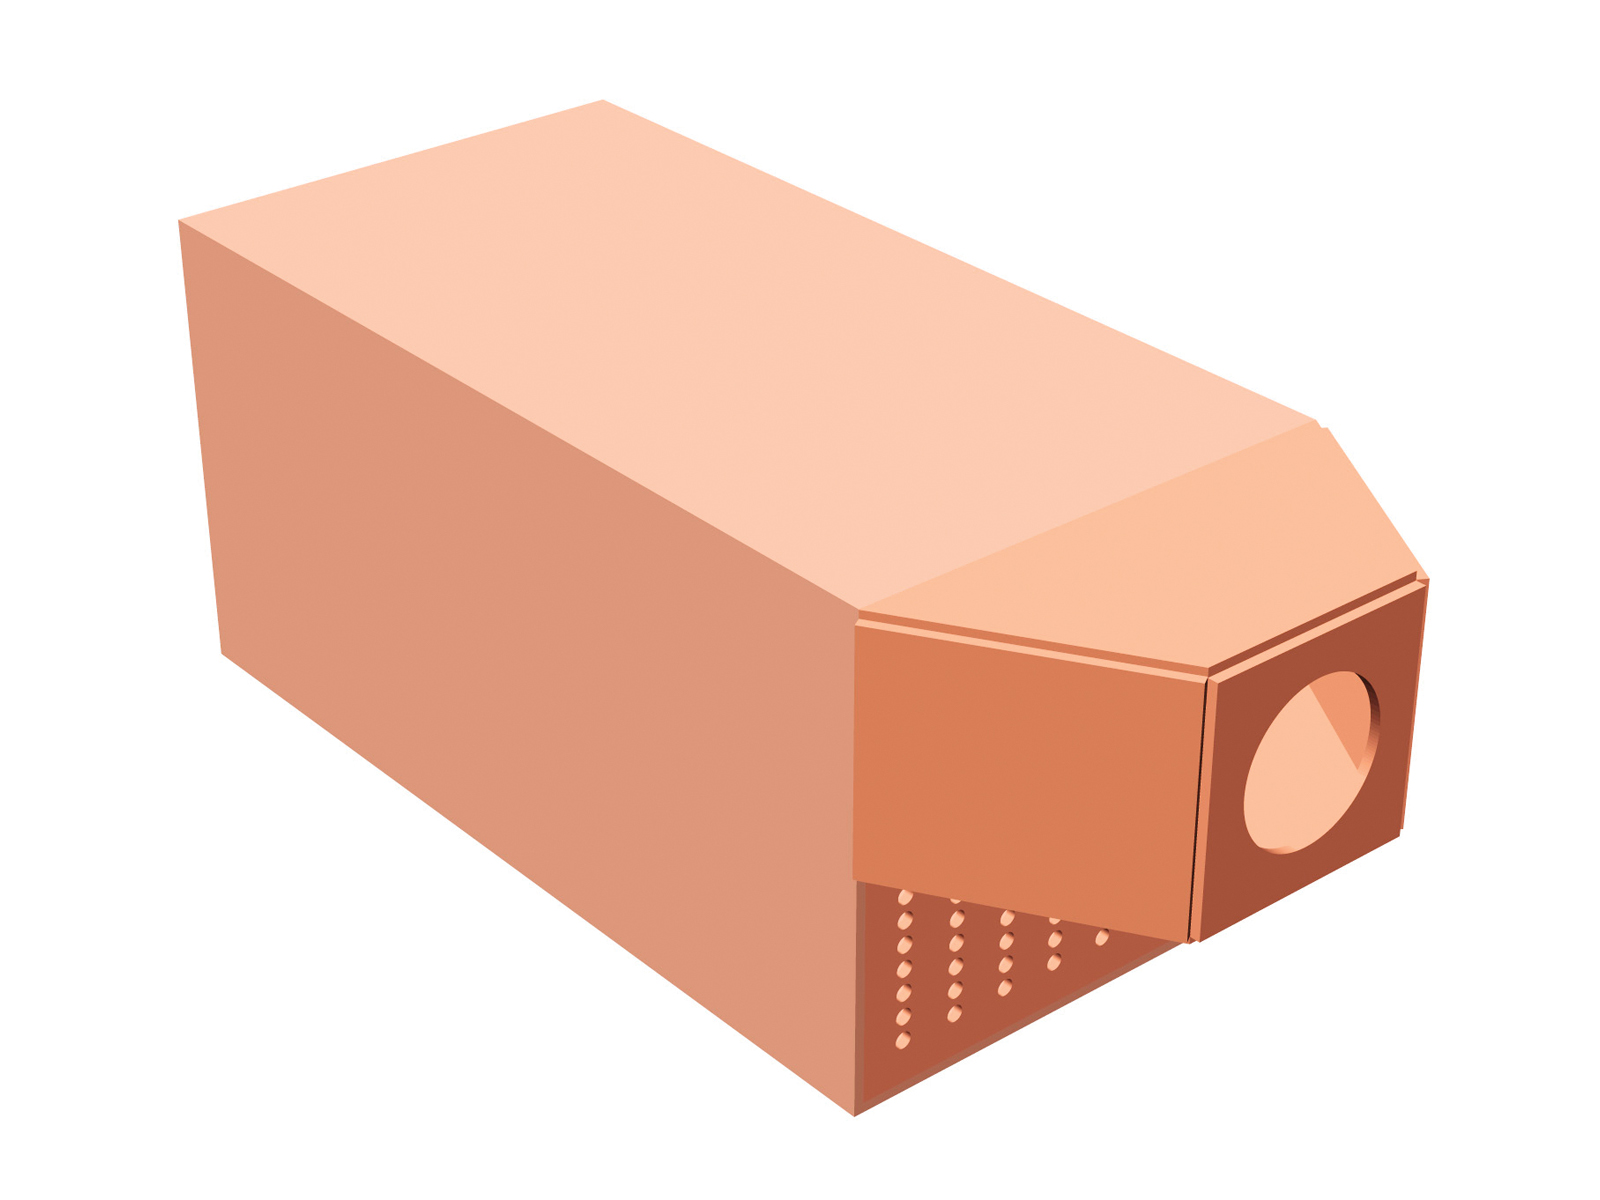
Since aluminum conducts heat very efficiently, I decided to make the panels from aluminum foil stuck to wooden frames, with holes drilled in the edges of the frames to allow air to pass through. Cheap computer fans are fine since they’re quiet and don’t use much power. Since this unit is merely providing some moderate ventilation rather than heating or actively cooling roomfuls of air, the flow rate can be low.

You might assume that slower airflow allows greater opportunity for heat transfer between air going out and air coming in. Theoretically, this should be true, but in practice other factors play a part, such as heat penetrating or escaping from the box containing the unit. When we tested our exchanger on the cold night air, we found that higher fan speeds actually warmed the incoming air more. Perhaps this is because faster-moving air lengthens the temperature gradient along the heat-transfer path and keeps the box containing the unit from getting cold.

Where, exactly, is the sweet spot? I suggest you build the unit and adjust the fan speed experimentally to find out.

Project Steps

Cut and drill the hardwood.

Cut the ¾” square wood into 18 lengths of12″ and 18 lengths of 24″. The shorter pieces should be exactly 12″, but it’s OK if the thickness of saw cuts causes your 24″ lengths to be slightly short.

Starting 1-1/8″ from one end of each of the 12″sections of wood, drill 8 centered holes 5/8″ in diameter, spaced 3″ apart. Reduce the diameter if your wood is undersized.

Make the frames.

Use the hardwood pieces to make 9 rectangular frames, with the holes in the 12″ pieces running in and out of the frame, rather than front to back, and positioned upside down relative to each other. Use fast-setting epoxy with 4 picture-frame clamps to hold the corners. Number the frames to identify them.

Make the end panels.

Cut 2 pieces of masonite (or ABS, or plywood), each measuring 12″×12¾”. Drill each piece with columns of 5/8″ holes.

The holes in your frames must align exactly with the columns of holes in the end panels. To make sure that they do, clamp a frame to the panel in each column position, and then drill the holes into the panel through the holes in the frame, to make them match.

Apply foil.

Cover both sides of frames 2 through 8 with rectangles of foil, using double-sided tape. Cover frames 1 and 9 with foil on only one side, the inward-facing side.

NOTE: Small air leaks around the edges of the foil are not very important, but tears in the foil will allow too much leakage.

Install the panels.

Attach frame 1 along one side of an end panel, matching the holes and facing the foil inward. Use three 1″–1¼” #6 flathead wood screws at top, middle, and bottom. Similarly join the other end panel onto frame 1, upside-down relative to the first end panel.

Then attach all the remaining frames into place, orienting and aligning their holes as you did with frame 1. When you get to frame 9, its foil side should face inward.

Enclose it.

The hard part is over. Now box up your frames by cutting top, bottom, and side panels, and taping them into place. For our test version we just used foam board, but for something sturdier to install in a house, screw or glue masonite panels, then clad them with foam board for insulation.

Mount the fans.

Make 2 manifolds for the fans, one sealed over the top set of holes, and one over the bottom set, on the end of the box that will sit inside the house. One fan will blow inward, while the other blows outward. We made a single trapezoidal hood by cutting, bending, and taping foam board, and then used another piece of foam as a divider inside.

Fit the fans snugly in the manifold ends. We taped around them, for air tightness more than to hold them in place. That’s it!

Time for Testing!

First, measure the temperature outside and inside. For a good test, you need at least a 20°F difference between the two. Place the heat exchanger in an open door or window and block the open space around it to prevent stray air currents.

We aimed ours out a screened window masked with more foam board. The screen may have increased the amount of exhaust air that doubled back and was drawn inside again. To minimize this, you could divert the outgoing air off to the side with a small baffle or shroud.

Run the fans, and measure the temperature of the incoming air. It should gradually move closer to the inside temperature. If you have an adjustable fan-speed control, try different speeds to find the one that warms incoming air the most.

Our exchanger worked best when the fans ran at 100%. Here are our results at that speed:

Trial 1 — Outside temperature: 42.6°F; Inside temperature: 71.4°F; Incoming air temperature: 62.2°F

Trial 2 — Outside temperature: 45.3°F; Inside temperature: 67.1°F; Incoming air temperature: 58.2°F

Trial 3 — Outside temperature: 41.0°F; Inside temperature: 67.4°F; Incoming air temperature: 58.1°F

Your heat exchanger will be especially useful in a home that’s fairly airtight, with good draft seals around doors and windows. In the summer, it can save power by providing ventilation without losing the coolness from your recirculating air conditioner. In the winter, it’s ideal in conjunction with an unvented gas heater. This type of heater retains all its thermal energy inside the house, while the heat exchanger gets rid of carbon dioxide and brings in oxygen. Together they form a perfect partnership. Download the heat exchanger plans at http://www.makezine.com/18/heatexchanger.

Conclusion

This project first appeared in MAKE Volume 18, page 56.