


Projects from Make: Magazine
Installing the Arduino Environment
In this guide, you will learn how to install the Arduino environment. You can do this on any computer that has access to the internet!
In this guide, you will learn how to install the Arduino environment. You can do this on any computer that has access to the internet!
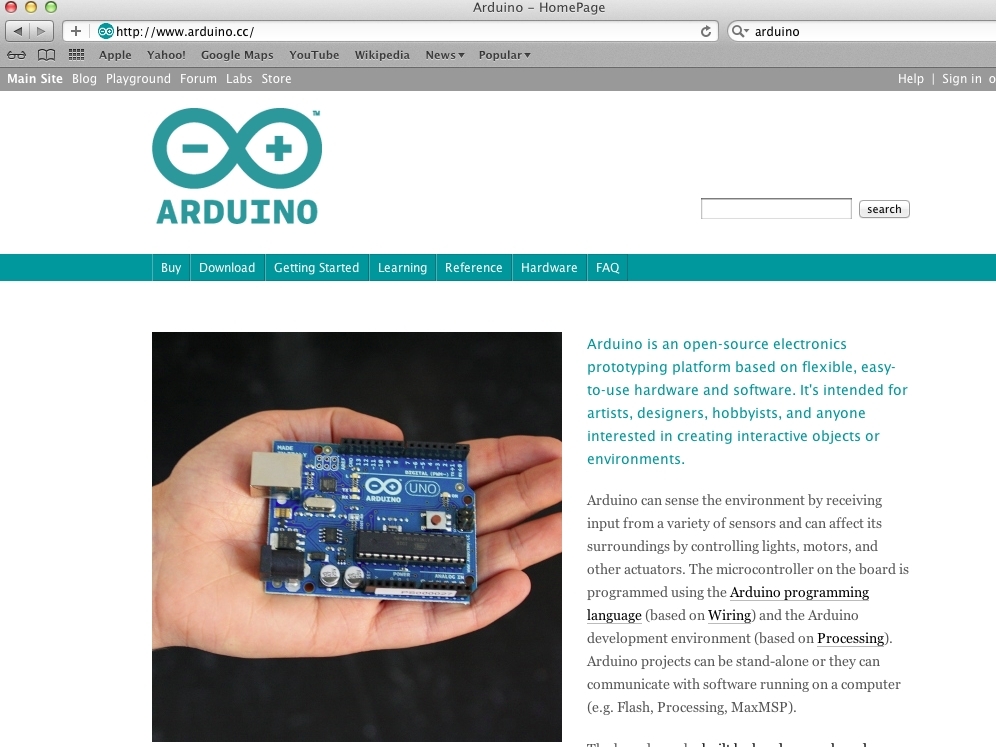
First, you need to direct yourself to the Arduino site. Open your web browser and enter this URL: www.arduino.cc/
Click “Search”, or press the Enter button on your keyboard.
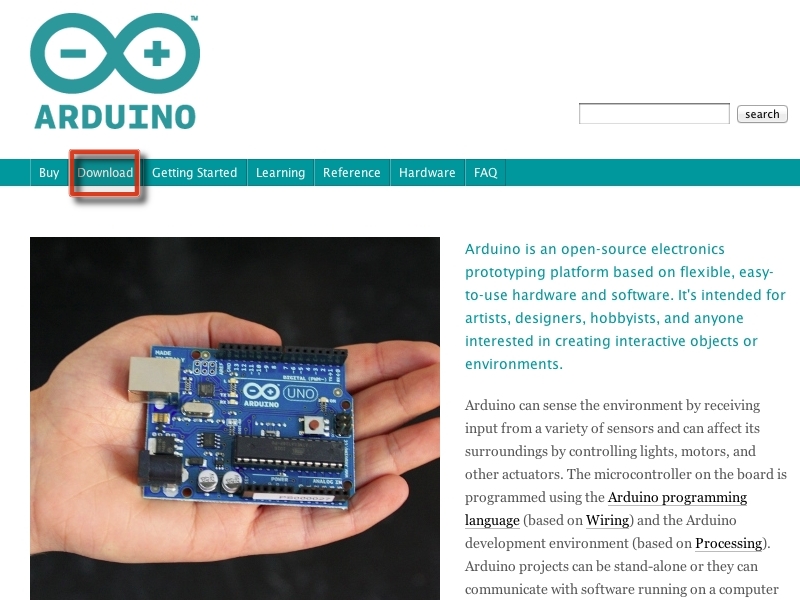
The Arduino home page should have appeared. Click the download button, shown in a red box in the picture.
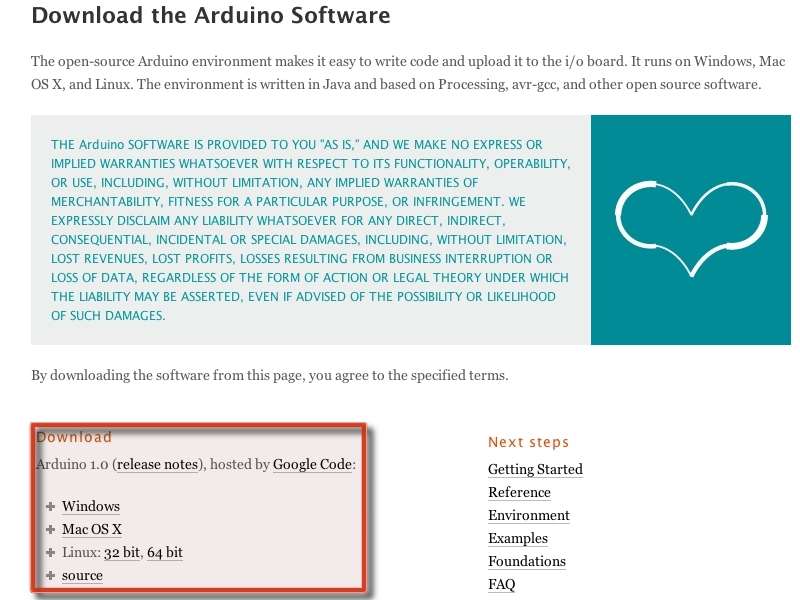
You will be taken to the download page. Under “Download” (shown inside a red box in the image), there is a list of options for what systems you can install the software on. Since I have a Mac OS X, I chose the Mac OS X option.
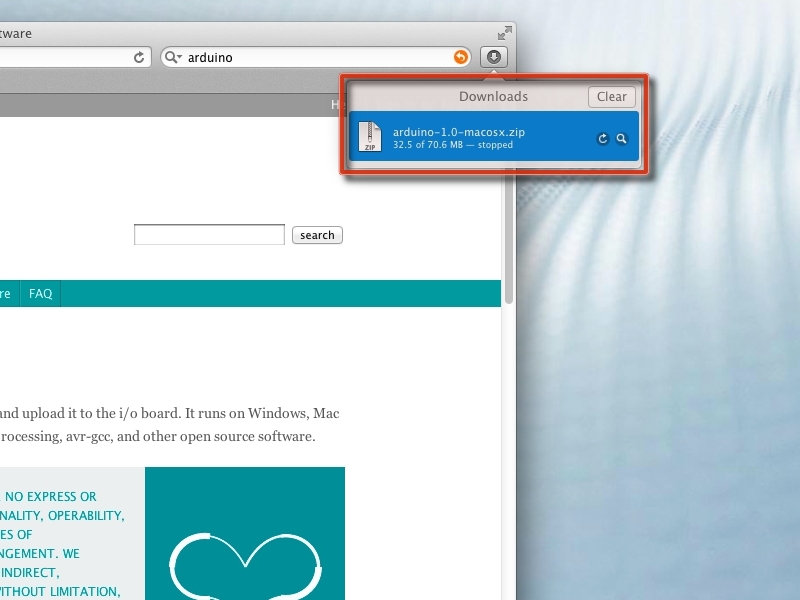
Once you click on the correct option, the download should automatically start. It usually takes a little more than a minute to load.
Once it finishes loading, you need to decompress the .zip file. On Macs, it does this automatically, but on other systems the method varies.
For Windows, right-click the file and then click “Extract” on the shortcut menu.
Linux is much more complicated. Once you download the file you must click Application > System Tools > Terminal, which will open the terminal window. Once in Terminal, enter this text if you are a root user (you will see the “#” prompt): apt-get install unzip. If you are a Red Hat Linux/Fedora user, enter this in Terminal: yum install unzip.
Once the software is unzipped, open the folder and double-click on the Arduino icon. It should open the Arduino environment!
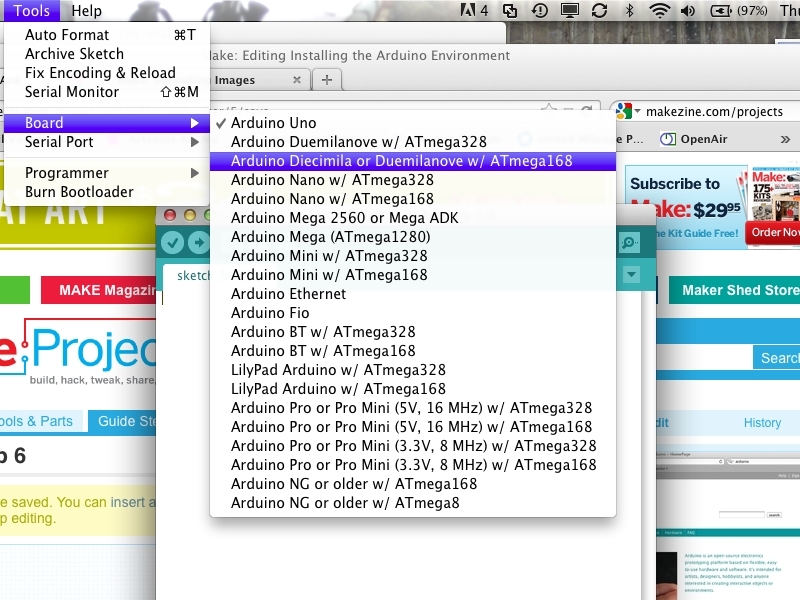
One last comment: To start programming, you need to select the board you are using by clicking Tools > Board, and then choose the serial port by clicking Tools > Serial Port.
And that’s it! You’ve downloaded the Arduino environment! Have fun!
That's it! All you need is a computer and internet to install the Arduino programming software (of course, if you want to program anything, you need a USB connector and an Arduino as well).


