YouTube player

With a few household items and a trip to the hardware store, you can whip up one of the all-time favorite projects of science experimenters: Lord Kelvin’s Thunderstorm, a high-voltage electric generator that uses nothing but dripping water as its source of energy.

It’s cheap to build, and perfect for anyone who loves to experiment because it can be made from a wide variety of materials once the basic configuration is understood.

Most importantly, you have a chance to contribute to the understanding of this fascinating effect and improve on technology that one day may spawn alternative energy sources, such as wind generators that don’t have moving blades or rotors. Building Lord Kelvin’s generator doesn’t take a big research budget, and its “open source” design plays into the hands of makers with ingenuity.

How It Works

Perhaps best known as Lord Kelvin for his scale of absolute temperature, Sir William Thomson was an Irish-Scottish physicist and mathematician who in 1867 invented what he called his “water-dropping condenser.” Kelvin’s electrostatic contraption generates voltage differences from falling streams of water, similar to the way charged water droplets in a thundercloud generate the static discharges we see as lightning.

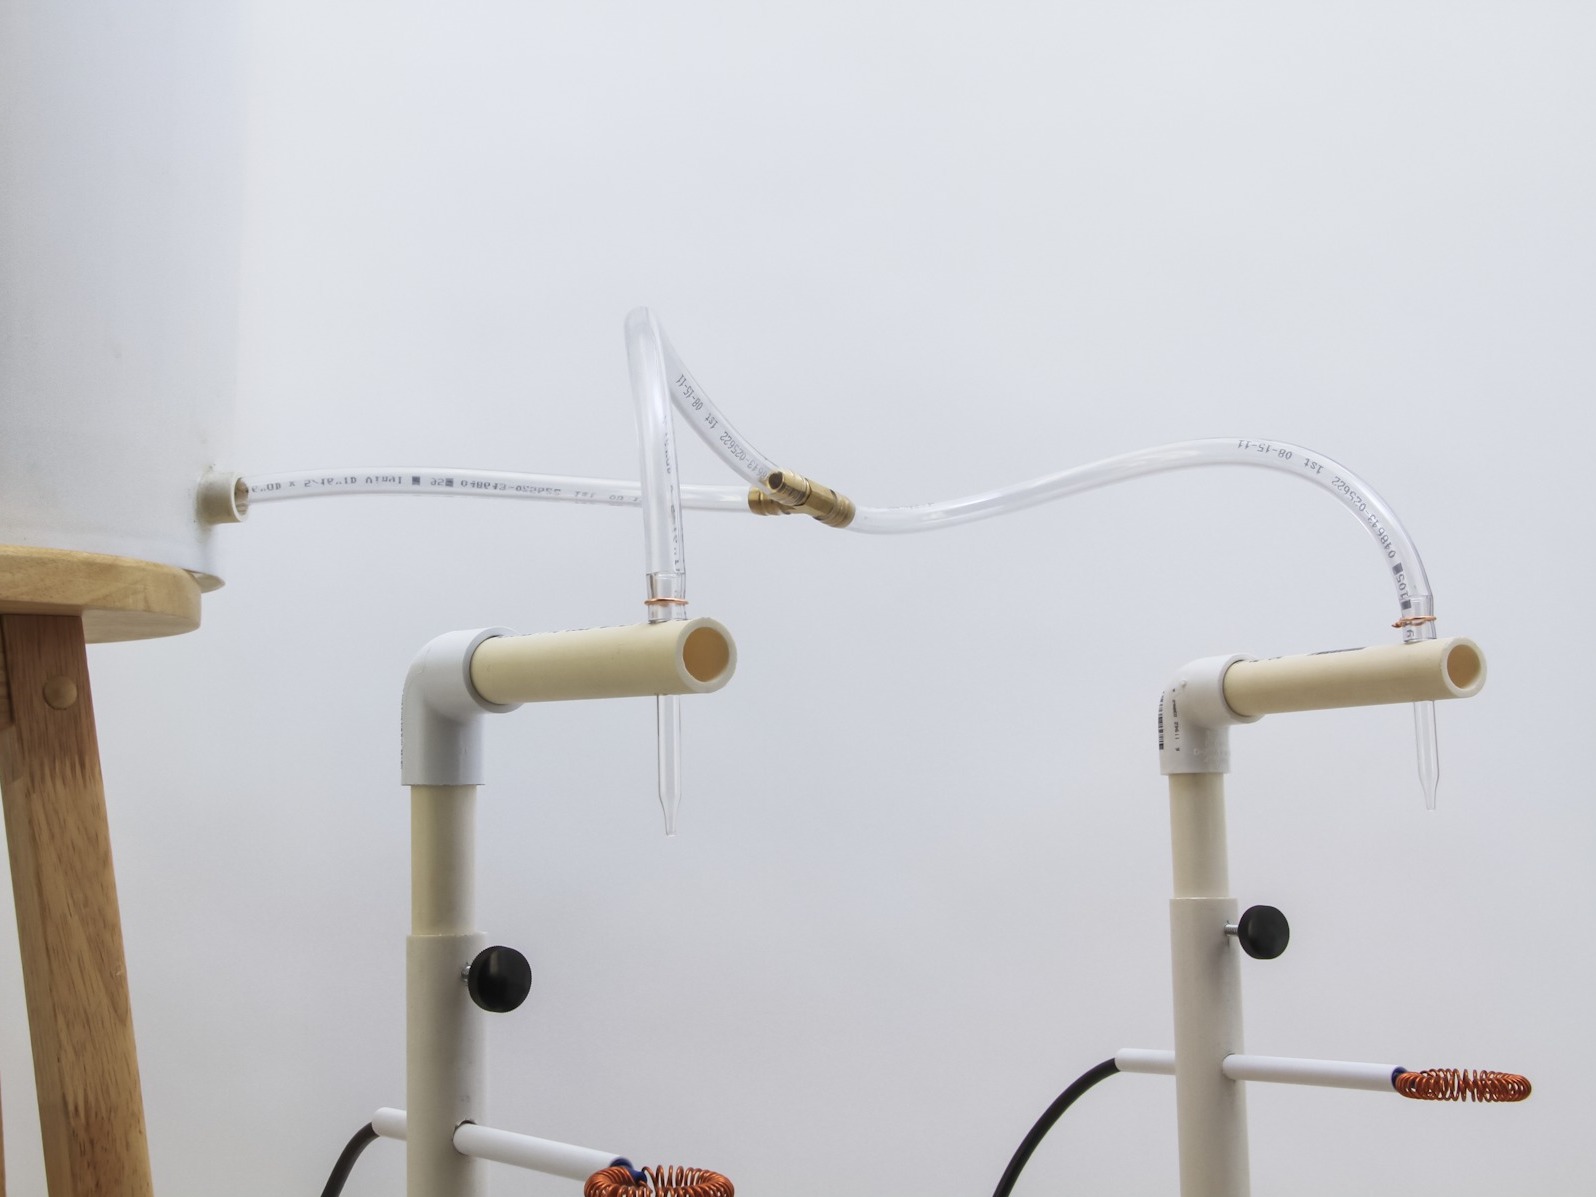
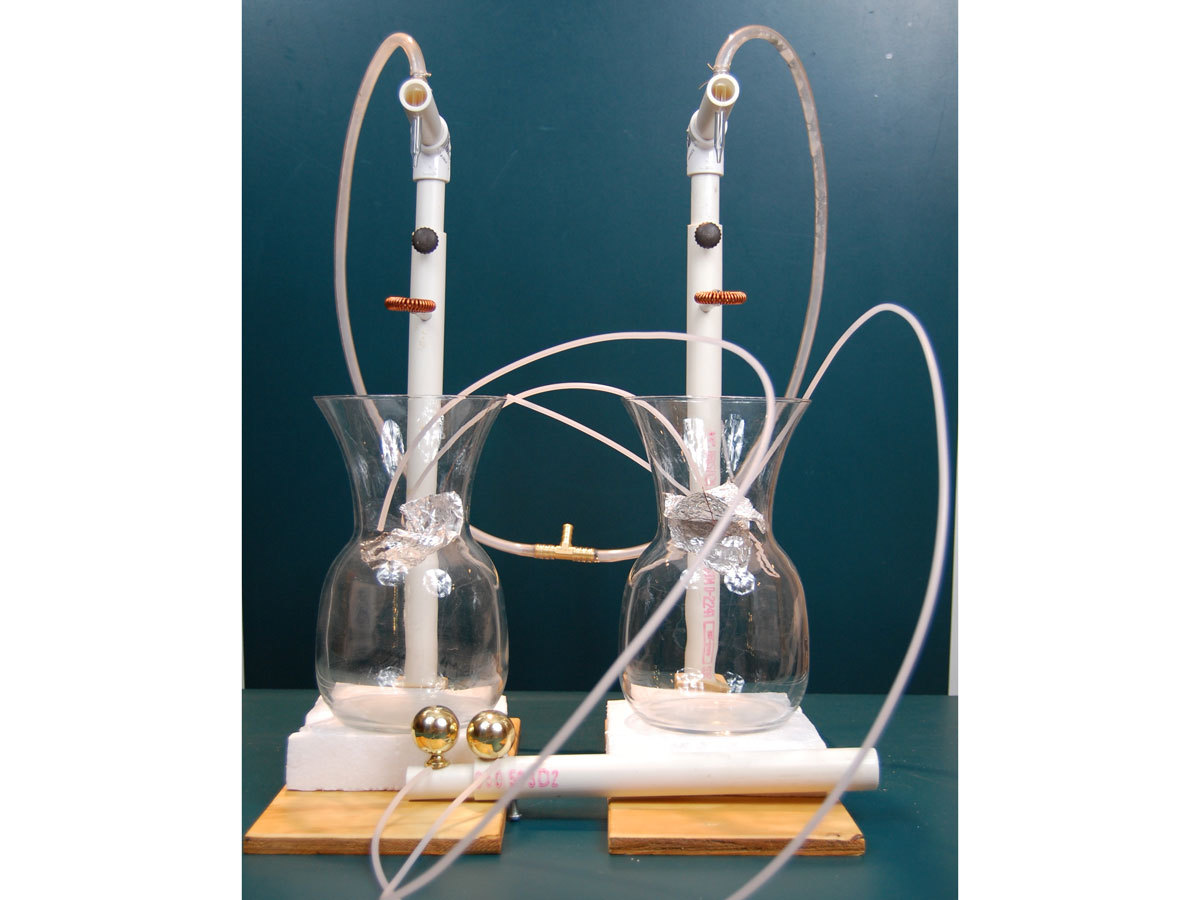
The basic setup is 2 streams of water that flow through 2 hollow electrical inductors, and 2 catch basins that capture the falling water. Each basin is connected to the inductor on the opposite water stream (Figure A, following page).

With gravity as the energy source, the water drops carry electric charges down to the basins, where the electric potential continues to rise until either a spark of electricity jumps across an air gap or it leaks away unnoticed at any sharp edges of the device. My favorite explanation of the phenomenon is by MIT physics professor Walter Lewin (see Resources). It goes like this:

Let’s say inductor A, by chance, has a slight positive charge. The inductor polarizes the water falling through it, giving each drop a negative charge. These drops fall into basin A, charging it negatively. Now it gets interesting: basin A, remember, is connected to inductor B, giving it a negative charge as well.

Once negatively charged, inductor B polarizes its water stream too, giving its drops a positive charge. These positive drops fall into basin B, charging it positively, and basin B in turn adds its positive charge back to inductor A.

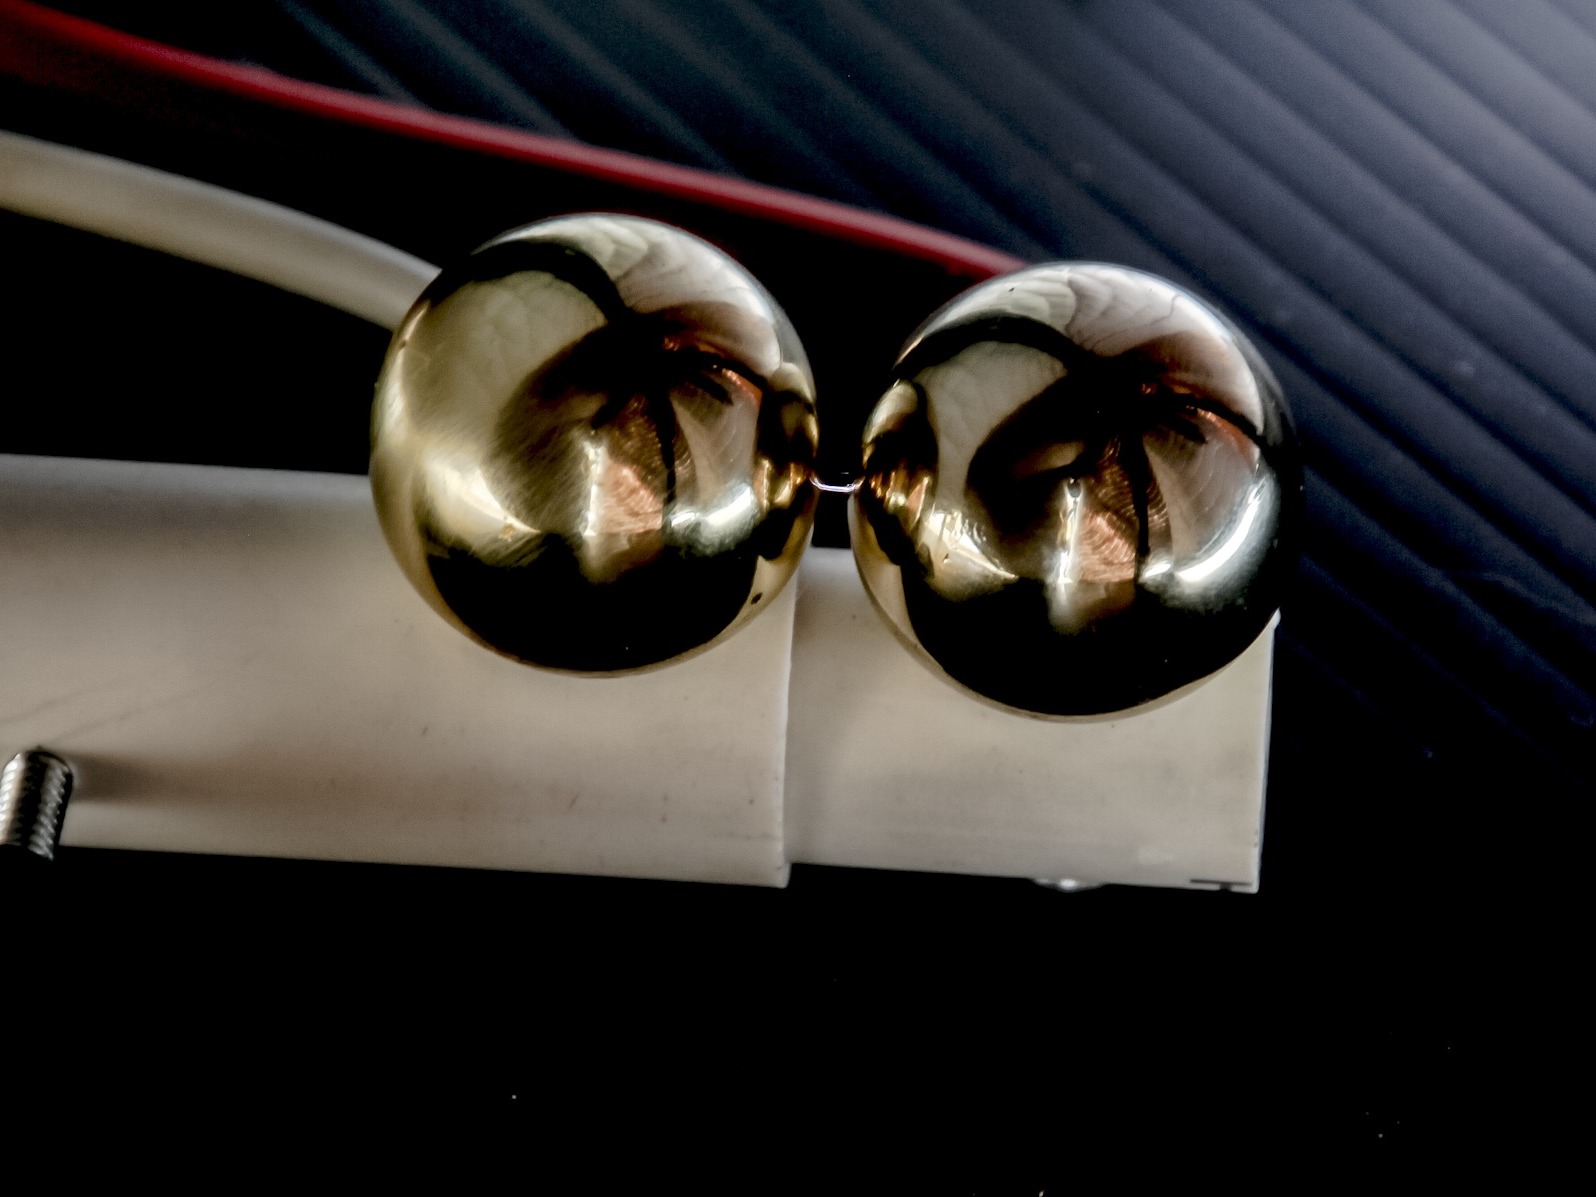
The cycle becomes a runaway positive feedback loop, increasing the charges in both basins exponentially until the potential difference is so great (up to 20kV) that a spark jumps the spark gap between basins.

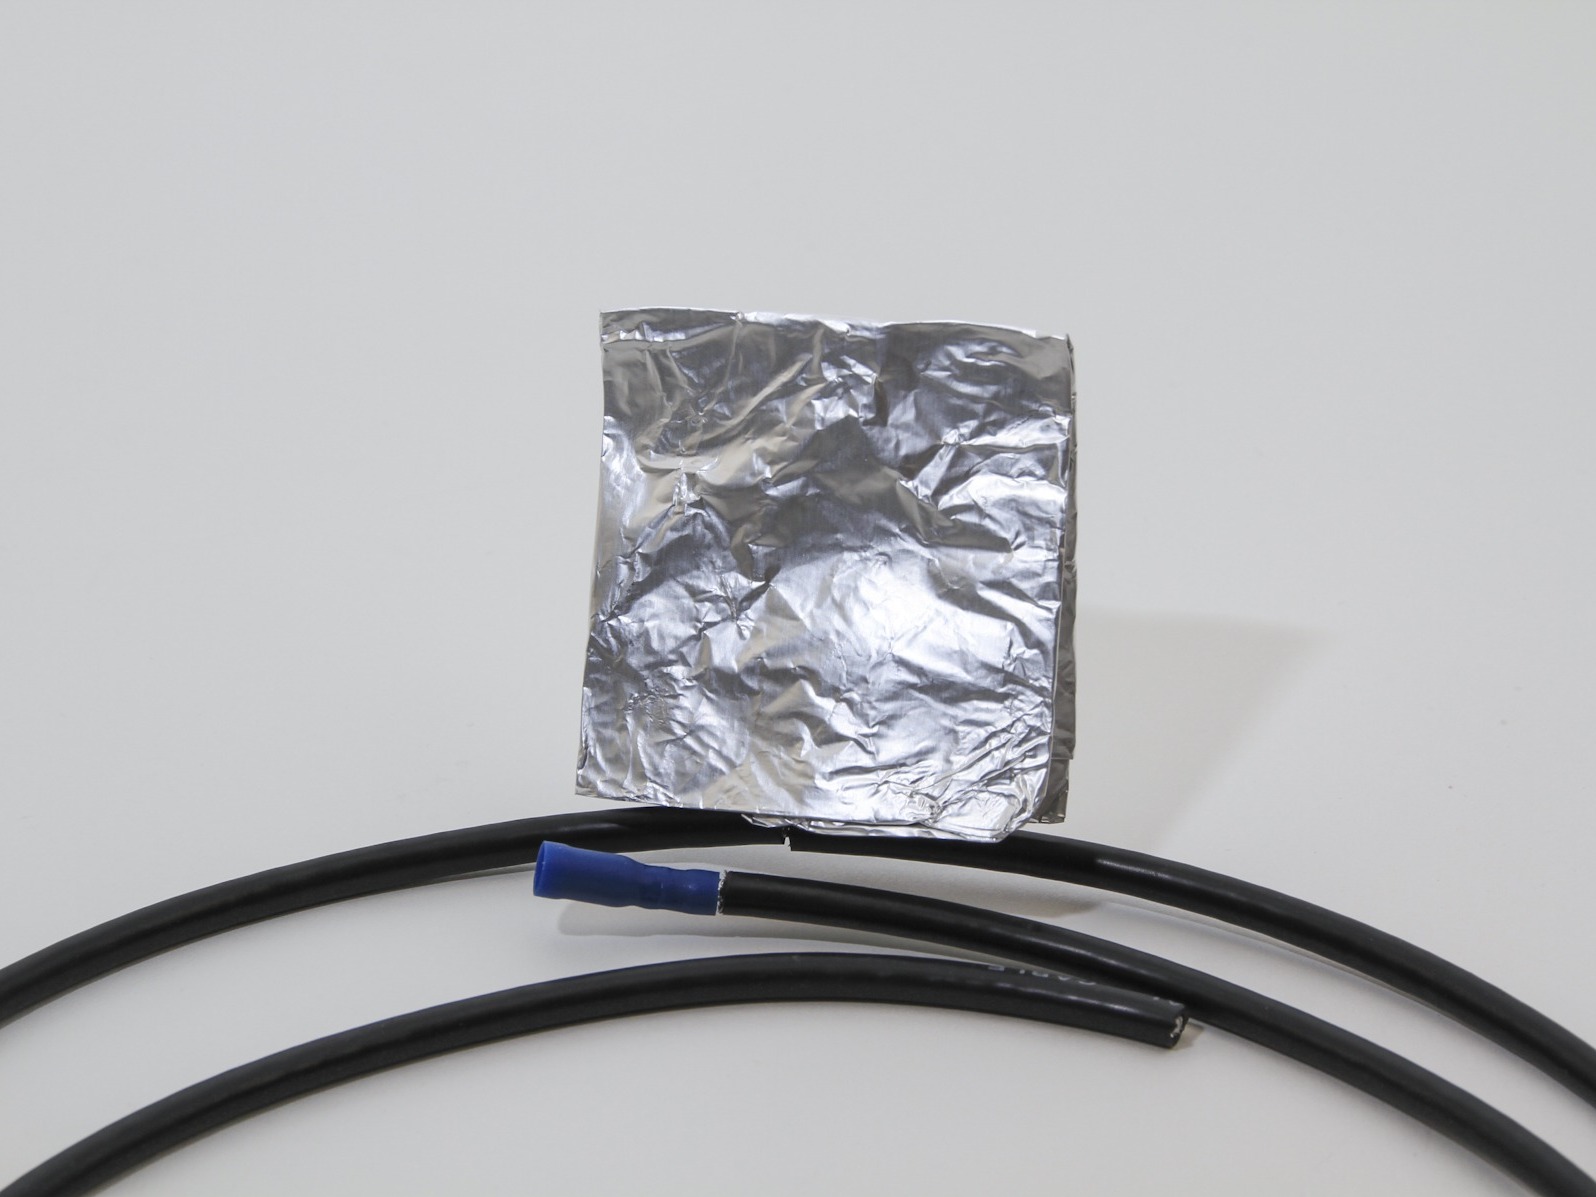
Given its simplicity, Lord Kelvin’s Thunder-storm can be made from a myriad of materials. A quick survey of YouTube shows generators made from styrofoam plates, soda straws, aluminum foil, and soup cans.

My design takes a little more time and care to build than one fashioned from soda straws, but the maker is rewarded with a generator that can be used to conduct reproducible, measurable experiments, including a remarkable phenomenon where water drops orbit the inductor like tiny satellites.

Project Steps

Start the bases.

I made 2 identical stands in the following way. The base of each stand is a 6″×12″ piece of 1⁄2″ plywood with a 1 1⁄2″ cube of scrap 2×4 glued on top, centered 2 1⁄2″ from one end. Find the center of the block and drill a 1″ hole with a spade bit or hole saw, 1⁄2″ to 3⁄4″ deep

I recommend putting a water-repellent finish on the base: water inevitably falls on the base and soaks into the wood if it’s not protected, causing possible leaks of high-voltage electricity. You could also substitute a plastic base.

Build the stands.

The main column of each stand is a 14″ length of 3⁄4″-diameter PVC plastic pipe.

About 1⁄2″ from one end, drill a hole slightly smaller than whatever machine screw you have handy (I used a 1⁄4-20 NC thumbscrew and #7 bit) and thread a screw into the hole, either with a tap or with the screw itself (the plastic is soft enough for you to make your own threads).

This screw acts as a setscrew to hold a smaller piece of pipe inside the column in place when you adjust the position of the water droppers.

Make the arm for each inductor from a 6″ length of 3/8″ OD rigid plastic tubing. To hold the inductor arm, drill a 3/8″ hole completely through the 3⁄4″ column pipe, about 2 1⁄2″ from the same end where you put the screw.

Now make the arms to hold the water droppers. Each arm consists of 5″ and 3 1⁄2″ lengths of standard 1⁄2″ PVC pipe, held together with a 90° elbow fitting.

if you’re using 2 standard glass eyedroppers like I did, drill a 9/32″-diameter hole about 3⁄4″ from one end of the 5″ pipe. You may have to expand the hole slightly so the eyedropper slides in easily.

Make the inductors.

Use a box cutter to strip all the outside insulation and shielding off the coax cables, to get at the central strand of insulated wire. Now strip 1″ of insulation from each end of the cables, and about 8″ of insulation from the middle of each cable to expose the bare wire.

I made inductors from coils of bare 14-gauge solid copper wire used for home wiring. Cut a 32″ length of wire and wind it like a spring around a screwdriver, leaving 1 1⁄2″ leads on each end, then slip the coil off the screwdriver. Trim the ends so that both leads are on the same side, then bend the coil into a donut, putting the 2 leads together.

You can solder the 2 leads of the inductor directly to the end of its cable, but you’ll need to melt and resolder this connection if you want to experiment with different inductors, such as copper tubing or flat coils.

If you want to switch inductors easily, solder a 0.156″ male bullet connector to the leads of the inductor, and a female bullet connector to the lead of the cable. These quick disconnects make it easy to experiment to see how different inductors affect the generator’s operation.

Assemble the generator.

Assemble the 2 stands, string the cables though the inductor arms, and use hot glue to attach the inductors to the arms so the inductors are rigid.

Coil the bared wire in the middle of each cable, and fold a 6″ square of aluminum foil around each coil. Wedge or fasten each foil plate to a glass or plastic basin so that the water will drip onto the foil, and so that the left inductor is connected to the right basin, and the right inductor to the left basin.

Whatever you use for basins, I recommend insulating them from the bases with a styrofoam block or large PVC pipe scrap.

Assemble the remaining parts as shown in the diagram, and connect the plastic tubing to the eyedroppers from either a faucet or a water tank, such as a bucket.

Then adjust all the components so water drips through the inductors, and soon you’ll get sparks jumping between the 2 free ends of the cables.

Make the spark gap.

I highly recommend making a spark gap because it allows you to see the electrical discharges easily, to adjust and measure the voltage that the device generates, and to vary the power and frequency of sparks.

The body of the spark gap is a section of 3⁄4″ Schedule 20 pipe, with a section of 1⁄2″ plastic pipe inside, and a setscrew through the outer pipe. Install this screw the way you did the dropper arm screws.

Connect the free ends of the cables to your round metal terminals. Mount one terminal to the end of each pipe, then slip the smaller pipe into the larger. Use the screw to adjust the distance between the 2 terminals.

Experiment!

Your generator will work differently if you change the speed of the water flows, the design of the inductors, and the length of the spark gap. Or try varying the distance of the eyedroppers from the inductors, or the types of fluid. Even the orifices of the eyedroppers have an impact on the generator, because of drop size.

This project is sensitive to humidity so keep your surroundings as dry as possible. Use ordinary tap water; it has plenty of the ions needed to begin the charging cycle. And lastly it’s absolutely critical that there are no sharp points anywhere in the circuit.

Shooting Sparks: You’ll quickly learn when the generator is ready to spark because the water flow chang- es as the voltage builds up. The water stream breaks into drops and is often deflected as it passes through the inductors.

Vary the spark gap to get many smaller sparks or fewer large sparks.

Orbiting Droplets: To see water droplets orbit the inductor, open the spark gap completely and let the charge build up in the inductor as high as it can. Depending on the light, look at the inductor from different angles until you can see tiny water droplets spinning around the inductor rather than falling into the basin.

Neon Flash: A neon test lamp, such as those used to check whether an electrical socket in the home is wired correctly, will flash if you touch both sides to the wires of the Kelvin generator.

Conclusion

Resources

This project first appeared in MAKE Volume 31, page 45.