M36-Kapstan-Opener

This project was first published in Make: Vol. 36. Don't have this issue? Buy it today!
This project was first published in Make: Vol. 36. Don’t have this issue? Buy it today!

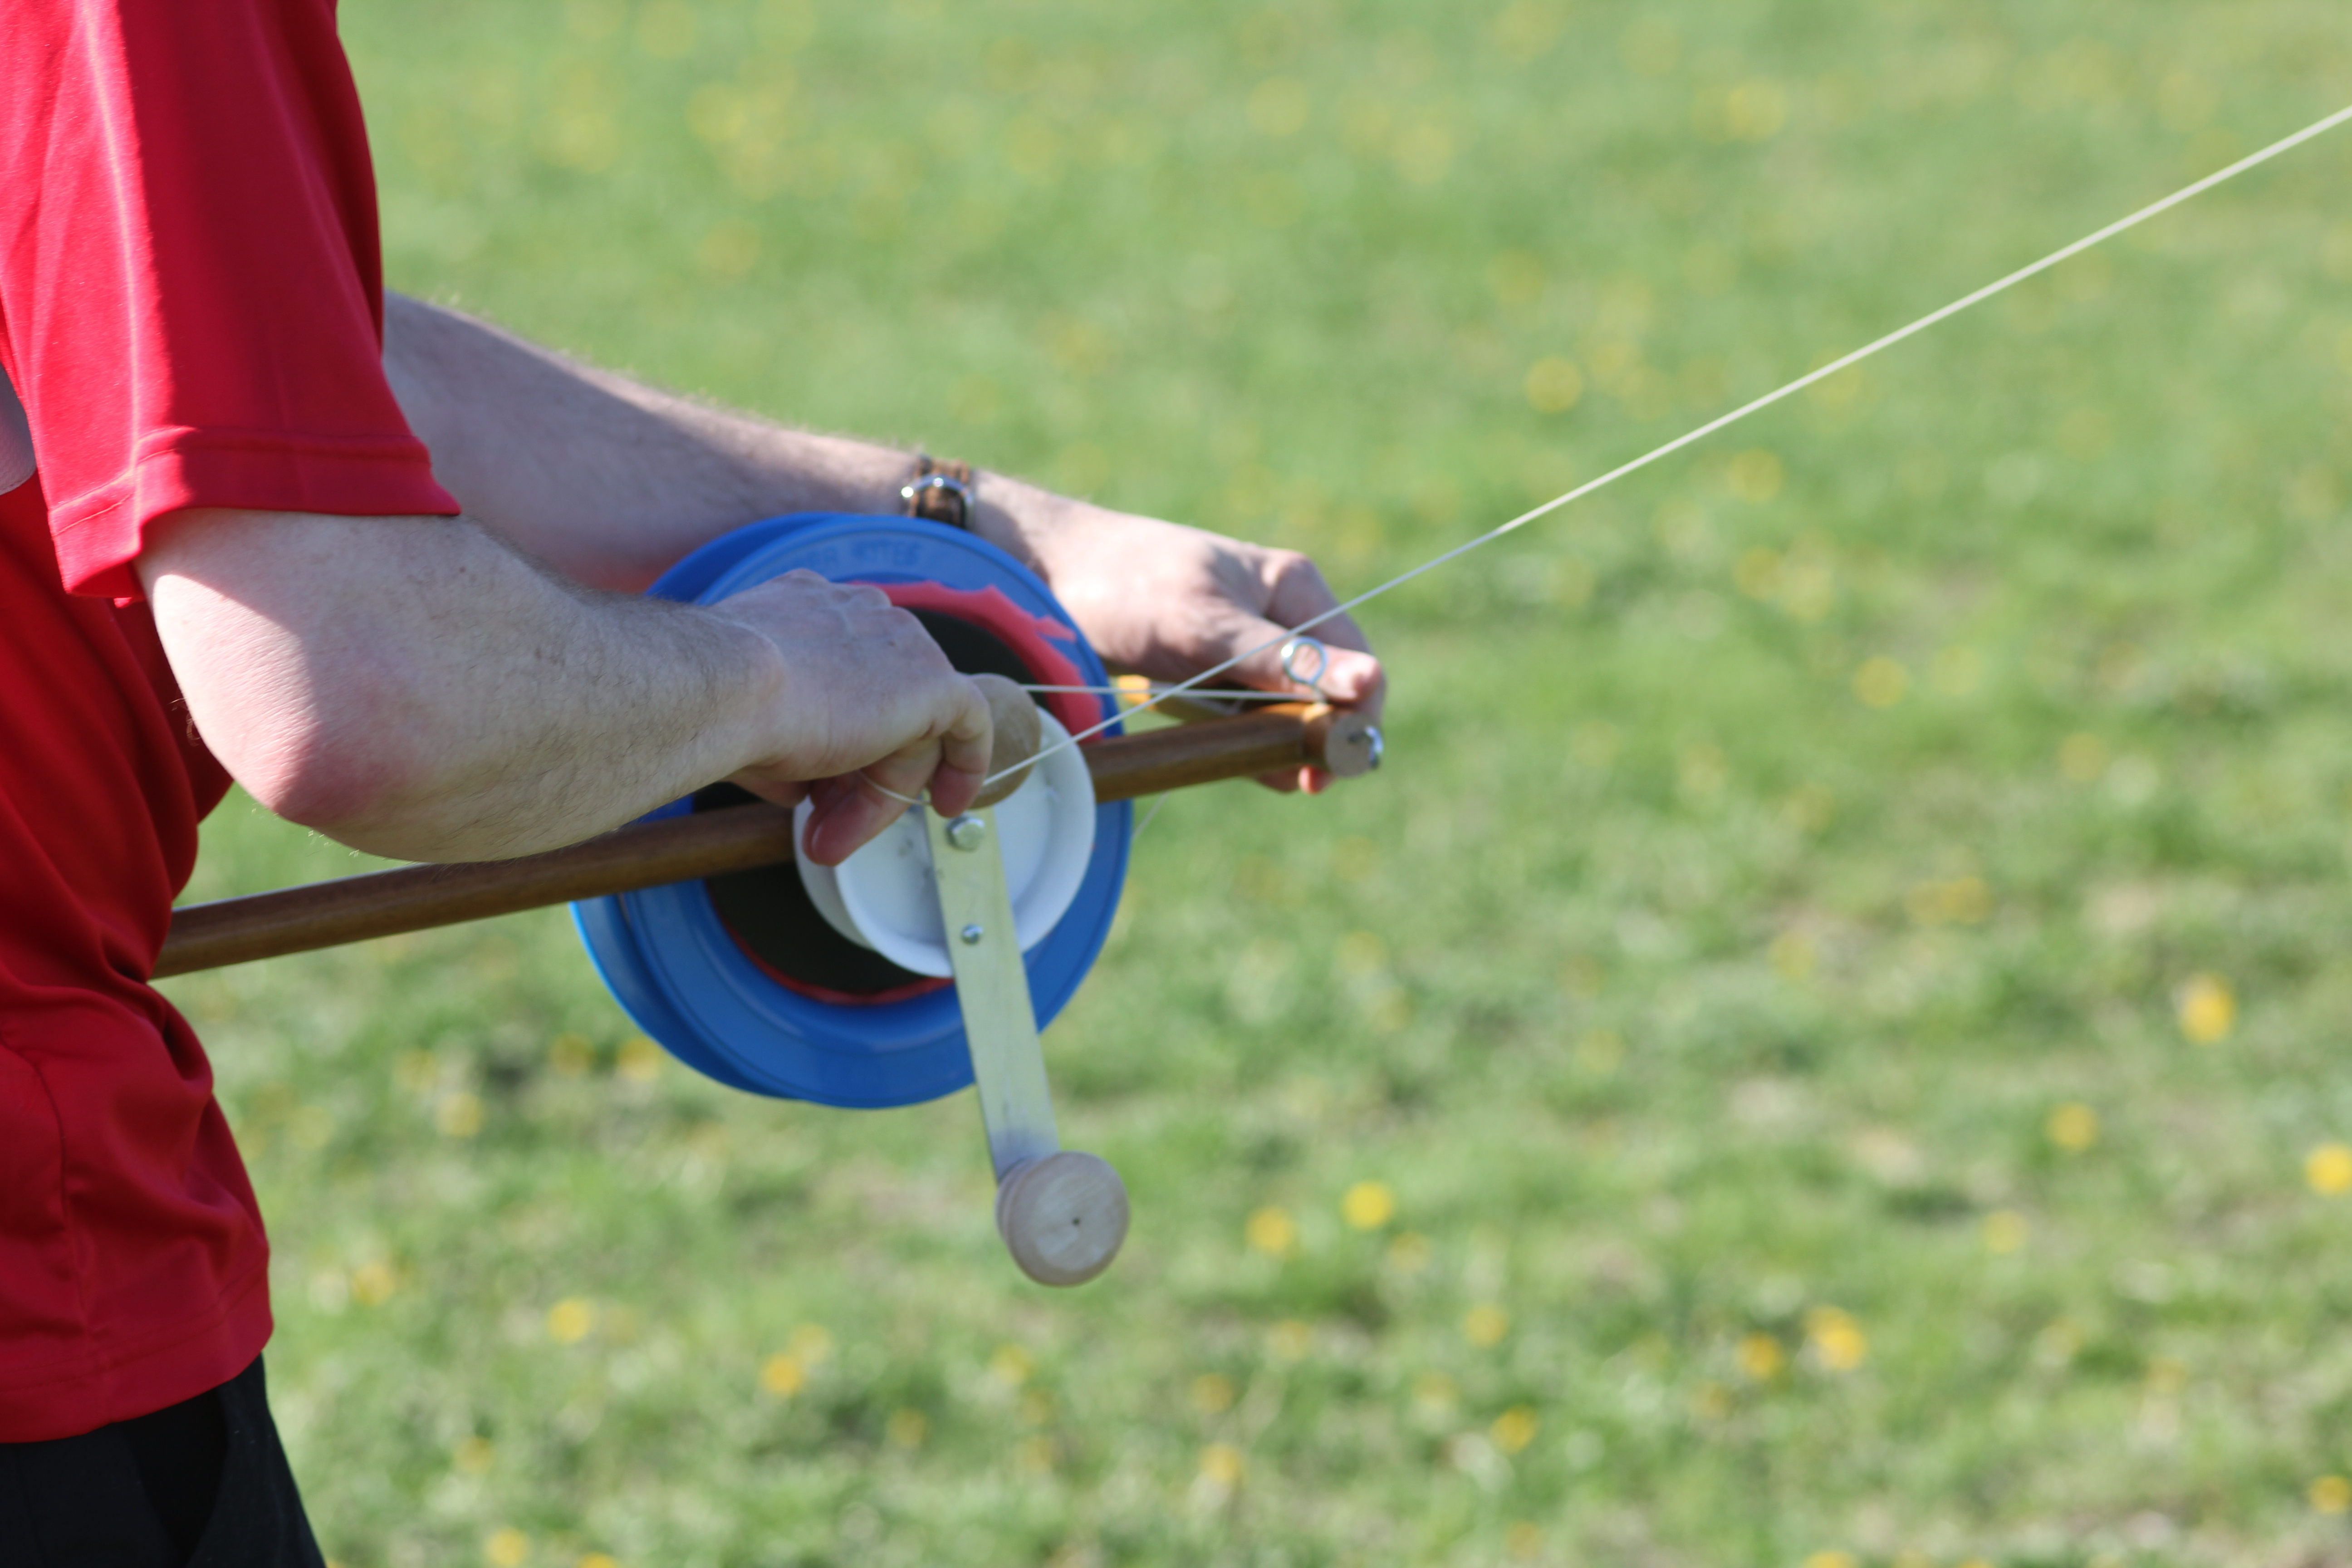
Handheld “halo” kite winders retrieve a lot of line with each turn, but they’re hard to use with powerful kites. This DIY winder pulls in big kites fast using a capstan — a long crank on a small drum — to increase your leverage and protect the halo from the stresses of winding. It’s easily built from hardware-store parts, breaks down for travel, and will even let you attach mechanical power. It’s great for kite aerial photography (KAP) or for flying several kites at once.

Capstans require some tension on the loose “tail” of the line to prevent slippage on the drum. This winder uses a simple adjustable “slip clutch” to give the capstan the proper tension, so you can pay attention to the kite, not the winder.

Fly your kite with just the halo, then mount it on the winder for retrieval. The long double-T shape is easy to prop on a hip, and the crank gives you the choice of high-power or high-speed knobs. Use the winder to manage several kite lines at a time while doing your real flying with just the lightweight halo reels.

Project Steps

Build the handle and make the capstan drum.

Cut the dowel to make a main handle or “spine” the length of your arm from elbow to wrist, and 2 crosspieces 6″ long.

Assemble as shown in the diagram, using glue and #6 screws in 7/64″ predrilled holes. The top crosspiece should project about 1″ on the capstan side; the bottom crosspiece is centered.

Saw the tire off the lawn mower wheel. Smooth any big bumps off the winding surface of the hub, but preserve any sub-millimeter texture to help the winding action.

If the axle bushing protrudes past the hub rim, cut it back flush. Press-fit the hose into the axle hole and trim it flush too.

Now cross-drill the axle bushing diametrically to accept a cotter pin. If your drill bit won’t reach, clip a wire coat hanger to an angled point. You can use it to hand-drill soft plastic and wood.

Optional: For extra strength, use a 1″ drill bit to cut the spine. This creates a “bird’s mouth” curve in each end for the crosspieces to seat into.

Make the crank and prepare the axle.

Cut the aluminum bar to span your wheel hub and extend 3″ past one side, as shown in the assembly diagram.

Drill holes for the knob screws 3/8″ from each end. Locate and drill the 5/16″ hole for the axle bolt so that the crank spans the hub completely.

Mount the knobs with 3/16″ ID washers so they spin without wobbling or binding. The inner knob is for low-power cranking, the outer for high-power.

Use a 5/16″ drill bit to ream out the hose in the bushing so the 5/16″ bolt can be inserted and removed with mild force.

Press the axle bolt through the crank handle and wheel hub, then use the hole in the bushing to mark the bolt for its cotter pin hole. Disassemble.

Center-punch your mark, mount the bolt in a vise, and cross-drill the bolt with a hole just big enough to pass the cotter pin, probably about 5/64″.

Assemble the capstan and drill the handle.

Drill through the crank and hub, close to the rim, and install the #6 bolt with locking nut. This helps to carry all cranking torque to the wheel hub.

Install the cotter pin to lock the capstan wheel to the axle.

Use the assembled capstan to correctly place the 5/16″ axle hole in the upper part of the main handle, so that the crank (and your hand) are clear of the top crosspiece and its hardware.

Cross-drill a 5/16″ hole for the axle bolt in the same plane as the top crosspiece. Lubricate the hole with powdered graphite.

TIP: Cover one end before puffing the graphite in, to lubricate just the hole!

Place the hitch pin and make the halo adapter.

Thread onto the capstan axle a flat washer, shim washer, main handle, and 2 more thick washers. Then mark the axle bolt for a hole to accept the hitch pin. Leave a bit of room between this hole and the last washer to account for the thickness of the pin.

Disassemble and cross-drill the bolt as you did for the cotter pin. Reassemble and insert the hitch pin in the new hole to hold the axle onto the handle. Add or swap shim washers as needed to take up slack.

Cut 2 discs of 1/8″ PVC or plywood: one just smaller than the hole through your smallest halo reel, another just larger than the inside of your largest reel. Sand the edges smooth and drill a 5/16″ center hole in each.

Cut a foam disc to fit very snugly inside your reel, and drill or punch a 5/16″ center hole.

On the axle, add the rubber washer, large disc, foam disc, small disc, flat washer, and 5/16″ hex nut. Tighten the nut so that all the discs rotate with the axle when cranking but can be stopped with the pressure of a bare thumb.

Now tighten the wing nut solidly against the hex nut. This helps prevent the slip clutch from loosening or tightening itself.

Add fairleads and the locking lanyard.

Twist the loops of the 3 screw eyes slightly out of alignment so that kite line can easily be slipped in diagonally but won’t wander out. Twist at least one left and at least one right, so that threading the winder will be easier.

Drill 3/32″ pilot holes and install the screw eyes as shown. Align the kite fairlead with the outermost flat surface of the capstan. Align the capstan takeoff fairlead with the innermost flat spot of the capstan; it should protrude upward slightly from the crosspiece. Align the reel-side fairlead with the centerline of your reel.

Tie the restraining lanyard to the bottom crosspiece so it can be looped over the high-power knob to lock the action.

Use it.

To retrieve your kite, mount the halo on the foam adapter disc and thread the string backward, as follows:

  • Hold the string on the top crosspiece with

    your capstan-side hand. Mount the reel on the foam disc so that the line reels off the bottom, and thread the line through the reel-side fairlead.

  • Switch hands and thread the line through

    the capstan takeoff fairlead, around the capstan 3–4 times in the same direction as the halo reel, then out through the kite fairlead to the kite. You can see a video of this process at makezine.com/go/capstanthread.

  • Adjust the fairleads as necessary by twisting.

    Now reel that big fella in.

For even more power, chuck a 1/2″ socket in your cordless drill and use it to drive the axle bolt!