x06-bulbs-on-on-black

This project first appeared in MAKE Volume 38, on page 88.

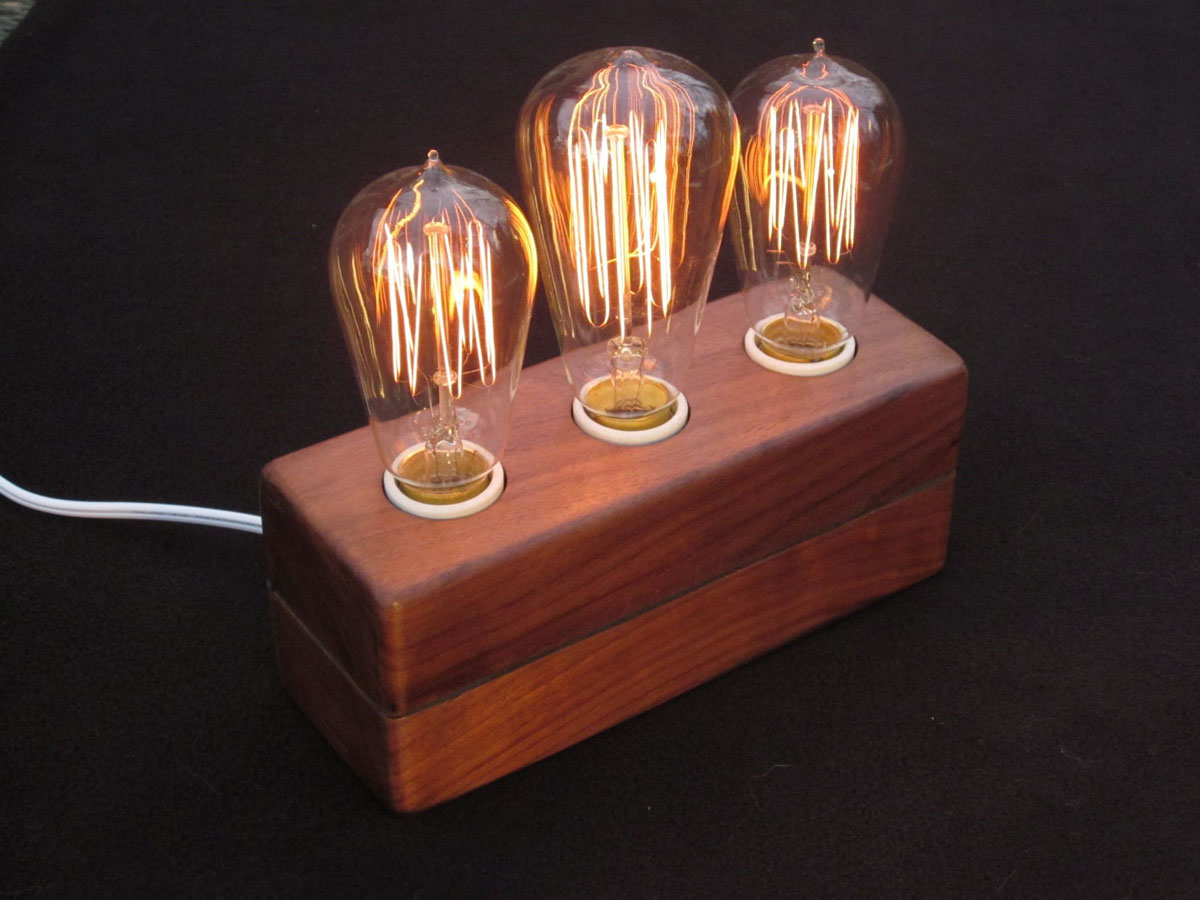
Have you noticed a growing plethora of vintage light bulb copies hanging in restaurants and other hip venues? Let’s add to that nostalgic glow this table lamp, that’s dimmable from a warm mood light to a very bright reading lamp.

It’s made mostly of wood. I like walnut, and happened to have a couple chunks, but any attractive hardwood will do. Electrical supply houses have the sockets and dimmer switch, and bulbs are readily available on the web.

My configuration uses three vintage bulbs — a 60-watt bulb in the center with 30-watters at each end, in porcelain sockets. Feel free to alter the design and dimensions to your preference.

CAUTIONS:

caution-warning-danger-graphic

  • Wear a new, quality mask when working with wood. Since sawdust, especially from hardwoods, can be irritating, keep the mask on while any dust is in the air. To learn more, read here.
  • You’ll need a bandsaw for this project. Set the top blade guide to just clear the wood (some photos here show it set higher for clarity).
  • Vintage bulbs are more fragile than their household counterparts — handle with care.
  • Follow safe electrical procedures for wiring, of course.

Project Steps

Make the parts.

Before cutting anything, ensure the bandsaw blade is sharp and perpendicular to the table surface. Cut 2 hardwood blocks as shown in the diagram, then plane or sand them to the same size, and label each lightly with a pencil.

In one pass with the bandsaw, cut about ¼” off one of the larger faces of the top block. This piece will be the top of the lamp, so make sure you like its appearance. Don’t sand the cut surfaces; later you’ll glue them together in the same relative positions, leaving an almost invisible joint.

Next you’ll drill the socket holes in the top. If you’re deviating from my configuration, space the holes to accommodate your bulbs and sockets; bulbs should clear each other by at least ¼” at their widest points.

Drill the socket holes with a circle cutter about 1-7/16″ diameter to clear the 1-3/8″ diameter sockets. Grip the lamp top tightly and lower the bit slowly, for safety and clean appearance. Beware the circle cutter arm!

Make the socket mounting platform, following the diagram. I used an old scrap of 3/8″-thick painted board.

Trace its shape onto the top block.

Bandsaw a slot in one end of the top block, and cut out the inside to your traced outline. You’ll fill the slot later.

Check that the platform fits into the cutout. You should now have the parts shown here.

Position the top block and its top together, in the same way you cut them. Glue them together, using lots of clamps to ensure a virtually invisible joint. When the glue is dry, unclamp and sand.

Chuck a ¼” rounding-over bit in your router and clamp it upside down in a vise, or use a router table. Round the outside edges and corners of both blocks, but not the surfaces that meet in the middle, which must stay flat.

Glue a thin, slightly protruding wedge into the slot in the top block. Let the glue dry, then sand it flush.

On the bottom block, bandsaw a slot in the middle of one of the longer sides, and continue cutting a cavity to clear the switch and wiring in approximately the shape shown here. Ensure you have good surfaces to mount the switch plate.

Drill a 7/32″ hole in the middle of the side slot, then enlarge it to ¼”. With a jigsaw and file, enlarge the hole to a 7/8″×¼” cutout to clear the switch toggle.

Carefully bandsaw a recess on the inside wall to bring the toggle farther out, keeping the wall 1/8″ thick for about 1″. Check that the switch fits, with its wires nearer the top of the opening.

Drill a ¼” or 5/16″ cord hole into the wiring cavity, missing the switch plate, as shown.

Bandsaw 4 small slots in the switch mounting plate as shown.

Fine-sand both blocks and finish with Deft clear wood finish, lightly sanding between coats.

Assembly.

Mount the switch in the bottom block using 4 small wood screws from the inside, aligned with the slots you cut in the plate. Don’t allow the screw heads or switch plate to protrude from the block. (Alternately, if you don’t mind screw heads showing, you can mount the switch with 2 machine screws and nuts using its original mounting holes.)

Set the socket mounting platform on the flat, top face of the bottom block. Remove the brackets (they’re known as hickeys) from the sockets as shown here and set the sockets on top of the platform. Drop the top block in place to help locate everything. Mount the platform with 2 diagonal screws.

Locate the sockets’ positions on the platform and drill wire clearance holes so that wires can pass into the cutout without hitting the switch below. Pass the socket wires through the holes.

With both wood blocks taped together to keep them in alignment, attach the sockets with wood screws through the hickey mounting holes. The middle screw must not protrude through the mounting platform; it could hit the switch.

From the bottom, wire the lamp following the diagram here. Some wires may need to be cut shorter. Tie a knot in the cord inside the wall for strain relief. Use wire connectors on all wire splices.

Add 2 thin strips of self-adhesive foam to the bottom as feet.

Add 4 more strips around the top edge of the bottom block as a spacer.

Drop the top block onto the bottom one. It isn’t fastened in place, but the sockets and mounting platform will align it.

Screw the bulbs in and you’re done!