IMG_1408_2

A barrel oven is a versatile and highly efficient wood-fired oven that’s relatively easy to build, and easy to use. It can be the seed for a small-scale baking enterprise or the heart of a community’s wood-fired cuisine. All kinds of food can be baked in the barrel oven, including bread, roasts, pizza, cookies, cakes, pies, casseroles, and stews.

The barrel oven offers surprising convenience because it’s hot and ready to bake within 15­–20 minutes of lighting a fire, unlike traditional domed or vaulted pizza ovens, which can take 2–3 hours! It’s also easy to maintain at a desired temperature for long periods of time. With its highly conductive metal barrel surrounded by a thermal mass of masonry, this type of oven is often called a “mixed oven” because it has the capability to cook with direct as well as stored heat.

The barrel oven can be built from recycled materials or brand new parts. At its center is a steel barrel, with racks inside and a door at one end. Two deep shelves offer the ability to bake eight to ten 2lb (1kg) loaves of bread, four 12″ (30cm) pizzas, or four cookie sheets at a time.

The secret to the barrel oven’s efficiency is in its construction. The firebox is located beneath the barrel. The fire hits the bottom and wraps tightly around the barrel as it travels through the carefully constructed air space between the metal barrel and the surrounding bricks. This extended contact between fire and metal concentrates the heat for cooking inside the barrel and is what allows the oven to heat up so fast.

barrel-oven-artistic--c

Since ash and carbon are not introduced to the cooking chamber, it stays clean and you can use baking pans interchangeably with other ovens. The wood-fired “smoky” taste is not present in the food cooked in it.

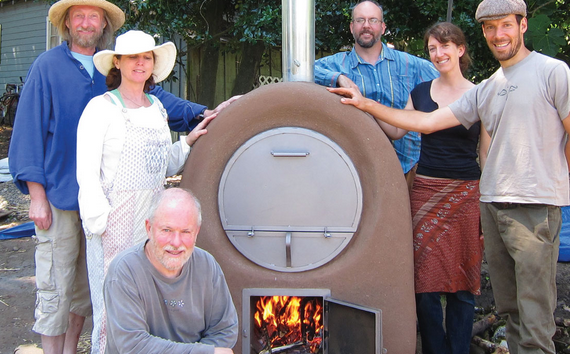
Building a barrel oven is a manageable project for experienced builders or beginners. Once made, it becomes a gathering place for good meals and good times. Your barrel oven could easily last for many generations.

This project is adapted from Build Your Own Barrel Oven (Hand Print Press, 2012), available in print or PDF from handprintpress.com/barrel-oven.

Project Steps

Choose a Site

Plan the area around the oven as a gathering place, so that you can both tend to the cooking and participate in the entertainment. The easier it is for you to engage with your oven, the more likely you’ll use it. Design an outdoor kitchen site with:

  • easy access to your indoor kitchen
  • countertops for food preparation and service
  • storage for some firewood right next to the oven, and a pathway to your main wood storage
  • a rough footprint of 38″×42″ for a 55gal barrel oven.

Plan a Roof

A roof is essential to protect the oven, keep it dry, and offer a place to cook in rainy weather. We recommend covering enough space for a small gathering of people.

You can create a small, independent roof structure, which could also include work counters, a sink, benches, and wood storage.

Or you can locate the oven so that the firebox and oven door are part of an indoor kitchen wall and the body of the oven is protected by a simple shed roof outside. This lets you use your oven indoors.

Lay Out Your Oven

Draw on paper the dimensions of your barrel and work out from there, including the width of the airspace and the width of your bricks. We generally use a 2″ air space surrounding the sides of the barrel and a ½” air space in the back.

Transfer your layout in full scale onto cardboard or scrap plywood. This will be a useful template throughout construction. Mark the dimensions and locations of the foundation, base pad, stone or brick walls, ash drawer, firebox door, chimney, and details like space for your plaster.

Draw a vertical cross-section too; it will help you anticipate materials needs and plan the height of your roof.

Prepare Your Barrel

The minimum amount of metal work necessary for a barrel oven is to fashion at least one rack on which to place baked goods, and a door with a latch that provides a tight seal to keep the heat in. For the racks, we typically use angle iron and 2″×2″ welded wire grid. This work can be done using welding gear, or using simple hand tools including a drill, with nuts and bolts for attaching metal pieces. Or you can use our kit (see Parts list) and let us do the work.

Foundation and Pad

Prepare a level, well-drained site. Draw the perimeter of your template on the ground, then dig it out, about 12″ deep, to reach compacted subsoil. Fill with drain rock up to 3″–5″ below grade.

We recommend building a “pad” that provides connection and continuity at the base of the oven. You can pour concrete or explore alternatives such as stone, urbanite (recycled concrete), or other repurposed materials. An existing concrete slab, patio, or driveway can also serve as a pad.

The pad should be made of units that are as wide as possible (or of one piece). This will unify the load of the smaller bricks that you’ll place above. Ensure that your pad is square and level, and that it’s nestled partly above and partly below grade so it won’t slide in the event of earth movement.

Ash Drawer and Grate

Lay the first layer of masonry around a long, relatively narrow cavity as shown in the first step photo. This will allow you to collect the ash that accumulates from firing your oven. Our kit includes an ash drawer that fits snugly in this space and doubles as an air register. If you’re building with adobe brick, use concrete block or fired brick for this first layer, to protect the adobe above from ground moisture.

Across the ash cavity, place a metal grate with 1/4″–3/8″ openings. You can fabricate this from steel plate or from ½” rebar, welded or tied with wire.

Firebox and Outside Walls

To create the funnel-shaped firebox, you must first build the outside walls in order to rest the diagonally placed bricks against them. This shape helps to keep the fire organized, burning well, and concentrated over the grate, and begins the sculptural form that will take the heated gases up and around the barrel.

Mortar all points of contact and fill the triangular spaces behind each brick with sand, clay and sand, rocks and clay, etc.

Firebox Door and Lintel

Plan for the top of a course of brick to coincide with the top of your firebox. This will enable you to place a lintel across the firebox opening at the right height. We generally make a lintel across the top of the firebox door with a length of steel “angle iron,” then place a single course of brick on the lintel to span across.

TIP: Metal expands more than masonry when heated. Mortar the bricks only to themselves (not to the angle iron) and before the mortar sets, tap the angle iron so that it moves ¼”–½” in either direction, to create an expansion gap.

Barrel Supports

Place 2 lengths of angle iron, pipe, or other strong metal across the firebox, from the lintel to the rear wall. Make sure they’re centered and level — shim them with pieces of brick or rock if necessary — then mortar them in place.

Test-fit the barrel on the supports and check that the cooking shelves are level in all directions. You don’t want to make slanted birthday cakes!

Build the Vault

There are a few ways to support the bricks of the vault while you lay them. You can make an arch-shaped armature from metal rod covered with diamond mesh and leave it in place, but we suspect this may contribute to expansion cracks in the plaster later on. Or you can make a rustic arch form out of flexible branches or saplings, and just burn it out on the initial firings of the oven.

We like to make a removable wooden form for the arch. Cut 2 plywood semicircles with a radius 2” (5cm) greater than the radius of your barrel. Then connect these 2 faces with boards the same length as your barrel. You can cover this form with a membrane of lath, mesh, melamine, or cloth to create a solid skin that assists in laying the brick.

Place the Arch Form

Place the arch form so that its top corresponds to the height of the barrel sitting on its supports plus the additional 2″ (5cm) of air space above. Then lay your masonry to cover the arch form (leaving room for the chimney) and complete the back wall of the oven.

Chimney

Locate the chimney at the top of the oven, centered along the length of the barrel.

If you used a metal armature, cut a hole in the mesh, then attach the chimney to the armature and lay the final bricks around it.

If you used a removable arch form, you’ll need to notch the final bricks on top of the oven so that the chimney has a stable seat. Carve them with an angle grinder, then mortar the bricks and chimney securely in place.

Set the Barrel

Let your masonry set at least overnight, then remove the arch form and place the barrel. We place a 4″-wide strip of ceramic wool insulation between the barrel and the seal that surrounds it. Create this seal by filling in the space between the barrel and the arch with cob or carefully placed brick pieces joined with mortar. A stiff mix made of 1 part clay and 3 parts sand will help to prevent cracking.

Plaster

We plaster our ovens with an earthen plaster. Cement and lime-based plasters are also options. The color for your earthen plaster will come from the beautiful natural colors of the clay and sand you use. Mineral pigments such as oxides and ochre can also be added. Here’s a basic recipe:

  • 1 part clay or clay-rich subsoil
  • 2–3 parts sand
  • ½–1 part fiber (short chopped straw or manure)

Mix well and apply with your hands or a trowel. To ensure good adhesion, wet the oven surface thoroughly before applying plaster. We find that 2 coats or more work best.

Decorate (optional)

Tiles and other decorations can be embedded in the wet plaster.

Cook!

Make a few small fires over a week or so to season your oven and prevent any initial shocks. Now you’re ready to cook.

You can bake, roast, toast, warm, and dehydrate in a Barrel Oven. Imagine your oven filled with 4 cookie sheets at a time, pizza stones with bubbling pies for your party, stockpots filled with soups and stews, and cast iron skillets baking your cornbread and frittatas to perfection. Casseroles and Dutch ovens are well suited to the barrel oven for long, slow cooking.

The Barrel Oven is hot and ready to bake (350°F–400°F) within 15–20 min of getting that good full fire going in the firebox. It can get to 500°–700°F by making a hot, blazing fire and maintaining it — ideal for pizzas, which cook best hot and fast. Once your oven reaches the desired temperature, you can keep a much smaller fire going to maintain the heat as you bake. Use an oven thermometer and experiment!

Read More

The Barrel Oven is a very simple pattern that can be modified and varied to improve the cooking experience. What we’ve presented here is just an overview. For detailed construction tips and materials lists, FAQs and troubleshooting tips, improvements suggested by other barrel oven builders, and table-tested barrel oven recipes, pick up our book Build Your Own Barrel Oven, available in print or PDF ($10) from handprintpress.com/barrel-oven.