YouTube player

If you ever wanted to create a movie quality Alien Rifle Prop now you can. In this tutorial I will instruct you in the basics of how to utilize a disposable flash camera to make the effect of a blaster.make_halloweenbadgeV2 (1)

You can utilize a toy gun for the housing of the flash unit with minor alterations, or you can go to the extreme and make a new design from scratch like I did.

Determine the overall look of your alien weapon so you envision the end product when searching for objects you can utilize in the construction of the weapon. The local thrift shops or dollar store are great places to start. I bought many types of toy guns and other plastic items I envisioned could be used in the construction of my weapon. It is amazing how many ways you can repurpose every day items for the external construction. I used just sections of toys, PVC pipe, styrene plastic sheets, and hardware to give a completely new and original look for my rifle.

Below are some of the parts I pieced together from toy guns and PVC pipe etc.Image A

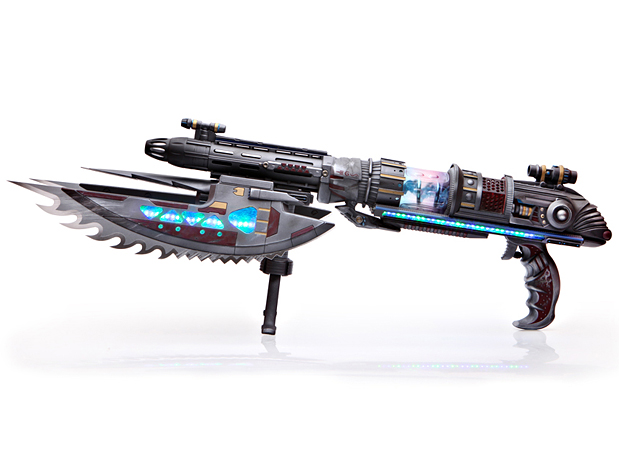
Here is an image of  the pieces put together as units for assembly. Image B

Project Steps

Creating the flash unit

Note: do not touch the capacitor because it may be charged, if you touch it with your finger you could get a strong electric shock or burn.

Always wear safety glasses when using power tools and soldering.

To remove the flash mechanism from your disposable camera, carefully remove the outer casing of the camera so that you can dismantle the flash unit.

Remove battery

To disperse the power, remove the battery

Deactivate capacitor

Touch the wires on the capacitor with a screwdriver. This releases the stored energy with a spark and will deactivate the capacitor until you charge it again with a battery.

This disposable camera has a charged indicator LED (red). You can use this to your advantage when testing the wiring. Note: If the light is not on you can still be shocked.

Removing the circuit board

With the plastic housing off, you are ready to remove the flash unit parts and lay them out on your table. You will see the wiring to the flash unit, noting the color of the wires and where they are connected on the circuit board and to the capacitor.

Capacitor reset switch

Note: there is also an electrical contact on the circuit board that allows the capacitor to be reactivated. I made a button on my rifle to be able to press the contact in and activate the flash unit. If this were not on the circuit board of the flash camera it would cause the battery to continually drain and not recycle charge

Wiring to flash tube

Lengthen the wires by splicing sections of additional wire. The goal is to have the flash unit in the front of the barrel with the circuit board and capacitor located closer to where you want the trigger.

This allows the bright light from the flash to shoot out the end of the barrel and give a better effect with maximum brightness.

Camera switch connects to trigger

You will need to attach wires on these two thin metal pieces that lead to the momentary mini pushbutton switch for your trigger.

The battery contacts

You will need to attach wires on these two metal pieces that lead to the positive and negative contacts for the battery.

Layout your wiring

Test the positioning of flash unit parts for your rifle temporarily by twisting the wire connections together.

When you have it fitting correctly you can solder the wires together for a permanent connection. Place protective shrink tubing on your wires before you solder to cover the connections.

Be very careful when you solder that you do not burn yourself.

Battery power supply

Finally, choose your power supply. If you are only going to have your rifle flash, you will only need to have space for a 1.5 V battery and it will be relatively easy to incorporate that into the rifle design since it is so small.

Don’t forget about battery access, an easily removable panel is necessary for changing out the battery.

My Alien Rifle has many LED lights, a sound speaker and a motor that rotates a crystal.

This design took a total of 8 batteries of various sizes, so the planning for the battery storage was a little more complicated. You decide how elaborate you want your rifle to be.

I envisioned my alien weapon looking fairly brutal, so I created a detachable bayonet also with flashing LEDs.

Painting and detailing

I chose to finish sections of my rifle painting them with a satin black paint for plastic.

Once it was all assembled and glued in place, I sanded and refined the finish until it appeared flawless. I gave the rifle a final coat of satin black paint.

Then I used various silver metal shades and used an airbrush to give an aged metal look. Gold, burgundy and other colors were layered on to give added interest and depth.

Finally, wear marks and scratches were added to make the rifle feel like it had some battle action and wear-and-tear.

Finished Alien Rifle

If you would like to see some of my other work, please visit my website

www.stevewynessdesign.com

Use your creativity, be patient and most of all, have fun in the process of making your own version of an alien weapon.