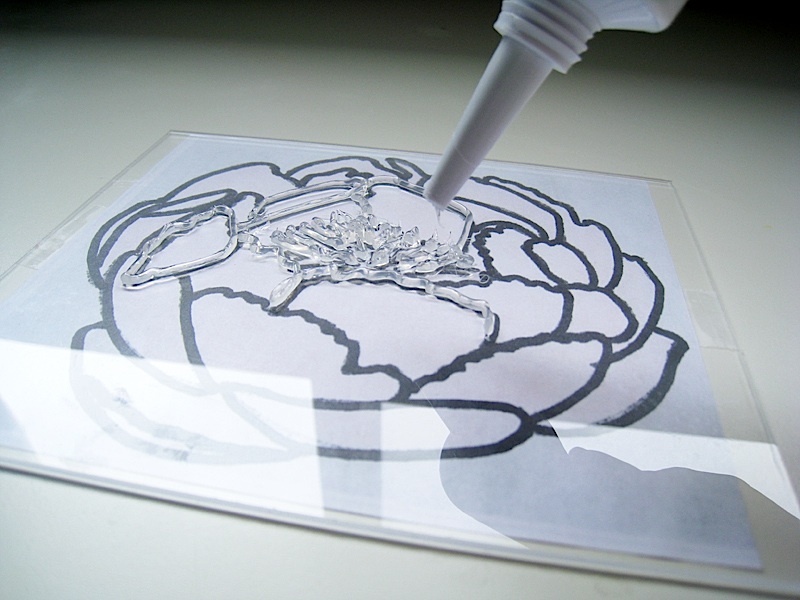
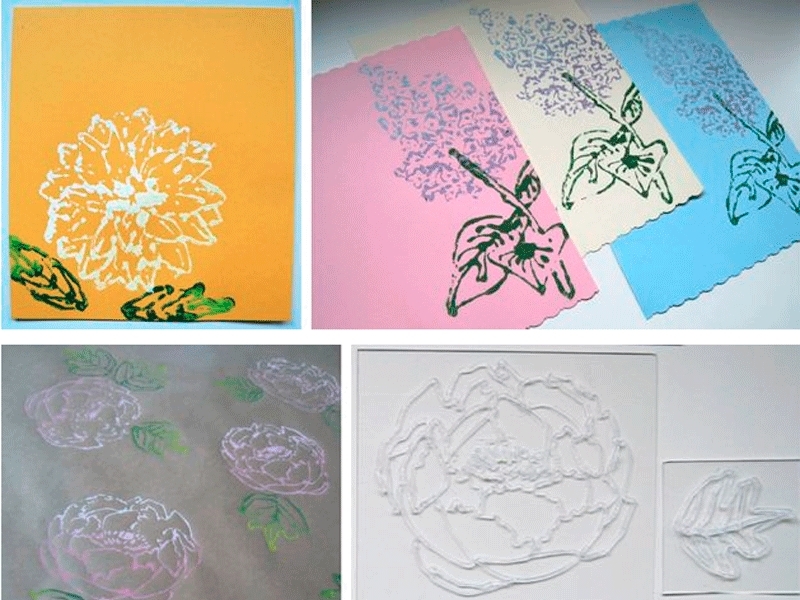
Ever wonder about the possibilities of designing your own stamps without having to carve anything? There is a simple way! You’ll need one ordinary household object – silicone caulking. Yes, the one you use on your bathtub, sinks, and windows!

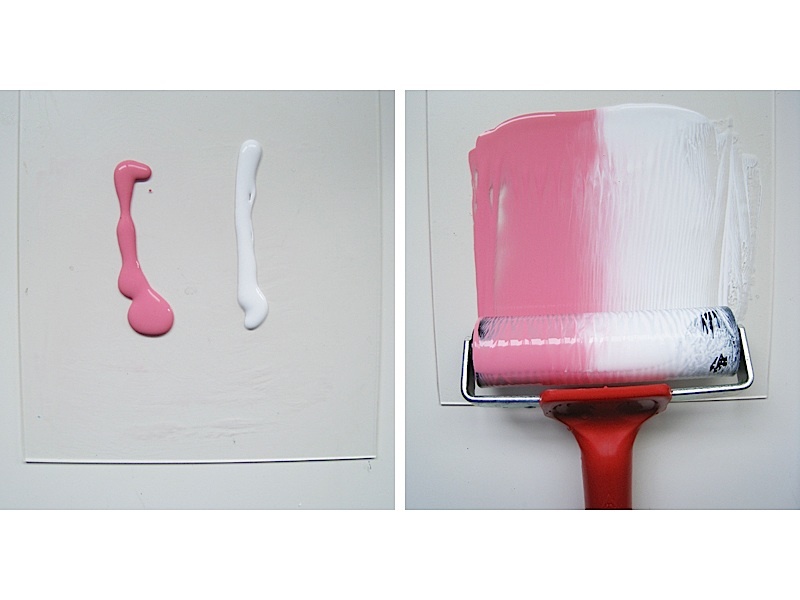
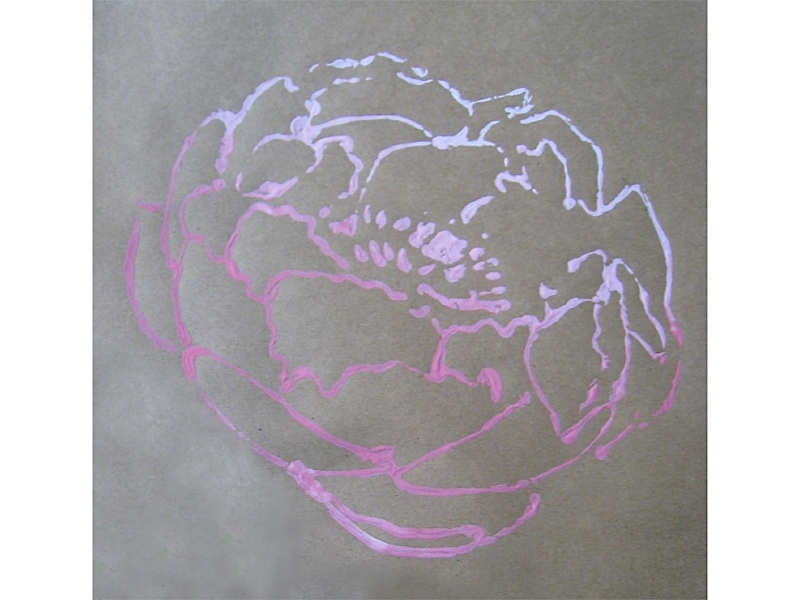
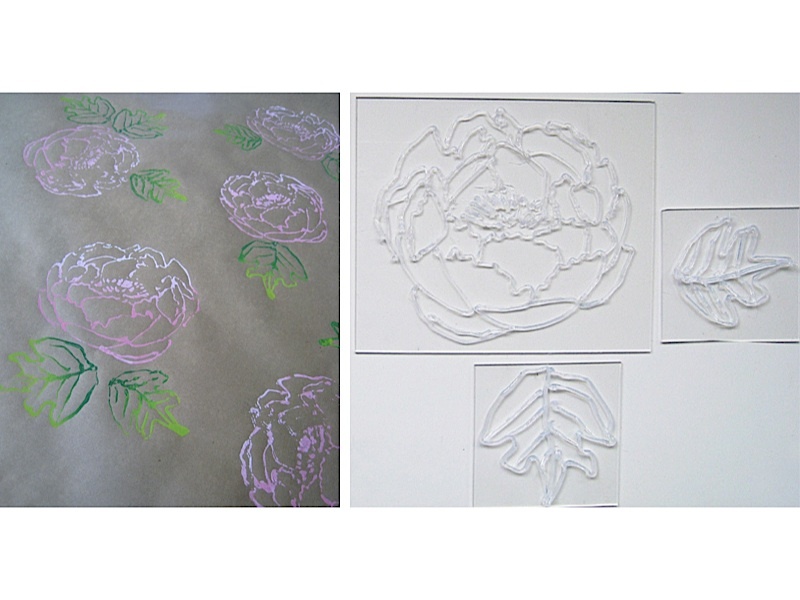
With no carving to do, this task couldn’t be simpler. And the result? Clear stamps just like the ones you buy at the craft stores, but made in any design and pattern you want, in any size. Here, I made some no-carve stamps in the style of vintage botanical designs. But you can use any art you desire.

Project Steps

Sketch your designs on paper.

These botanical designs range between 4″-6″ wide. The leaves are 2″-3″. But your designs can be any size you like.

Cut the plexiglass and draw with the caulk.

Cut the plexiglass to the size you desire. You can cut plexiglass to size by scoring a straight line several times using an X-Acto knife and metal ruler, and then placing the plexiglass on a table with the score line over the edge and snapping it in one quick motion.

Hold the caulk tube vertical and tap it against a flat surface 8-10 times to remove any air bubbles.

Cut the tip of the tube with scissors. I usually cut about 1/8″ away. Remember, the size of the hole on the tip of the tube will be the thickness of your lines, so cut cautiously! You can always cut a little more off, but once the tube is cut, you can’t make the opening smaller again.

Place your design under a piece of plexiglass and trace over it with the caulk, making sure you are evenly squeezing the tube and all drawn lines are touching the plexiglass.

The harder you squeeze the tube, the thicker your lines will be. In some designs, this might be a desirable effect. You might want to practice on some scrap paper or plexiglass before you start on your stamp.

Let the caulking cure for 24 hours, and then your stamp is ready.

Paint.

On a sheet of plexiglass, squeeze a dollop of paint. Load the brayer with paint as you roll.

To create an ombre print, you will need to use two paint colors at the same time.

Using your brayer, apply the paint on the stamp.

You will need to make 3 to 4 passes to ensure all lines are covered.

Print.

Carefully press the stamp on your desired surface.

If your design has other components, like this one does, repeat Step 4 to add them to your print. In this case, I’ll add some leaves to my flower.

Create a beautiful botanical pattern!

Clean up.

Clean your stamps immediately after use by wiping the surface with a dampened paper towel and any small spaces with a dampened cotton swab.

Then, wash gently under running water with a little bit of soap.

Creative Use Suggestions

Stamp your own designs and patterns on paper to create beautiful stationery.

Or on fabric to make your own floral-print clothes, tablecloths, and placemats.

Or accent a narrow wall in your home with your own stamped designs.

Of course, stamps can also be anything other than floral. Enjoy – the list is endless!