


This particular technique for folding paper claws is highly versatile as it can be done with any piece of paper that can be folded into a triangle. It therefore qualifies as both purist and non-purist origami as it can be made with a square paper folded in half, and a rectangular piece of paper as well.
Projects from Make: Magazine
Origami Claws!!!
Make a simple origami claw out of ANY size piece of paper!
Gather thy materials!
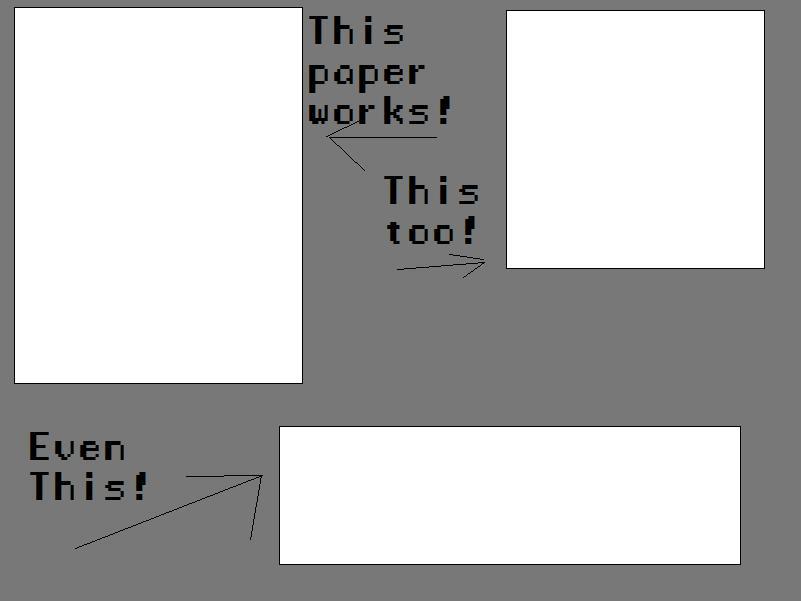
Get a piece of paper. Any shape or size will do. I would recommend a paper with a middle-range thickness. Too thick and the folds cannot be made precisely enough, but too thin and the finished claws will crumple upon contact with anything too solid.
Make it triangular!
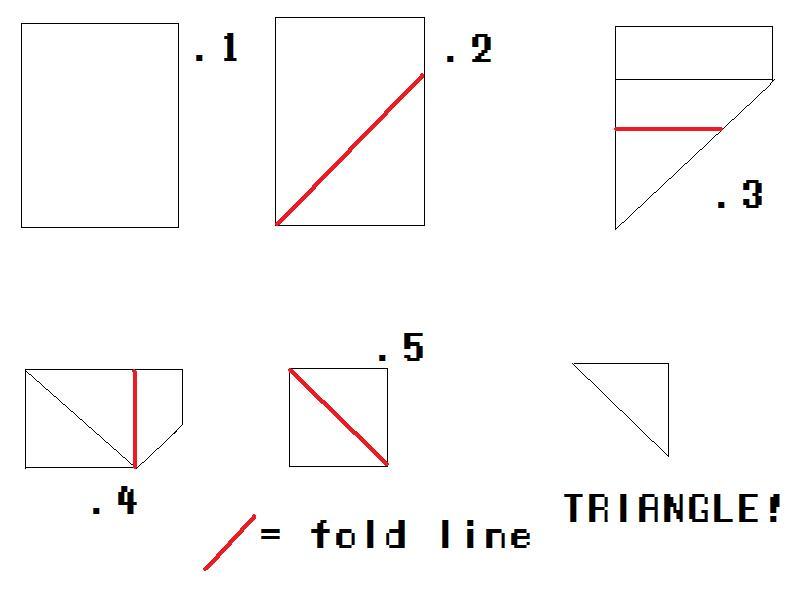
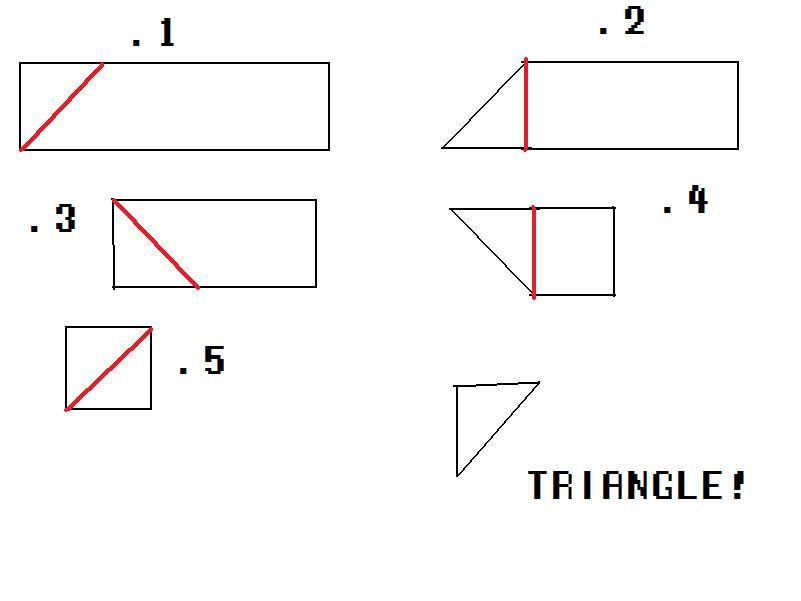
What makes this design so versatile is that any shape of paper can be made into a triangle. Different papers have better or worse outcomes as claws, though. The regular printer paper seems to do best for me.
All folds are valley folds in this technique, meaning you always fold so that the imaginary fold line is on the inside of the fold!
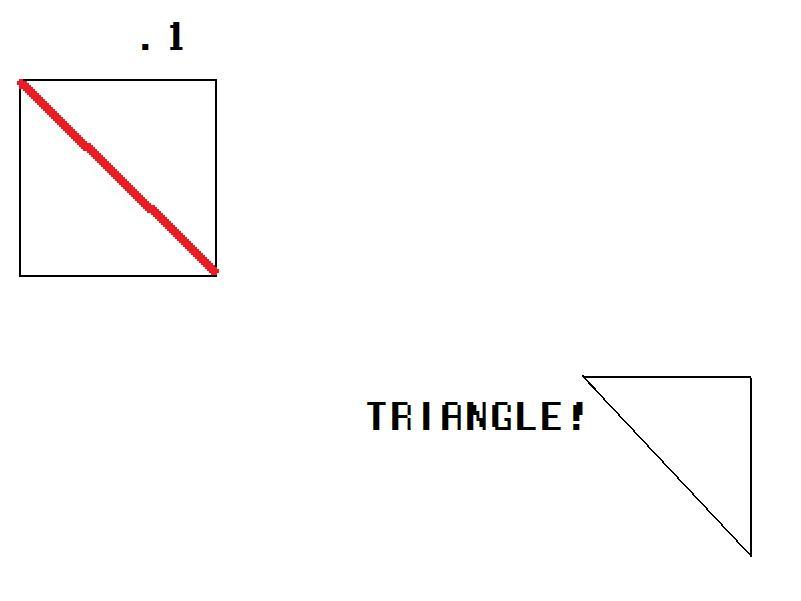
From triangle to claw!

Follow the directions in the picture. `Tis a little hard to explain, but here I go — never mind. Just remember, on steps 1 to 3 in my drawing the paper matches up at the conclusion of step three, and each time you use the previous step to outline where you fold. There’s really no good way to explain it. I couldn’t understand it until my buddy did it in front of me…
Yaaay! You win!

The finished claw can now be sealed for strength! You can even paint it! I find that the claws look freaky with watercolor paint on them, which works well because they’re paper!


