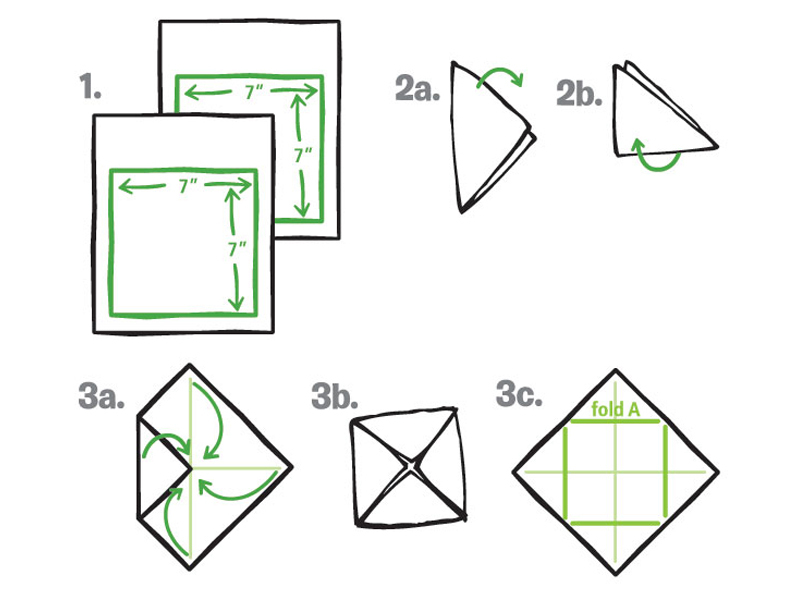
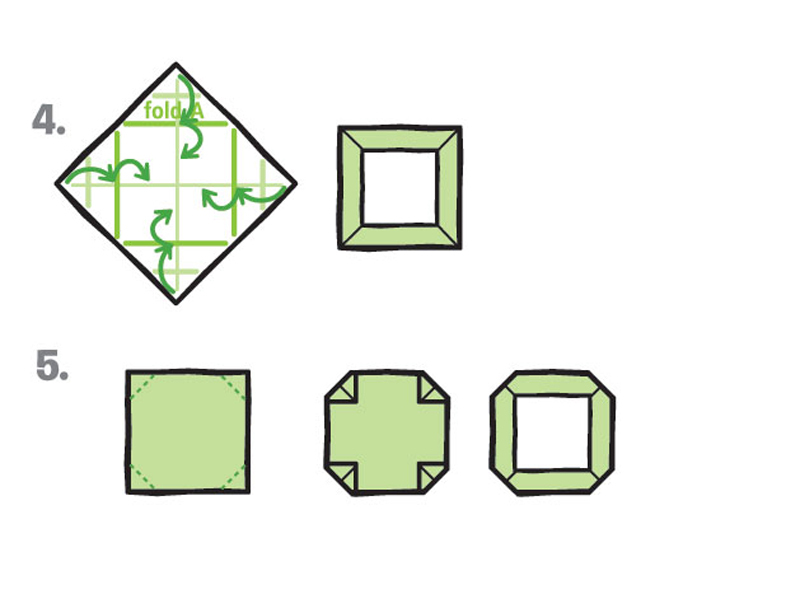
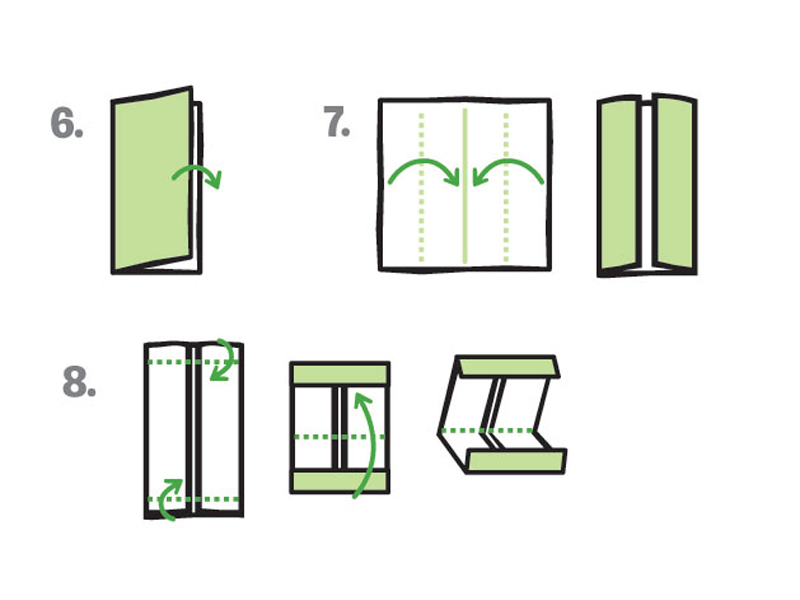
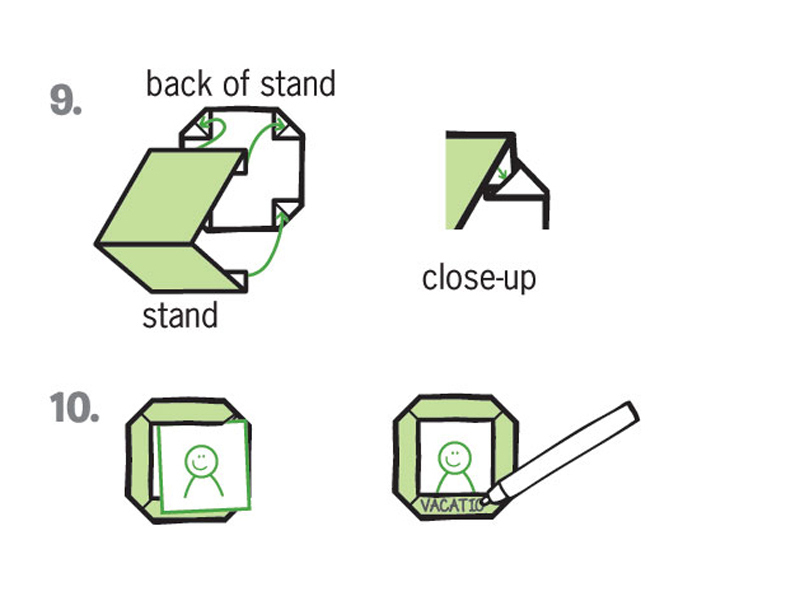
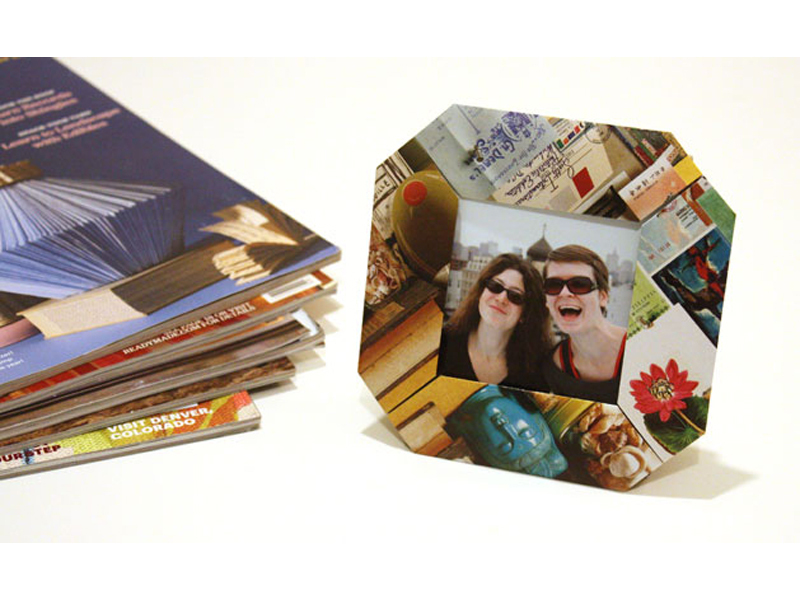
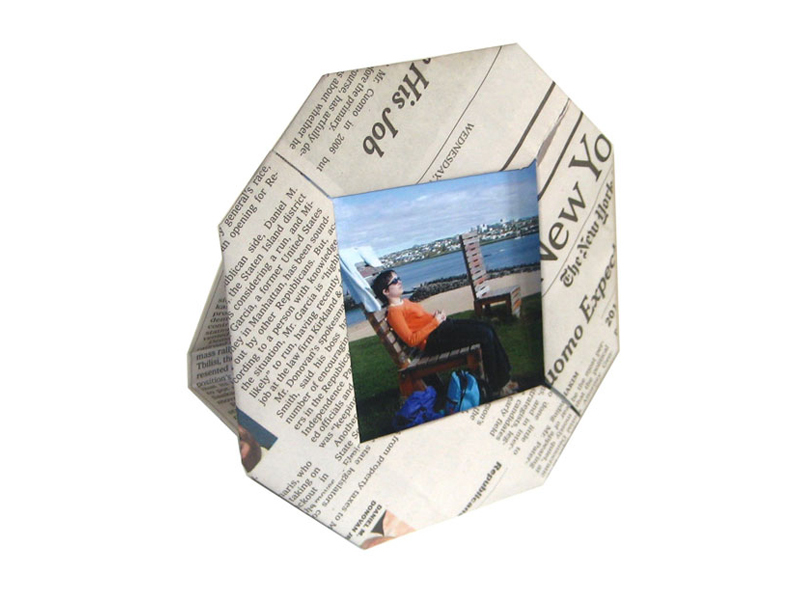
Here’s a great recycling project to subscribe to – transform a few pages from an old magazine into a brand new picture frame. It takes some fancy folding work, but once you have the hang of it, you’ll have a new frame in no time.

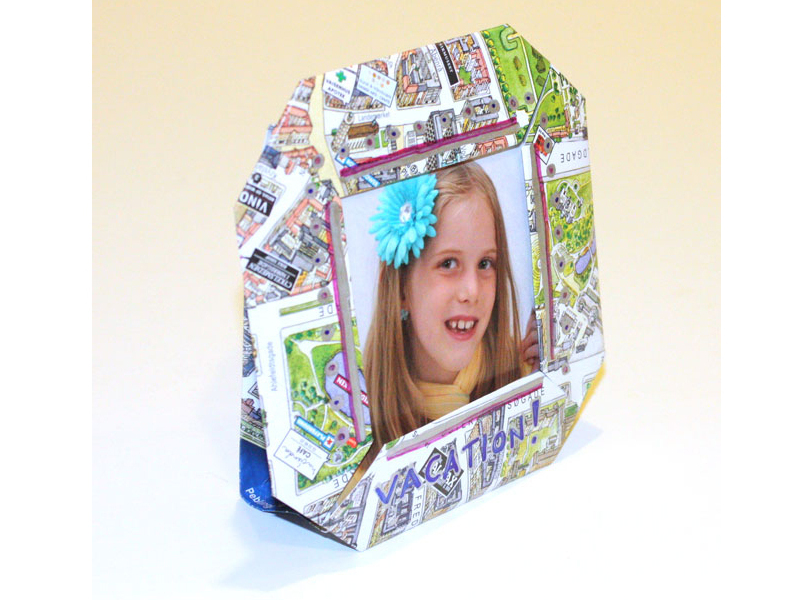
Once you’ve tried your hand at magazine pages, you can move on to other types of scrap paper and match the paper to the photo. An old map makes a great memento from a road trip to frame that vacation photo. Comic book pages make a great frame for your Halloween super-hero costume. Your paper recycling bin is your best source for inspiration.

Project originally posted on CRAFT.

Project Steps

1: Measure and cut two pages from a magazine into squares that are 7″ on each side. You can scale this project up or down, just make sure your squares are the exact same size.

2: Take one square piece of paper and fold it in half corner to corner. The paper should now look like a triangle. Fold the triangle in half again, straight across the middle. Unfold the paper so it is flat again.

3: Fold all four corners of the paper into the center. Open the piece of paper back up. This is fold A.

4: Now, fold each corner twice toward the center. First, fold each corner so the point touches fold A. Then fold again along fold A so the corner is hidden. There will now be a 3″ x 3″ open square in the center of the folded parts.

5: Flip your project over, keeping all the folds you’ve made in place. Fold each new corner back 1″ toward the center. Set this piece aside.

6: With the other piece of paper, make the picture frame stand. Start by folding the paper in half long-ways down the center. It should now look like a long rectangle. Open the piece of paper so it’s flat.

7: Fold each side of the paper lengthwise to the centerfold you made in step 6. It should now look like a long rectangle with two flaps.

8: With the flaps closed toward the center, fold the top of the rectangle ½” down and the bottom of the rectangle ½” up. Now fold the bottom of the rectangle up to meet the bottom edge of the flap at the top.

9: Tuck the folded edge of the flaps from the stand into the corners you folded on the back of the frame in step 5. Each of these corners has a slit down the middle from the folds you made, so you will be able to tuck flaps at the top and bottom of the stand in at this slit. Tape the stand in place.

10: Cut your photo into a 3½” square. Insert the photo into the front of the frame by sliding it under the folded space. Decorate your frame with markers, stickers, and anything else you wish. Your picture perfect frame is hot off the press!

Conclusion

This project first appeared on Craftzine.com.