m44_RaspPiCam_Nerd-5

Build this project and more in Make: Vol. 44. Don't have the issue? Get yours today!
Build this project and more in Make: Vol. 44. Don’t have the issue? Get yours today!

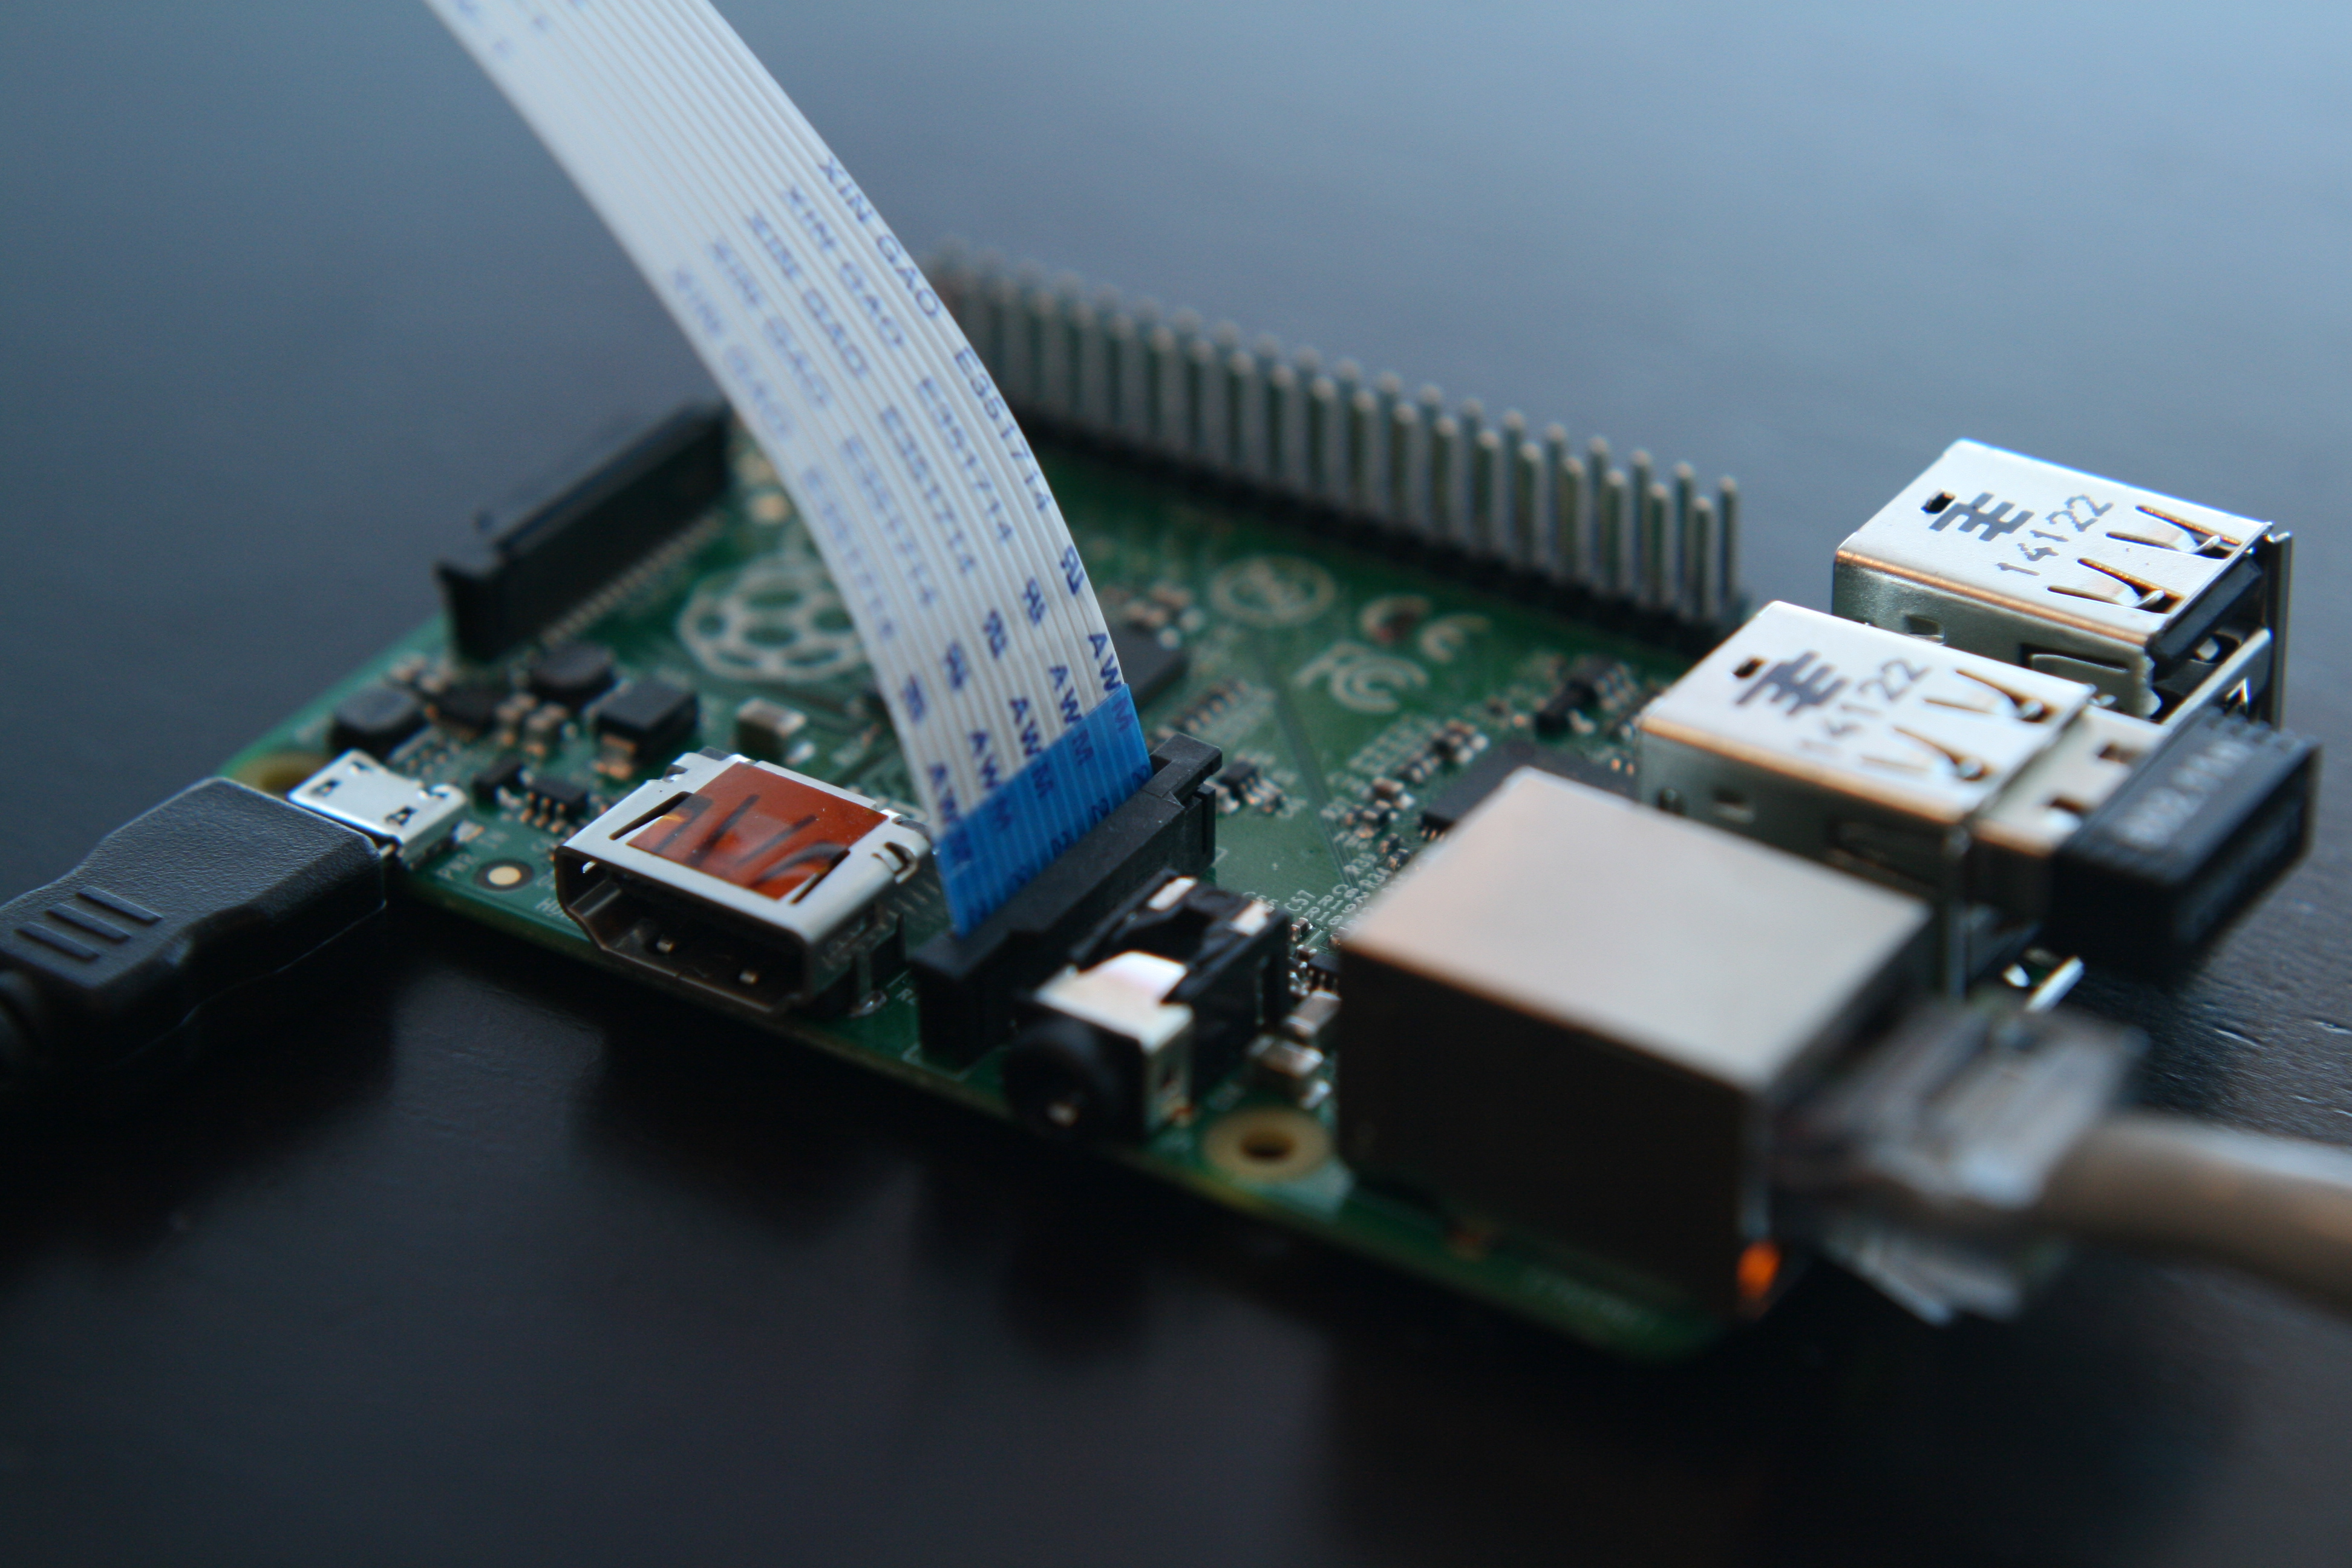
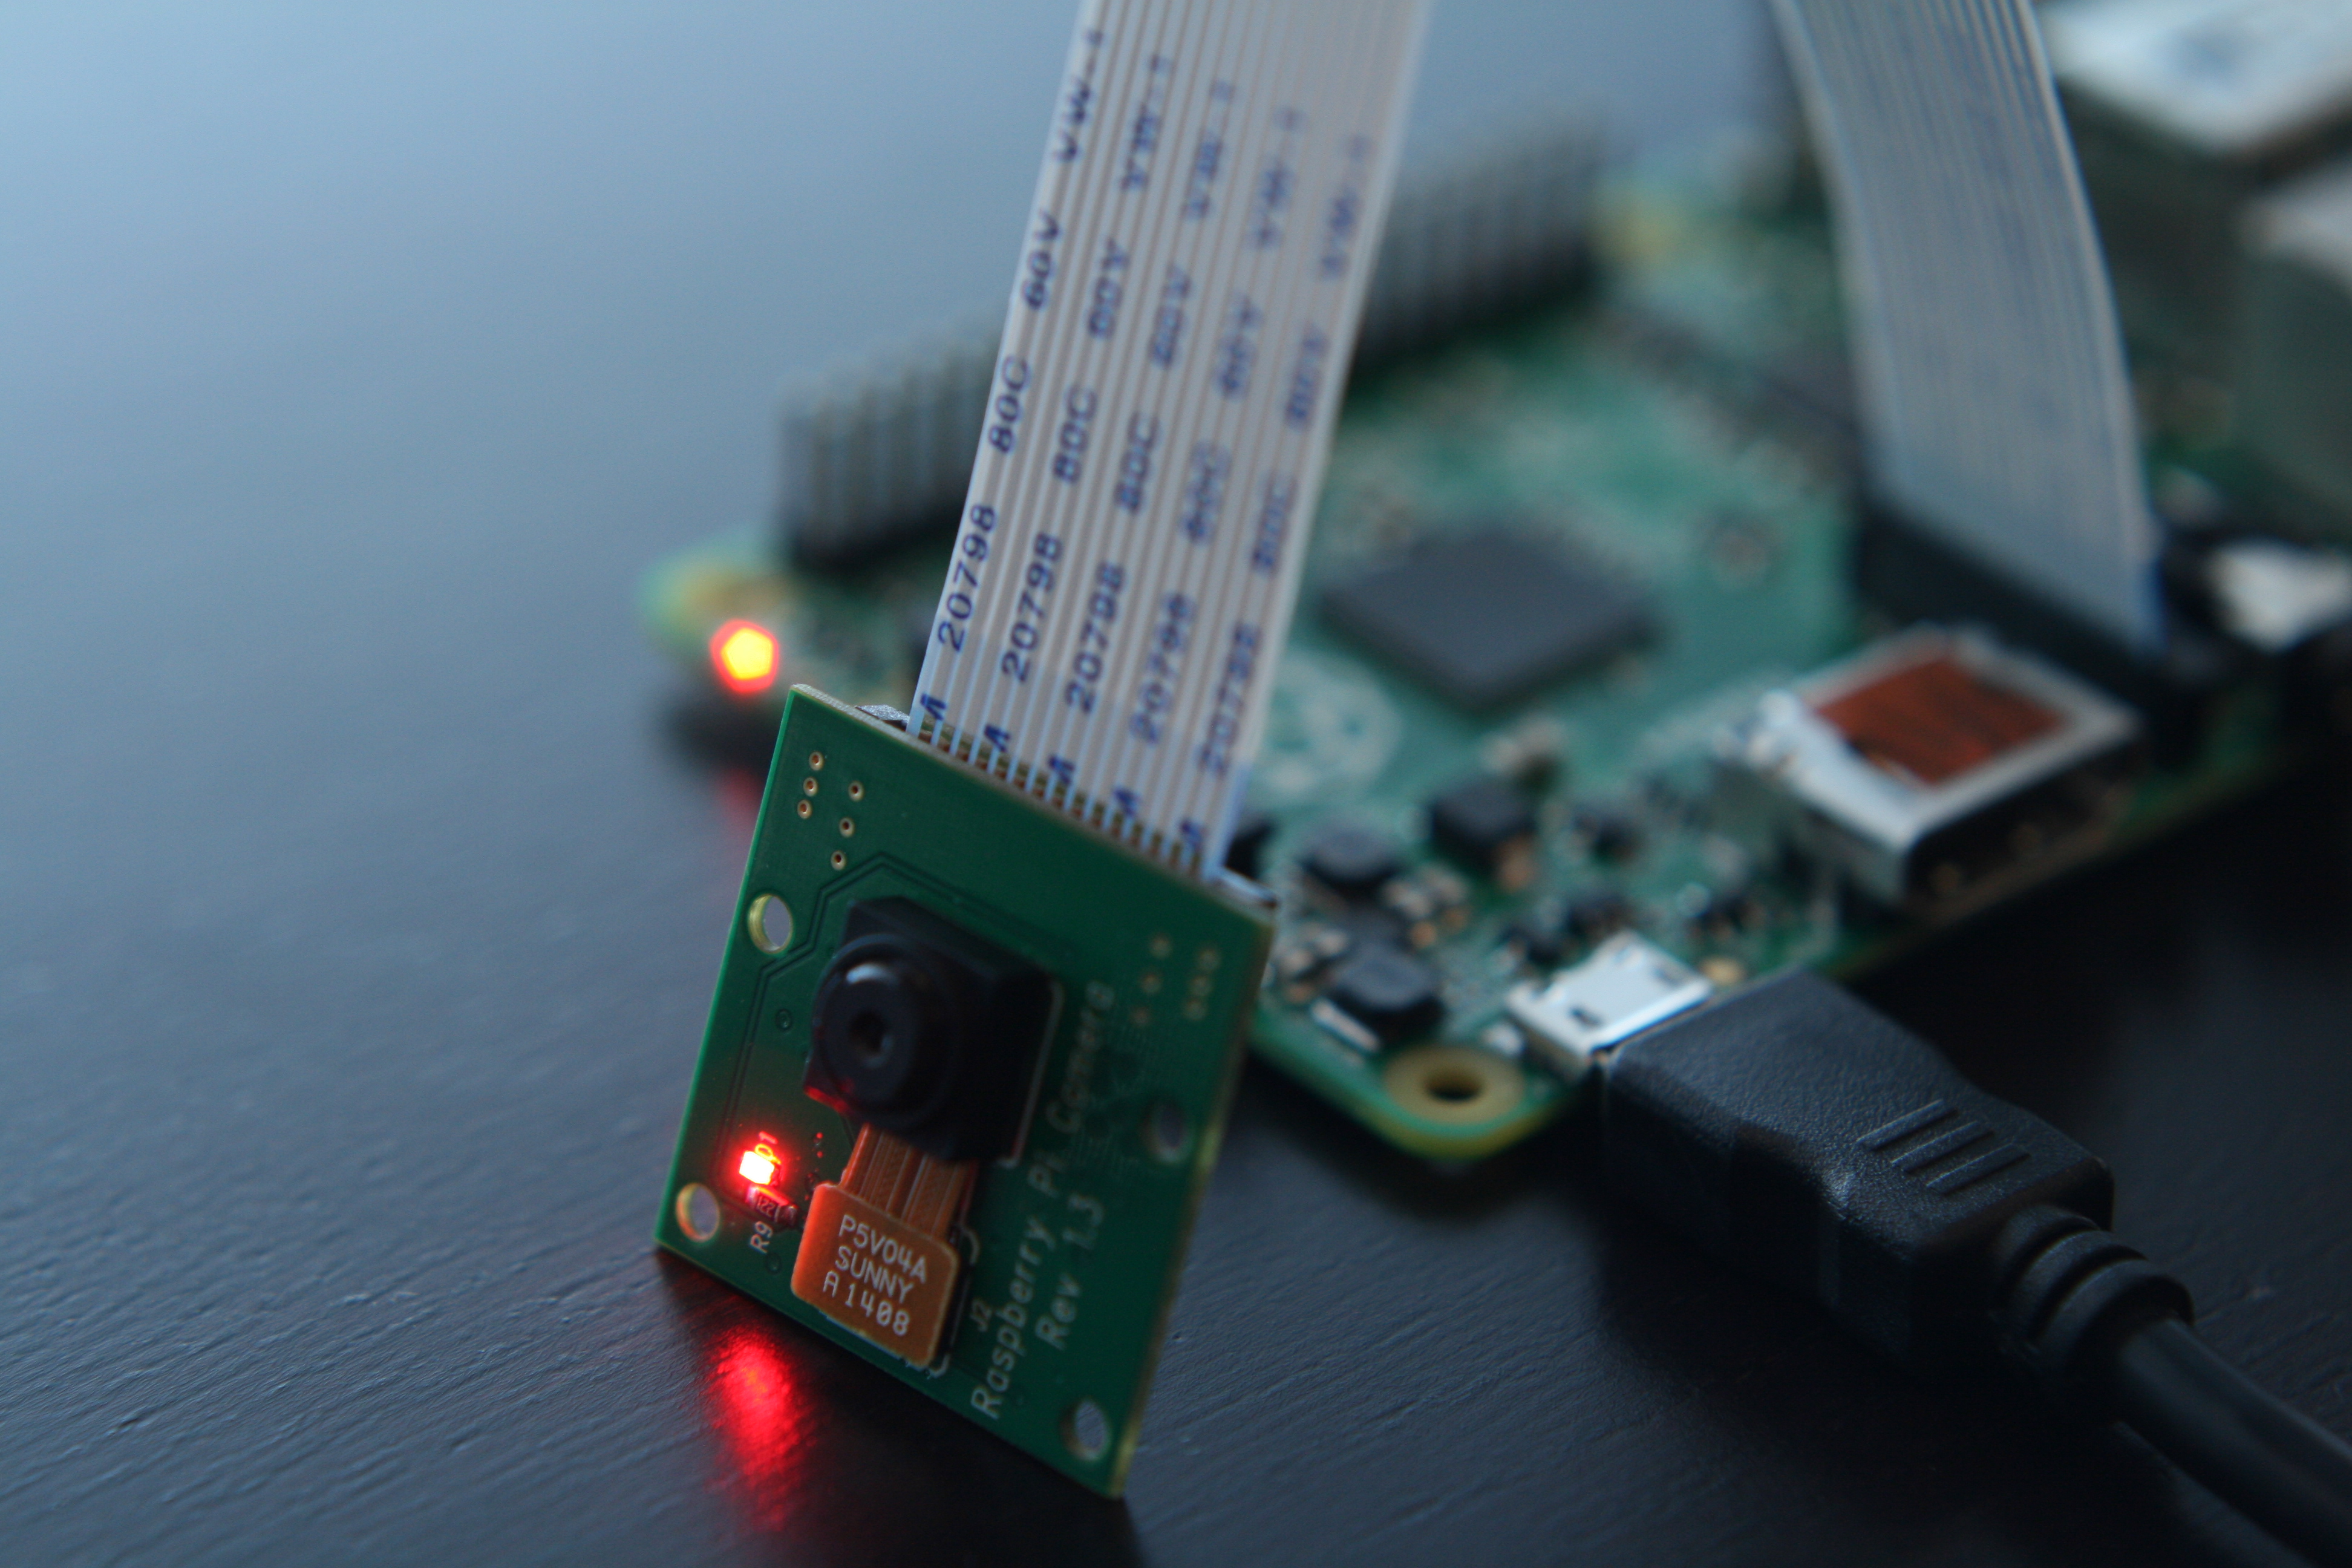
The Raspberry Pi computer is at the heart of a lot of rewarding projects — especially when you add the Pi Camera Module into the bill of materials. The module is easy to set up (see our Skill Builder tutorial) and recently helped me with a home-security solution.

The Pi Model B+ is the perfect hardware for a security camera project: It’s inexpensive, physically smaller and thinner than previous Pi models, and needs little power — the B+ can run for a very long time simply on power from a cellphone charger battery.

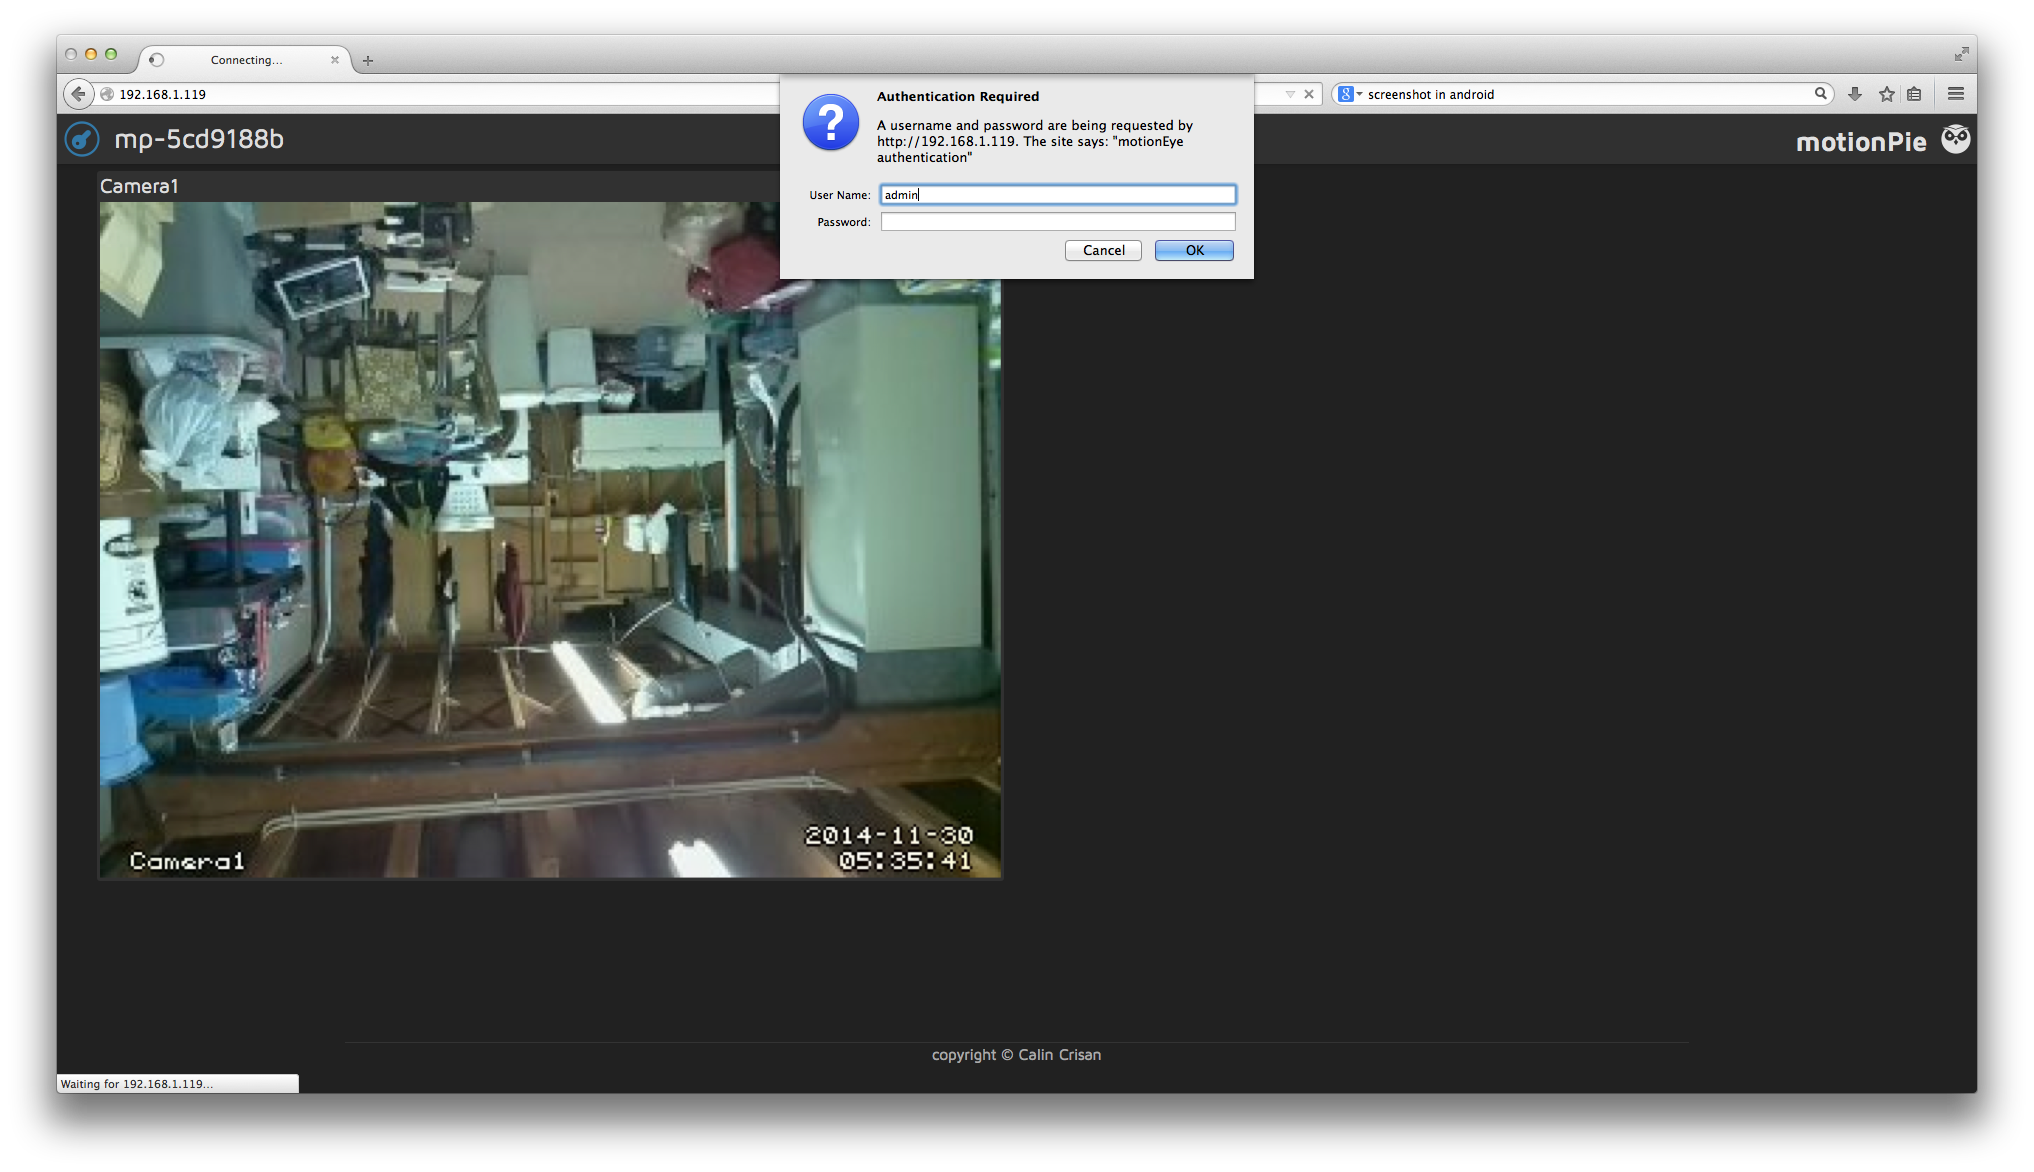
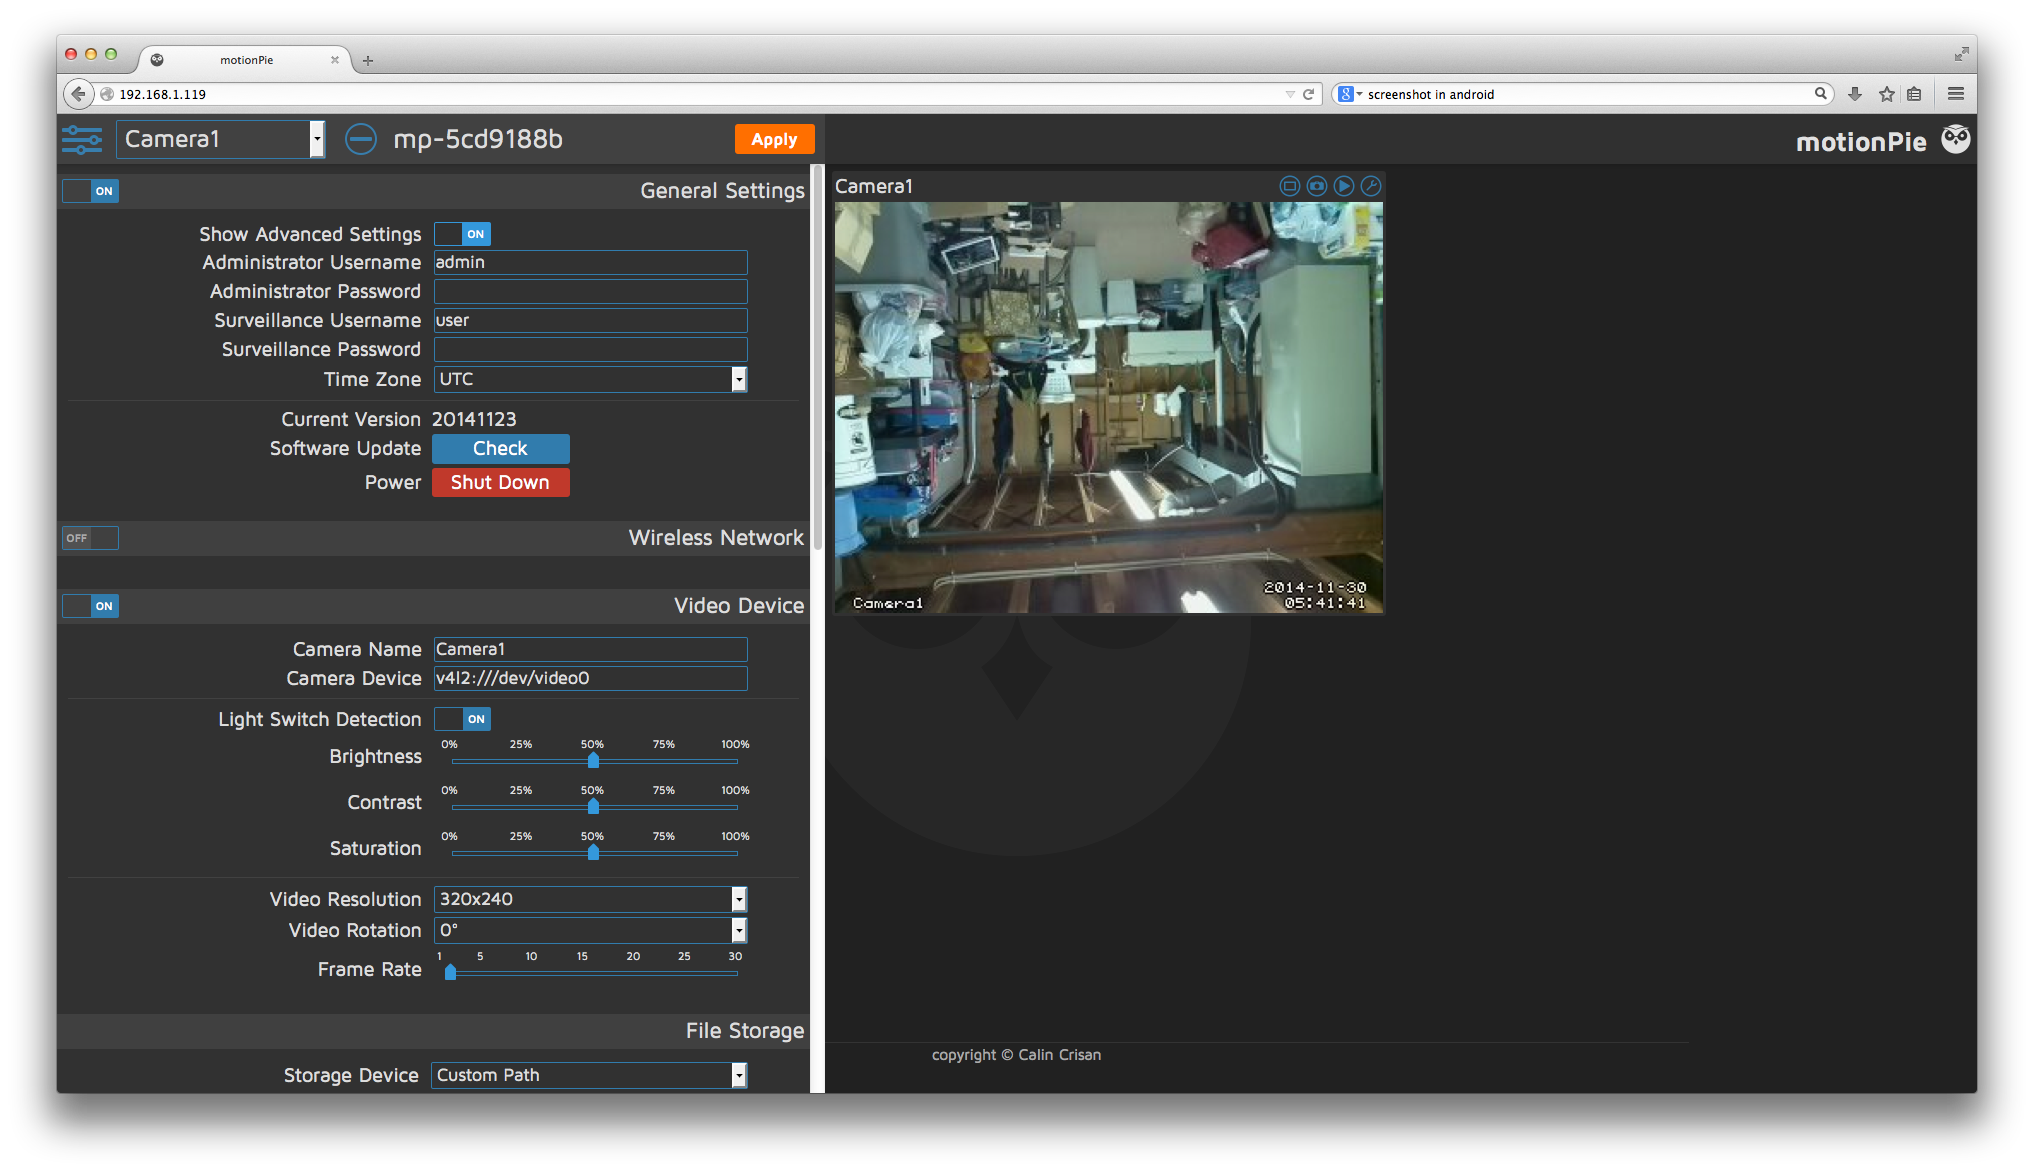
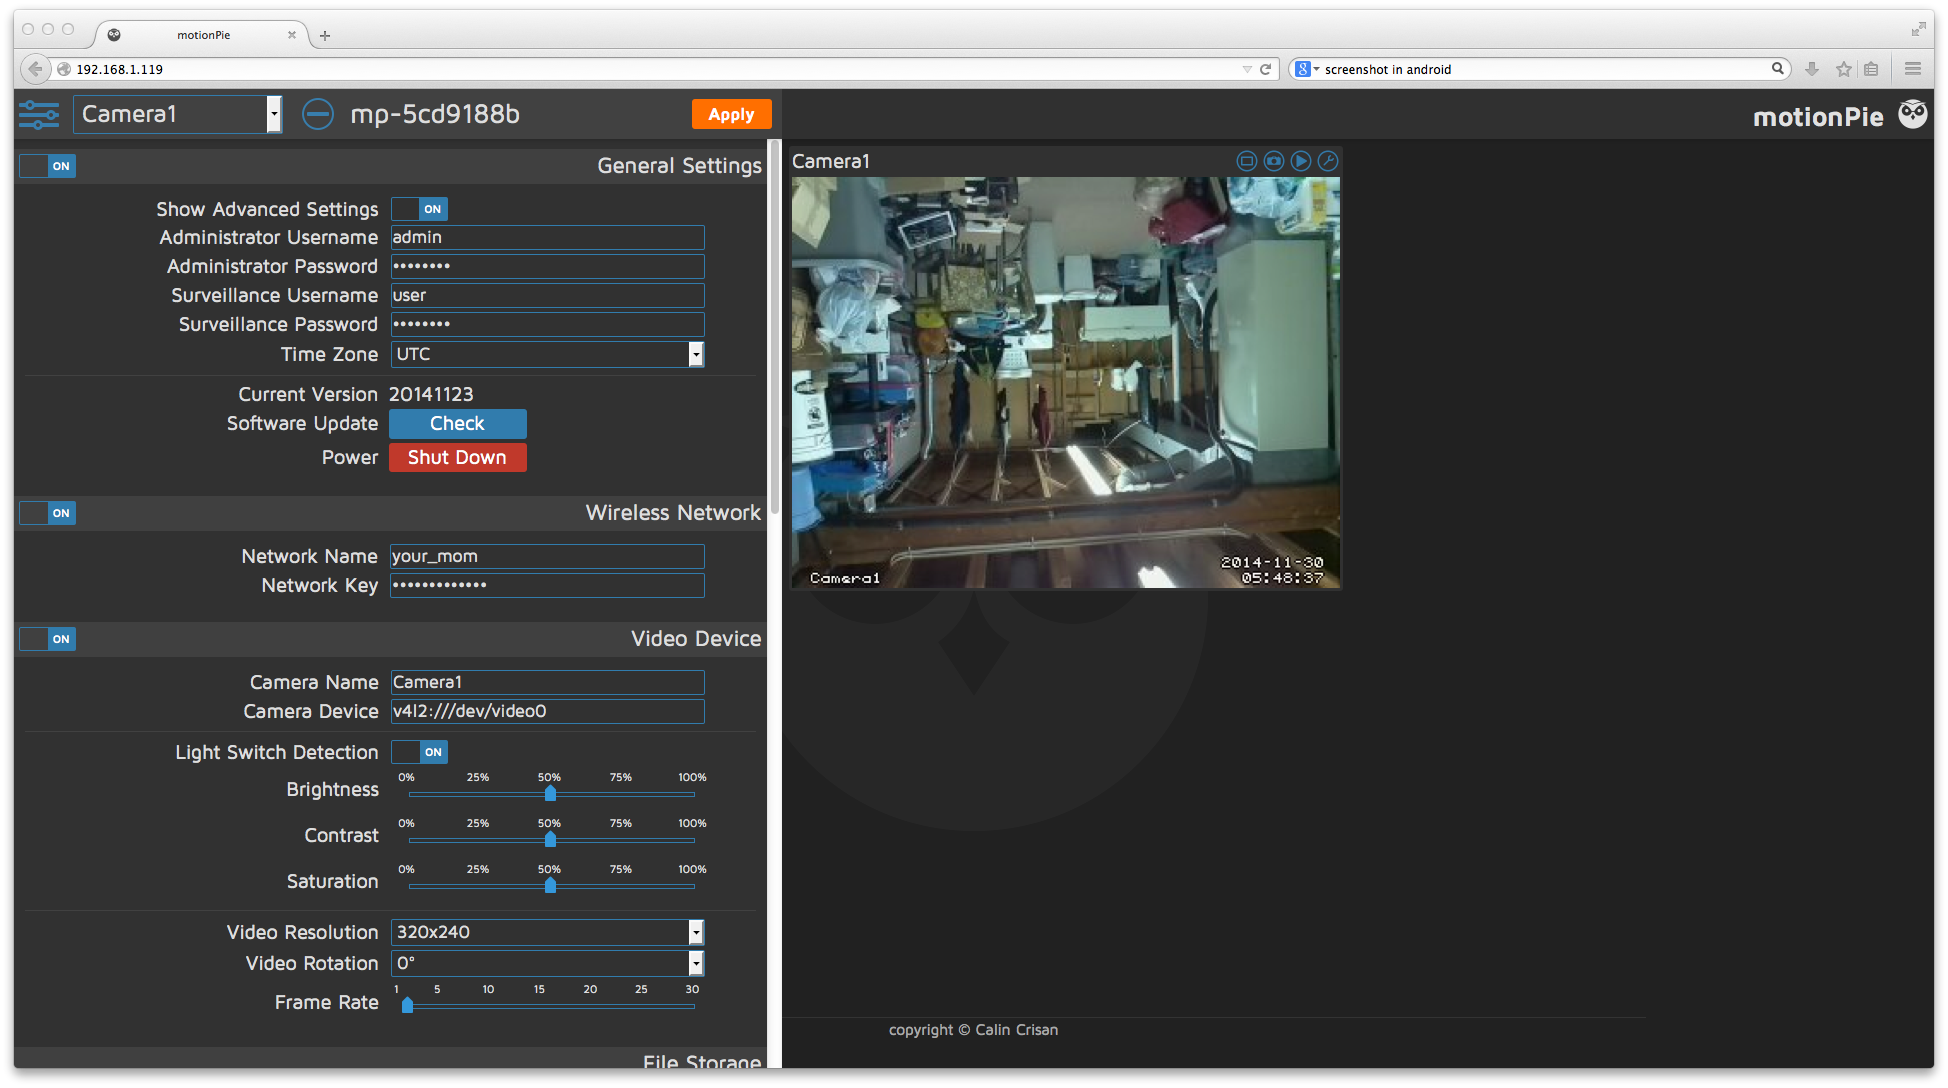
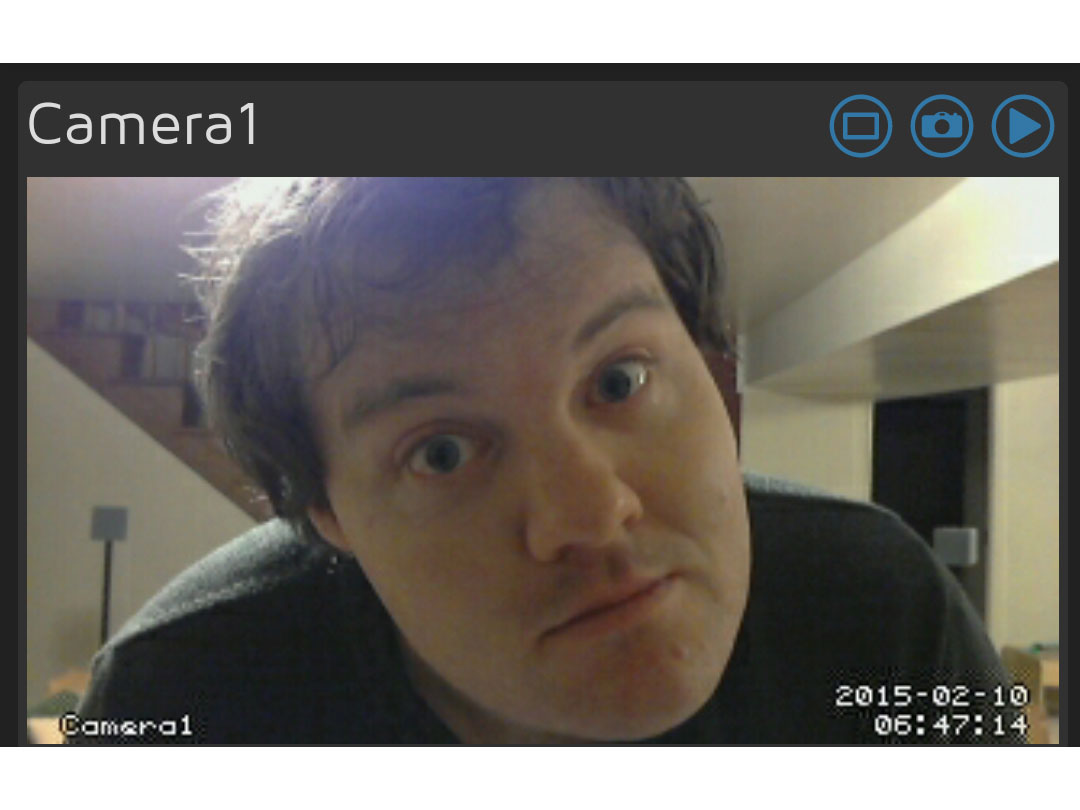
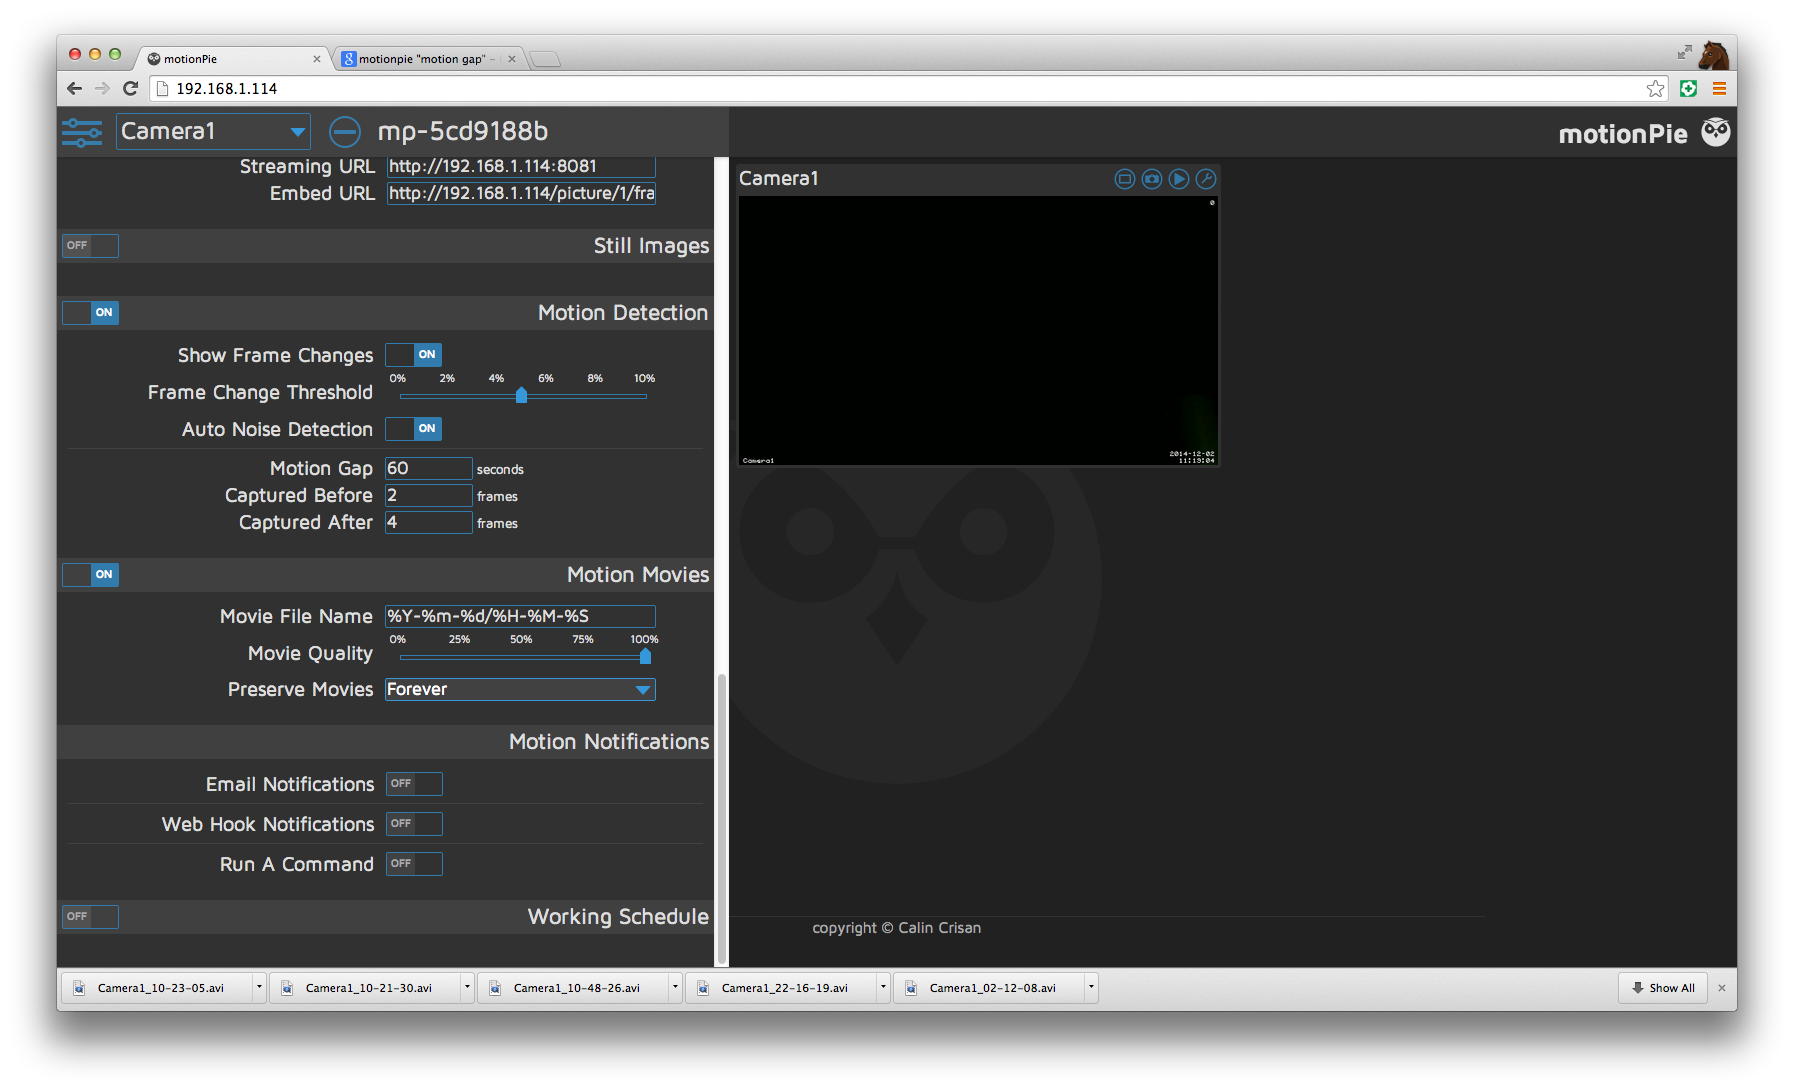
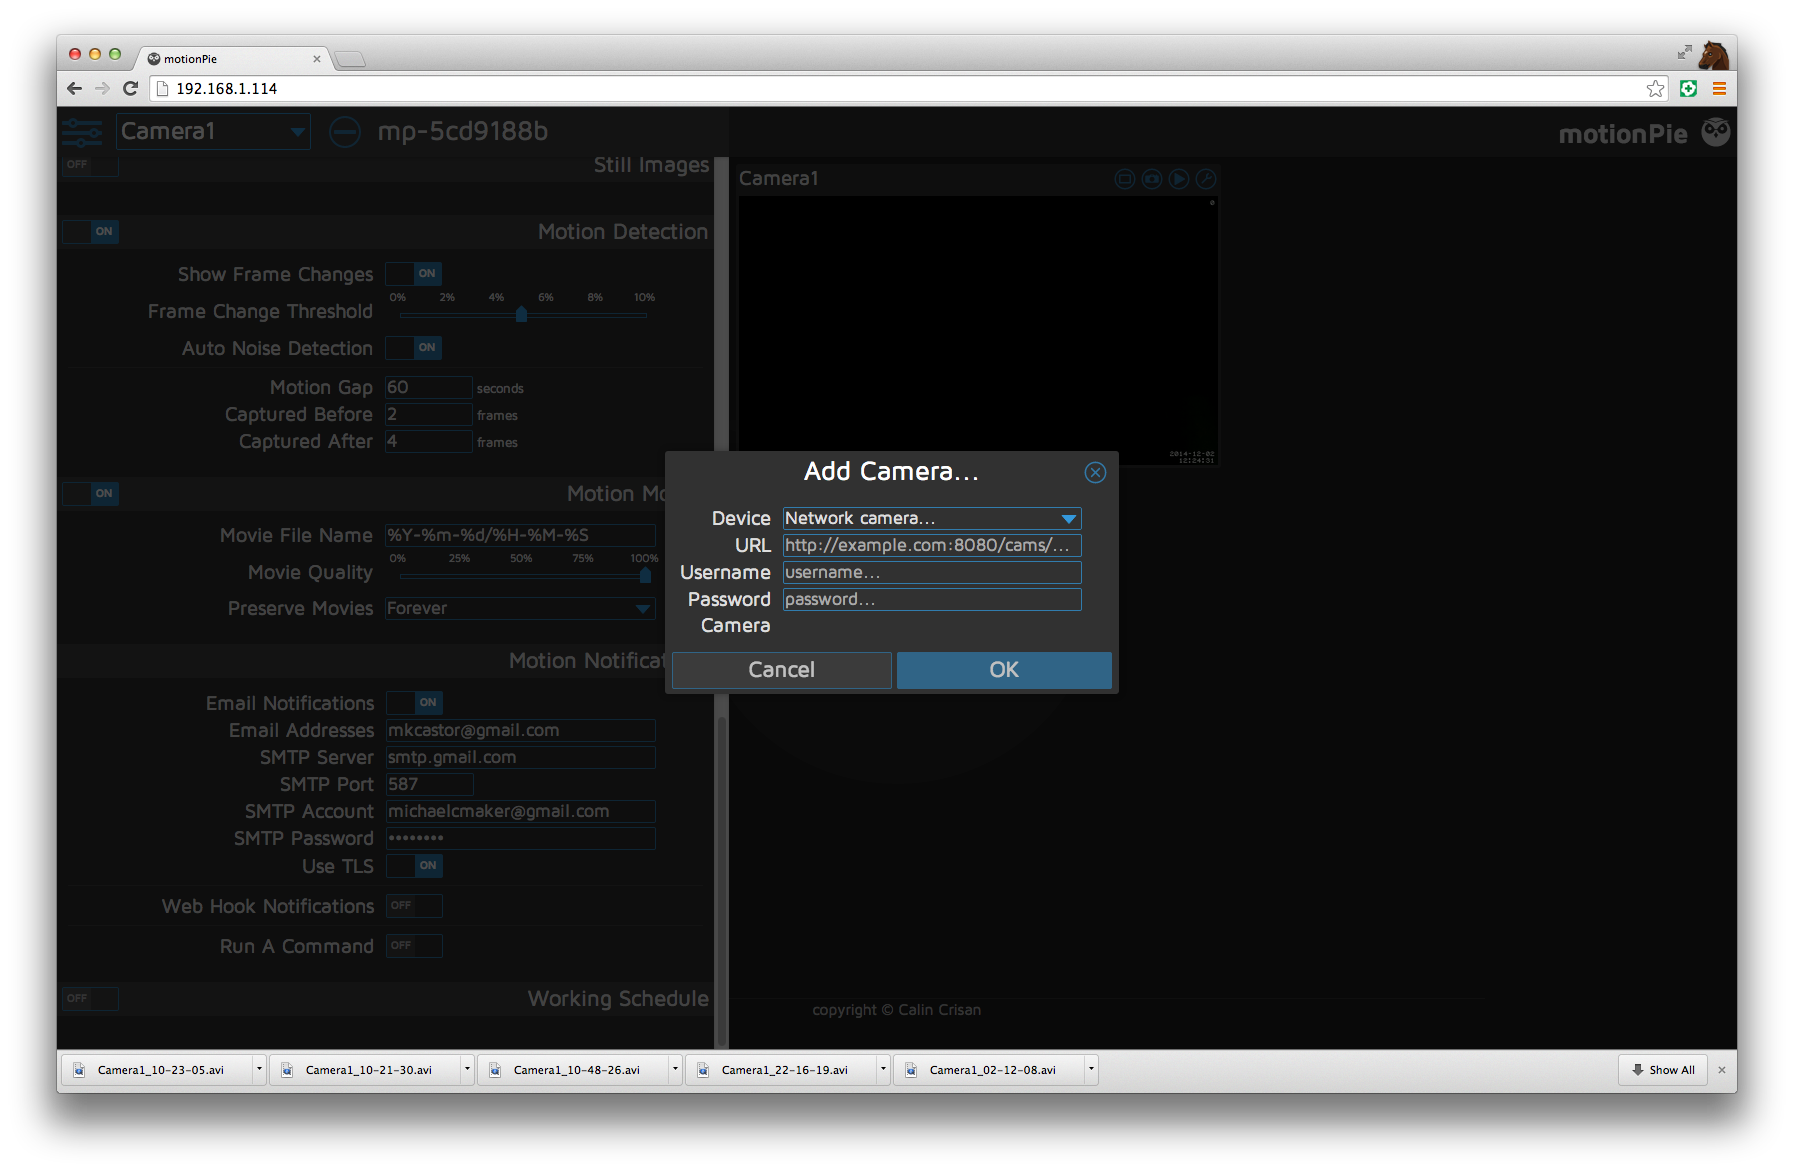
And Calin Crisan’s free software package, motionPie, takes all the hard work out of building a custom surveillance-camera system. The easy-to-use interface lets you check your cameras from anywhere, via a web browser on your computer, tablet, smartphone, or almost any internet-accessing platform.


Project Steps

Put motionPie on the microSD card

Download the latest stable motionPie image from github.com/ccrisan/motionPie/releases and unzip it.

Write the image to a microSD card using your favorite image-writing utility. My current favorites are Win32DiskImager for PC and ApplePi-Baker for Mac.

Insert the freshly burned microSD card (with adapter) into the Raspberry Pi B+.

Connect and configure your Pi

Connect the camera module, Wi-Fi USB dongle, and Ethernet cable to the Pi.

Finally, power up the Pi by plugging it in. The power LED will immediately illuminate, though on first boot the Pi will take a bit of time to initialize.

Find the Pi’s IP address

Now you’ll need to determine the IP address of the Pi. The easiest way I’ve found to do this is with an app called Fing for iOS or Android. Make sure your mobile device is connected to the same network as your Pi and run Fing to get a listing of all the IP addresses on your network.

Look through the Fing output for a line with “Raspberry Pi Foundation” and the IP address to its left; this is the address you’ll enter into a web browser to access your Pi. You should be greeted with an interface and a live video feed.

NOTE: If you don’t have an iOS or Android device you can always log into your router and look at the DHCP assignments.

Set up your camera(s) with motionPie

Using the motionPie website, click on the key graphic in the upper left-hand side of the site. This will bring up a dialog box requesting a username and password. The username is admin and you can leave the password field blank.

Click the slider icon again to bring up the Admin menu, turn on Show Advanced Settings, change your admin password, and click Apply to save the settings. You’ll then be asked to log back in using your updated credentials.

Finally, in the Admin menu, click the slider next to Wireless Network to the On position. Type in your network SSID name and password and click Apply to save.

View your Pi security camera

Setup is complete. You can now view your Pi security camera from any computer or mobile device!

Deploy and spy

Thanks to the small form factor of the Pi and Camera Module, this project fits almost anywhere. Consider deploying yours in a stuffed animal, a birdhouse, a live-streaming “street view” rig atop your car, or even concealed in a shirt — the possibilities are endless!

Going further with motionPie

MotionPie includes additional configurations you’ll definitely want to check out. The system can do motion detection and record videos. It can do time-lapse videos. And you can set a working schedule so the system only records video during certain times of day.

You can also add more camera nodes — Pi NoIR night vision cams, USB cams, and networkable IP webcams — and even set up email alerts, which you can easily convert to text messages using your cellular carrier’s email-to-text services.