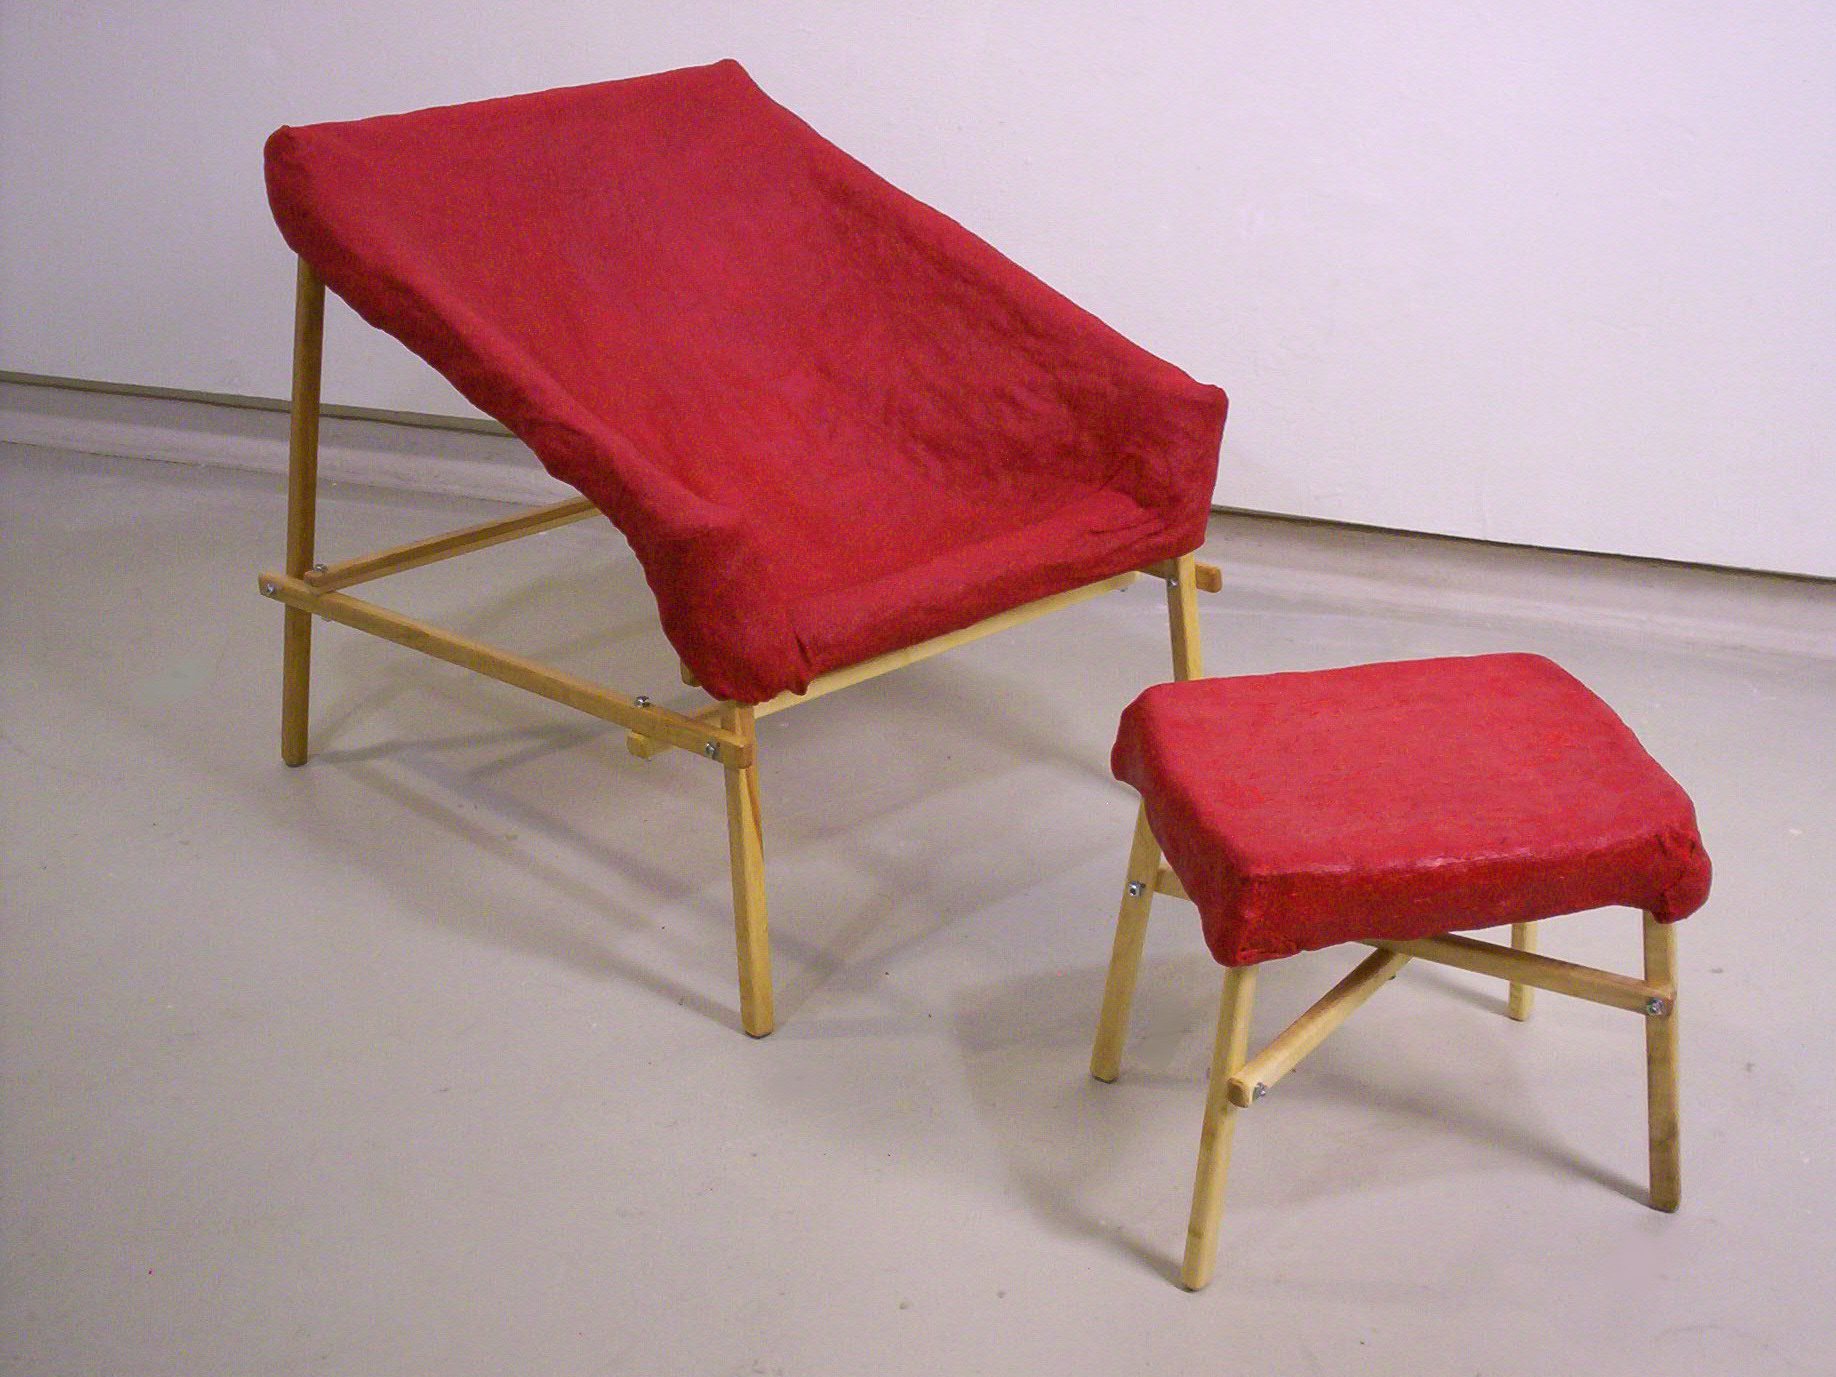
Unique, expressive and comfortable furniture can be expensive and economically inaccessible to many people. Inspired by the work of Enzo Mari ‘Autoprogettazione’ and more recently ‘Starter Office’ by Scott Klinker Product Design, this project aims to outline a process that allows a person to design and construct furniture with very few tools and affordable bulk and nominal materials. The methods are simple and the process is fun, where many variations can be designed and completed. Variations can be interesting and explorative, this design project/ process is hoping to encourage not only design and manufacture using this method, but also derivatives and variations that would suit the owner per domestic setting. Keep in mind, this project does not require epoxy resin, high VOC chemicals or expensive materials.

Beside choosing form and typology of furniture some of the initial decisions can be choice of hardwood (oak, maple, ash, etc.), fabric choice (burlap, crinoline, buckram, cotton muslin) and color choice for fabric. The bioplastic used in this project is a corn starch plastic which is easily made at home, non-toxic, biodegradable and affordable. The square stock hardwood lumber can be found at many local lumber yards.

Chris Palmer will complete the MFA 3D Design Program at Cranbrook Academy of Art this May, 2012. Through the 3D Design Program Chris has worked with non-toxic, renewable and environmentally friendly materials while exploring new and advanced aesthetic for object design using these types of materials.

Project Steps

Safety Disclaimer: The information provided in this guide is only a rough estimate of how one could begin and complete a project like this. If there are any safety doubts in the manufacture or use of this object the designer/ builder should consult an expert in that field before attempting these processes. The designer and author assume no responsibility for injuries, failures or miscalculations in the production and/ or use of this object. Wear safety glasses when operating hand or power tools and use heat resistant gloves when working with liquids that are hot.

The complete process is broken into three sections: Lumber and frame making, fabric and template making, bioplastic recipe and cooking. Part of what makes this process affordable is that there is no need for expensive clamps, table saw, sewing machine and other tools that many people do not own. What you will need are many items that you may already own which are listed in the ‘tools and parts’ section of this guide.

Part 1 of 3: Lumber Selection and Frame Making Process. Depending on duty required to make this furniture, the lumber you choose should be strong enough to support your weight. The lounge and ottoman featured here use 1” square maple stock. Nothing smaller or thinner in hardwood should be used, preferably over 1” square should be sufficient depending on form choices. You may want to design this object keeping in mind that many lumber yards sell square stock in either 36” or 48” lengths.

Once the lumber type and size have been chosen, take your ideas to a CAD program or you can draw the object at ~ ¼ scale for modeling and angle template making. The program used here was 2D program where only the profiles of the Lounge were drawn and redrawn in different ways that looked interesting, strong and within 48” lumber lengths. After chair form has been drawn cardboard templates can be made to set the angles for frame assembly using a protractor. Lumber lengths can be cut using miter box and saw.

At this time locate and drill 1/4” holes for all intersection points on the two profiles (sides) of the object, a chair in this case example. Once holes are drilled assemble with wood glue, 1/4” x 20 bolt, washers and nut. Set the angle of each intersection from the cardboard templates (or drawing) made from the drawing. Tighten bolt and wipe of excess glue applied to the joint area.

Now that the two sides of the object have been assembled, connect with lateral frame pieces in the same method; locate and drill, assemble with hardware and wood glue. Allow time for glue to dry. The Lounge in this example has dowels installed close to the bolt. This will limit torque on the joint area. It is best to wait a day for the glue to dry when you drill the joint for a 3/16” dowel. Drill about 45º way from bolt center, cut 3/16” dowels and install with glue. The frame being structurally complete it can be treated with tung oil or another natural wood preservative.

Part 2 of 3: Fabric Selection and Template Process. When selecting fabric for seating area try to purchase a fabric that is open weave (burlap, crinoline, buckram, etc); this will make saturation easier for the bioplastic that will be applied and will be stronger because of the saturation. Using fabric saturated with corn starch plastic it took about six laminates of this composite to make the object structurally reliable. Keep this amount in mind when purchasing fabric. Many of these fabrics come in several colors; now is the time to choose which color looks best with the treated wood.

Fabric templates can be cut at this time. Final form for this object is made by sitting in the fabric when it is wet with the plastic. This can be the tricky part when cutting templates; In order to cut about six templates the builder will need to obtain template dimensions by lightly placing their figure in the fabric that is retained in the frame by using thumb tacks. Be very careful; thumb tacks are not intended to hold your weight with fabric and a lot of balance is required to get a comfortable and accurate contour.

Adjustments can be made from this point. Some questions to consider: Is there enough pocketing area for a headrest? Is this too formal? Not formal enough? Make final adjustments to fabric amount and trim cut fabric with three or four inches of overhang from top of wood frame. This three to four inches will be the hem area and hand sculpted area of the fabric which provides the strength and makes a pocket around the frame to retain the fabric.

Remove this first fabric template from the frame; this will serve as your layout for all other fabric pieces except for the final layer. The final layer of fabric should have another inch bigger than all of the other pieces; this will allow a final wrapping and hand sculpted hem area which will visually unify the fabric layers.

Part 3 of 3: The Plastic; Manufacture and Application. Now that at least six fabric layers have been cut it is time to make your first bioplastic mixture. This is a non toxic plastic made from items that you can buy at the grocery store. What you will need are: corn starch, sunflower oil, vinegar and tap water. Normally glycerine is used instead of sunflower oil. Sunflower oil is employed as it is more affordable. Each piece of fabric needs about ½ gallon of this bioplastic; it is a good idea to saturate two fabric pieces for one session so one gallon at at time is a good amount to make.

Recipe: ~ One gallon Corn Starch Plastic

Water 12.75 cups

Corn Starch 3.25 cups

Vinegar 1 cup

Sunflower Oil 1 cup

In an eight quart pot mix corn starch, water, glycerin and vinegar. Stir until there are no clumps. On the stove turn heat on full amount and stir the whole time the mixture is being heated. When the mixture reaches a critical temperature a gel-like and somewhat clear compound are made. Remove from heat and with silicone heat resistant gloves put fabric in pot and saturate each fabric piece individually. This organic plastic can also be applied with a roller paint brush; a large table is required for this method of application.

After the fabric has been thoroughly saturated place the layers on the chair frame and pin the top. Make sure that all edges of the fabric are hanging over the edge of the wood frame and with a plastic bag lightly place your physique into chair. This will be final form of the fabric and over a day another two layers may be applied. As the edges hanging over the side during initial layout make sure to sculpt wet plastic and fabric around the chair frame. This gives a bulbous, hemmed effect that makes the fabric shell stay rigidly on the frame.

After two layers of the fabric have been applied and the edges have been forced together, use clothes pins to retain pressure on the two layers.

Repeat this process until you get to the last fabric laminate which is bigger than all of the others. Upon layout of the final laminate sculpt and fold edge around all previous layers. Allow several days for the bioplastic to dry until your lounge chair is put to use.