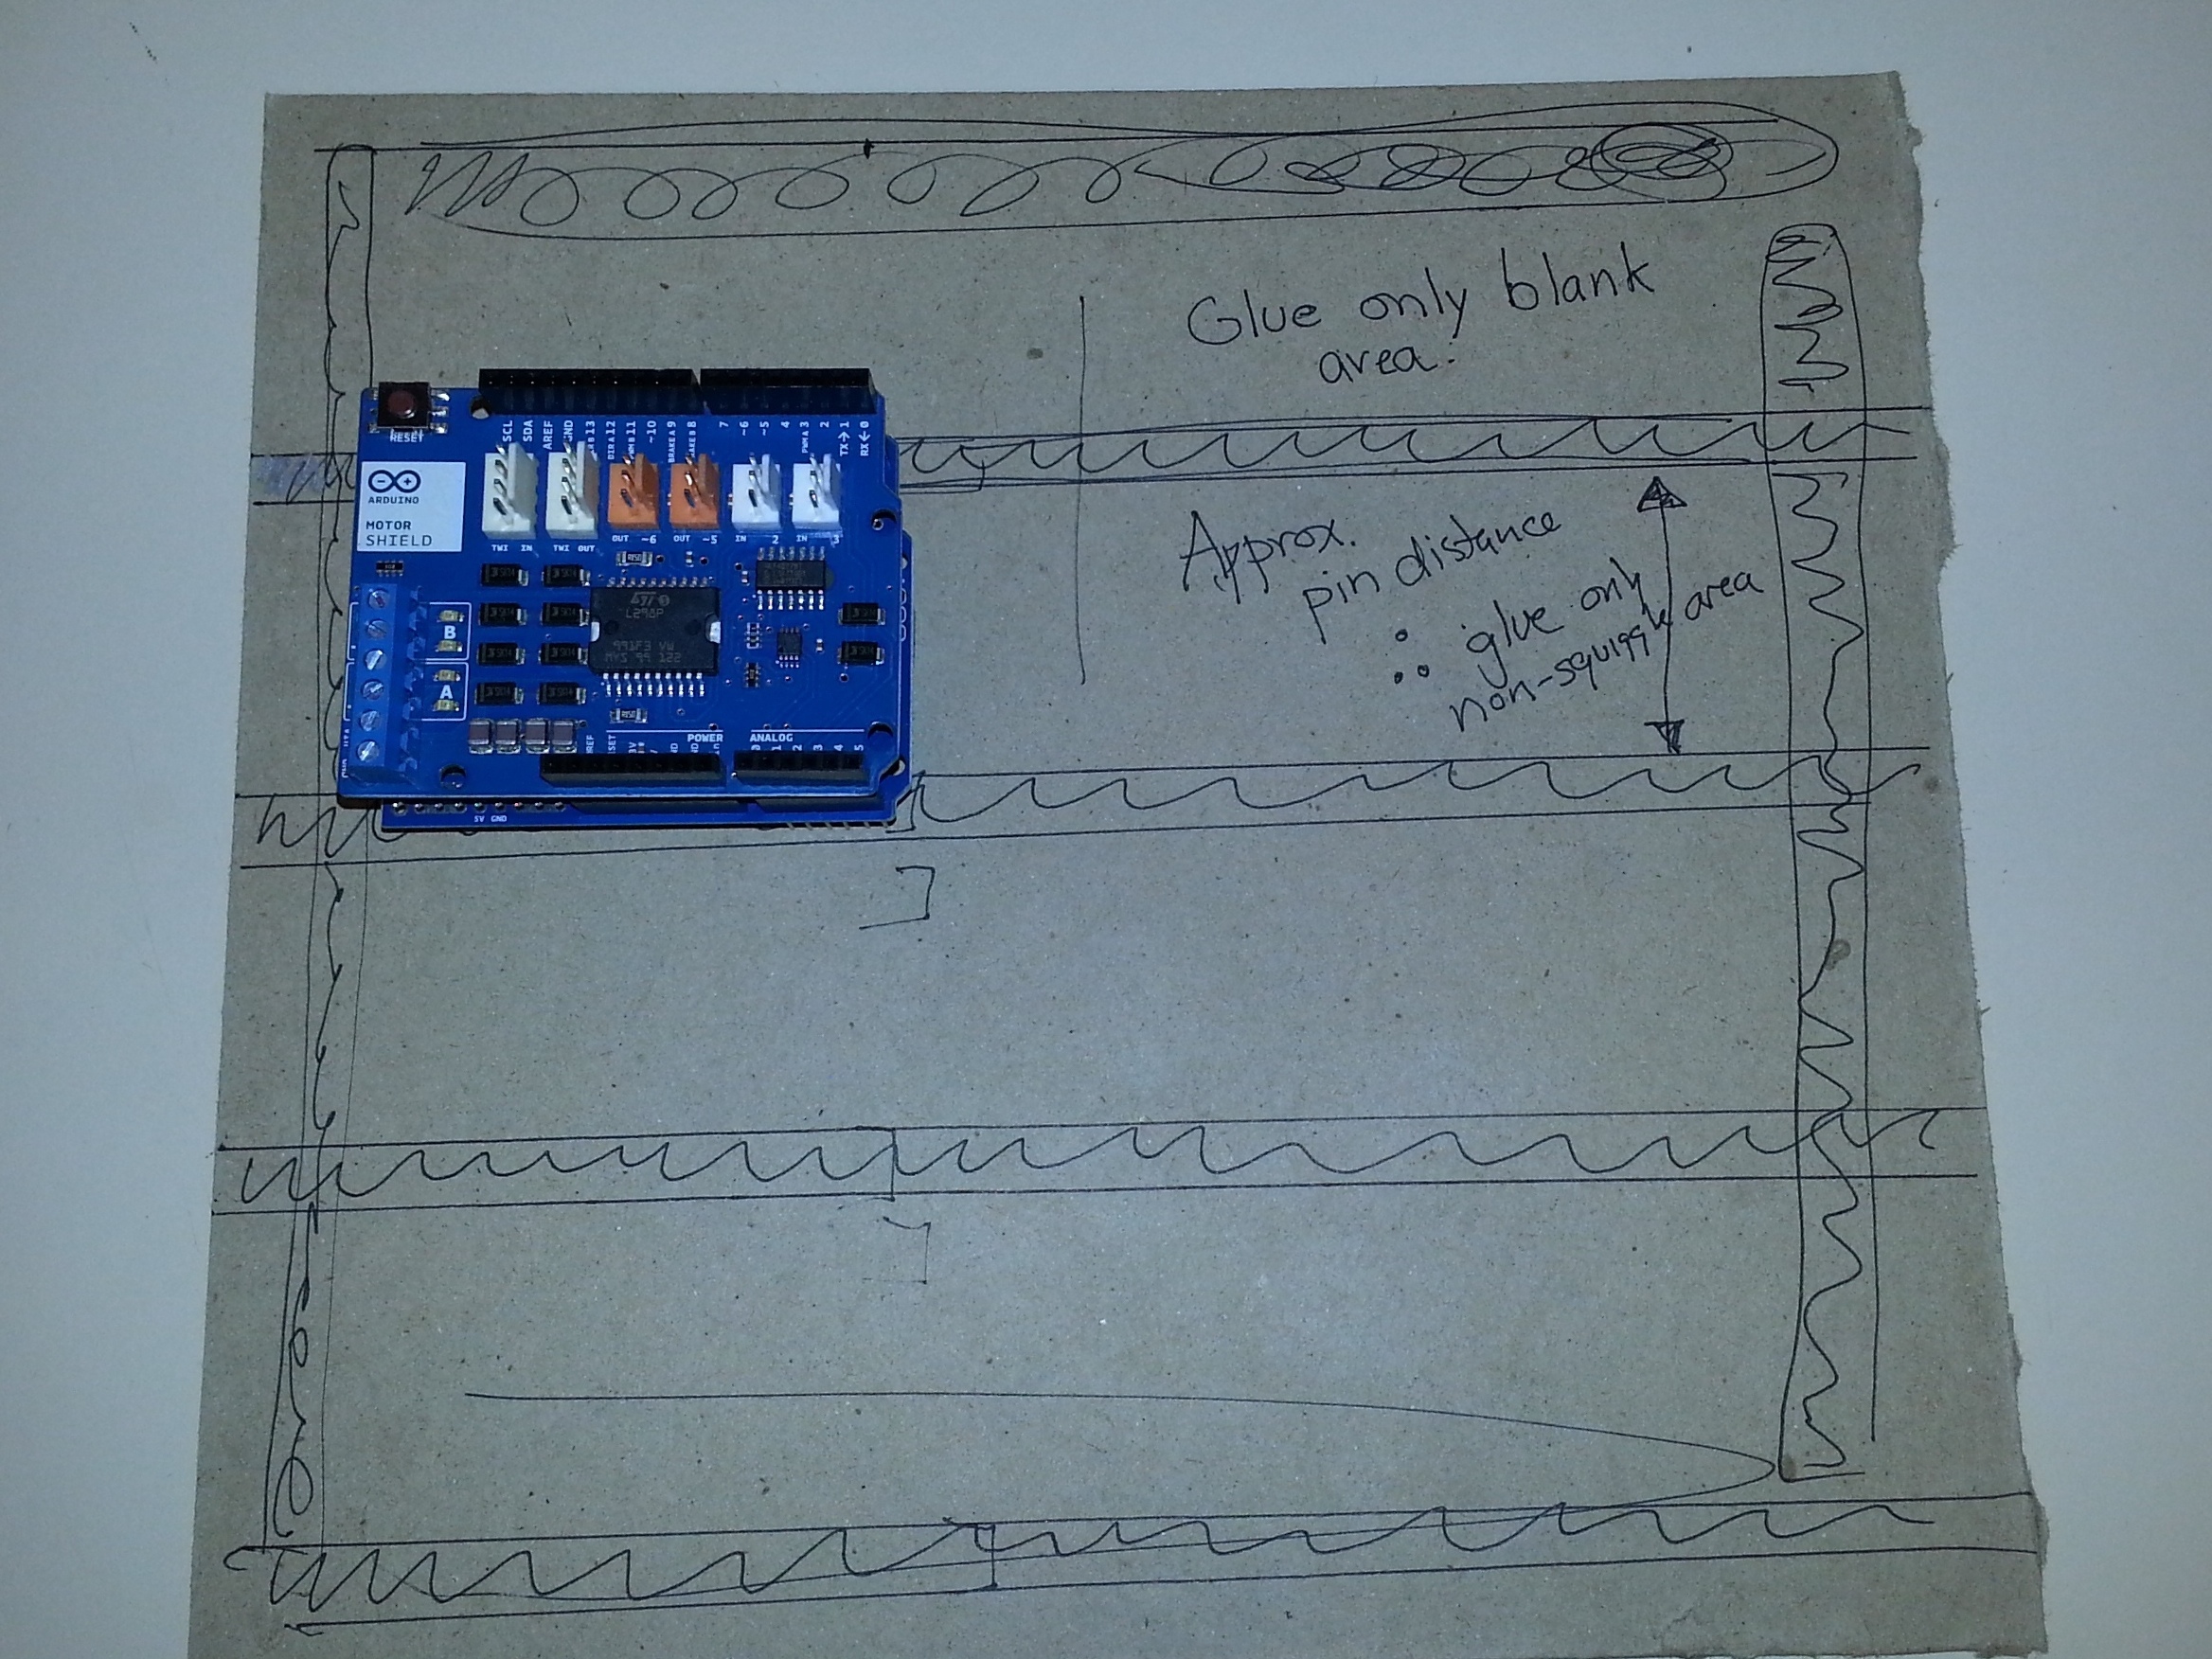
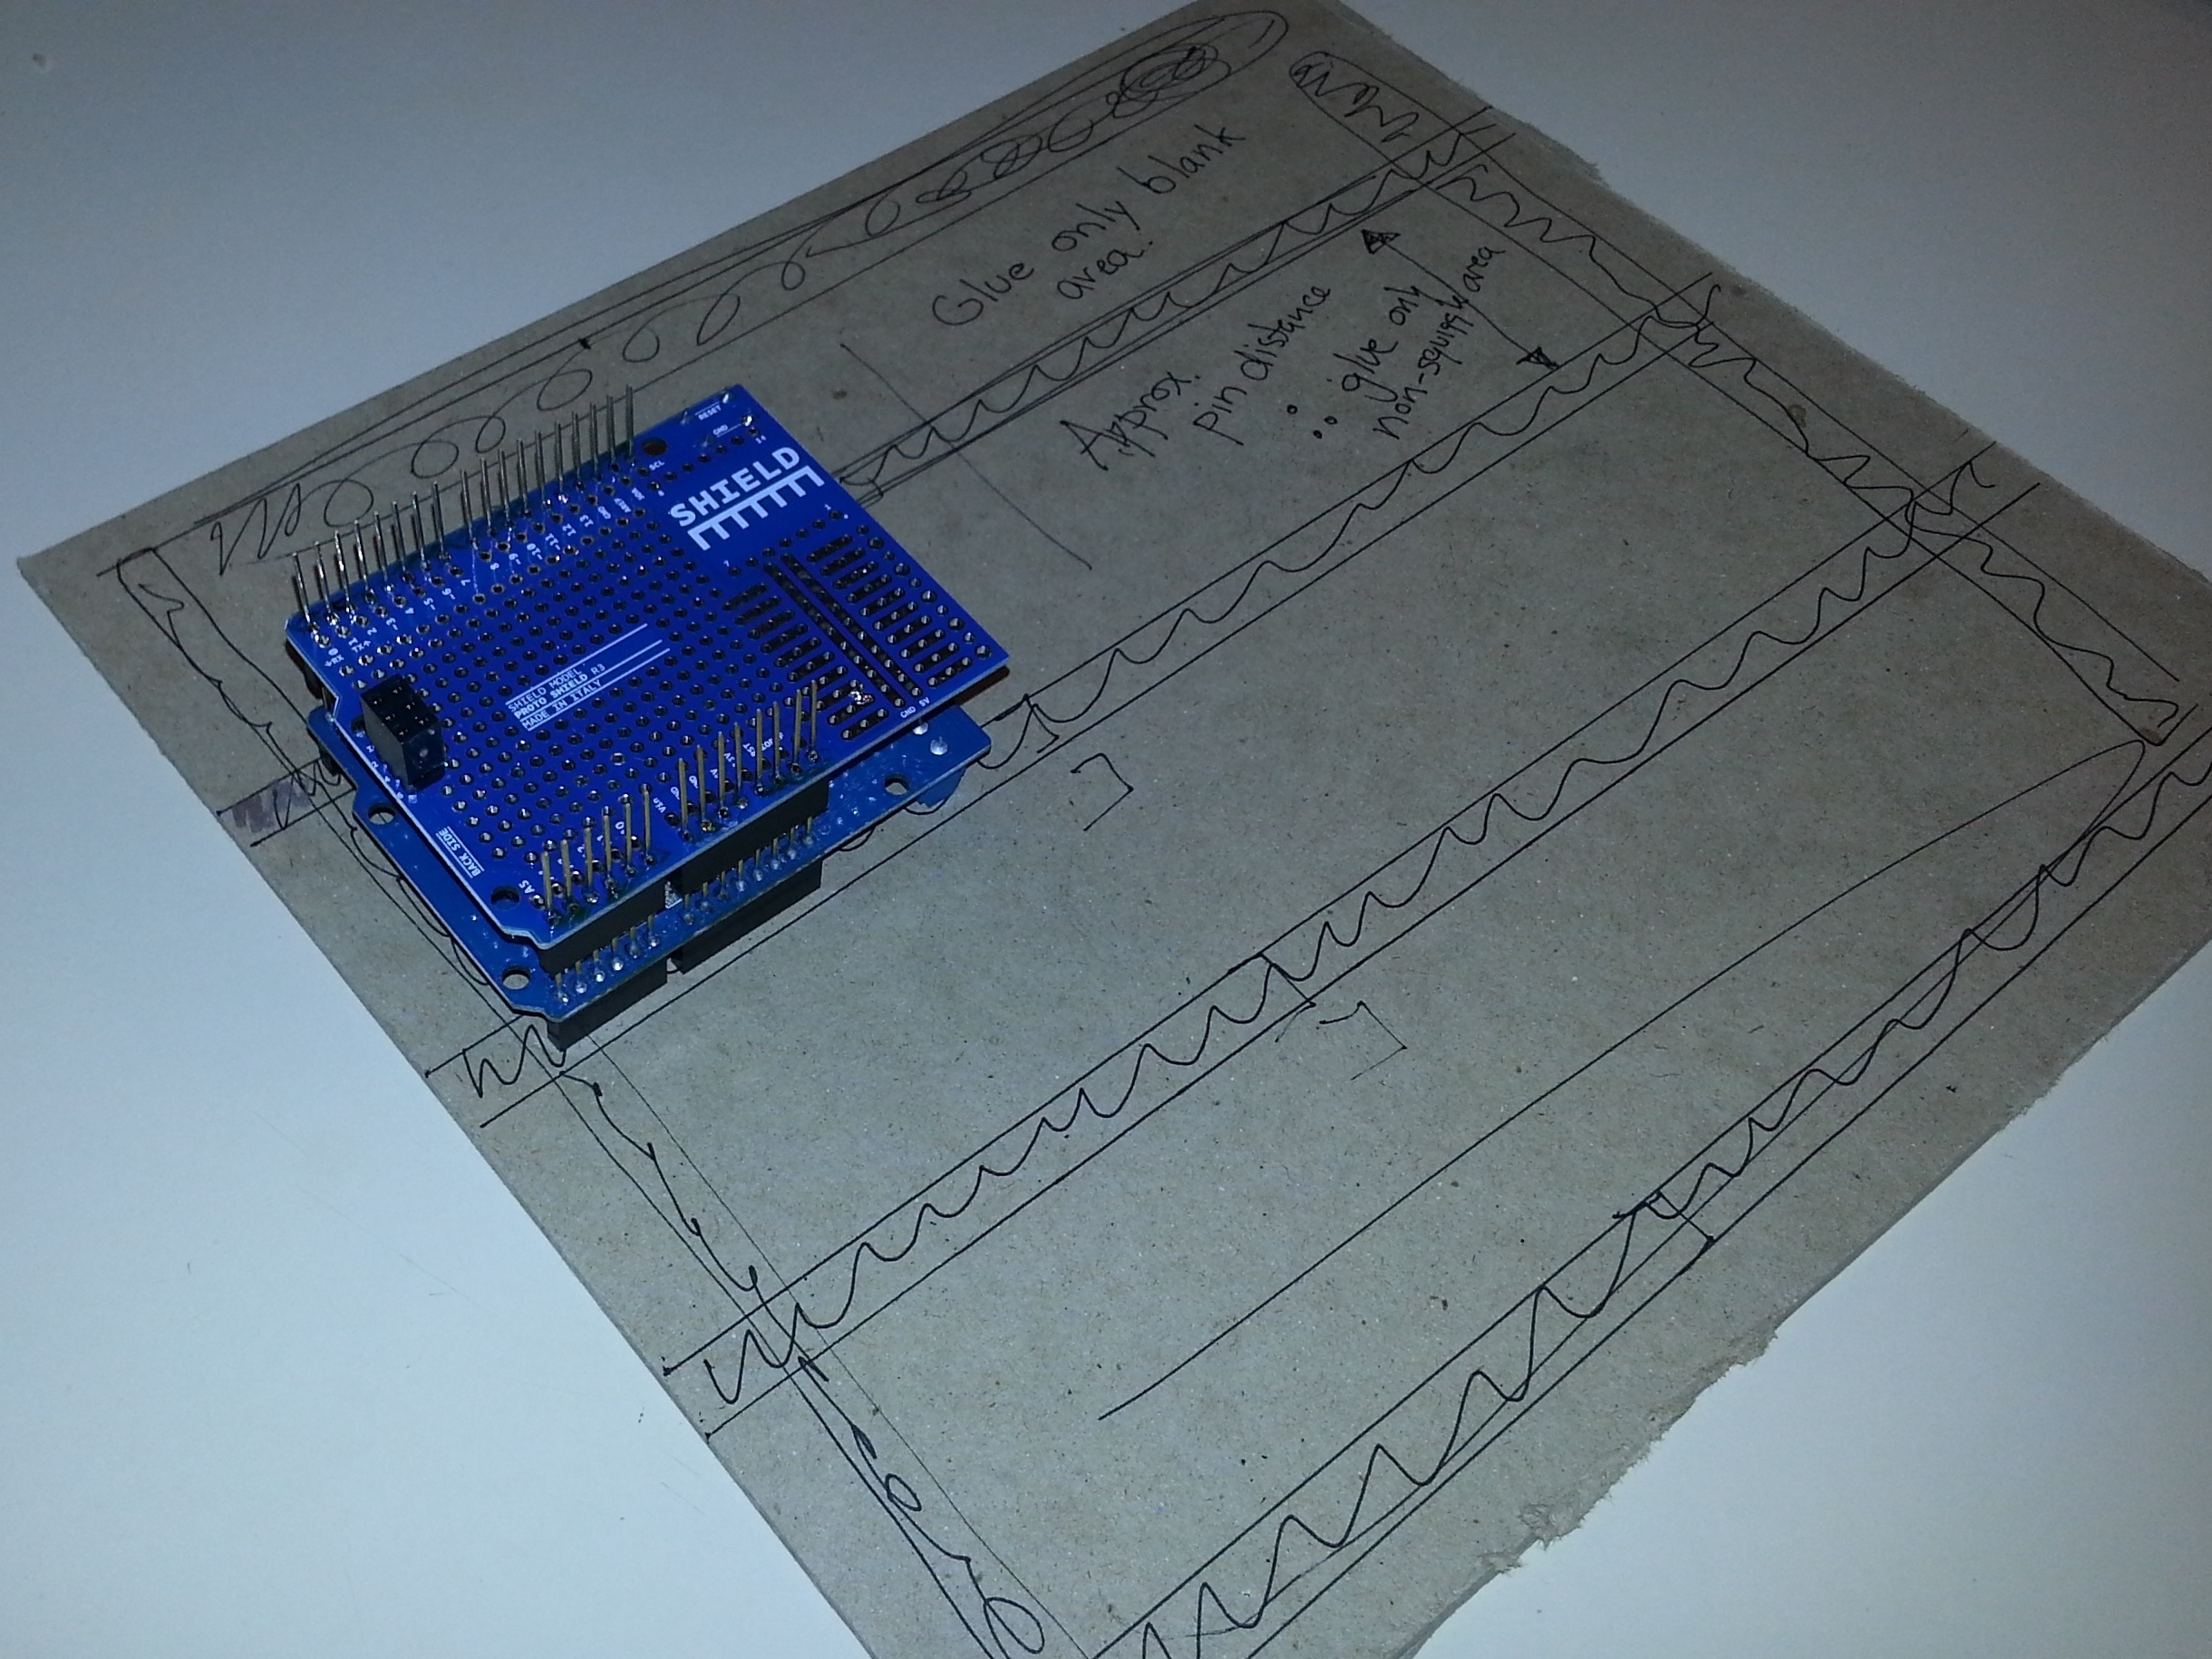
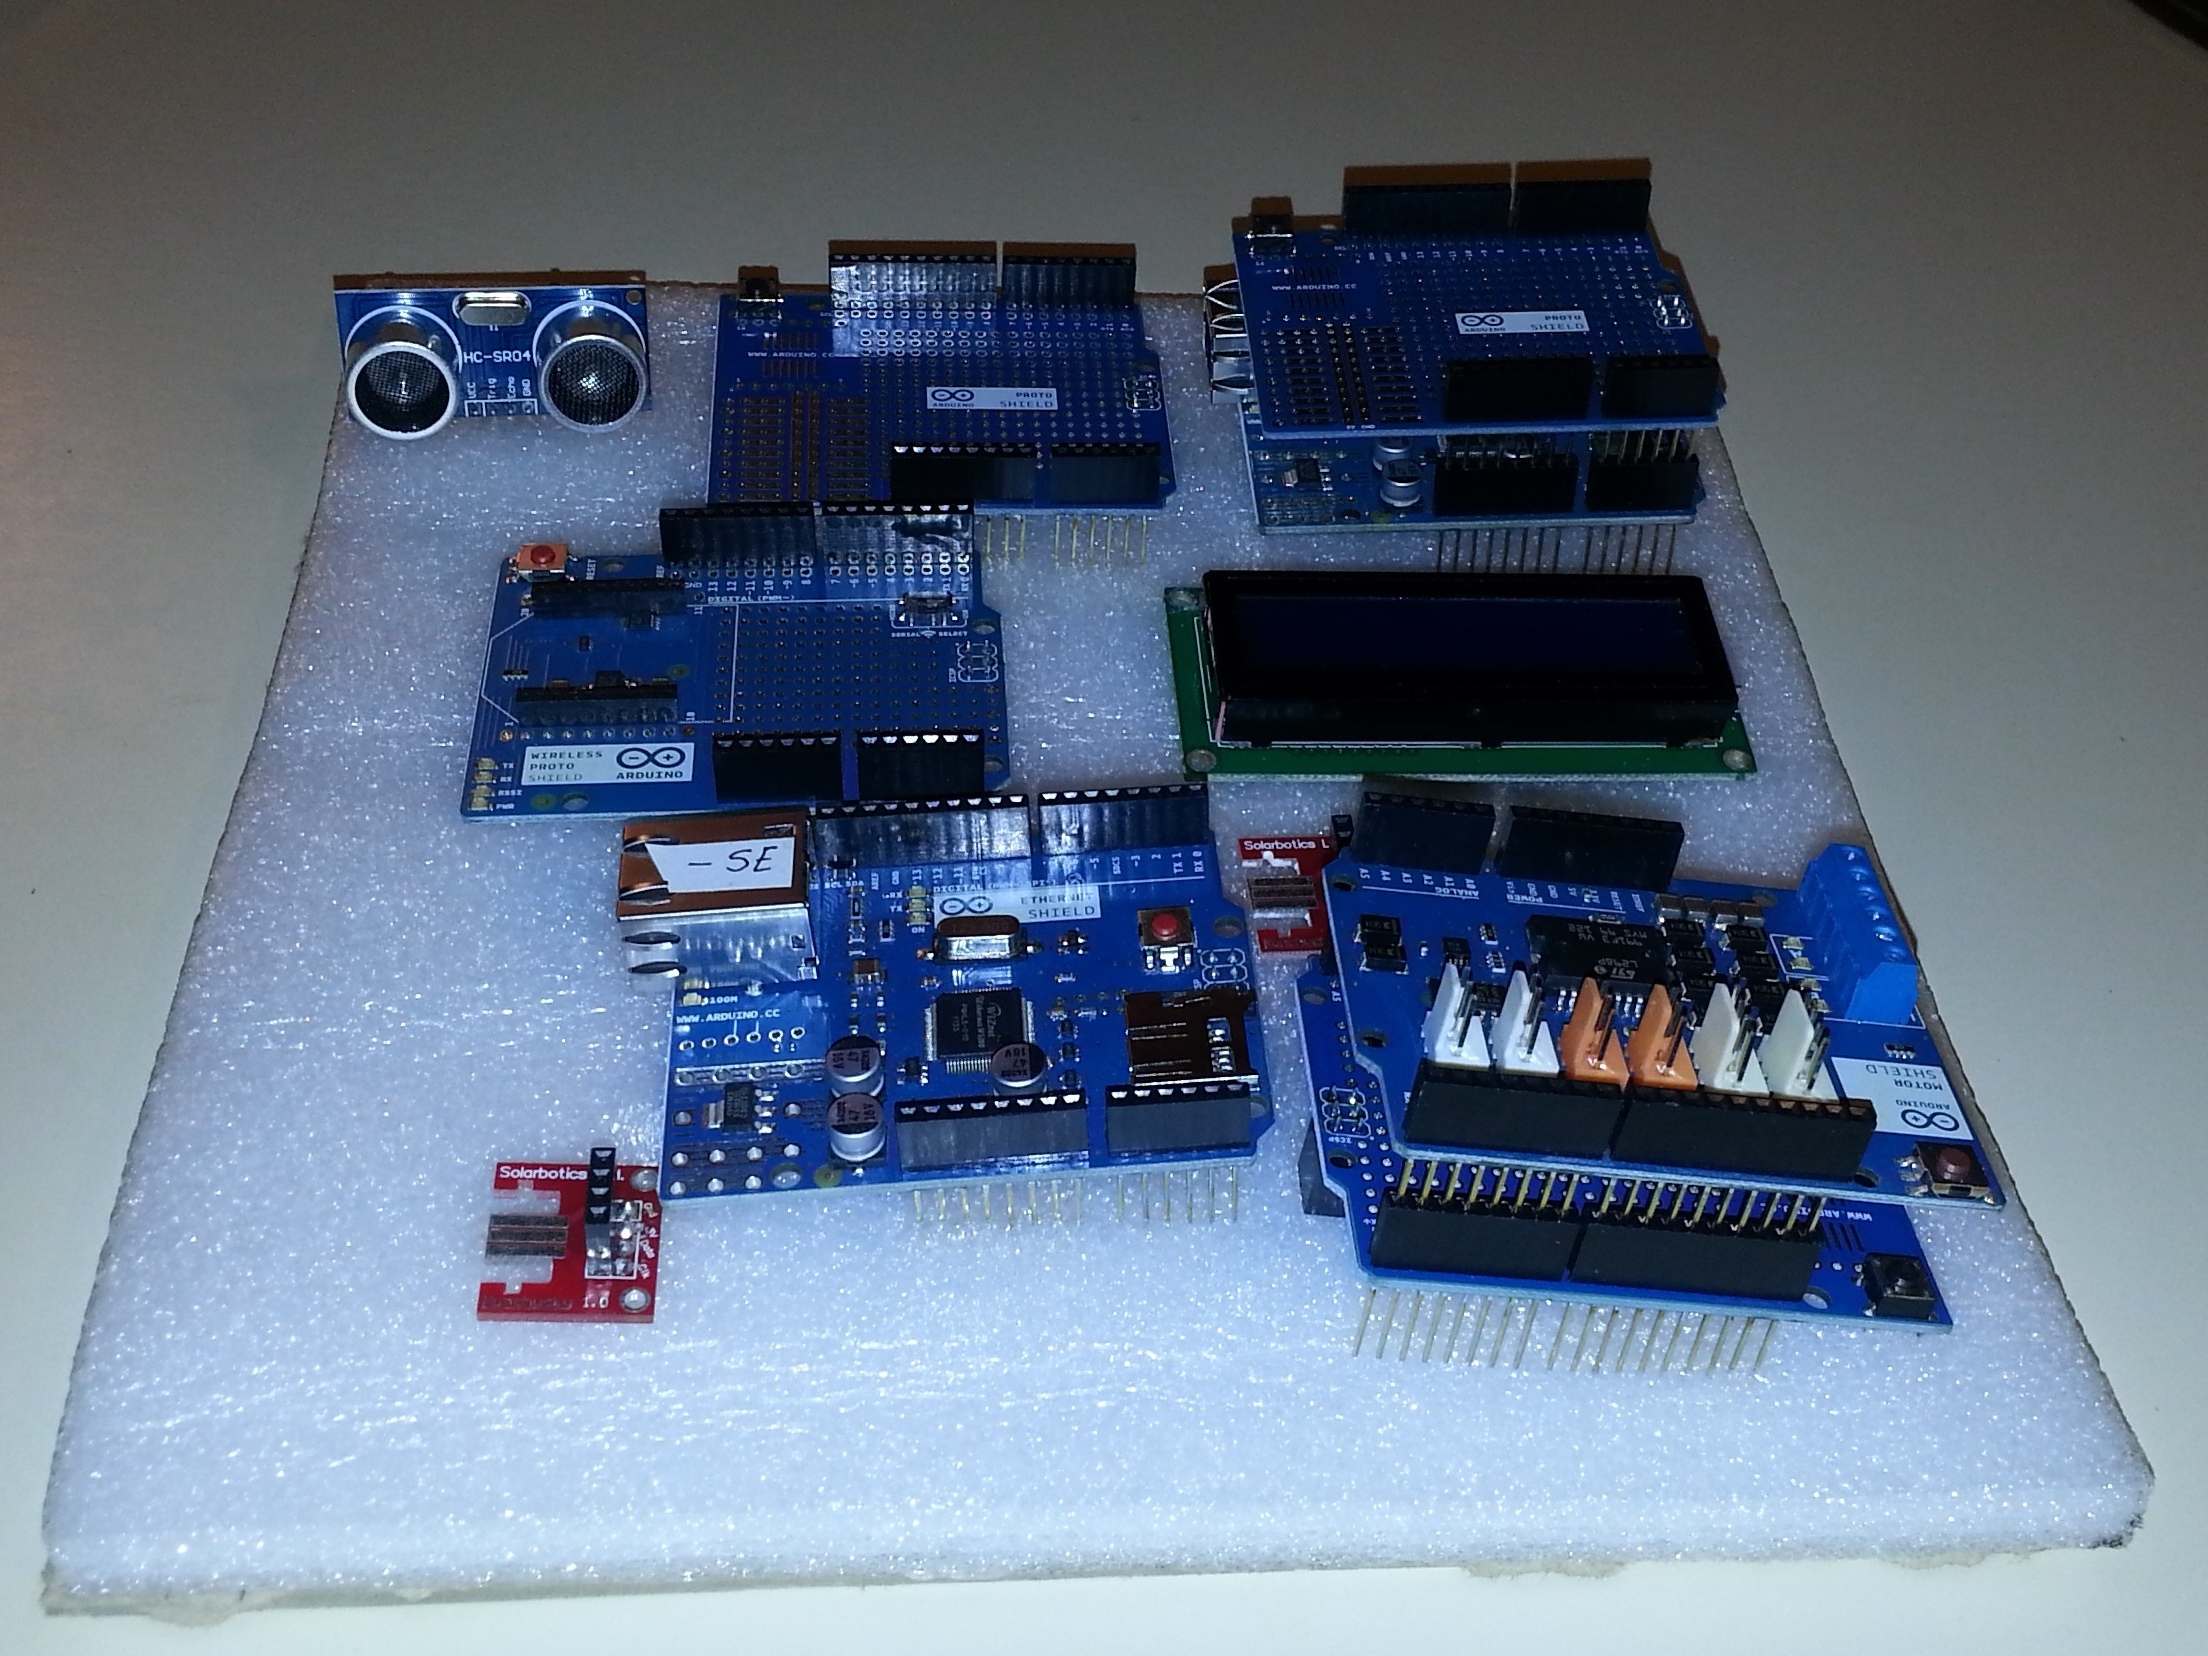
If you are like me then you have to travel to your maker space, but how do you pack up all those Arduino shields and other PCBs with header pins?

The solution is simple: take a rigid lightweight board and give it a plastic foam top.

Your shields can ride in the secure comfort of foam rigidly backed with Davey binder’s board.

No more poking bags or fingers in transit with this simple solution, and it is a project ready for further customization: why not make its dimensions fit inside a toolbox or a plastic container? There are many ways you can expand this simple and effective portability solution.

Project Steps

Take your Davey board (or rigid stock) and cut to your desired size.

I determined my board dimensions based only on the size of plastic foam I had. I wanted a contiguous piece of foam and so I cut the board to match that size.

Roughly trace out the distance between your shield’s rows of header pins and draw a guide on the Davey board.

My oscillating lines denote the general vicinity in which a pin placement might occur.

This step is important because we want the depth of the plastic foam to remain consistent and adding hot glue could potentially create obstructions for the pins.

Apply the hot glue to the areas you determine will not have pins hitting them.

I found it essential to draw out the prospective pin placement, though this is obviously not exacting.

Align a corner of the plastic foam piece at one of the two corners of your Davey board farthest from your body — I chose the left but suspect that you will have your own starting-corner preference.

While holding down the corner of plastic foam and Davey board you have mated, take the other corner farthest away from your body and align foam and board. Glue these two corners down.

By securing the two corners you can then take a bone folder or a large board and press firmly down on the entire foam and Davey board pairing while your glue sets.

Apply glue at the places you have marked for it. Lay the foam down on the glue, place the second rigid board on top of the assembly and place a suitable weight on top of that.

Note: the board you use to press down with needs to be larger than your foam and Davey board combination to ensure even pressure. Notice how I put the stoneware atop the large Davey board.

Once you let the glue dry for a bit with the weight supplying even pressure you will have a nice layer of Davey board, glue, and plastic foam.

Tip: Tug a bit on the plastic foam to test whether you used enough glue or if there are any voids. Hopefully the amount of glue and the relatively consistent weight spread the glue; however, double check just in case as the last thing you want is an incomplete gluing.

Expand the Idea: This is just how to make the rigid sandwich, but a more elegant design could be made to fit perfectly inside a toolbox or a traveling case. I would love to hear about how you take this simple project and use it to create more nuanced adaptations.

Conclusion

The parts need not all be sourced specifically. This guide is a simple idea and a simple execution. I documented what I used and where I at one time obtained the tools or materials. You can do well to ignore the specifics and explicate the concept yourself.