Perhaps nothing walks so fine a line through the world of culinary appreciation as vinegar. The bane of the winery, it’s also the prince of the kitchen, and few salads would dare show their faces without it. In the making of vinegar, science and art merge, and like its alter ego, wine, vinegar is a subject for the scrutiny of gourmands. Good vinegar, after all, is not just spoiled vino — it’s an art form that can take years to refine.

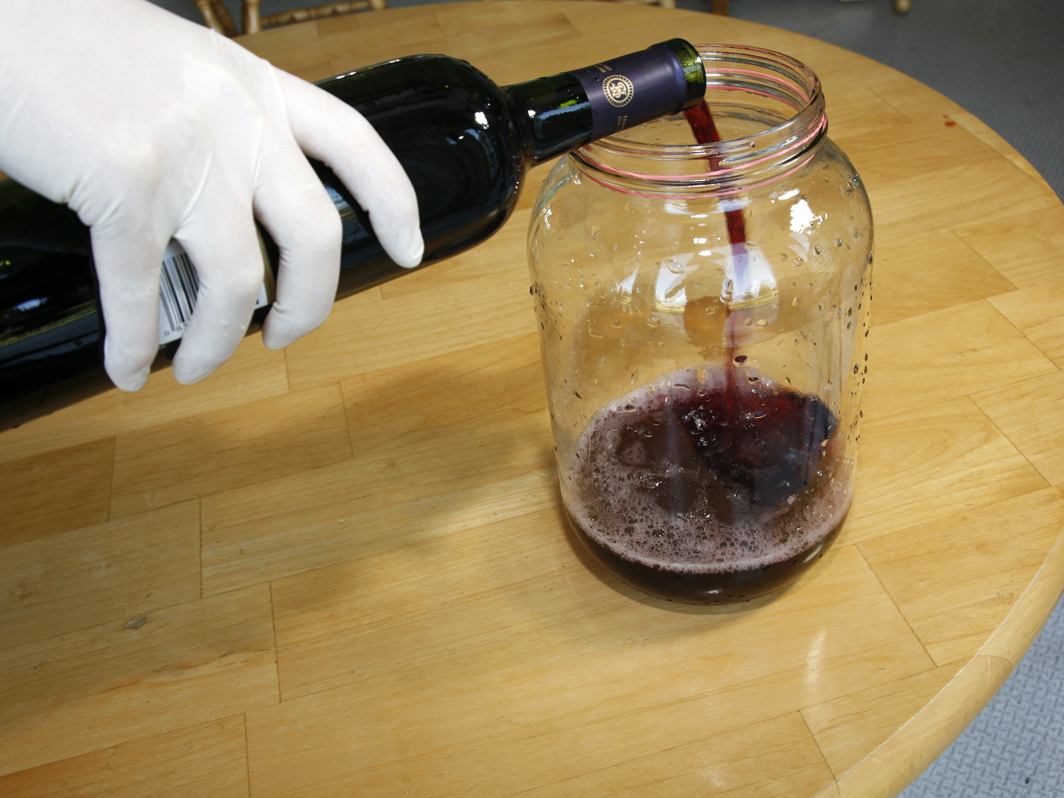
As you explore vinegar making, you may discover a fulfilling aspect of this hobby: it becomes a self-sustaining, living process, almost like gardening. A portion of vinegar “mother” can be left in the production vessel after each harvest, and if you continually add more wine to this thriving liquid, the process can go on indefinitely, providing you with homemade vinegar for years to come. All your mother asks for is a little wine.

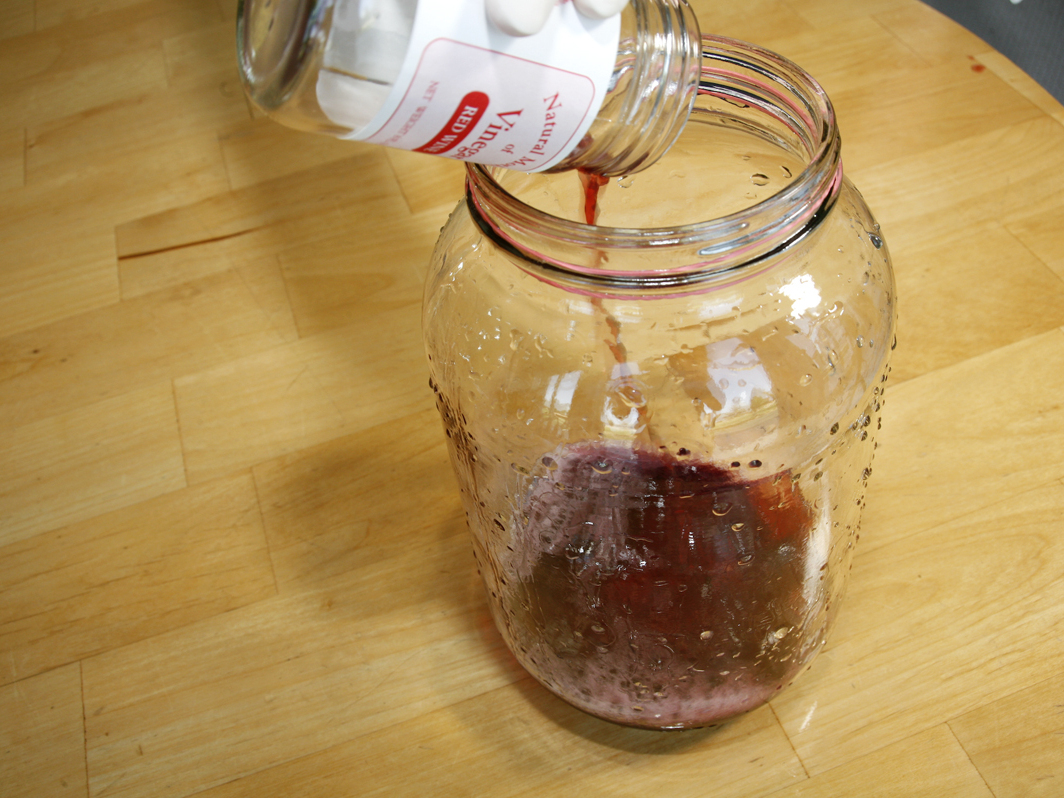
We’ll start with the simple science. By deliberately infecting your wine — or beer or cider, for that matter — with Acetobacter, a genus of bacteria that also goes by the name “vinegar mother,” you touch off a transformation. These bacteria eat the alcohol and churn out acetic acid, which supplies the tanginess common to all vinegars.

YouTube player

Project Steps

Acquire a vinegar mother.

Essentially, a vinegar mother is a portion of unpasteurized, living vinegar. You can acquire it in 2 ways. The easiest is to purchase an 8oz jar from your local homebrewing shop, for about $10. You can also take the more artisanal approach and contact another home vinegar-maker to request a small half-pint sample of his or her active vinegar.

Before you begin your vinegar, ask around or search the web for information on sulfites in wine. Sulfites such as sulfur dioxide are added by winemakers to prevent deterioration. Wines that contain too much sulfur dioxide may not turn to vinegar, killing the mother instead. Seek out organic wines, which contain no added sulfites.

Sanitize your equipment.

Sanitize all equipment immediately before you use it. Don’t use soap or fouled sponges. Instead, use a water-iodine solution, then rinse with boiling water.

If you aim to make gallons of vinegar, use a large food-grade bucket or a ceramic amphora with a spigot. Add wine and water into the vinegar vessel at regular intervals, about once a month. Always follow the mother-water-wine ratio of 1:1:2. Overbooze your mother and she could die.

Combine your ingredients.

Combine your mother, tap water, and a quality wine in your jar using a 1:1:2 ratio.

Store your concoction.

Cover the jar with a piece of boiled, sanitized cheesecloth, secure it with a rubber band, and store in a dark place for 6 weeks. Acetobacter needs oxygen, so allocate at least the top ¼ of the jar to airspace in order to enhance air-vinegar contact. Vinegar also likes warmth, so aim for 75°F.

Taste it at week 6.

Uncover the container after 6 weeks. Note that a leathery cap may have formed in the jar. It might resemble a liver, but it’s harmless. Let it lie. For sampling, pour the vinegar from the vessel into a spoon. Taste carefully. You should detect a faint to strong pungency. It may need more time, or it may be ready for the olive oil and mustard. The choice depends on your preference.

Consider your options.

When you decide it’s ready, you’ll have 2 options. You may just want to invest more wine and water into the vessel (remember the 1:1:2 ratio) to jump-start a bigger batch, or you may wish to harvest the ready vinegar. If you harvest, be sure to leave 8oz of mother in the jar for making more vinegar at a later date. You can store the mother, jarred and sealed, in the fridge; deprived of oxygen, she will lie dormant.

Bottle your vinegar.

You may wish to pasteurize your vinegar by heating it at 150°F for 30 minutes in a clean pot. This optional measure destroys the Acetobacter and halts the alcohol-to-acid conversion process. Let the vinegar cool to room temperature. Then, being careful not to disturb any sediment at the bottom, pour it through sterilized cheesecloth into a jar or bottle. (This initial recipe makes just enough to fill a wine bottle, but successive batches will grow in size.)

If you don’t pasteurize the vinegar, be sure to keep it in an airtight container, filled all the way to the top, as this vinegar is alive and holds the potential to embark on further transformation if provided oxygen. Airtight storage of unpasteurized vinegar may call for screw caps. If you prefer corks, T-corks are the easiest to insert and do not require a corking press.

Flavor your vinegar.

You may wish to flavor a bottle of vinegar with herbs such as dill, oregano, rosemary, basil, or garlic. This is easy. Place clean, fresh sprigs or cloves or crumbled dried leaves into the bottle, then fill with vinegar. Cork the bottle, age it for 30 days, then taste for strength and dilute with unflavored vinegar if necessary. Recork, store in the cupboard, and use sparingly.

Conclusion

This project first appeared in CRAFT Volume 09.

Related posts on the Craft blog:

Best of Craft video: Red Wine Vinegar

http://blog.craftzine.com/archive/2009/0...

In the Kitchen with Jarod: Make a Mother of Vinegar

http://blog.craftzine.com/archive/2010/0...

Grilled Balsamic Basil Flank Steak

http://blog.craftzine.com/archive/2010/0...