With a few hours in the shop, a small amount of wood and just a few tools you can give new life to an old pocket knife.

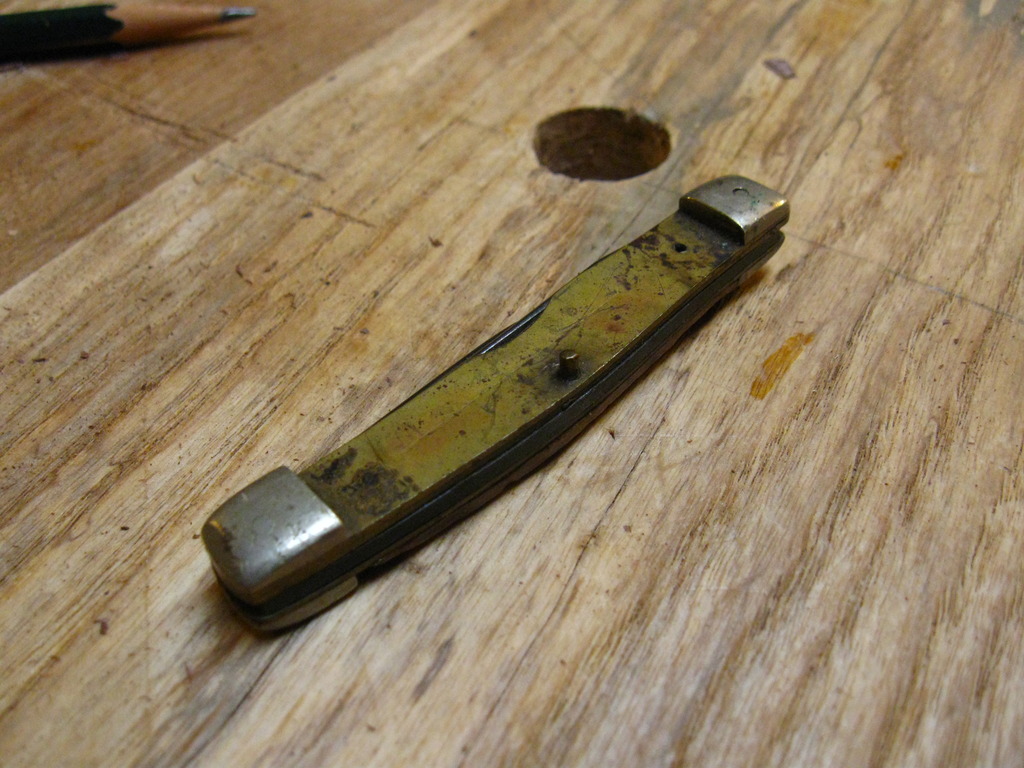
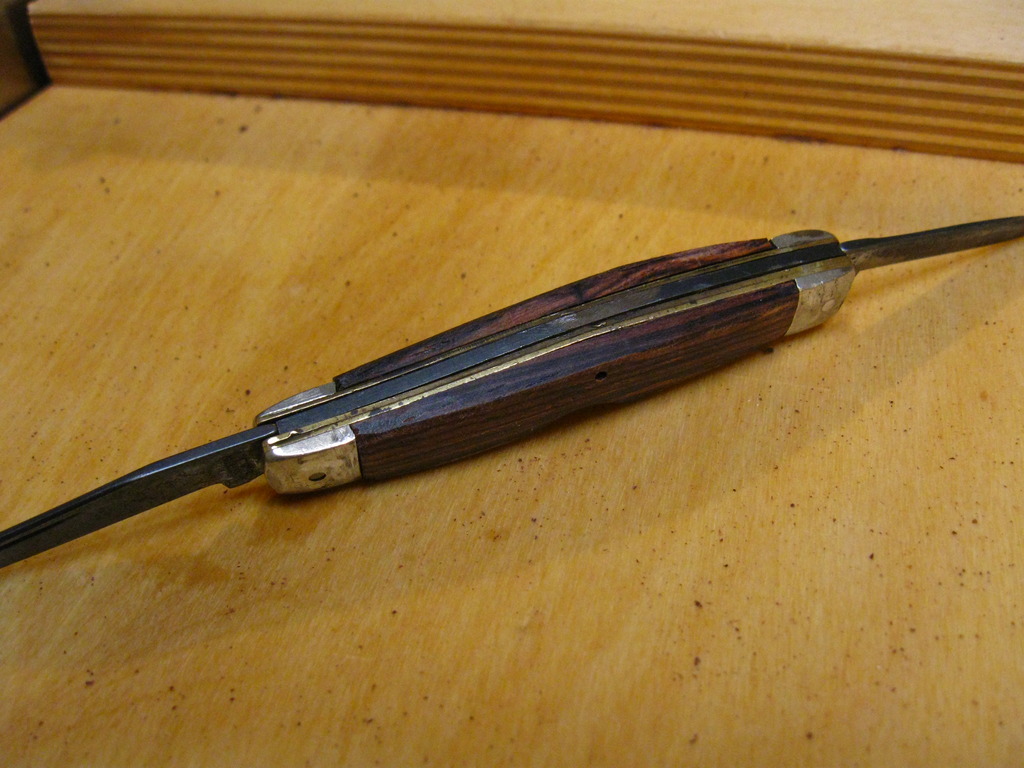
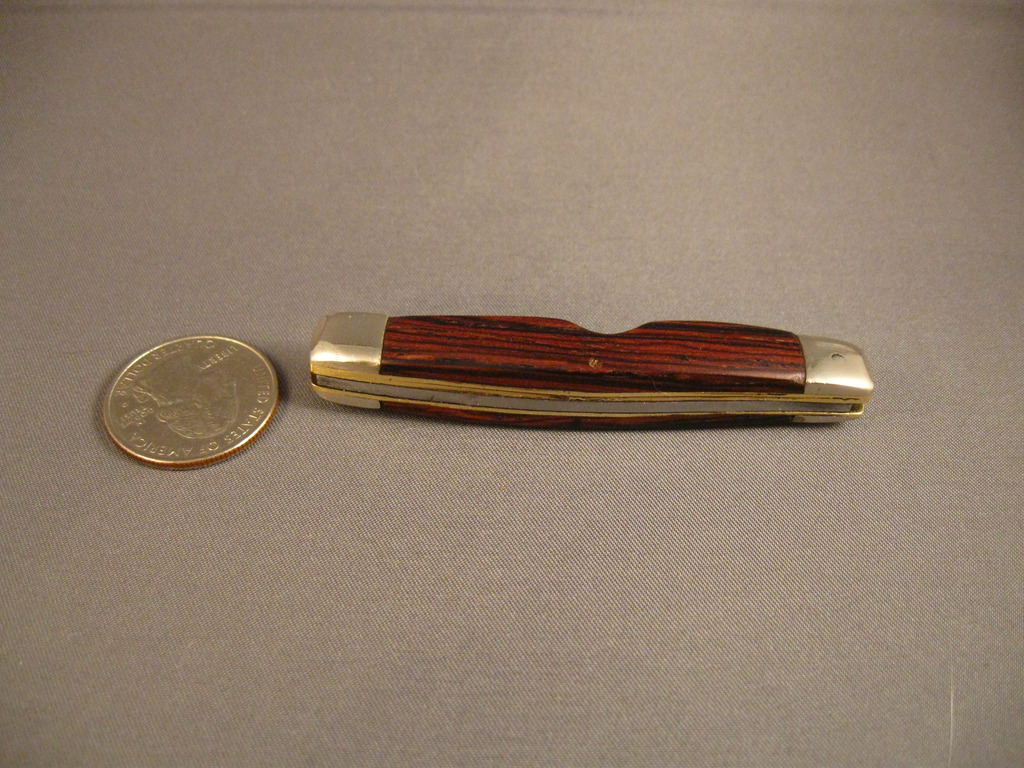
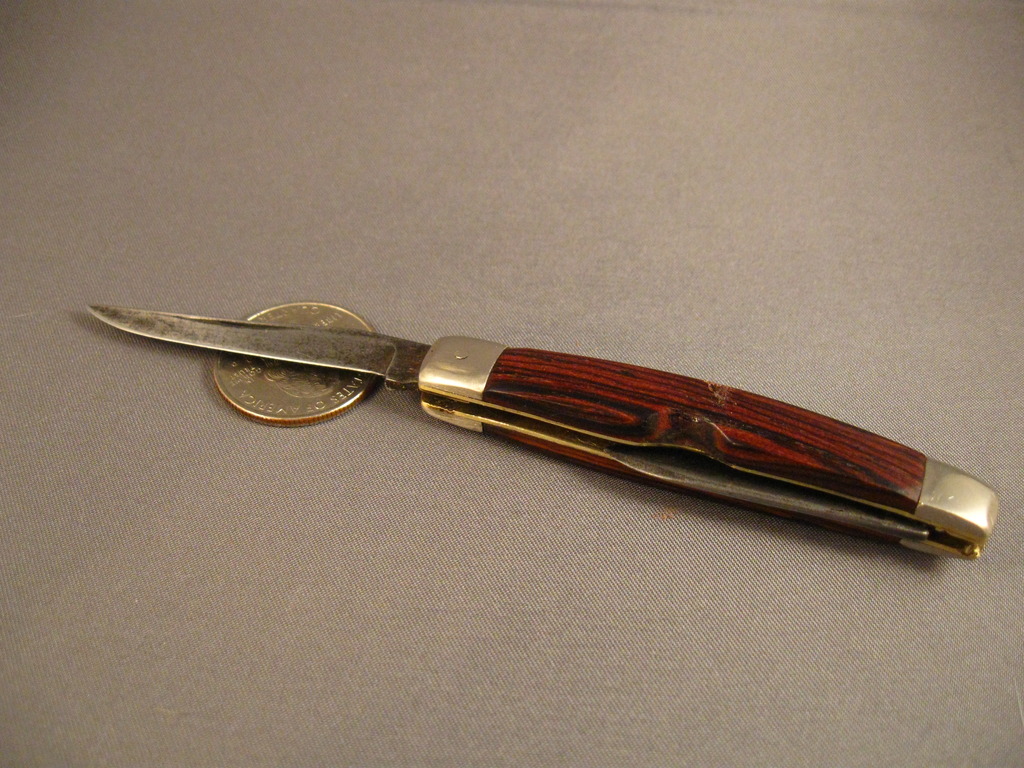
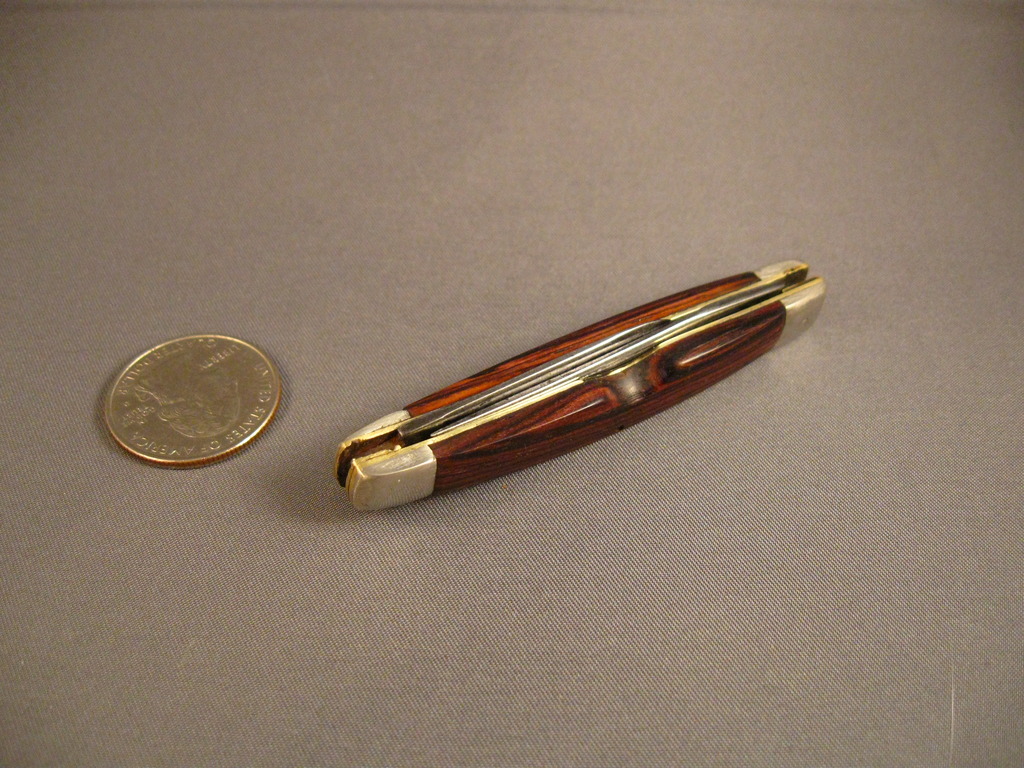
I had an old pen knife that belonged to my grandfather sitting around in a drawer for many years and never really used it because it was in very sorry shape. It was missing one scale and had a roughly-made replacement for the other one, and overall the whole thing was dirty and scuffed up. I finally took this heirloom out to the shop for a proper rehabilitation.

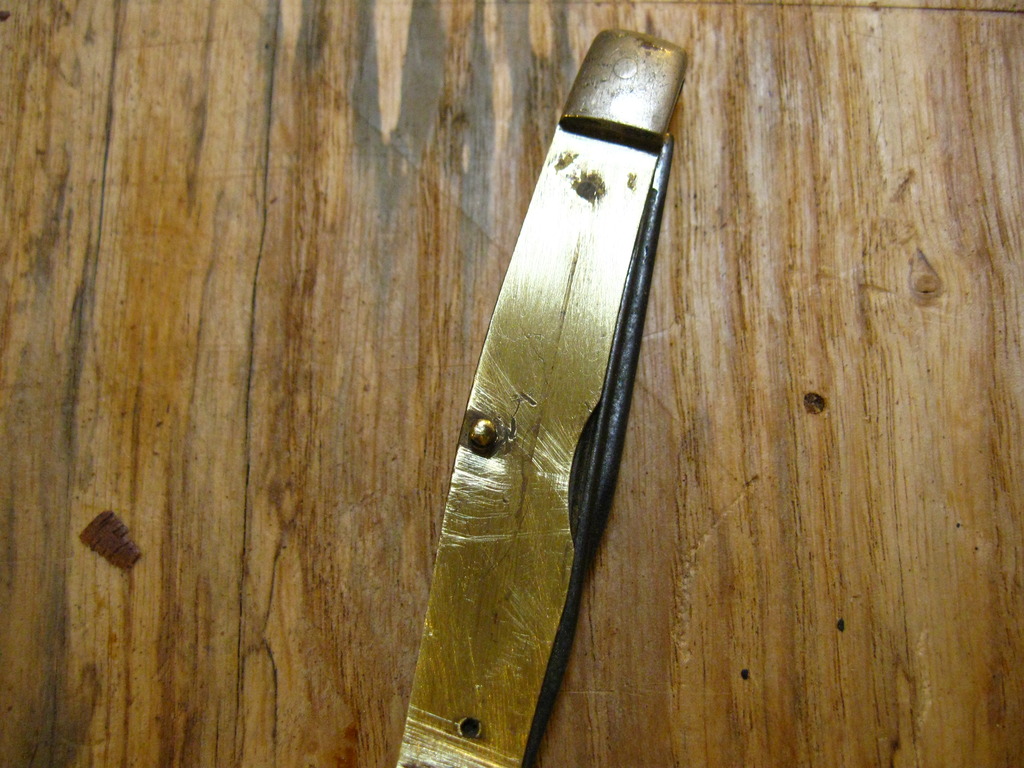
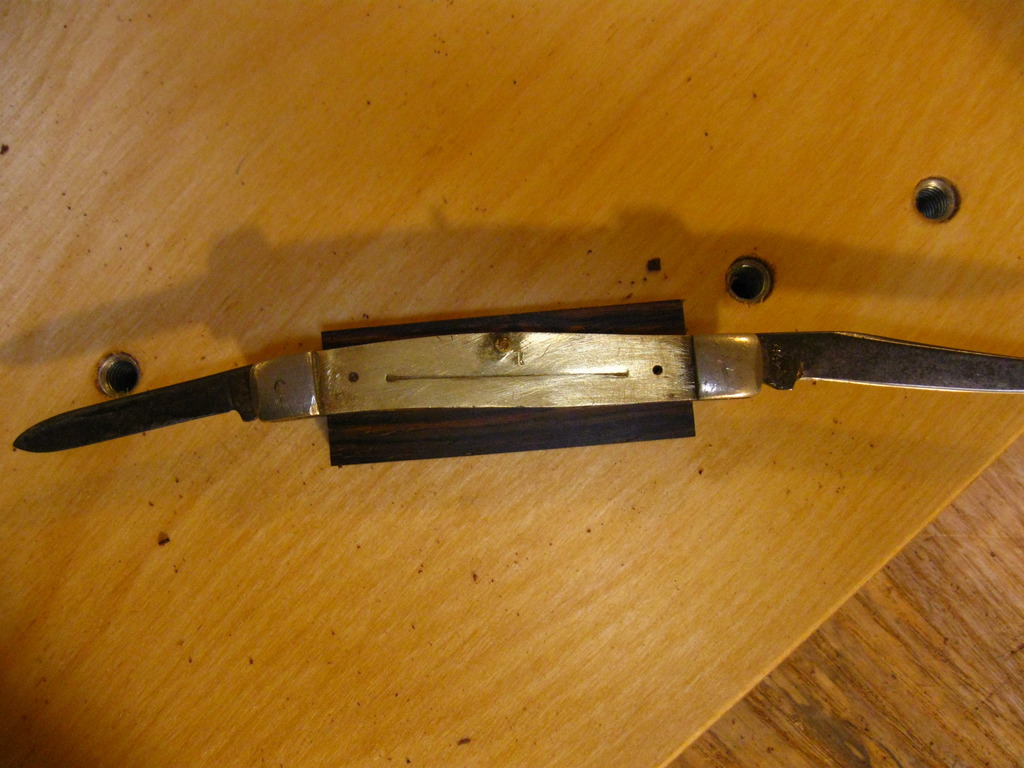
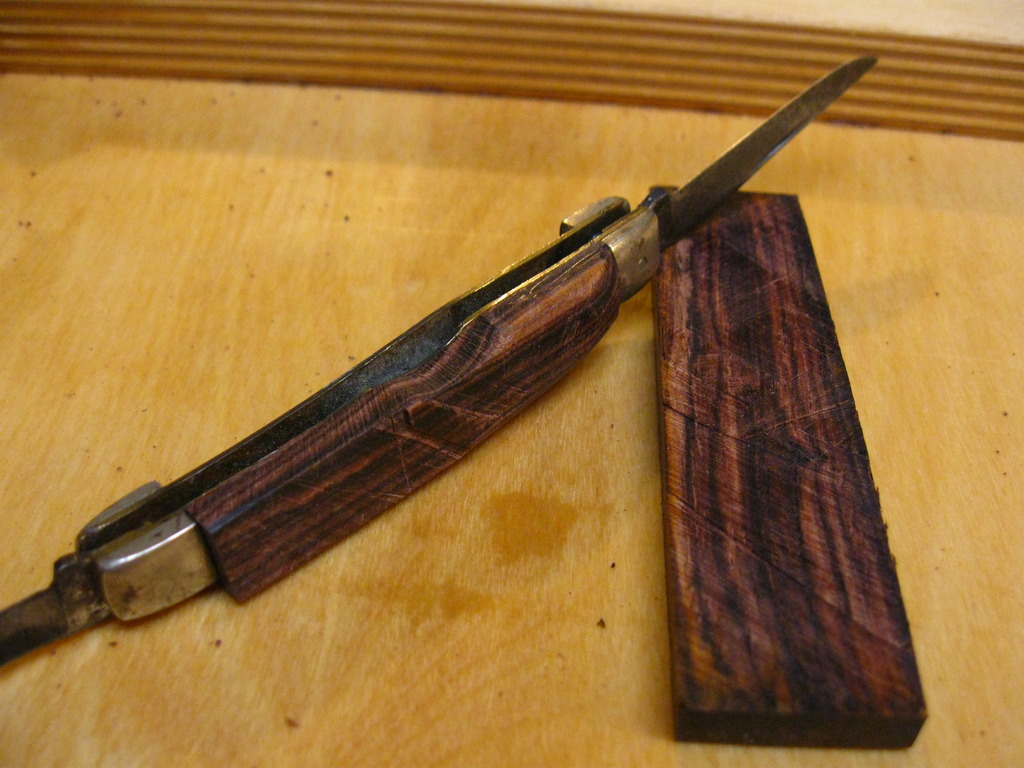
The exact challenges faced will vary from knife to to knife so this guide will aim to describe a general technique instead of an exact step-by-step process. For any knife repair like this you will have to remove the old scale(s), clean and sand the metal parts the new scales will mount on, cut the scale blanks to fit, shape and contour the scales to a close fit, epoxy them into place, shape, sand and buff the whole knife. I did this knife in an afternoon, about five hours.

Project Steps

This little pen knife belonged to my grandfather and was in pretty bad shape by the time it passed to me.

Carefully remove the old scales (if present) and clean the metal beneath them. Scuff the metal well with sandpaper; 150 grit will do fine.

Find a nice piece of wood. Dense, tight-grained hardwoods work the best. In this guide I’m using a small piece of cocobolo, a type of rosewood. Other good choices would be ebony, boxwood, osage orange and many others.

Cut blanks a little oversized.The safest way to make such a cut would be with a small backsaw. Flatten one side of each blank. The flat side will be glued to the knife. The other side can be left rough from the saw since you’ll be shaping and sanding on that side.

To flatten the one side use a small block plane with a very sharp blade set to take a fine cut. First remove all of the saw marks and once you have a smooth surface use a straight edge to check for high or low spots. If you don’t have a block plane you can can flatten the blank using sandpaper glued to a piece of glass or a ceramic tile.

Make a cardboard template for each scale and once it’s trimmed to fit use the template to lay out your cuts on the wooden blanks.

Using your cardboard template as a guide trim the wooden blanks to the correct length for a snug fit.

Mark out and drill any holes needed for rivets or studs at this time also. It’s easier to secure the blanks for drilling while they are still square.

Mark out the shape from your template and begin sawing the wood as close to your marked line as possible without going over. You need to use a saw with a thin, narrow blade capable of following curves. I used a wooden framed turning saw but a standard metal coping saw or jeweler’s fret saw would work equally well. A power scroll saw or band saw with narrow blade would also be a good choice. A jigsaw, on the other hand, would be a disaster and dangerous due to the small size of the wooden blanks.

Once the blank is cut to fit the knife handle begin shaping it with a small model-maker’s-sized rasp. Shape the scales into a smooth flowing shape that’s pleasing to the eye and will be comfortable in the hand. Make frequent test fits to the body of the knife to avoid removing too much wood.

Instead of a rasp you could use a coarse file at this stage but it will be much slower. Sanding drums on a Dremel or mounted in a drill press could also be used but the model maker’s rasp will give the most control and will be the safest choice. A good rasp removes material very quickly.

If possible, friction-fit the scales to the knife as you get closer to your final fit and continue shaping while the scales are on the knife.

As you get closer to the metal parts switch to using a file to avoid damaging the teeth of your rasp on metal. I used a “mill bastard” file at this stage. It cuts fairly quickly but leaves a decent surface on hard woods and metal.

When the scales are about 90% finished, stop and prepare to epoxy them to the knife.

Mix up your favorite two-part epoxy and attach the scales to the knife.

On a folding knife, leave the blades open so you don’t accidentally glue them shut with excess epoxy squeezed from the joint. Even so, try to avoid getting any excess epoxy in the slot for the blades; it’s not fun to clean out.

Once the epoxy has cured for the appropriate time as stated by the manufacturer on the packaging you can continue shaping.

Using rasps and files as appropriate, bring the scales down flush to the metal parts so you can’t feel the transition with your finger tips.

With an old, damaged knife like this it’s OK to file away metal while doing your final shaping in order to remove surface damage and light corrosion. More care is required for a new knife.

Shape and tweak the scales until the knife looks good and feels good in your hand. Take a few minutes to pull the blades in and out, use the knife a bit, etc., until you’re happy with how it feels in your hand.

Sand the blanks and knife body using progressively higher grits. I started with 150 and worked up to 600. Use gentle hand-sanding only at this point.

If you have access to a buffing wheel – an easy add-on to a bench grinder or lathe – stop sanding at 600 grit and take the knife to the buffer instead. Pick a buffing compound appropriate to the materials and polish the entire knife to a high sheen.

If you don’t have access to a power buffing system you should continue hand-sanding up to 2000 grit or higher. Very high-grit sandpapers are often available at auto-parts stores in the paint section. Power buffing compound can then be applied by hand with a clean, lint-free rag to achieve the final shine.

Now just sharpen the blade(s) with your favorite sharpening tools and enjoy your restored, custom-scaled pocket knife!

Conclusion

All tools seen in this project guide are available via mail order from Lee Valley Tools and Tools for Working Wood.