This is the sixth of eight guides in a series documenting my build of MakerGear’s Mosaic desktop FDM/FFF 3D printer kit.


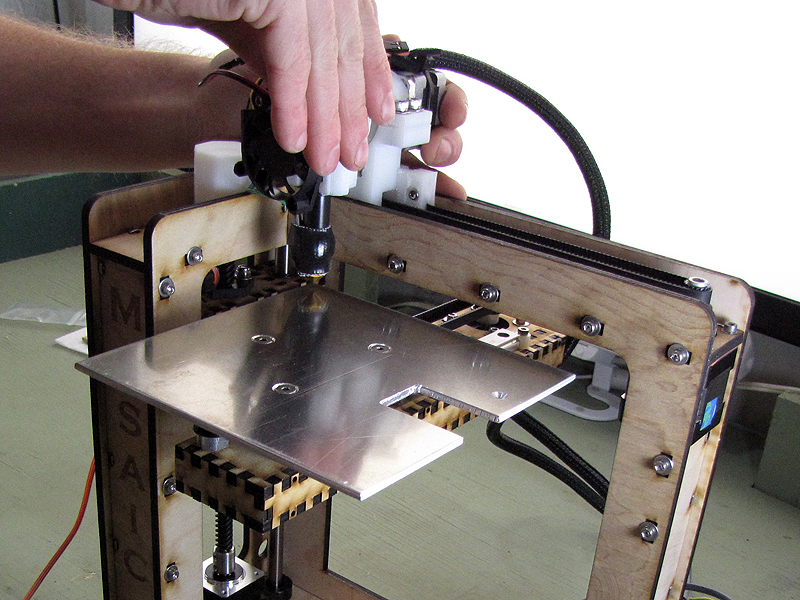
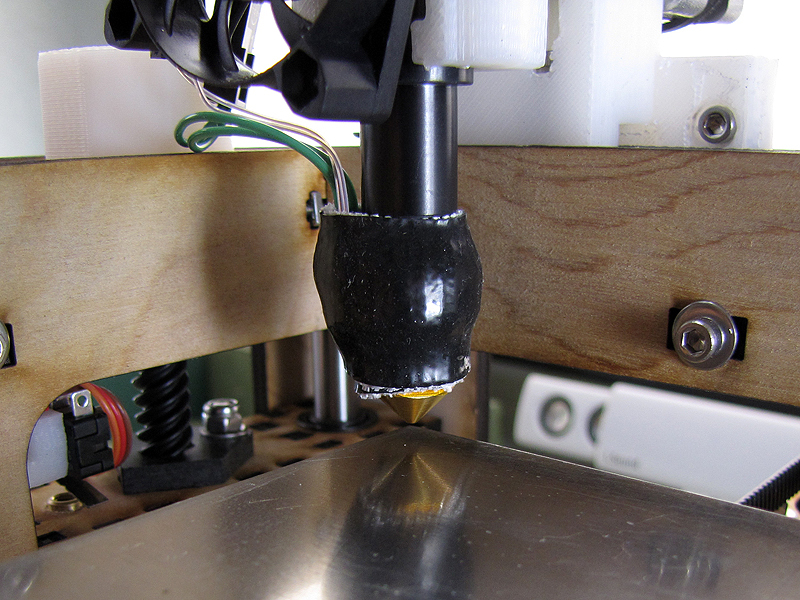
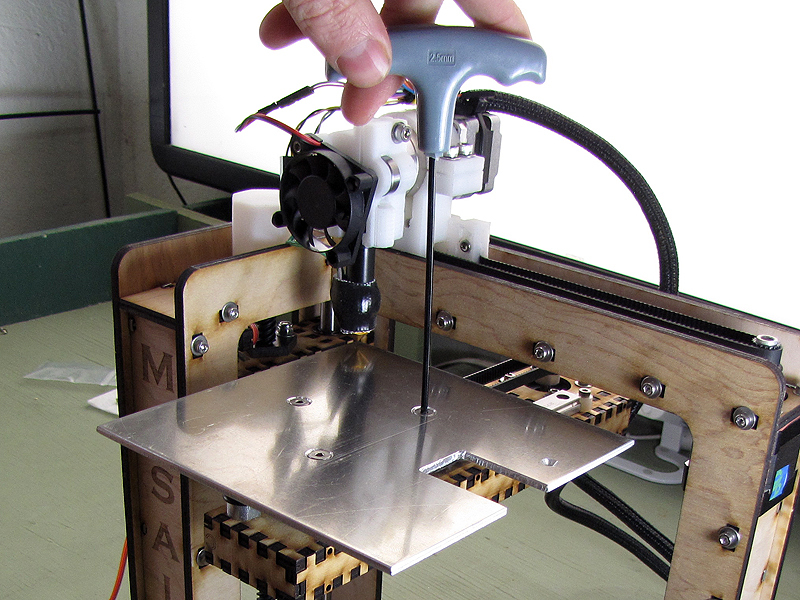
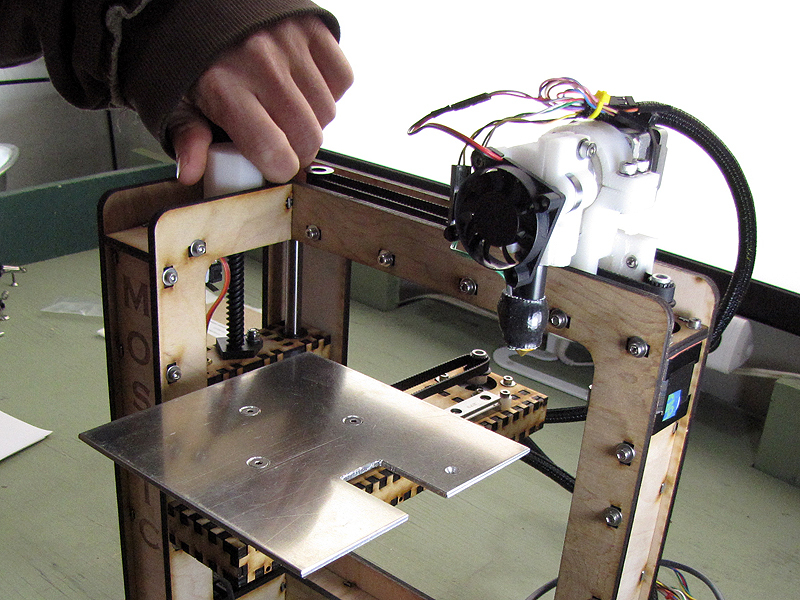
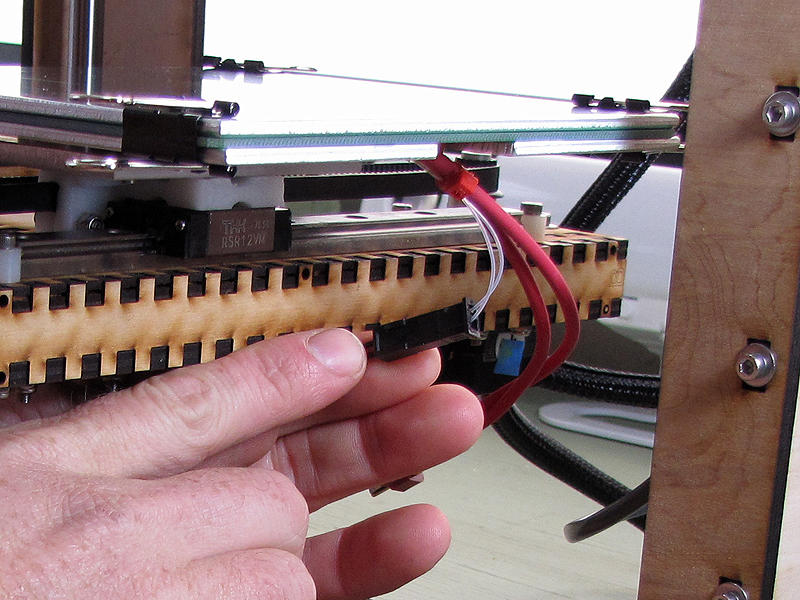
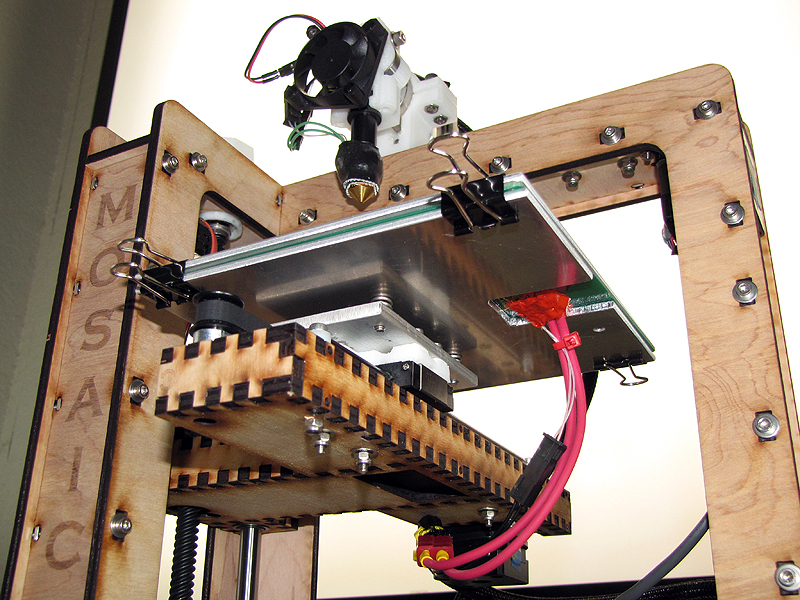
This part covers assembly of the build platform, which consists of installing and adjusting the leveling platform, mounting the build surface and heating element, and making the associated electrical connections.

Project Steps

Mount the leveling plate

Slide the mounting plate all the way to the front of the printer, so you have room to work.

Position each of three 7mm coil springs over one of the three threaded holes in the mounting plate.

Hang the three flathead M4x14mm bolts through the countersunk holes in the leveling plate, then guide them through the springs and into the mounting holes as you lower the leveling plate into place. It’s a bit tricky, but not too difficult, even for one person.

Hold the leveling plate in position with one hand, and use a 2.5mm hex wrench, in your free hand, to start each of the three bolts into the corresponding threaded hole in the mounting plate. You need only engage one or two threads of each bolt, for now, just to keep everything in place.

Prepare for leveling

Use a 2.5mm hex wrench to tighten the mounting bolts until the springs underneath are about “halfway” compressed.

Temporarily remove the nylon Z-height stop adjusting bolt, and set it aside.

Turn the white octagonal knob to raise the Z-platform assembly as high as it will go, until it butts up against either the extruder nozzle or the Z-height stop switch.

Level the build platform

Though this operation is described as “leveling,” in fact, the name refers to “leveling” the platform with respect to the extruder nozzle, and not with respect to the Earth’s gravity.

Adjust the position of the X- and Y-axes as necessary to check the distances between the nozzle tip and each of the plate’s four corners.

Adjust the tightness of the three leveling plate mounting bolts, as needed, to equalize the distance between the nozzle tip and the plate at each corner.

Reset the build platform

When the leveling operation is complete, turn the white octagonal knob to lower the Z-platform back to a midway position along the Z-axis.

Using your fingers, reinstall the nylon Z-height stop bolt in the threaded brass fitting in the Z-platform.

Install heating element

Position the heating element PCB as shown, with the power and temperature sensor leads positioned to exit through the slot in the leveling plate.

Set the aluminum build surface plate over the heating element. Note that the surface is designed to be removable for maintenance and cleaning.

Secure the build surface and the heater in place, on the leveling plate, with a binder clip in each corner, as shown.

Electrical connections

Connect the thermistor leads to the Z-platform wiring harness via the snap-lock Molex connection, as shown. This connection is self-indexing, and cannot be plugged in the wrong way.

Connect the heating element power cord to the Z-platform wiring harness by the red polarized two-prong connector, as shown. Again, this connection cannot be plugged in backwards.

Conclusion

Next up: the electronics!