Food prepared in a smoker is always a treat, so building a backyard smoker is a perfect project for those who love to combine making things with eating things.

This project is primarily an exercise in sheet metal work. You may need to purchase some tools and learn some new skills. Fortunately, the tools are relatively inexpensive and the skills not hard to learn. Plus, there’s the benefit that, once obtained, both the tools and the skills will likely be useful for myriad future projects.

This electric smoker incorporates several useful features, including multiple doors and a large smoking area. The most interesting feature is the separate, movable firebox. By adjusting the distance between the firebox and the smoke chamber, the backyard charcutier can experiment with hot, warm, and cold smoking.

Smoking Hot (and Cold)

The Nellie Bly Smoker is an electric smoker, and unlike most drum smokers it’s got a traditional two-box configuration. This design allows excellent temperature control.

Inside the firebox an electric hot plate heats wood chips in a shallow pan to generate smoke. A louver in the bottom controls airflow.

The food box or smoke chamber has 2 sealed doors for access, a grill to support food, and 4 eyebolts for hanging food. Two thermometers monitor the temperature inside.

A flexible, extensible duct carries smoke from the firebox to the food box. The temperature inside the food box is controlled by shortening or lengthening the smoke duct.

To help draw the smoke upward over the food, the food box is raised above the firebox by a stand, and fitted with a chimney (see diagram in Step 1).

Project Steps

Make the doors.

This diagram shows the modifications required to turn your 55gal drum into a working smoke chamber. In a nutshell, you need to make several openings in the barrel: the doors through which the food is inserted and removed, a smoke inlet hole, a smoke outlet hole, and several smaller holes for grill supports and thermometers near the doors.

Using a light-colored grease pen or crayon, mark the doors as shown above, centered between the barrel chimes. Punch your hole marks before drilling, to center your drill bit and prevent it walking across the metal. In the corners of the door, drill holes large enough for the jigsaw blade.

Support the barrel so it stays in place, insert the jigsaw, and cut out the doors carefully — you’ll use the cutouts as the doors. Grind all edges smooth with a file, rotary tool, or angle grinder.

Use a nibbler or jigsaw to cut 1″-wide metal door facings from 26-gauge sheet metal, 1″ longer and 1″ wider than your doors. The doors close against these strips, keeping the smoke inside the chamber.

Place the facings on the barrel so they overlap the door opening by 1/2″, and clamp them in place.

Drill 1/8″ holes through the facings and barrel at 3″ to 4″ intervals, and then use 1/8″ pop rivets to fasten the facings to the the barrel. You can also use 3/16″ rivets. If you’ve not used blind rivets before, it’s easy and fun.

Attach each door to the barrel with 2 hinges, using rivets, sheet metal screws, or short #8 machine screws. If you rivet the hinges to the doors, insert the rivets from the inside so they won’t block the doors from closing.

Attach the draw-pull latches to the barrel and door so that when the door is closed, the latch pulls the door securely into place.

Once the doors are attached to your satisfaction, apply weatherstripping to the edges of the doors so smoke can’t escape.

Vent the smoker.

Cut two 3″-diameter holes, centered in the top and bottom flat surfaces of the barrel. Again, use a punch and drill to make a starter hole for the jigsaw.

Because jigsaws have a hard time with tight-radius cuts like this, you may want to use an air nibbler instead, to make quick work of the job.

Add the grill, hangers, and thermometers.

Drill 3/8″ holes in the sides of the barrel as shown in the Smoker Diagram (Step 1). Insert 18″ threaded steel rods and secure with nuts. Cut a circular grill from expanded metal, sized to fit your barrel, and place it atop the rods.

Drill four 5/16″ holes in the lid. Insert the eye bolts inside and fasten each with a nut and 2 washers.

These eye bolts are useful for hanging large fish and fowl in the smoke chamber.

Drill holes near the doors and insert the thermometers such that they fit snugly.

Make the chimney.

Rivet the (optional) rain cap to one end of the 18″ duct. Rivet the other end to the tab collar in the barrel lid, and seal with aluminized tape.

Make the firebox.

Test-fit your hot plate and pan in the bottom of the steel pail, then cut and mount a 9″×14½” door in the pail’s side, as in Step 2.

Lay out 2 triangular vent holes in the bottom of the pail, and a 3″ smoke outlet hole centered in the lid. Use the punch, drill, and jigsaw to cut out the holes.

Insert the remaining tabbed collar into the 3″ round hole in the top of the firebox, bend the tabs to secure it, and seal with aluminized tape.

Cut a louver from thin sheet metal large enough to cover both vent holes. Attach to the bottom of the firebox with a rivet in the center.

Build the stand.

The smoke chamber must be positioned higher than the firebox. I built a sturdy stand from perforated steel angle and bolts, but you could weld angle iron instead, or improvise your own frame.

The Smoker Diagram shows how to lay out and assemble the perforated steel angle. Use angle plates at the corners to add strength and rigidity to the structure.

Note the position of the cross-members about midway between top and bottom. These support the firebox during hot smoking.

Connect the smoke duct.

Hot smoking setup: Place the firebox on the stand directly below the smoke chamber’s inlet hole. Connect the firebox outlet collar to the smoke chamber inlet collar using a short piece of 3″ duct. Seal with aluminized tape.

Cold smoking setup: Position the firebox about 6′ away from the smoke chamber and extend the 3″-diameter bend-and-stay duct to its full length. Attach the duct to the smoke chamber inlet collar and the firebox outlet collar. Seal with aluminized tape.

Conclusion

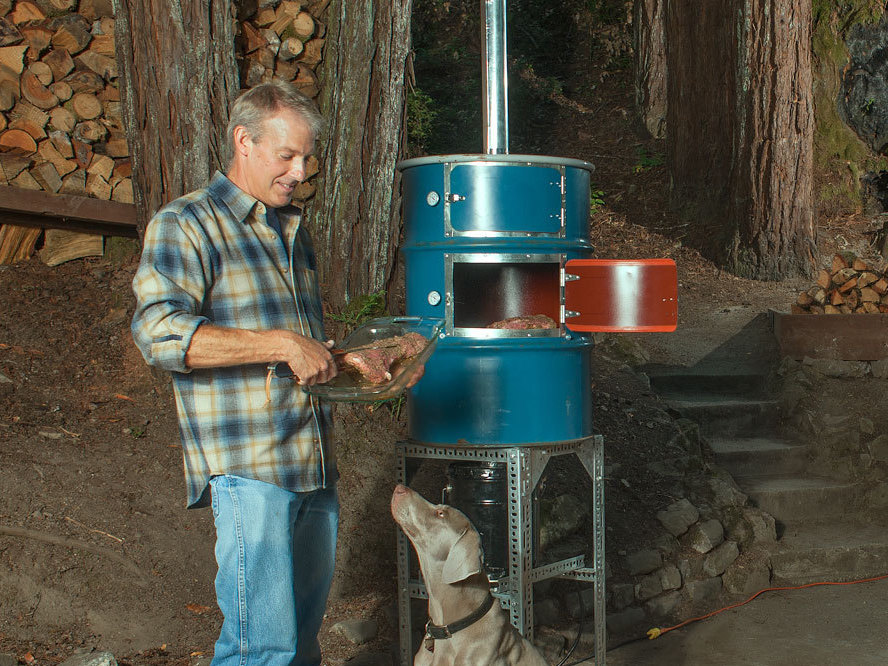
Smoke 'Em if You Got 'Em

Why Smoke?

Exposing foods such as meat, cheese, and fish to wood smoke is desirable for a few reasons. Wood smoke adds wonderful flavors, from sweet caramel notes to spicy, smoky, and even vanilla aromas. Smoking also dehydrates foods to some degree, changing the texture and making them saltier and savorier.

Finally, wood smoke contains antioxidant and antimicrobial compounds that slow the rates at which fats turn rancid and bacteria multiply, so smoking helps preserve foods.

Consult one of the many excellent cookbooks that address safe food preparation prior to smoking. It’s imperative that you use the correct techniques to prepare your smoked food.

Hot Versus Cold

There are 2 main categories of smoking: hot and cold. In hot smoking, the smoke heats the food to about 126°F–176°F. Some hot-smoked foods, such as fish, may cook fully in the smoker. Other foods, such as red meat, should be pre-cooked. Consult a cookbook for details on safely preparing meats.

Since cold smoking (68°F–86°F) does not cook food, cold-smoked foods must be cured or cooked before being eaten.

So why cold-smoke at all? Cold-smoked meats and fish are moister and often more flavorful. The choice of hot or cold smoking depends on the item being smoked, how the chef wants the food to taste, and the equipment and time available.

Fuel and Temperature Control

Mound wood chips or sawdust in a shallow steel pan about 10" in diameter, so they make a cone-shaped pile. Place the pan on the electric hotplate. Adjust the heat on the hotplate so the chips smolder but don’t burn with a flame. When the chips are used up and the smoke becomes thin, add more chips.

The temperature inside the smoke chamber is the critical variable in successful smoke cooking. This is controlled by the length of the duct between the firebox and smoke chamber, the heat of the firebox, and the ambient air temperature. Choose cool days for cold smoking and warm days for hot smoking. Try adding a little charcoal to the pan to sustain warmer temperatures.

Adjust the smoke levels by opening or closing the louver on the bottom of the firebox to let in more or less air. This will speed up or slow down smoke production.

Good woods to use for smoking are hardwoods such as hickory, beech, alder, mesquite, and fruit and nut woods like apple and pecan. Don’t use softwoods such as pine and fir because their resins produce undesirable chemicals in the smoke.

How to Smoke Fish

1. Prepare fish.

  • Oily fish, such as salmon, trout, herring, sardines, and mackerel, work best. If you’re cold-smoking you must freeze the fish for several days to kill parasites before thawing and smoking. Fresh, never-frozen fish can be used if you’re hot-smoking.

2. Prepare brine.

  • For 5lbs–10lbs of fish:
  • 1½ cups coarse salt
  • 1½ cups sugar
  • 2 cloves garlic, crushed
  • 2 tablespoons peppercorns, cracked
  • 1 gallon water
  • Mix the ingredients in a large pot and heat until boiling. Cool the mixture in your refrigerator to 35°F–40°F.

3. Brine the fish.

  • Soak the salmon in 35°F–40°F brine for 6–12 hours. Thoroughly rinse the salty brine from the fish. Pat dry with paper towels.

4. Air-cure the fish.

  • Place the brined fish on an uncovered rack in the refrigerator, overnight.

5a. Cold-smoke the fish.

  • Place a couple of wood chunks on the pan in your smoker and adjust the hotplate until moderately dense smoke is generated. You’ll have to add wood at intervals, so careful attention to the process is required.
  • For cold smoking, the temperature must stay below 90°F, as indicated by the smoke chamber thermometers. Adjust the temperature inside the smoker by increasing or decreasing the length of the smoke duct, adjusting the firebox louver for a slower burn, and by selecting cool or cold days to smoke.
  • Smoke the fish in continuous, moderately dense smoke for 16 to 32 hours. Congratulations, your cold-smoked fish is ready!

5b. Hot-smoke the fish.

  • Hot smoking is much quicker than cold smoking. To hot-smoke, follow the directions in Step 5a but increase the heat so a thick, dense smoke is maintained in the smoke chamber at a temperature of about 200°F. Again, adjust the temperature inside the smoke chamber by changing the length of the smoke duct, adjusting the firebox louver, or choosing a warm or cool day to smoke.
  • Hot-smoke the fish for 2–4 hours, depending on thickness, or until fully cooked. Enjoy!

This project first appeared in MAKE Volume 32, page 94.