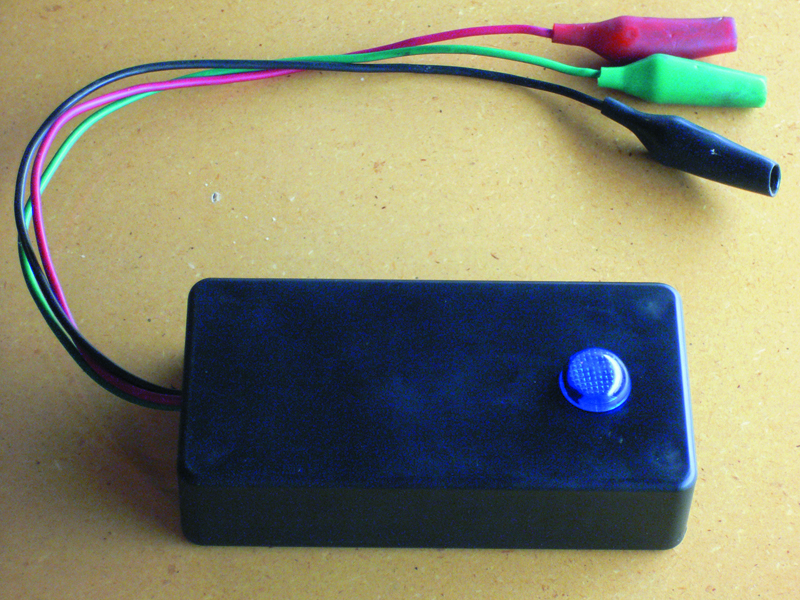
When you’re working on your car’s 12V wiring system, it helps to have a few special tools to get the job done. The Uber Tester is a 4-in-1 gadget that won’t remove door panel clips but does test for most wiring conundrums you might encounter. Plus, with its dual notification (buzzer and light), you’ll be able to use the tool when your stereo is blasting or when you’re contorted under the dash.
This 9V-powered handheld device will test the following scenarios with just three wires:
1. DC polarity — positive or negative voltage
2. Speaker polarity — “pop test”
3. Connectivity — wire loop back
4. Presence of voltage — fuse tester, constant or ignition switched power Installing a 12V accessory or stereo properly — that is, with the correct speaker polarity, switched power source, and constant voltage for the clock and preset memory — requires a tester such as this. Tracing wires in today’s vehicles is next to impossible with their nearly identical colors and tight wire looms. This gadget will help you find that needle in a haystack.
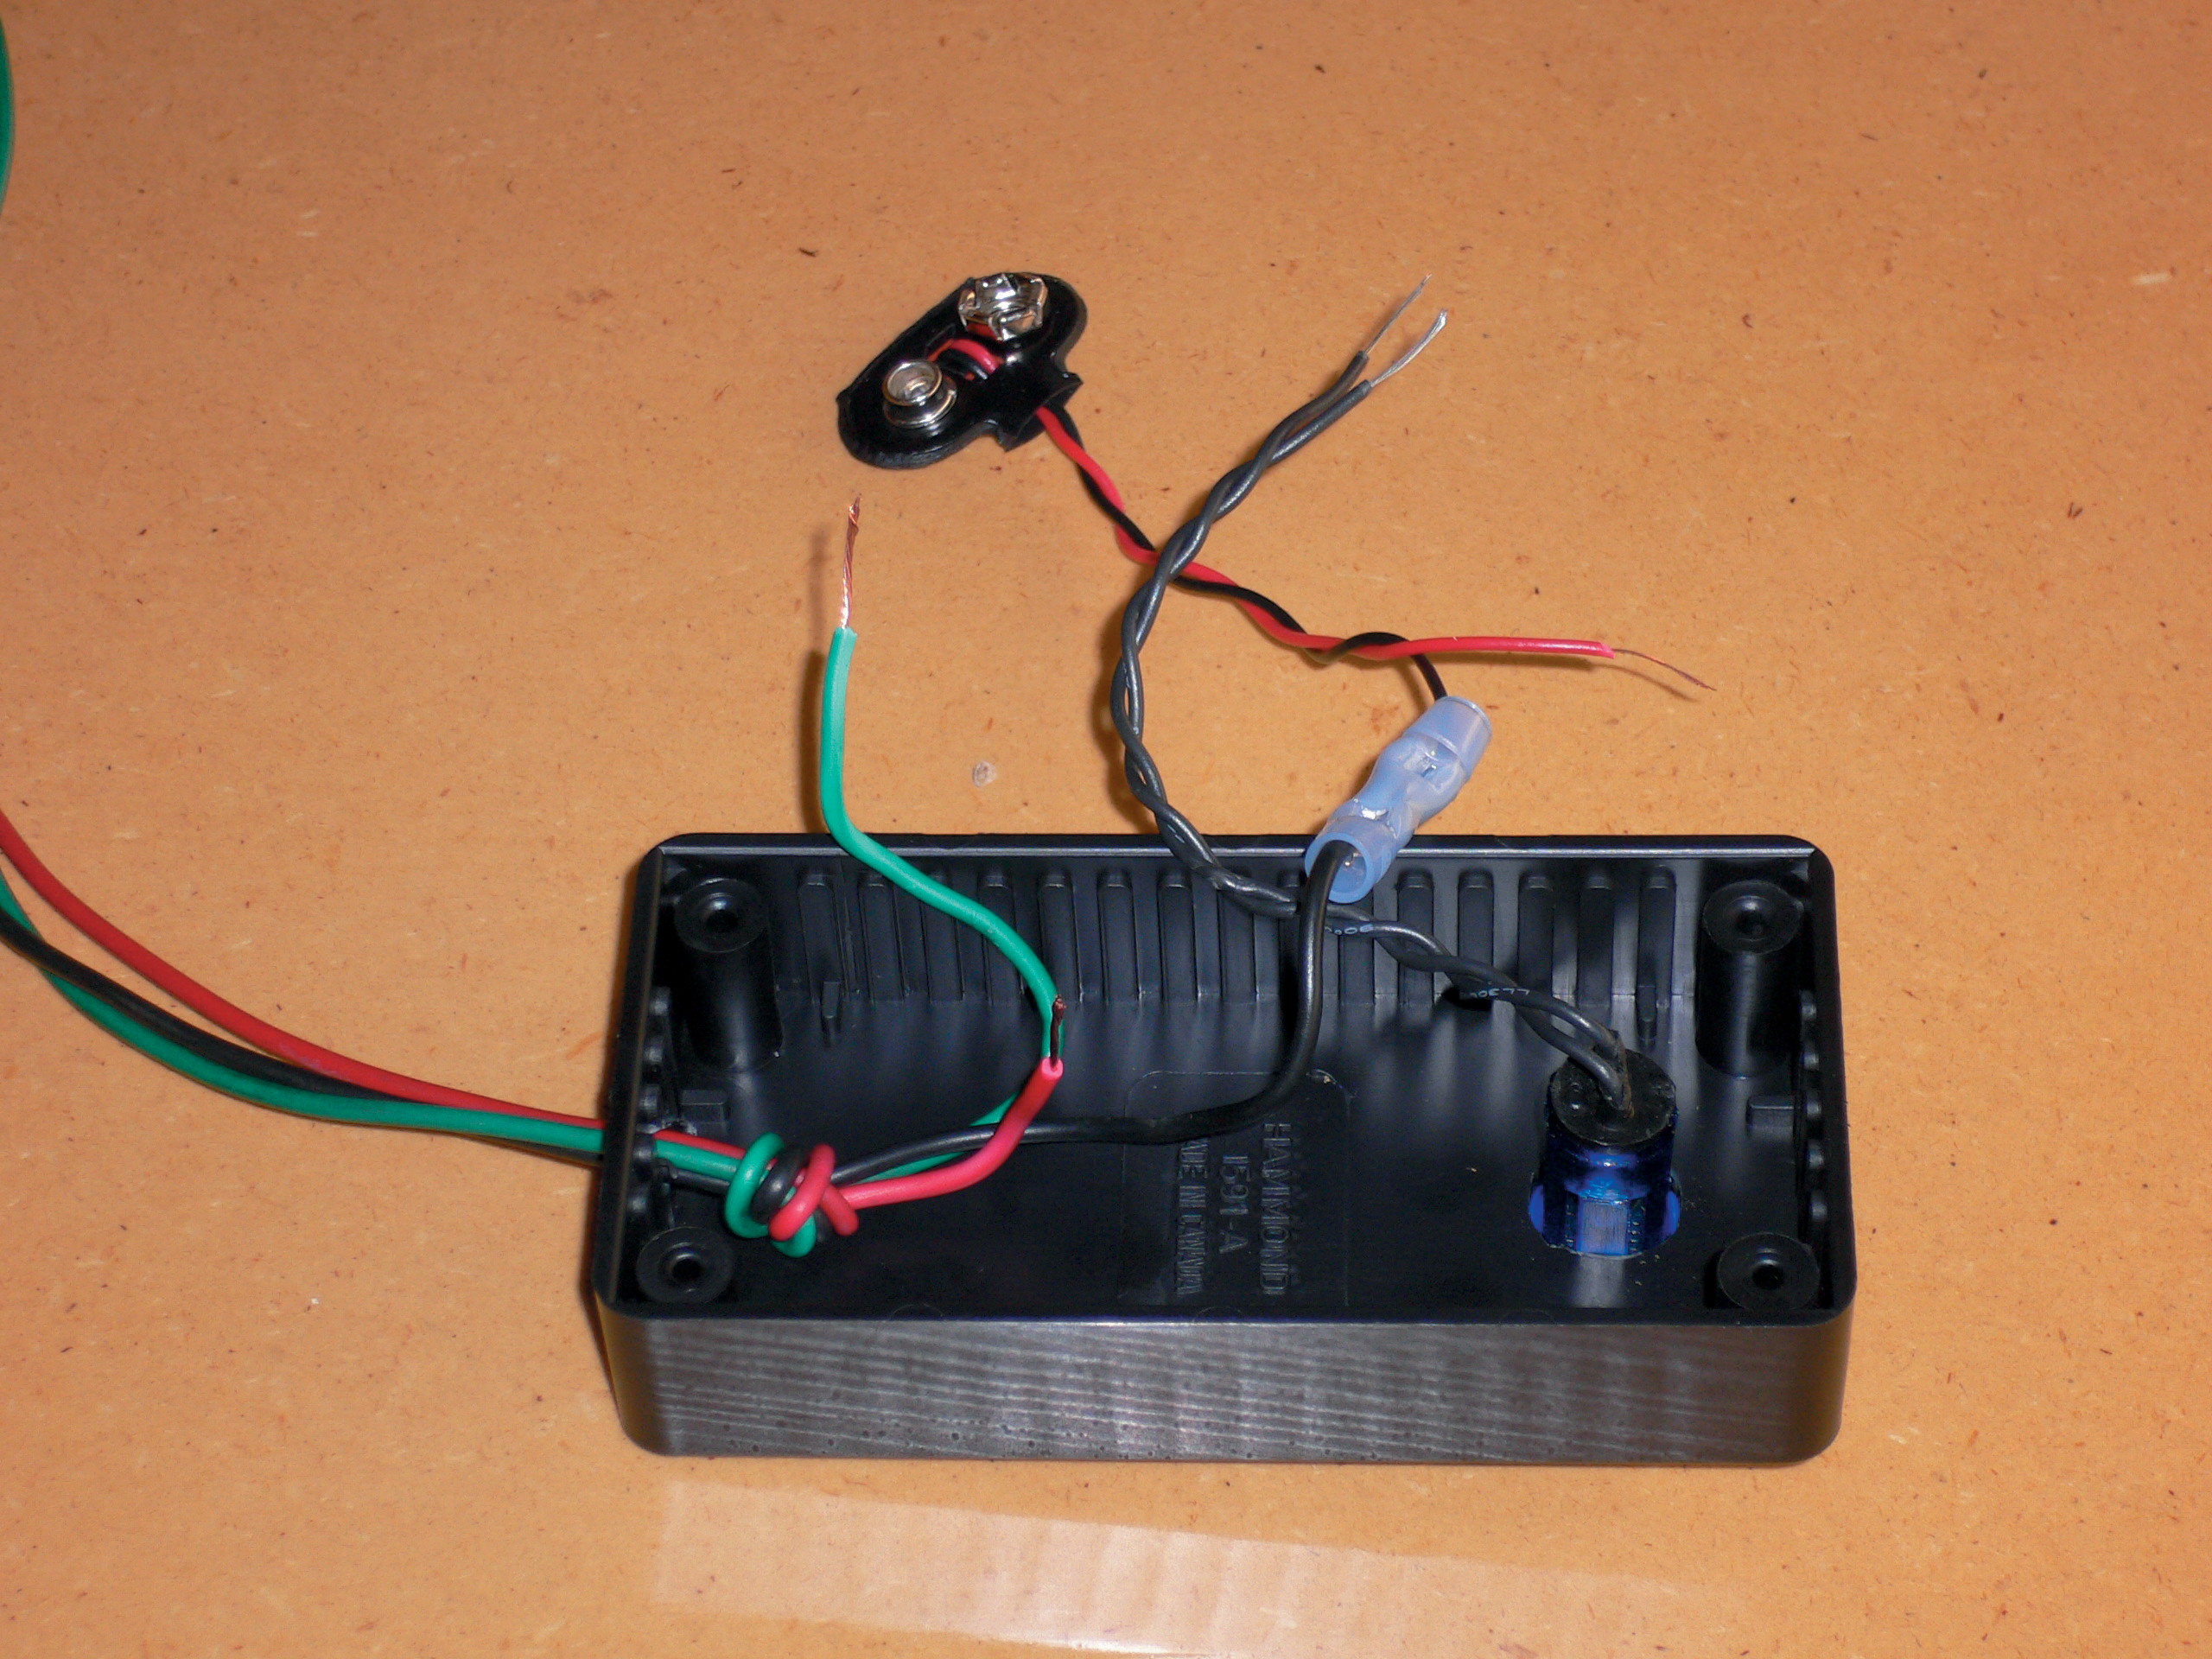
Start by drilling a hole for the lamp in the bottom of the gadget box (not on the removable lid) about a quarter of an inch down. Then drill a hole just large enough to let the three jumper wires pass through it. Strip ¾” of insulation off the lamp wires and insert the lamp into the hole you drilled for it.
Cut one alligator clip off the end of each of the red, green, and black wires and poke the wires into the gadget box, leaving the alligator clips outside of the box. Tie the three wires into a knot to prevent them from pulling through the hole, leaving about 2″ of wire to work with inside the box.
Strip the wires back ¾” to prepare for the connections.
Connect the black wire from the 9V harness to the black alligator clip wire.
Connect the red wire from the 9V harness to the red alligator clip wire, the red buzzer wire, and to one of the lamp wires.
Connect the black wire from the buzzer to the green alligator clip wire and to the second wire on the lamp.
Check wiring.
Note that coming from the alligator clip jumpers, the red wire makes three connections, the green wire makes two, and the black one only connects to one. That’s it!
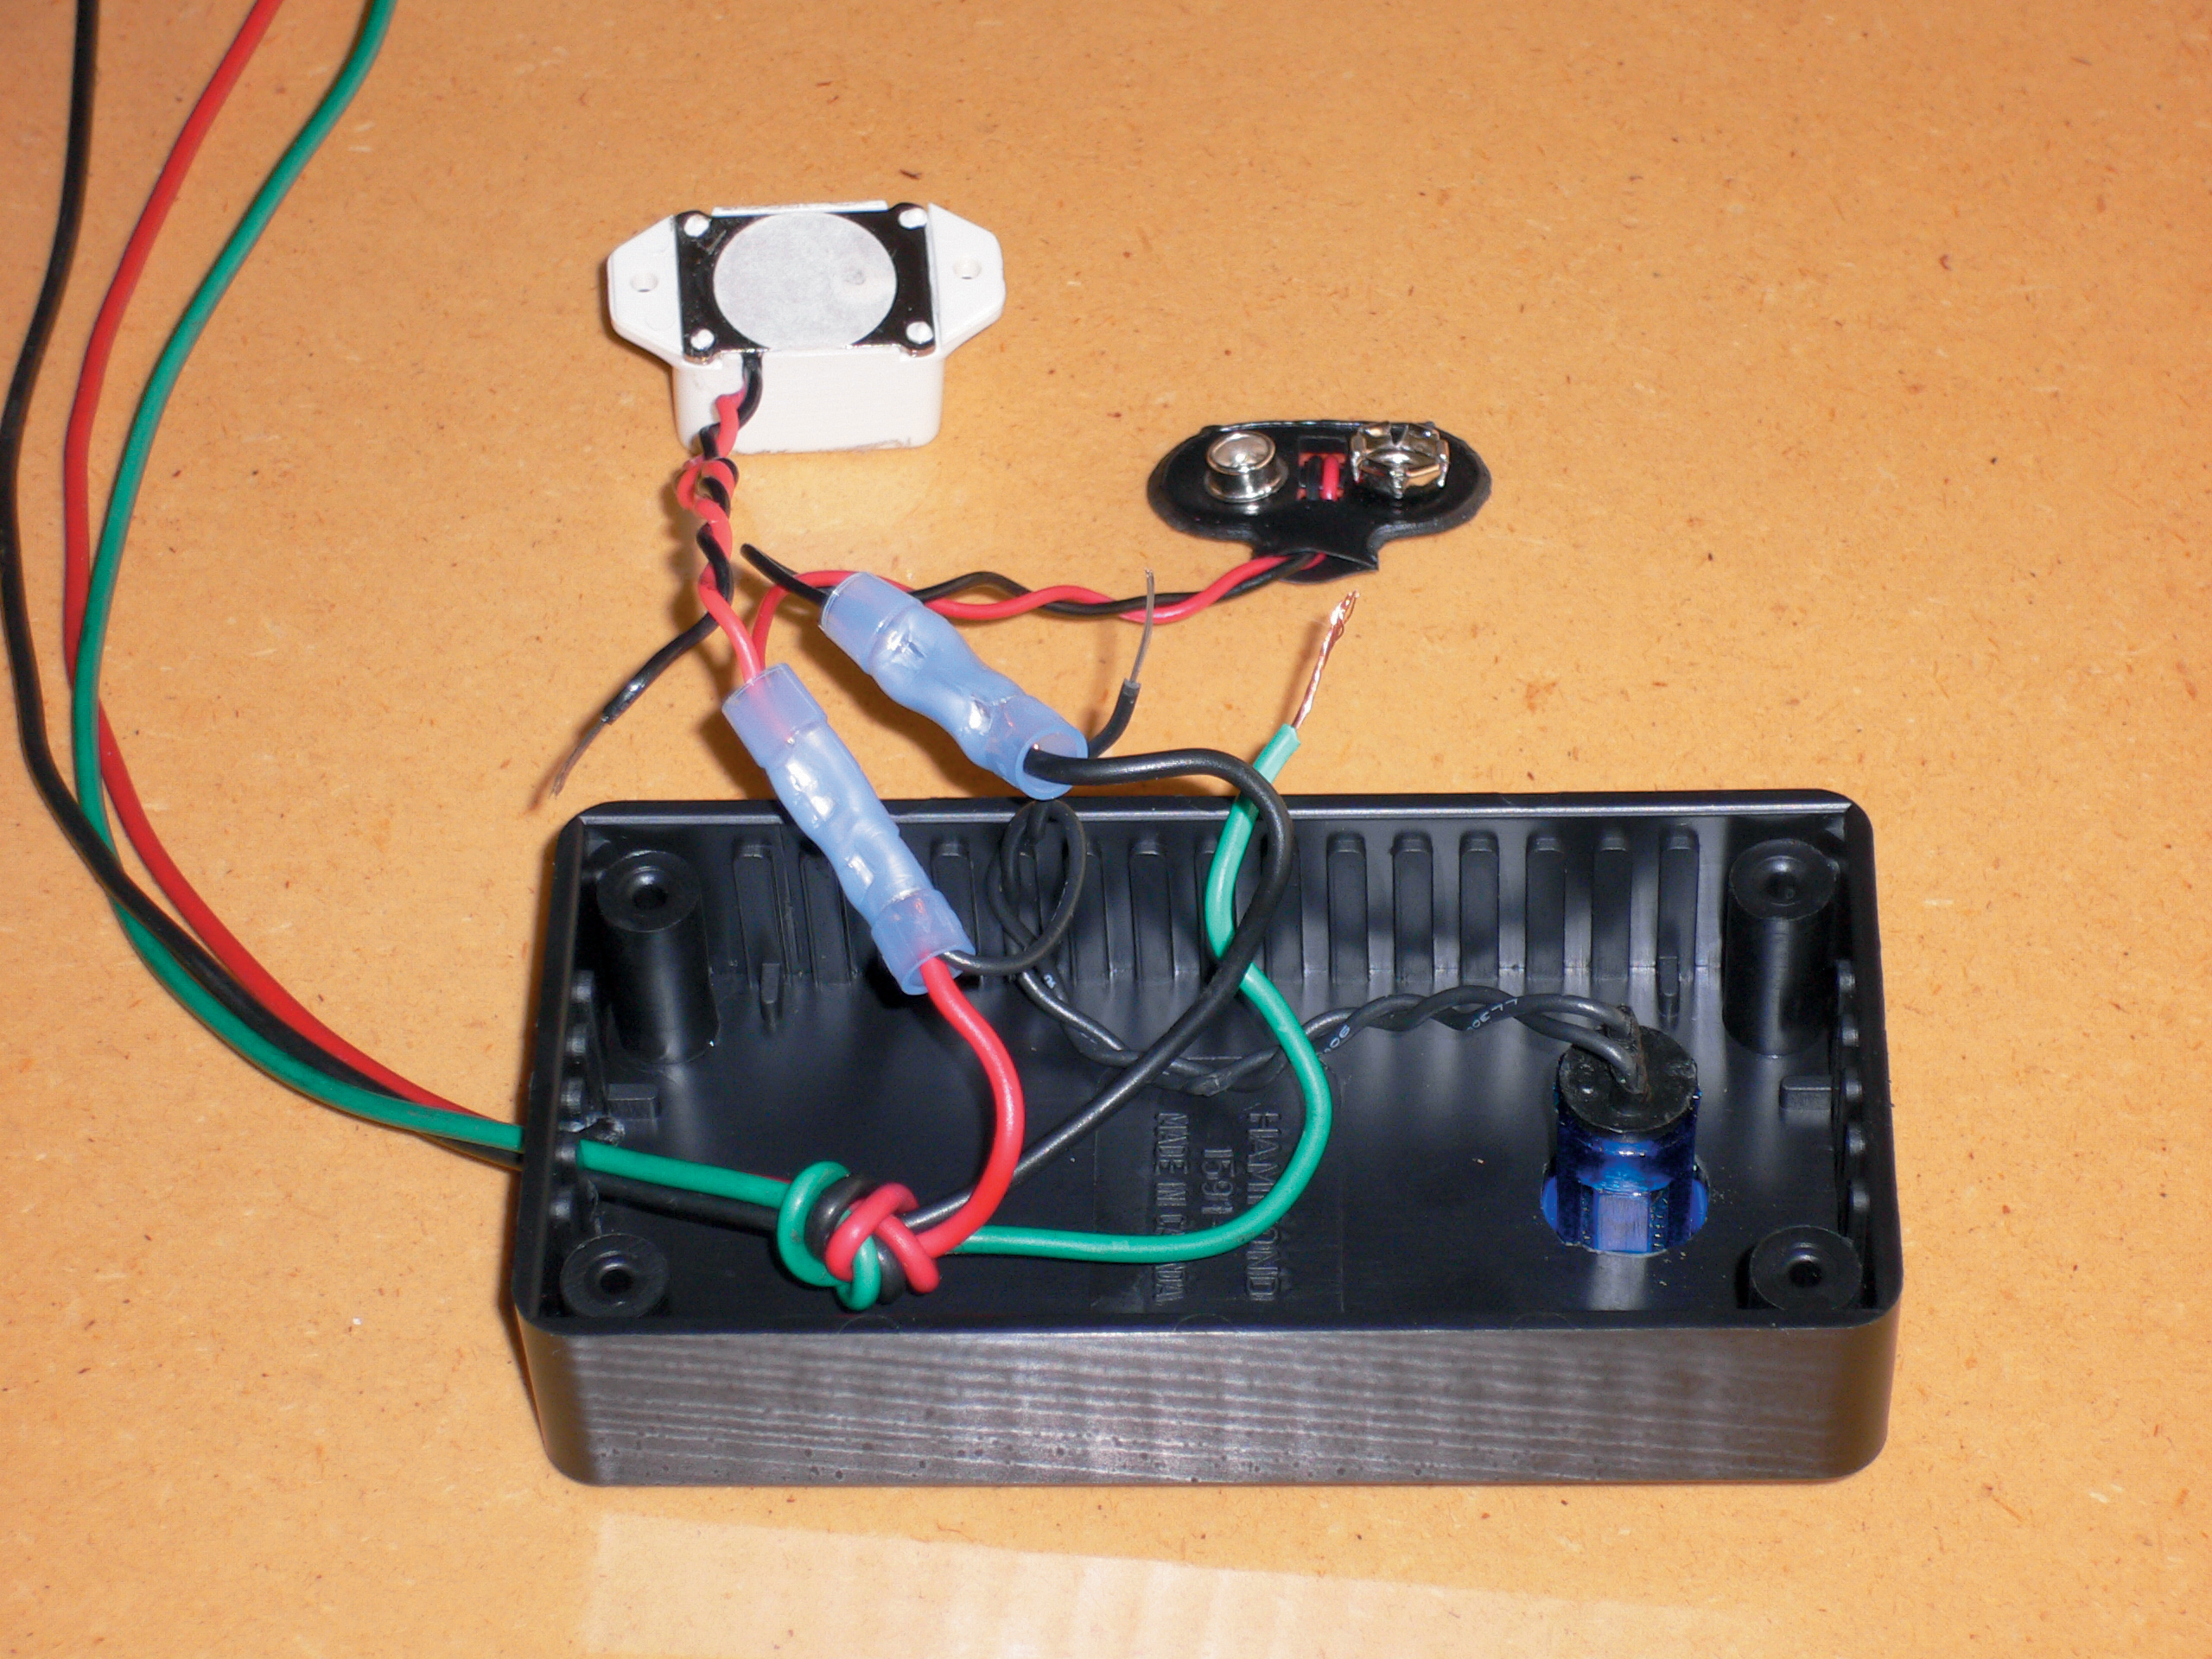
Connect the 9V battery to the connector and touch the black and green alligator clips together— you should hear a tone and the light should illuminate. Connect the red wire to a positive 12V (or lower) source and the black to ground, and you should hear a tone and see the light illuminate. If so, your wiring is properly connected.
Now would be a good time to put some extra solder on the jumper wires inside the alligator clips. Usually they are merely crimped on, which will not provide a strong enough connection to allow you to let your tester dangle.
Just pull back the protective covers on the jumpers, clip the jumpers to a piece of cardboard to keep them from moving around, and load up the solder under where the wires are crimped.
Now it’s time to stuff the buzzer, battery, and wires into the gadget box. Put the cotton balls in the leftover space to keep the tester from sounding like a baby’s rattle.
Note: 12V UBER TESTER WIRE GUIDE Red/Black 9V output and speaker polarity pop test Black/Green Continuity test Green/Red Voltage presence — constant or switched Memorize this guide, or copy it and paste it onto your gadget box.
To prevent your battery from dying, keep the red wire from shorting on the black or green wires by pulling the insulation hood over the metal. You should see years of service from your battery since it is rarely used.
Our websites use cookies to improve your browsing experience. Some of these are essential for the basic functionalities of our websites. In addition, we use third-party cookies to help us analyze and understand usage. These will be stored in your browser only with your consent and you have the option to opt-out. Your choice here will be recorded for all Make.co Websites.
Allow Non-Necessary Cookies
Escape to an island of imagination + innovation as Maker Faire Bay Area returns for its 15th iteration!
Buy Tickets today! SAVE 15% and lock-in your preferred date(s).