https://youtu.be/XXkYxFYX4a8 

In summertime, it pays to be prepared.

Tell me if this sounds familiar; the kids on the street start a water balloon war and run just out of your reach to return fire. Well I’m here to help. Let’s add a new weapon to your water fight arsenal and build a pneumatic water balloon cannon. This is an easy project to put together. For about $20 and 20 minutes of time you can return fire across the street, down the street, or even to the next block if you want.

WaterBalloonCannon-1small

YouTube player

You will strike fear into all those who seek to soak you.

Project Steps

Cut the pipe

We’ll cut down the single piece of pipe into 4 separate pieces that, when glued together, will form our overall cannon. The lengths noted here are not mission critical, but are more just to provide guidelines.

Measure out 30″ from your single piece of pipe and cut it. Set aside the 30″ piece you just cut. Note that when you cut try to make as straight a cut as possible and with some sand paper or file, remove the straggling burs left on the end.

Take the other (not quite 30″) piece and cut it into 3 pieces of approximately the same length. You’ll now have a total of 4 cut PVC pipes.

Mount the valve stem

Take one of the 3 smaller pieces and put a mark with a pen about 2″ up from one end. You will be drilling a hole through one side of the pipe, and making it large enough for your valve stem to be placed through.

Note that the pipe is easily drilled so you want to drill a hole that is smaller than the valve stem and slowly make the hole larger or even use a file to enlarge it slowly. The goal is to have the valve stem just barely fit through so that it creates an airtight seal. Don’t make this hole too large. You can always make it bigger, but it’s not so easy to make it smaller.

Coming from inside the pipe, insert the valve stem, wiggling it through until it seals against the pipe securely.

Glue it together

This step involves gluing the various pieces together. With this step it’s very important to lay your pieces out in advance, before you apply any glue. This glue is not forgiving and dries very quickly so you want to make sure you are gluing the correct pieces together as you will only get one shot at it. You can always go buy more supplies, but let’s try to get it right the first time.

Apply a liberal amount of glue to the left end of the T­ fitting. Insert one of your 2 smaller pieces, twisting about 1/4 turn as you insert it.

Apply a liberal amount of glue to one of the caps and place the cap onto the end of the piece you just glued to the T fitting.

Repeat the 2 above steps, with the other small cut piece, inserting into the right end of the T fitting.

Apply glue into the top opening of the T fitting and insert the tube that you place the valve stem into. Place the end with the valve stem closest to the T.

Apply glue into one end of the ball check valve, and place it onto the end of the pipe that your valve stem is mounted to.

Apply glue into the top end of the ball check value, and insert the long piece of pipe remaining. This would be the barrel of your cannon.

Fire in the hole!

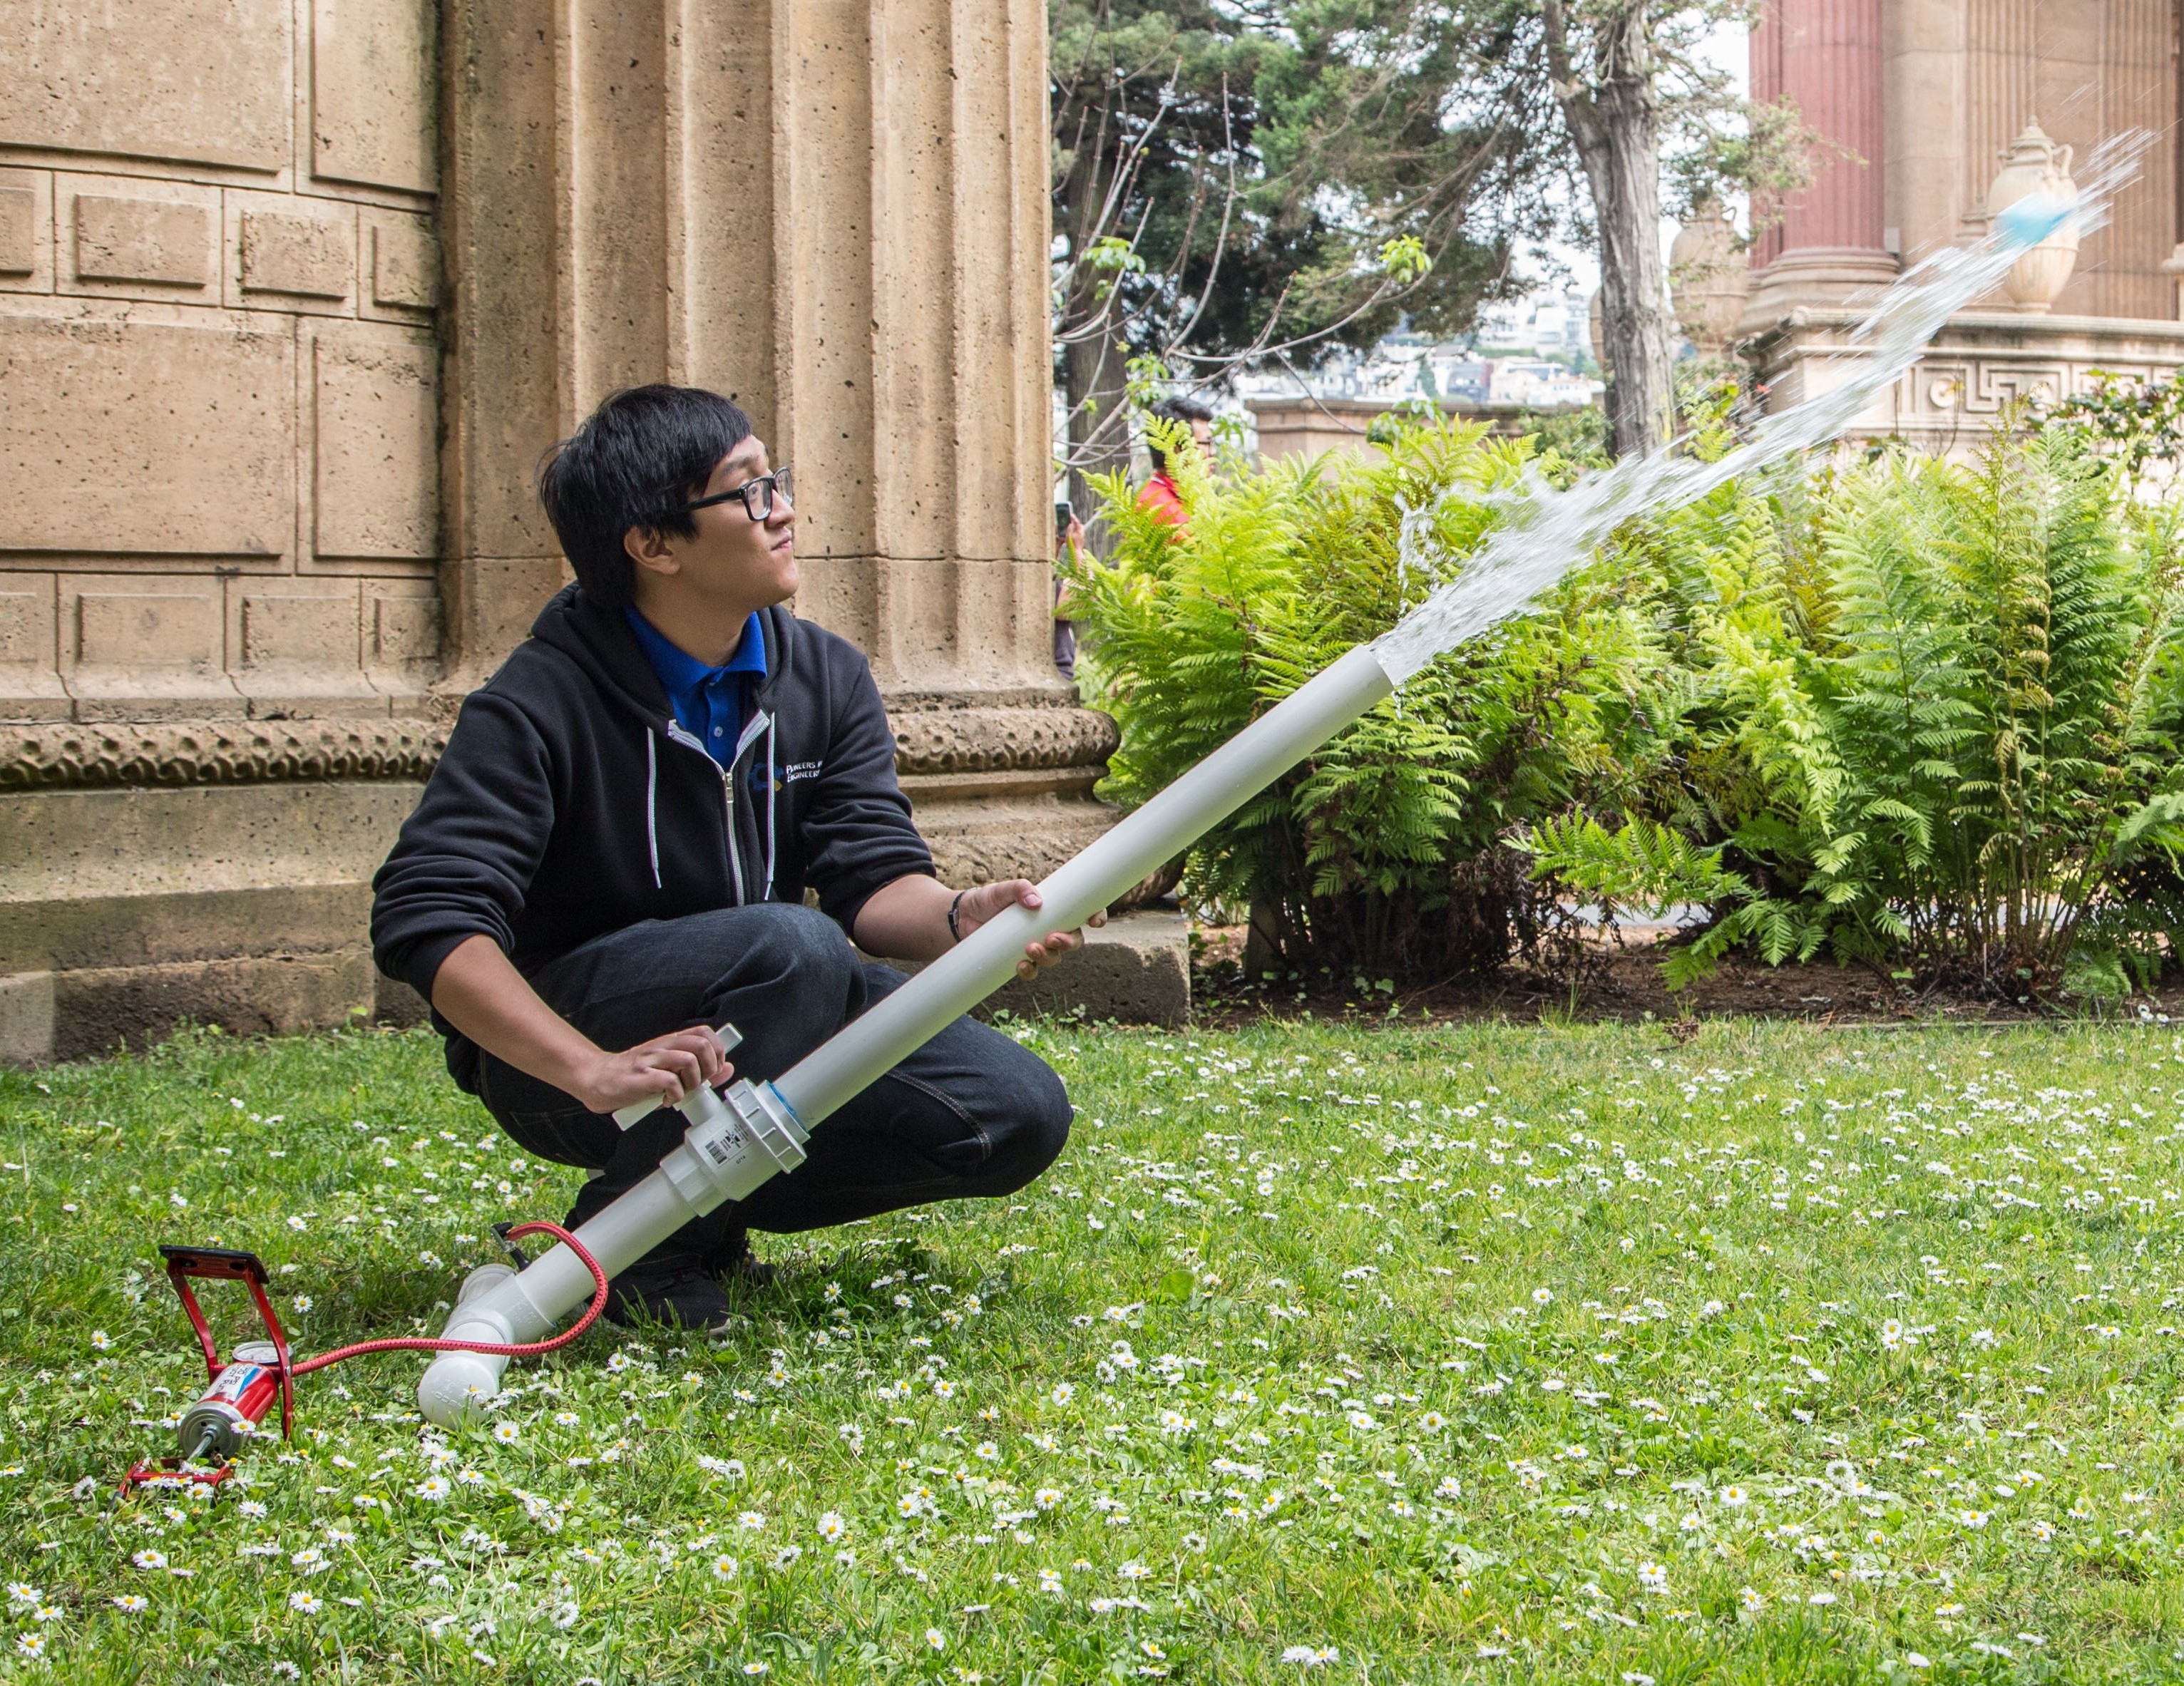
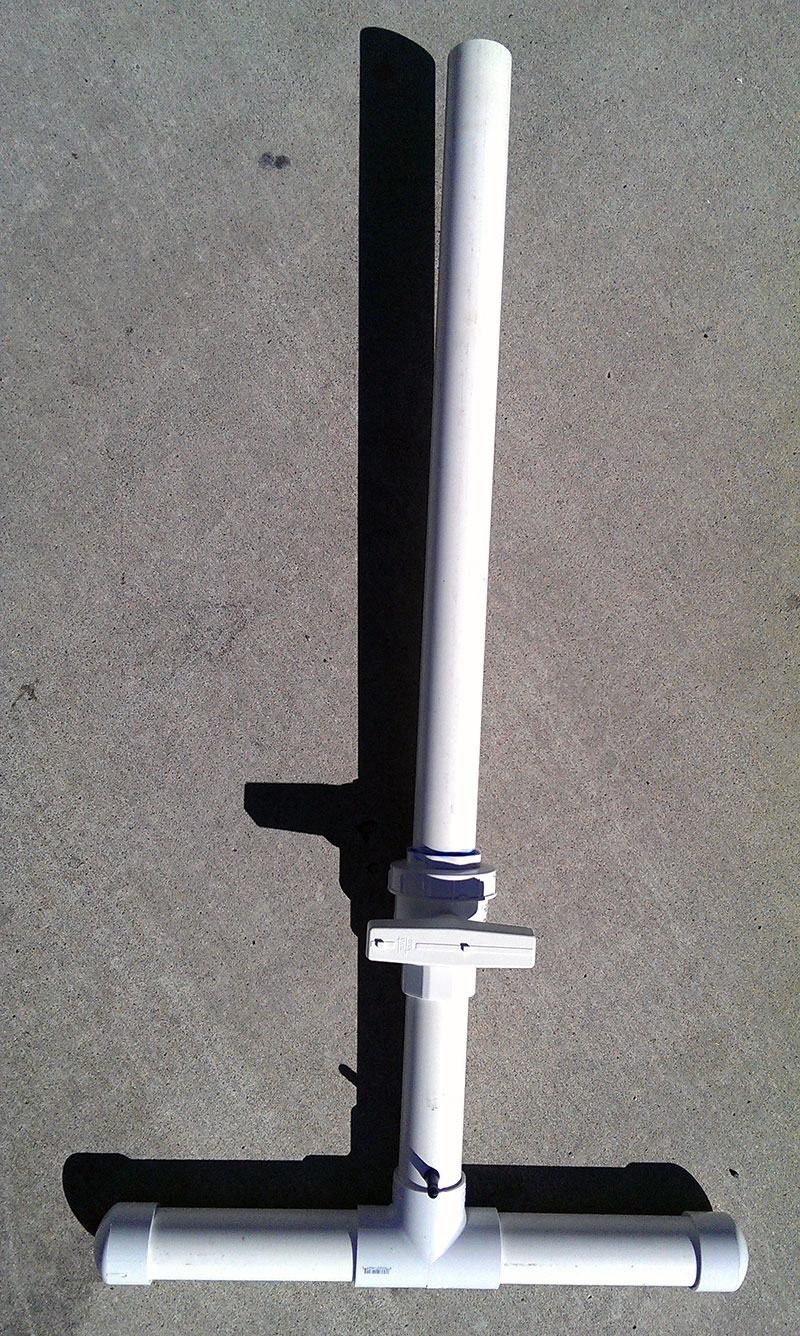
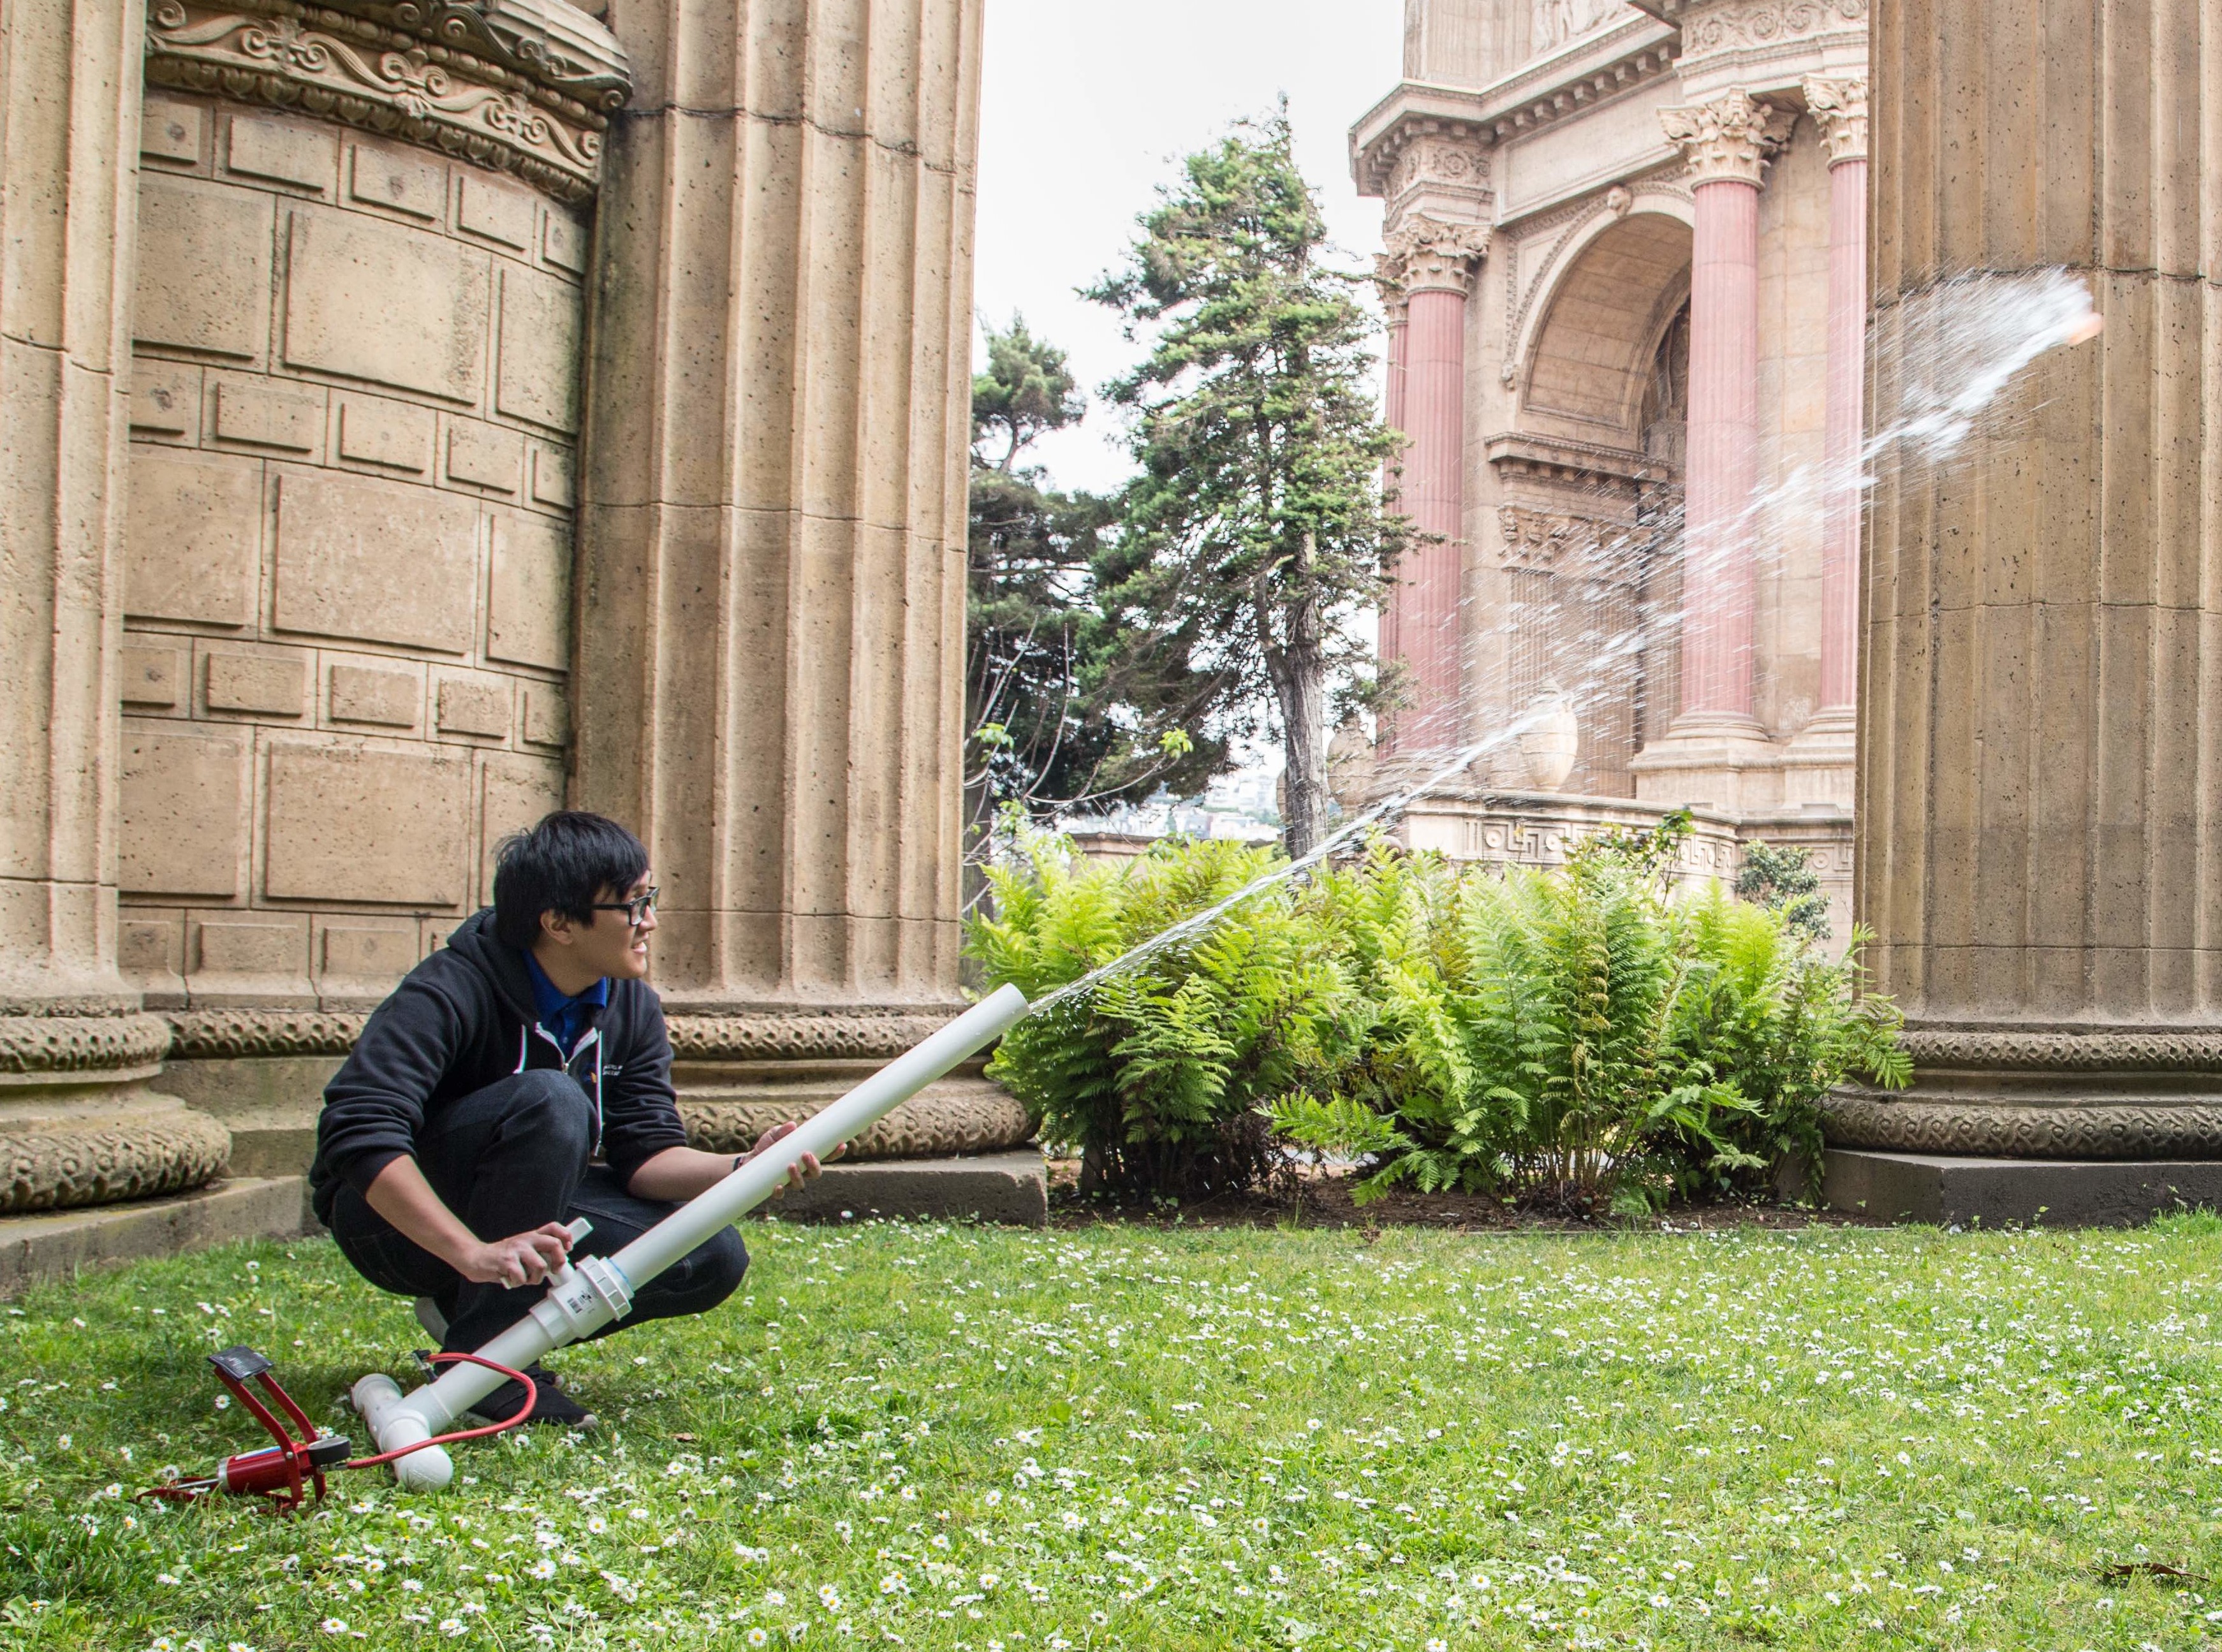
If you’ve taken your time and followed the previous steps you should now have something that resembles our assembled cannon. Congratulations! You now have your fully assembled Water Balloon Cannon. To fire water balloons follow these steps:

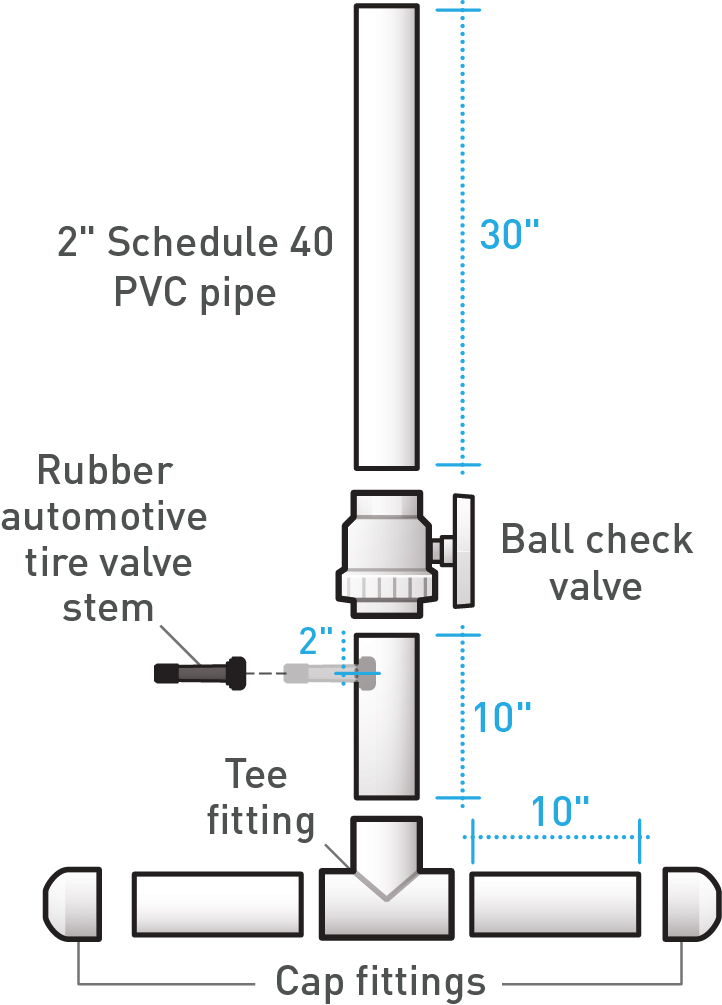
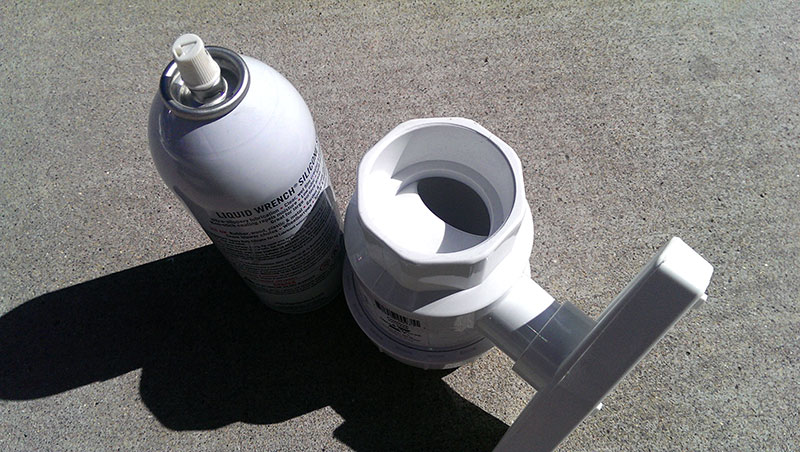
Close your check valve. If left open your balloon will fall into the “air tank” area never to be seen again.

Pour in approximately 4­–5 cups of water, or put the hose in and fill the barrel about 3–4 inches. This water in the barrel is crucial as it prevents the balloon from exploding on exit.

Fill a water balloon that is almost exactly the diameter of the barrel, about 2″. It can be smaller, and they can be squished to fit, but an overfilled balloon won’t travel very well. This takes some experimentation.

With your valve closed, your water “batting” in place, and your balloon dropped in, next you want to fill the air tank. Attach an air compressor or bicycle pump to the valve stem. If using a compressor, do not over fill with air. I would suggest approximately 20–­30 psi. A bicycle pump is good at about 15–18 pumps.

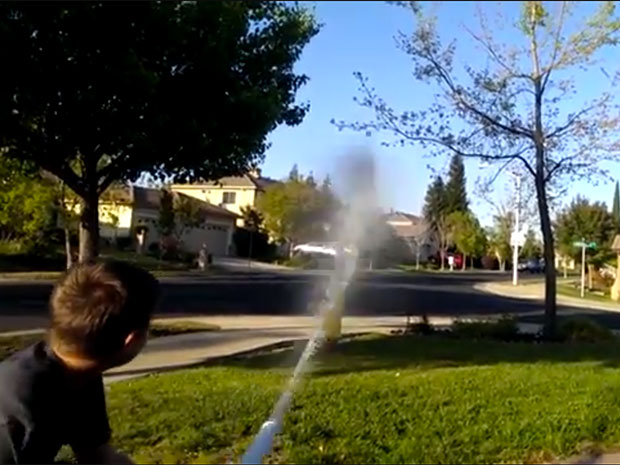
Make sure you are not aiming at anyone directly (straight up is a good first test) and open the valve with a very quick motion. Pooof!! There goes your balloon followed by a trail of water. If you open the valve slowly the air will escape too easily and your balloon may barely get out of the barrel. So you want to open it fast!

There you have it. A simple yet effective water balloon cannon that will be the envy of every kid on the block. Happy water wars!