


With berry season right around the corner, I got to thinking back on Alastair Bland’s One-Week Wine tutorial from the pages of CRAFT Volume 03. Alastair crafted his first batch using wild-harvested mulberries, while bike-touring around the Greek countryside. Doesn’t get much eco-friendlier than that! Read on to whip up your own batch and pick up a back issue of CRAFT Volume 03, if you don’t already have it, for lots more evergreen projects.
Make wine anywhere — even on a bike trip.
By Alastair Bland
In June 2006, I biked through Greece for seven weeks. The summer brings hot, arid conditions there, yet feral roadside fruit trees grow by the millions, particularly figs, cherries, and mulberries. The berries made for excellent road fare, but it occurred to me that mulberries also could make allowable wine.
Greeks, however, like Californians, are a bit hung up on the whole grape craze, and the only way I was going to taste mulberry wine was to make it myself. So I crushed the berries by hand, collected the juice in my 1-quart bottle, and added bread yeast to turn the fructose into our good friend, alcohol. I snugly lodged the bottle in a travel pannier on my bike while the juice fermented, and in four tries my results were consistent and potent: full-bodied, no-joke wine within one week — no corkscrew needed.
Materials
Bicycle While not required, this vehicle allows for a fast rate of travel and easier access to roadside trees than is offered by the large, noisy, and cumbersome automobile.
1/2 gallon of fruit
Clean sock
1-quart jug or larger with a sturdy screw cap
Second vessel for use as a transfer container
Funnel not required but certainly helpful
Yeast: Wine, beer, champagne, or bread
Step 1: Pick a half-gallon of berries.

Depending on the wealth of the tree or bush, this may take as little as 30 minutes or more than an hour.
Step 2: Juice the berries.
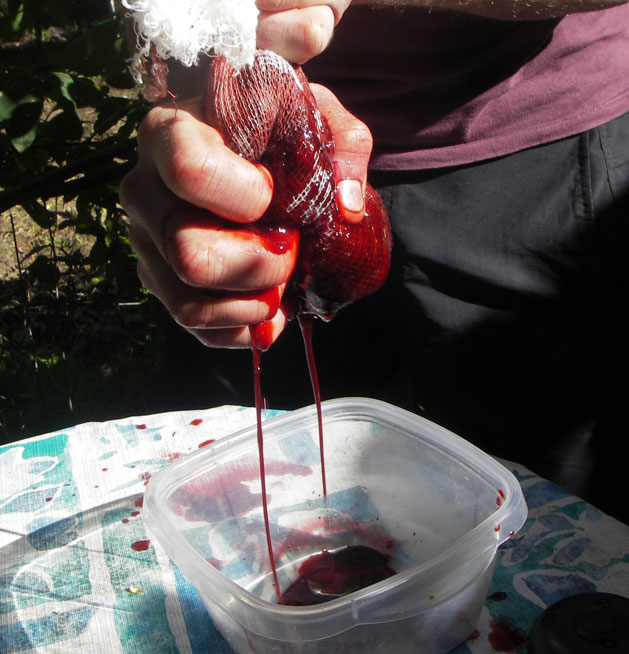
For this step you’ll want a water source nearby for washing off when you’ve finished. Take a clean sock or a sack fashioned out of cheesecloth and fill it about 3/4 full with mulberries. Squeeze from the top down. The juice will seep through the fabric and down over your fingers. Carefully drip or funnel it into your bottle, or a temporary collection vessel with a wide brim.

When the berries in the sock have been squeezed dry, discard the pulp and refill the sock. Keep on juicing.
Step 3: Jar the juice.

When your berry collection is spent, pour the juice into your sealable container. You’ll want a screw cap, as it can be tightened almost all the way — but not quite — and thus allow for the fermentation gases to escape. Leave 1 1/2″ of empty space to accommodate the bubbling and frothing that occurs as fermentation commences. Drink any excess juice you may have.
Step 4: Add the yeast.

Winemakers and brewers use specially bred yeasts, which are available at homebrew and winemaking supplies shops. Bread yeast from the local countryside baker also does the trick, and a pinch is all you need for a quart of wine. Sprinkle it over the surface of the juice (no need to stir it in).

It can be entertaining to watch the yeast particulates begin to wake up from their dormancy as they react to the surplus of sugar in their midst. Within several hours they will begin to swell. Bubbles may appear around them, and within 30 hours, a foamy head will have developed on top of the fruit juice.
Warning: Beware of explosion! We are not concerned here about an explosion of heat and flame, but rather one of sheer pressure and sticky juice. To avoid a minor disaster, you must periodically loosen the cap to allow the pent-up gases to escape. If your bottle remains stationary during your winemaking enterprise, you can keep the cap loosely sealed for the duration of the fermentation. You may hear a persistent fizzing or whistling noise as the gases seep into the open air.
When traveling, however, circumstances are more complicated. On the bike, I keep my bottle tightly sealed to prevent spillage. Meanwhile, the constant disturbance produced by the rigors of travel actually invigorates fermentation, thus increasing the rate of pressurization. At traffic lights and food and water breaks, I always loosen the cap for a moment, then reseal it before moving onward.
Another Warning: In the midst of heavy fermentation, never completely remove the cap, no matter how badly you wish to peek inside at your frothing wine. Carbon dioxide bubbles will abruptly expand in the liquid, and within seconds the juice will accelerate upward. If the cap is not replaced in an instant, much of your potential wine will spill over the brim and be lost.
Step 5: Ferment.
Allow 7-10 days for complete fermentation. By day 4 or 5, you will notice a deceleration of activity in the bottle and a progressively weaker hiss each time you crack the cap to release the pressure. If you wish to drink your mulberry wine slightly bubbly, enjoy it now, but it will be less potent than fully fermented, non-bubbling wine.
Step 6: Decant.
To prepare your wine for consumption, let the bottle sit undisturbed for 6-8 hours.
Expired yeast cells and other “dust” precipitates from the liquid and forms a sooty layer of sediment on the bottom of the bottle.

Pour the wine into a clean vessel, leaving waste matter behind. Your clean sock may be used as a filter.

Wash out the fermentation vessel, pour the wine back in, and seal the cap.
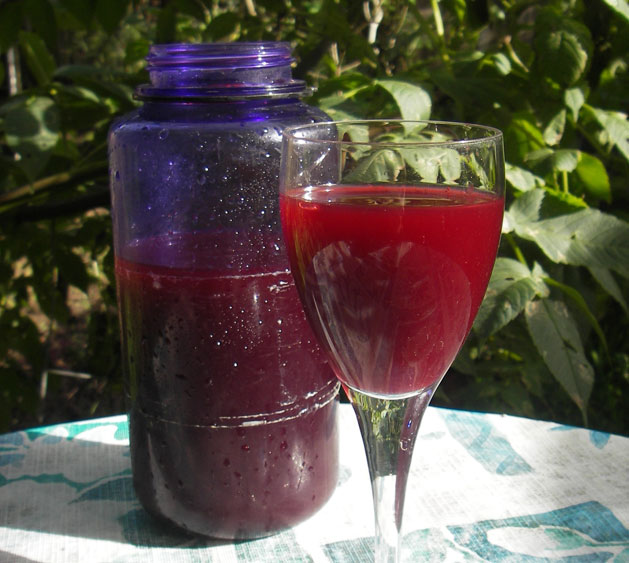
Step 7: Drink!

Mulberry wine is a rustic, punchy, big-boned beverage, dominated by yeast aromas
and lingering traces of berries. There is little tannic quality, making it surprisingly smooth. The alcohol probably runs at 8% by volume, although I never had the opportunity to measure. Don’t expect a first-rate drink — this is travel wine. Enjoy it in the afternoon, but remember that it’s always 5 p.m. somewhere, and in Europe it doesn’t really matter anyway.
Final Thoughts
In my 2,000 miles of cycling through Greece, I encountered four easily distinguished varieties of mulberries: white, pink, purple, and black. All were delicious, but I reserved the black mulberries for wine. These fruits ripen in June, becoming so packed with juice that they burst at the most delicate touch, and shower the harvester with a cascade of sticky syrup. While this is an unpleasant drawback, the black mulberry ultimately makes quite good wine.
On-the-road fermentation extends beyond Greece and mulberries. Wherever your next overland expedition takes you, watch the roadside vegetation. Fruit trees, bushes, and vines grow almost everywhere, and blackberries, blueberries, raspberries, and cherries all produce fine wine. Prickly pears, carefully pulled from the cactus, sliced open and pulped, render wonderful, mild juice, and grapes of course work well. On the back of my bicycle I’ve produced some mighty, head-spinning zinfandel.
My last word of advice for the traveling vintner: never steal, and never hop fences in pursuit of fruit. If the tree or vine is clearly unpicked, with fruit splattering on the ground below, then go for it. Pick away.
About the Author:
Alastair Bland is a freelance writer in San Francisco. An avid cyclist and homebrewer, he travels frequently while fermenting fruit juice, but he can always be reached by email at allybland@yahoo.com.
ADVERTISEMENT
Join Make: Community Today


