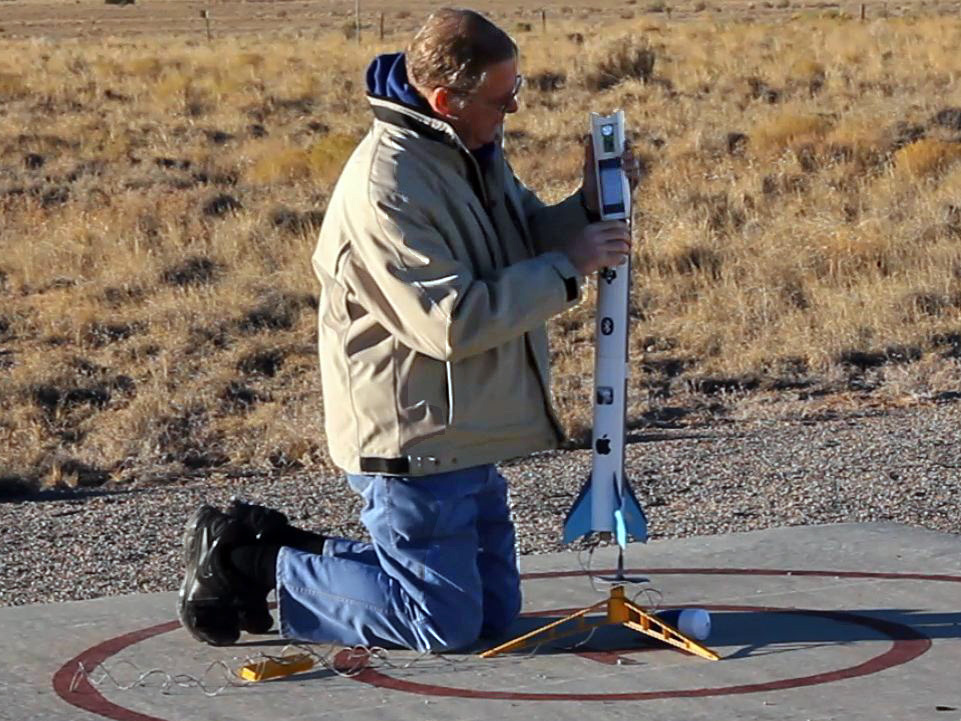
It was a beautiful fall morning as I carefully packed the parachute, slid in the engine, and installed the igniter in my model rocket. I started the data collection program and slid the payload with a TI Bluetooth low energy SensorTag and an iPhone 4s into the payload bay.

Yes, an iPhone.

My wife’s iPhone.

Gulp.

Silently, I recited the astronaut’s prayer, “Dear Lord, please don’t let me screw up.” Then I pushed the launch button.

The rocket lifted off smoothly, arcing into the air. The parachute deployed. Landing broke off a fin, but pulling the payload out, I saw the iPhone was still working, still collecting acceleration, rotation and pressure!

We launched three more times that morning, once more with the same rocket after a quick field repair, and twice with another rocket that carries the SensorTag without an iPhone, transmitting the data using Bluetooth low energy to an iPhone held safely on the ground. This blog shows how it’s done. You’ll get plans to build the rockets, programs to collect and analyze data, and even links to the data from our four rocket flights.

Project Steps

The booster is a pretty standard model rocket. Assembly directions are covered in lots of places, so we won’t go over them here.

See the accompanying plans for measurements and fin patterns.

One thought, though, is to change the fin design. The fins shown were chosen because the rocket was going to be shown at a trade show in Germany, and needed to stand up on a table. The swept fins are pretty vulnerable to breakage on such a heavy rocket, though, and did break on both flights.

A more practical design is also shown in the plans. The rocket won’t stand up, but it is also less likely to break the fins when it lands.

The main part of the payload bay is also pretty standard. The only exception is the plug at the bottom of the payload bay. I could not find a nose plug for a BT-80 body tube. Cut the top off of a NC-80b nose cone and epoxy a 1/8 inch piece of balsa across the top to make a nose plug.

Epoxy the finished plug into the payload tube. Use epoxy to get a very strong joint, but only glue about 1/8 inch of plastic into the payload section.

Inside the payload section is a balsa wood holder for the iPhone and SensorTag. It’s constructed using two side rails with a slot sized to fit the iPhone and other wood pieces, one of which holds the SensorTag.

The dimensions in the accompanying plans are for an iPhone 4s. If you have an iPhone 5, you will need to adjust the dimensions a bit to account for the thinner, taller model.

There are two ways to build the rails.

If you have a router, start with two pieces of balsa wood that are ¼ x 1 ½ x 9 inches. Cut a 3/8 inch wide, 1/8 inch deep groove in the center of the strip.

If you don’t have a router, start with a 1/8 x 1½ x 9 inch piece of balsa and glue two 1/8 x 9/16 x 9 inch strips to form the 3/8 inch wide slot down the middle of the long piece.

With the pieces in place, the next step is to sand a curve on the outside of the pieces so they slide smoothly into the body tube. Place a sheet of sandpaper in a body tube and start sanding! When you are finished, the side pieces should lay snugly against the inside wall of the body tube.

Glue a 2 5/16 x 3/8 x ½ inch piece of balsa across the bottom of the side bars to form the main piece for the payload section.

The next section holds the TI SensorTag. Cut the pieces as shown in the plans. The main piece is cut from 3/8 inch balsa to hold the SensorTag.

Since 1/16 inch router bits are tough to come by, this time use 1/32 x 3/16 strips of balsa to form the groove for the SensorTag. Note that the rails stop about halfway up on the battery side of the SensorTag, leaving room for the tall components of the SensorTag. There are two 2.75 inch pieces, one 1 inch piece, and one 1 1/8 inch strip.

Cut a notch in the side over the button on the SensorTag, leaving room to insert a fingernail and push the pairing button just before the launch.

Cut a notch at the bottom to fit over the power button on the iPhone so the mount doesn’t turn the phone on or off.

Cut the end piece from 3/8 inch balsa, making it just a tad longer than needed.

Don’t glue these pieces into the side rails! Once complete, slide in the iPhone, slip the SensorTag into its holder and slide the holder on top of the iPhone, and cap it off with the end piece

With all of the pieces cut, assemble the payload section and trim the top of the end cap and rails so they fit snugly against the bottom of the nose cone. Sand carefully to remove the last bits of extra balsa from the rails and end cap.

Download the software and data package from here. Unzip the file if your O/S doesn’t do it automatically.

Copy the contents of the file Rocket Data.bas and paste it into an otherwise empty email. Mail this to yourself.

From your iPhone, copy the contents of the email by tapping twice, then tapping Select All, then tapping Copy.

From techBASIC’s Programs tab, tap New to create a new program. Use the name Rocket Data.

Paste the program into the newly created empty file by tapping the screen and then tapping the Paste button.

Insert the recovery wadding, parachute and engine.

This is a heavy rocket. Start with a D12-3. Do NOT use a D12-5–the rocket is too heavy for this engine.

Use at least a 24 inch nylon parachute. An 18 inch parachute is too small. My best results were with an 18 inch parachute on the booster and a separate 24 inch parachute on the payload bay.

Run the techBASIC data collection program by tapping the Rocket Data program from the program list.

Push the pairing button on the side of the SensorTag.

Verify that the Status goes from red to yellow to green.

If the status does not go to green after a few seconds, try pushing the pairing button again.

Note the name of the data file. You will need this for analysis. It’s output10.txt in the photo.

Working quickly, insert the payload into the rocket and fly it.

Once the rocket flight is over, extract the payload and stop the program by pressing the Quit button.

The less data you collect, the faster it will be processed and the easier it will be to find the flight data among the junk data from loading the payload and handling the rocket.

After you’ve used all your engines or broken something, it’s time to retire to the bunker and analyze the data.

See this maker software project to see how. You don’t need to know how to program. The software is included.

If you do know how to program, you can change the software. You get the source!

Conclusion

See my blog for more about my own rocket launch, including the data I collected from two launches of this rocket and two launches of the companion ST-1 rocket.