What You Need
- 1 ten foot piece of 1/2" PVC pipe
Plastic pipe is very cheap and it comes in 10 foot lengths. You can cut --or even bend-- the ten foot section in half at the store for easy transport. The pipe carries the blast of air from the 2 liter bottle to the rocket, forms the two stabilizers,and provides a shape to form the rockets on. You can get this at hardware stores with well stocked plumbing departments, or less expensively at plumbing supply and building centers.
NotePVC pipe is the White plastic pipe. Do Not Buy the tan colored “CPVC” pipe. One more confusing thing: even on the inside, 1/2″ diameter pipe is actually bigger than 1/2″ diameter. Go by what the writing says on the outside of the pipe, not by actually measuring - 1/2" PVC elbow
Buy this from the same place you got the pipe. It is a tiny pipe fitting that will bend the pipe from horizontal to skyward.

Note: As an alternative to white plumbing elbow pipe, you can use 1/2″ PVC electrical “conduit” pipe, which is usually gray and usually used to contain electrical wiring. As you can see from the picture above (thank you, Guy Migneron of Canada), an added bonus is that the 90 degree elbow has a more gentle curve. This probably results in less friction as the air rushes through the tube. You find it in the electrical section rather than the plumbing section.
- Plastic food wrap, strong string, and some rubber bands
These lash the two short stabilizer pipes to the launcher, acting like feet to keep it from tipping over. - Hacksaw (or just a hacksaw blade) and a ruler or tape measure
These are for cutting the plastic pipe to the right lengths. - 2-liter soda bottle
This is the air bladder for the step rocket. You can get 50 stomps from a bottle before you have to replace it. - Wide tape
This is for attaching the bottle to the pipe. Duct tape is my first choice, followed by packaging tape. Electrical tape will work if carefully applied.
Step1 Measure and cut the plastic pipe.

The 10 foot pipe length is enough for the following pieces with no waste. Notice that if you cut it according to the illustration above, it works even if you cut the pipe in half for easy transport. Any of the pipe pieces except the short 1' sections can be a few inches off without hurting launcher performance.
- 1 piece 4' (48") pipe
- 2 pieces 1' (12") pipe
- 2 pieces 2' (24") pipe

The illustration above shows an easy way to cut the pipe without it flopping around. The double cross-cut saw style has the further advantage of allowing very young kids to safely participate in the cutting. If you are using a hacksaw blade without a frame, wrapping a piece of tape around one end makes a more comfortable handle.
Step 2 Bevel the inside corner of pipe on one end.
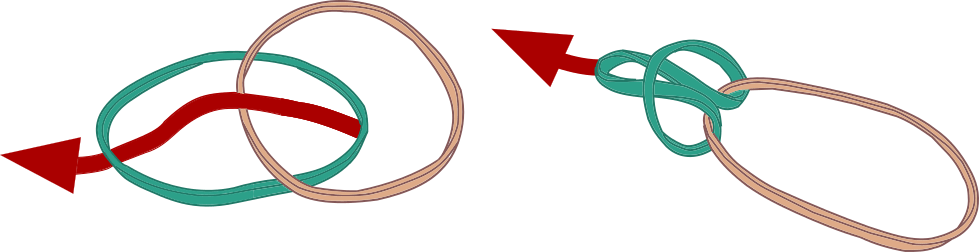 Start by making a chain of rubber bands about 16" long, un-stretched. Link the rubber bands as per the illustration.You can't lash very tightly with rubber bands, but rubber has a very high coefficient of friction. That means it is the opposite of slippery.
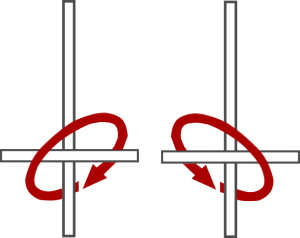 Make a cross with one of the 1' short pipes and the 4' long pipe, about 6" from the end of the long pipe. Hook the end rubber band around a pipe. Wrap the rubber band chain around the intersection in the two ways shown in the illustration, stretching it a little as you wrap. When you get it almost all wrapped on, hook the other end rubber band around a pipe again to keep it from unwrapping.
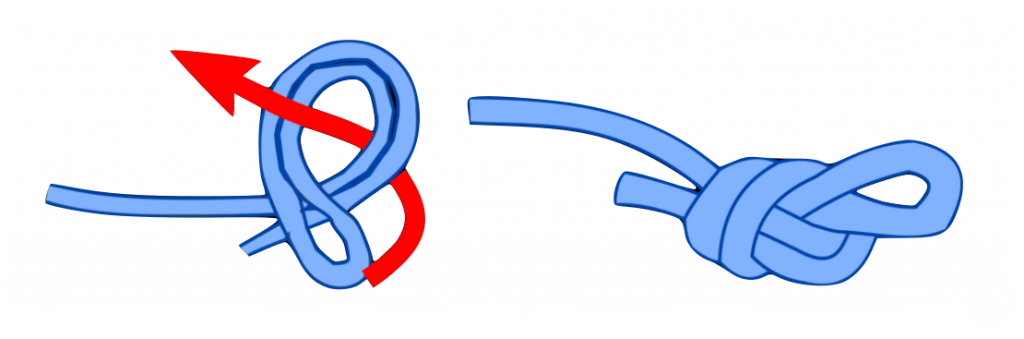 Next comes the wrapping of clear plastic food wrap. Cut off about a 5' piece and squeeze it to make it thin--more like a rope than a sheet. Tie a small loop in one end as shown. Hook the hoop around one of the pipe ends.
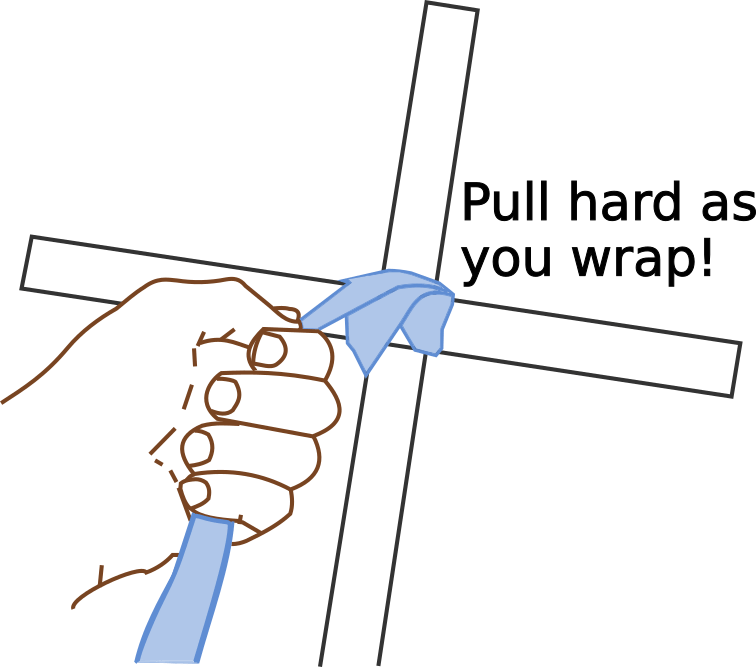
Start wrapping the clear plastic around the intersection, but wrap it under lots of tension. Pull on the plastic as hard as you can -- short of breaking it -- as you wrap.
Finally, wrap the string around the same way as the other two layers. The string, too, must be pulled very tight as it is wrapped. This is the last chance you have to squeeze the pipes together very tightly with the wrapping, short of doing it all over. Tie the end or tape it down.

Repeat the lashing with the other short pipe and the other end of the 4' pipe. Your assembly should look something like the illustration above.
Step 3 Taper and attach the 2' vertical pipe.
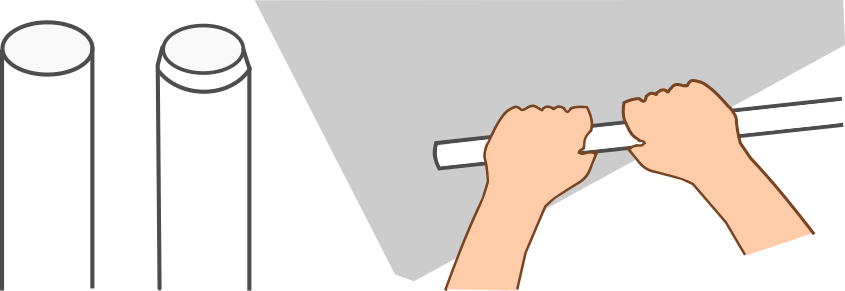 Tapering the outside of one end of the 2' vertical pipe makes it much easier to get the rockets on. I suppose the proper way to do it is with a file, but I find it's very easy to rub the pipe end on a concrete sidewalk (the gray, square thing shown in the illustration). Pulling the pipe while rotating it at the same time makes a smooth taper
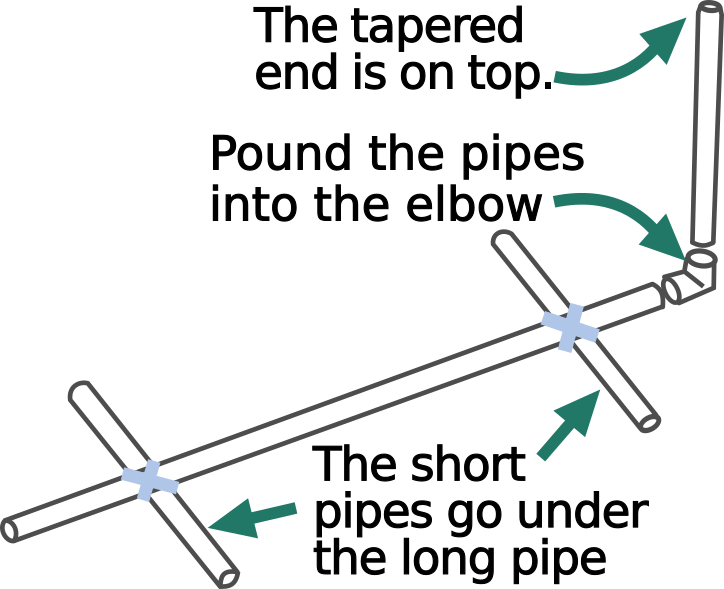
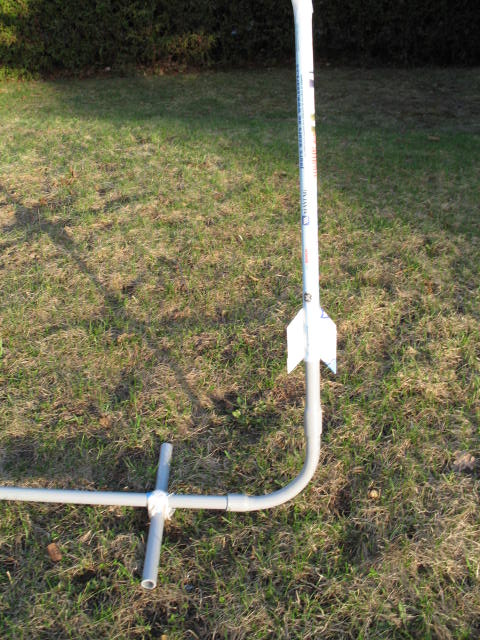
The pipe "elbow" allows you to attach the vertical 2' pipe to the 4' horizontal pipe. I used to glue both pipes into the elbow. Now I only glue one--or none--because it can be much easier to transport and store the launcher when the vertical part comes off. Instead, to hold it on I use brute force. All the elbows I've ever seen have a taper, so I pound the pipes into them tightly. Just pounding them on like that holds them on.
When assembled, the two short pipe feet should keep the 2' pipe pointed up, even if bumped. If it falls over, go back to step two and lash it more tightly this time.
Step 4 Attach the bottle.
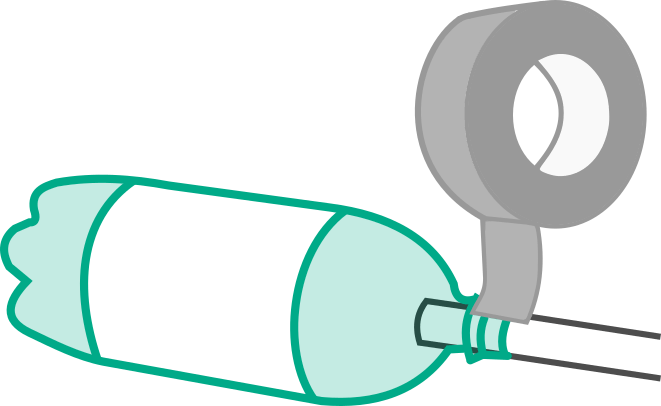 On the pipe end opposite from the elbow, tape on a 2-liter soda bottle using wide tape. Although the bottle can be stomped 50 or more times, eventually it will have to be replaced.
 For that reason, it's a good idea to stick a little bit of the end back onto itself. This creates a no-stick tab that makes it easier to un-wrap the tape.
Step 5 Increase the diameter of a forming pipe.
Strictly speaking, you're done with the launcher, but you have a 2' piece of pipe left over. You will make rocket bodies on this pipe by wrapping paper or other materials around the outside of these tubes. If you want to see what I mean, you can take a peek at the rocket instructions, but then come back and finish the forming pipe.
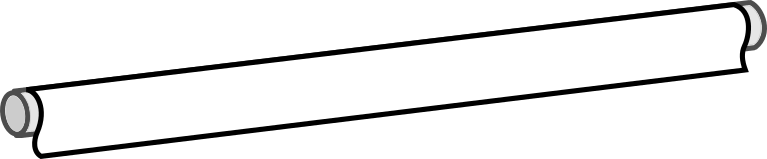
Rockets formed on the pipe as it is now will fit too tightly on the vertical pipe of the launcher. If we make the diameter of the forming pipe slightly bigger, however, the resulting rockets will load and fire easily.
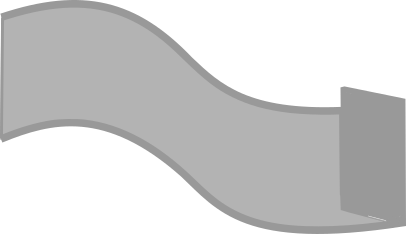
The most durable way to increase the diameter of the forming pipe is with wide tape, usually duct tape. Cut off a piece as long --or slightly longer -- than the pipe. Note that it's a good idea to have someone help you because a piece of tape that long tends to curl, stick to itself and become unmanageable. The tape in the illustration appears slightly too short for the pipe. I drew it a little short to clarify how the long strip of tape wraps around the pipe.
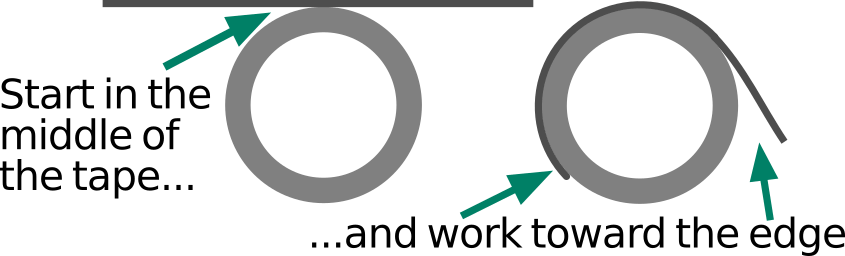
Take care to apply the tape smoothly. I have found that the best way to avoid air bubbles under the tape and wrinkles in the tape is to have the pipe make contact with the middle of the tape, then carefully work outward to the edges.
Two pieces of duct ought to increase the diameter enough. If rockets are hard to put on the launcher, add another. If using a thin tape like clear packaging tape, start with three pieces. If the rockets get hard to fit onto the launcher, add some more tape to make the diameter of the forming pipe bigger.